Category: DIY

  • Loving My Rad Power Bike

    Loving My Rad Power Bike

    person and battery powered bicycle
    I’ve been riding my Rad Power ebike for over a year now. A few weeks ago, I asked Rad Power about being becoming an affiliate, and they said yes. Here is my my new affiliate link !

    I’ll be doing a more in depth talk here on why I am a Rad Power fan boy, but if you are thinking of buying an ebike, I strongly endorse Rad Power Bikes. I get asked every week to promote stuff, but I only work with people and products I actually think are good and useful. Rad Power is one of those. 🙂

    Curious about their ebikes? Check them out using my affiliate link here.

    person and bike


  • Hoist Stuff To The Roof With An Electric Winch

    Hoist Stuff To The Roof With An Electric Winch

    I never thought I would need an electric winch, until I bought one. Now I’m thinking of all the things I can do with it.

    Electric Winch

    I just did a really cool thing with it, but first some background on how this all came together.

    We have a flat torch down roof. Here is a technical explanation:

    Its core is a strong, resilient non-woven polyester mat that is coated with weather-resistant, APP polymer-modified asphalt.

    These roofs are great, but you can extend the life of your torch down roof by painting it or sealing it. If you paint it white or silver, you also keep the roof and your house cooler. Our roof is painted silver, but the paint is starting to crack and flake off.

    I researched the best material to apply my torch down roof, aka a modified bitumen roof. I found that you get what you pay for. (This is a running theme here on Gardenfork) I opted for an elastomeric roof coating made by Henry. It has a 12 yr warranty. To me, that means the sealer will probably last at least 10 years.

    Calculating the coverage I would need for a 1000′ sq ft roof, I ordered four 5 gallon buckets of the sealer. Then it occurred to me:

    How do I get four very heavy 5 gallons buckets of white sealer up on the roof?

    There are no stairs to the roof, only a metal rung ladder that you climb up 11 feet. Fun.

    So I do as I always do, I just started thinking about how to get this stuff up there. I thought about using three 2x4s in a tripod configuration with a pulley and rope. But that would not be the easiest thing in the world to use, I thought. I had also been thinking about putting beehives on the roof as well as new air conditioning units, and to get them on the roof would require something more involved. If you want to take this even farther, you could use this to install a solar space heater rig.

    Talking to my neighbor one day, he had hauled AC units onto his roof with an electric winch he bought. Lightbulb moment.

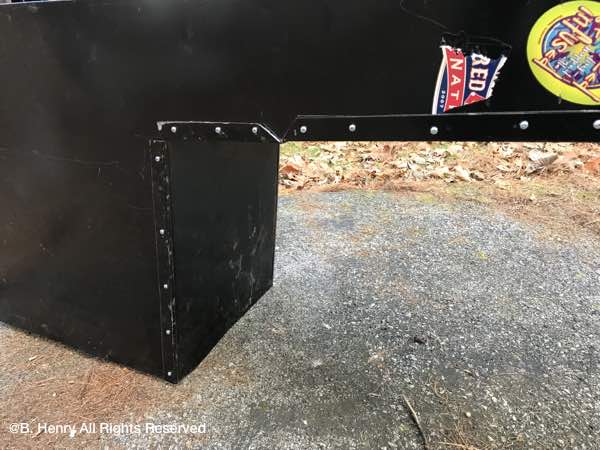
    I originally set out to somehow hang the winch from the original idea of a tripod of three 2x4s, but it wasn’t working in my head. The winch is long and narrow, and the tripod setup wouldn’t be the best thing. Then the idea of using four 2x4s and build something similar to a kid’s swing set came to me.

    I cut down 8′ studs to 4′ and scrounge around for some scrap wood as footers that would hold the angled stud in place. I then set about looking for a pipe or angle iron to hang across the 2×4 supports to hold the electric winch. I had recently been decluttering and had recycled a lot of angle iron I had laying around. So I could not find anything to hold the winch across the roof hatch. Then a trip to my neighbor’s basement yielded a piece of a metal mattress frame, aka, angle iron.

    Roof and Winch

    A little right angle grinder work and we are good to go.

    Roof and Winch

    This hoist system to get stuff on your roof works best with two people, you need someone to guide the material you are hoisting from below.

    electric hoist

    The electric winch I bought is quite good for the price. It has 30′ of cable and will lift 660 lbs on the single cable, and if you use the supplied pulley/hook to make it a double line, it will lift 1300 lbs. more than I will ever need. My only issue with it is the length of the cable for the controller. Its only about 3 feet long and I need it to be about 12′. I will order some 14/4 wire cord and extend the cable myself.

    Now you are thinking, “What can I use an electric winch for?” Right?

  • How To Declutter Using Ebay

    How To Declutter Using Ebay

    Declutter using Ebay and make sure your stuff goes to a good place and is useful to someone. That’s a huge thing with me. I have stuff, and I want to get rid of it, but I want it to be used by someone who needs it.

    I have way too many electronic and computer things, and most of it can’t be recycled well. One example was this two disc set of Mac OSX Install discs. Perfectly good software that I’m sure someone out there needed, and was just taking up space on my desk.

    Computer CD ROM

    I could just toss them into the plastic recycling bin, but are software CDs really recyclable? Why not allow these discs to improve someone’s life instead?

    Enter Ebay!

    One thing you have to keep in mind here to declutter using Ebay. Throw profit out the window, expect no windfall of cash. Expect joy of letting stuff go and feeling it wen to somewhere useful. That’s your payoff.

    To declutter with Ebay, make sure that the object is what it is. For these software discs, I made sure they still worked, and weren’t damage. You don’t want a negative experience, because decluttering is all about joy, right?

    For these discs, I photographed the discs and typed into the auction description exactly what it says on the discs. I also did some research to see what computers these discs would work with. Any helpful info you can provide will make it easier for someone to find your stuff and help you get rid of it. (Again, more joy…)

    I listed the auction to start at $1 and set the Buy It Now to $5. Again, not seeking profit, but seeking to get rid of stuff to a good place.

    The discs sold in a few hours.

    image of text

    Ebay is hooked up with PayPal and USPS to create this seamless process to print out a shipping label. So in a few minutes the label is printed and the discs are off my desk and my brain has joy.

  • Will A Portable Generator Run Whole House AC?

    Will A Portable Generator Run Whole House AC?

    Can a portable generator run whole house AC? I learned the answer in short order the other day. I had just installed a generator interlock switch (video here) on my sister’s electric panel, and showed her how to hook up a portable generator to the house.

    Portable Generator Run Whole House AC
    Can a portable generator run whole house AC?

    The power went out during a recent storm during a heat wave, and out came the portable generator, ready to hook up to the house electric panel. Soon we would have the whole house air conditioning up and running.

    The proper hook up steps were followed. All breakers turned off, main breaker turned off. Interlock switch engaged. Generator cable connected from it to the weatherproof outlet. Fire up generator.

    But will a portable generator run whole house AC?

    The generator started up right away on the second pull. The generator used to never start easily, but thanks to the new carburetor we installed, and an excellent generator tune up it fires up nicely.

    Portable Generator Run Whole House AC

    We then switched on the 240 volt AC breaker in house electric panel. The air conditioner started to fire up. Then a clicking noise started coming from the outdoor unit. We shut off the breaker, waited a few minutes, and tried again.

    And it did the clicking thing again. The AC tried to start, but never got up to full speed. After this second try, we didn’t try again. We set up some fans in the house and called the air conditioner repair guys.

    Portable generators are a great thing to have, they can run most of a house when the power goes out. I call them portable because they are on wheels, they aren’t those giant metal boxes that sit on a cement slab connected to a propane tank next to the garage.

    I’ve talked about how to size a generator for your needs in this video. Figure out how many watts/amps you want to power in a house when the power lines go down, buy a generator that matches that number.

    Problem here was I didn’t do this with this install. We already had a generator that came with the house, and it seemed sufficient to take care of our needs.

    The air conditioner repair guy came out quickly. I was happy and surprised, figuring they would be busy during a heat wave. He showed me the mistake we made in sizing a generator to run a whole house air conditioner.

    I hadn’t looked at the label on the side of the AC that noted the unit needed 23 amps to start up.

    Portable Generator Run Whole House AC

    That’s a lot of power. All at once.

    And our little 5000 watt portable generator was not going to supply that.

    Even a larger portable gen unit was not going to supply that amount of amps. One would need one of the stand alone units, with the propane tank and all, to fire that AC up.

    Our work around for this was to realize we did not need to cool the whole house during a power outage during the summer. We could buy one or two bedroom size window AC units to have on standby, and stay in a few of the rooms in the lower part of the house during an outage.

    The portable generator we have will run a couple of small window ACs.

    Learn More:

    How to install a generator interlock switch

    Generator Transfer Switch, How It Works

    How To Hook Up A Generator To Your House

  • LED vs CFL – 5 ways LEDs are better than CFLs

    LED vs CFL – 5 ways LEDs are better than CFLs

    If you are using compact fluorescent bulbs, hear me out on the LED vs CFL debate. Below I’ll list out 5 ways LEDs are better than CLFs. For a long time I was an advocate for CFL bulbs, but then LEDs became affordable, and the tables turned. I now also use LEDs for dusk to dawn light installations.

    LED vs CFL lights

    LED vs CFL  Here are 5 ways LED are better:

    1.CFL Bulb shape = design fail. CFL lights have always had a bad reputation for being, basically, ugly. I still see some hanging lights in buildings that have those curled CFL bulbs in them. Not a great look. LED bulbs have the same look and feel as incandescent bulbs.

    2. Most of them put out an ugly green tinged light. The light cast is reminiscent of those tube fluorescents of gym class. You can get a warm white compact fluorescent, and some are not bad. But there is still that tinge of an ugly cold white light reputation.

    3. LED bulbs are much cheaper to use. I was always loyal to the CFL for the energy savings. You could leave lights on without feeling guilty. Then LED lights showed up in the hardware store and costs pennies to operate.

    4. LEDs are dimmable! There are a few CFLs that are kinda dimmable, but the light level steps up and down instead of being on a continuous dimming spectrum. You need to use quality dimmer switches with LEDs, the cheap ones don’t work. Learn from me. And buy LED bulbs that specifically say dimmable on the package.

    LED vs CFL lights
    LED bulb on left is in classic bulb shape, CFL less than classic

    5. CFL bulbs contain a trace amount of mercury, and you have to bring them to the hardware store to dispose of. This means the CFLs sit in my car until I remember to drop them off on the next store trip. Even then I will forget them in the car for several weeks. LEDs do contain electronic circuitry, and whether we should recycle them is a work in progress.

    Recommended dimmable LED bulbs on Amazon. Get this dimmer switch to use with dimmable LEDs

  • A Simple Way To Insulate Your Hoop House With This Curtis Stone Video

    A Simple Way To Insulate Your Hoop House With This Curtis Stone Video

    Rick and I were talking on the GF Radio podcast about the success of his mini greenhouse, and how using 2 layers of  plastic, separated by some wood supports, had added an insulation layer. I immediately thought of a video I saw on Curtis Stone’s YouTube channel about how he uses a double layer of plastic in his very successful market garden operation. Here is the video:

    Curtis uses a fan to force air between the two layers of greenhouse plastic, which reduces heat loss through the plastic. Think of it as air as insulation. I think you can do this on a small scale, but the key is to pick a fan that works for your size greenhouse. Here is a good starting point for fans you can connect to your greenhouse plastic.

    I’m wondering if you have a small greenhouse, could you hook up a bathroom fan you’ve pulled out of a dumpster? I’ve got a few from some renovation projects sitting here looking at me. One of them worked really well on the homemade sap evaporator, but we have more to put to use.

    I have built several what I call mini-greenhouses, aka hoop houses, to cover our raised beds. And of course, we have videos about all of them here. Considering the size of my raised beds, 4′ wide x 12′, I’m not sure using a fan to insulate the layers of plastic would be a good use of electricity. Maybe we could go solar with the fan?

    I am a big fan of Curtis Stone, and how he shares so much info on his YouTube channel. He also has in-person classes if you are serious about becoming a market gardener. I’ve learned better methods on how to grow carrots and salad greens from Curtis.

    He has turned his yard, and those of a few of his neighbors, into farmland, basically. Gone is the grass and instead there are rows of vegetables. This doesn’t go over well with everyone, but I’m all about a smaller lawn.

  • Pizza Oven Brick, How To Store It

    Pizza Oven Brick, How To Store It

    I just pulled a bunch of pizza oven brick out of a dumpster in Brooklyn. The contractors were taking down the parapet wall of a crumbling building near my house. I walked down with my hand truck. The crew were happy to help me sort out a ton of excellent brick.

    When I say pizza oven brick, I mean old school clay brick. We talk about this a bit in our pizza oven videos, but we can expand here. We don’t use fire brick in our home made pizza oven, we use used clay bricks. These old kind that we salvage from construction sites or we find online. I wrote about how to find used brick here.

    People have asked about the potential for bad things being in the brick that one doesn’t want touching their pizza dough. From what I understand, that potential is low to non-existent, because the pizza dough is only on the brick for a very short time. Not long enough to absorb anything, in my opinion, as long as the brick is clean.

    How To Store Pizza Oven Brick

    The beauty of our home made pizza oven is you can break it down. But, you have to store the brick somewhere. I learned the hard way that just leaving them out in the yard is bad. Over the winter, the bricks got wet, consequently, they froze and cracked over the winter. Bad Bricks!

    Pizza Oven Brick
    Snow and Rain will damage your bricks, don’t do this.

    Pizza Oven Brick

    So here is how I now store pizza oven brick.

    Grab two pallets, probably an easy thing if you are a GardenFork sort of person. Plan where you are going to store your brick. Ideally, this is not under the overhang of a shed, because we don’t want more water than necessary near the brick. Learn from me…

    Pizza Oven Brick
    Plenty of space between the bricks

    Put one pallet down on the ground, and stack the bricks on the pallet with air space between them. Because if the bricks do get wet, they can dry out. If they are stack tight together, they wont dry out as well.

    Pizza Oven Brick

    Place another pallet of the same size on top of the loosely stacked bricks. Finally, cover the whole stack with a waterproof tarp.

    Pizza Oven Brick

    What I have found is the tarp can pool water, so I make sure the side of the pallet with more cross pieces is facing up. Unlike the photo above… It wouldn’t hurt to slide a piece of scrap plywood over the top pallet, then the tarp.

    Homemade Brick Pizza Oven Video

  • File Cabinet Maple Syrup Evaporator Photos From A Friend

    File Cabinet Maple Syrup Evaporator Photos From A Friend

    Always love getting file cabinet maple syrup evaporator photos, these are from a friend who has greatly improved the GardenFork version 2.0 file cabinet evaporator. The photos tell the story best here. This is designed be used with a stainless steel evaporator pan made by our friend Zach of Silver Creek Maple Equipment. But you could certainly use this file cabinet with steam table trays, similar to our GF version 1.0 file cabinet evaporator.

    File Cabinet Maple Syrup Evaporator
    Super smart way to build your homemade maple syrup evaporator.

    My friend sent me this photo of his version of the homemade maple syrup evaporator and my jaw dropped. I had been trying to find a solution to how to slow down the heat escaping from the fire box, and here is the answer. A smaller firebox and a sloped channel to the chimney. There will be a baffle or bricks at the sharp bend in the floor of the cabinet. This closely mimics the arch of many evaporators I have seen.

    The back of the cabinet is cut along the sides to preserve the right angle corner, and this slips over the cut sidewall of the cabinet. Self tapping screws hold it all together. You could also weld this seam with a flux core or mig welder.

    File Cabinet Maple Syrup Evaporator

    The firebox is about 24″ deep, the fire grate was bought at Tractor Supply. You could do the same, or go to your local welding shop and pick up some scrap extended steel grate.

    File Cabinet Maple Syrup Evaporator

    File Cabinet Maple Syrup Evaporator

    To create some turbulence and keep the heat swirling under the pan, a firebrick, or sand or some steel will go right at the sharp bend in the bottom of the box here.

    File Cabinet Maple Syrup Evaporator

    Big thank you to my friend for sharing the photos and his crafty knowledge here. Read and see more about how to make maple syrup here.


    Steam Table Pan Maple Syrup Evaporator Improvements – GF Video

  • Probably The Best Way To Hook Up A Generator To Your House

    Probably The Best Way To Hook Up A Generator To Your House

    Wandering through YouTube, I found what may be the best way to hook up a generator to your house. Its brilliantly simple and safe. Manual transfer switches require wiring inside the electric panel, generator interlocks a bit less wiring. This rig, technically called a meter mounted transfer switch, no wiring.

    Best way to hook up a generator
    Image from Generlink.com

    Instead of messing with your electric panel, this unit sits between your utility meter and the electric panel on the outside of your house. An electrician or your utility company has to install it, but it should only take about 30 minutes to do. And, in most cases, no electrical or building permits. How cool is that?

    I have a transfer panel in my basement to hook up my generator to the house, and it isn’t the perfect solution. My post about it here. You have to run a wiring harness from the transfer panel into the main panel, choose which circuits to control, splice the wires together, its some work to do it all. This meter mounted transfer switch is much closer to ideal. More info on the unit here.

    The meter mounted switch supplies power to the whole panel, and you choose which circuits to run based on the wattage of your generator and the appliances you want to use. The beauty is you can turn on and off breakers at will. With a hard wired transfer panel, you can’t change which circuits are powered. My transfer panel only has one 220 volt circuit breaker, so it limits what large appliances you can run. With this unit, you can turn off and on different appliances that draw a large amount of power.

    Run your electric dryer, then turn it off and turn on the air conditioner or the well pump. Nice.

    The other plus here is many people have a portable generator and plug multiple extension cords into the generator and run them into the house. You can hook up your central AC or well pump with an extension cord. So yes, at this writing, this is the best way to hook up a generator to your house.

    Watch this video by Steve Maxwell, its a nice visual of how it works:

    Hook Up A Generator To Your House – GF Video


  • Clean A Dirty Tin Ceiling & Prepare For Painting

    Clean A Dirty Tin Ceiling & Prepare For Painting

    To show you how to clean a dirty tin ceiling, I took some photos to show you how we clean one in preparation for painting. You can also use this method to just clean most tin ceilings that don’t need a fresh coat of paint.

    This paint job was a tin ceiling in a small kitchen, and the tin ceiling was covered in grease from the stove. You can see in the picture below how stained the tin ceiling is. The lighter areas are where we did spot cleaning to see how bad the grease on the ceiling was.

    Clean a dirty tin ceiling
    Kitchen Grease on Tin Ceiling

    To to clean a dirty tin ceiling, we first cover all the counter tops and floors with plastic. We wore paint coveralls and gloves, goggles, and masks to shield ourselves while cleaning the ceiling.

    We then used TSP (Trisodium Phosphate) mixed according to the package directions in a bucket of warm water on the ceiling. We used large sponges to apply the TSP to the ceiling and then removed the cleaning solution and grease with sponges soaked in warm water. It took several applications of the TSP to get the tin ceiling clean.

    TSP is a strong cleaner! Follow all label directions and safety guidelines on the box, OK?

    Clean a dirty tin ceiling
    See the difference cleaning the ceiling makes

    If your ceiling has grease on it or is stained yellow, you have to remove this stuff before painting. The paint wont stick to grease.

    Clean a dirty tin ceiling
    After cleaning one area, you can see the contrast

    It took a whole day to clean the ceiling, applying the soap several times, then allowing the ceiling to dry before painting the ceiling. We used a 3/8″ nap roller and a high quality latex paint.

    Materials List

    TSP Surface Cleaner

    TSP P Free (less harsh cleaner)

    Cleaning Sponges (you will need a bunch of these)

    Chemical Resistant Gloves

    Safety Goggles

    Disposable Coveralls

    Have you cleaned a ceiling? What was your experience? Tell us below:

    Spilled Paint Cleanup!

  • Lithium Batteries Aren’t Always Better

    Lithium Batteries Aren’t Always Better

    I was talking to a tech support person about one of my weather stations that was not working. I told them that I had put lithium batteries in the outdoor sensors for winter. The tech person said, in so many words, that using lithium AA batteries in the weather sensors was not recommended unless it gets very cold in your area.

    Like sub zero cold more than a few times a winter.

    Of course I can’t remember the exact reason, but the voltage levels of AA lithium batteries can affect the electronics in a not good way.

    So the not working weather station is on its way back to the company that makes them. And I’ve taken the lithium batteries out of my outdoor weather sensors.

    BTW, this indoor outdoor temp display works pretty well. I have yet to find the best one ever, but I have three of them and they work.

    From what I can tell from various forums, lithium AA batteries work best in flashlights and other high power drawing devices. Weather station sensors are the opposite, just sending a bit of data ever minute.

    Could you fill in the blanks on how lithium batteries affect electronics?

    Storm Preparedness – 3 Must Have Tools – GF Video

  • Rollerblade Office Chair Wheels To Fix Your Broken Desk Chair!

    Rollerblade Office Chair Wheels To Fix Your Broken Desk Chair!

    As soon as I saw the description “Rollerblade Office Chair Wheels” I knew this was the solution to the question: How to fix broken office chair wheels? I have an older Aeron chair, and I have never loved the plastic roller wheels it had. Kinda like those plastic wheels on cheap rollerboard luggage.

    Rollerblade office chair wheels

    BTW, my rollerboard wheels died on the last trip I took.

    BUT, there is light at the end of the tunnel! I ordered these replacement rollerblade office chair wheels (affiliate link) and they were easy to install. Lets walk through the process of how to fix a broken office chair.

    First flip the chair over, and with a screwdriver and a pliers, lift the broken office chair wheels out of their mounts in the bottom of the chair. You will need to wiggle the screwdriver between the wheel and the mount, but they slide out pretty easily.

    Rollerblade office chair wheels

    You don’t need to save the old wheel spindle, please put it in the metal recycle. The new rollerblade office chair wheels come with new ones attached.

    The new wheels are easy to install. Just press the new spindle into the wheel mount. They should slide in easily.

    Rollerblade office chair wheels


    Couple of things to keep in mind when repairing office chair wheels:

    Make sure you order the correct replacement wheels, the spindle diameter is key.

    Order by searching for the brand name of your office chair + roller blade wheels.

    Check the reviews and comments for the wheels you are ordering, make sure they fit and work well.

    My office is in a 120 yr old building. And the floors aren’t level, and my desk is on the part of the floor that is higher than the rest of the room. These replacement office chair wheels work so well I often slide away from my desk.

    But this office chair repair is a great improvement in wheel performance. Plus they look pretty cool. Not sure why I didn’t upgrade to these wheels before, one of those light bulb moments. Gone are years of bad plastic wheels scratching up your floors, get these instead.

    Skil Right Angle Grinder Repair

  • Bought a 110 Volt power adapter for the car, here’s what I learned.

    Bought a 110 Volt power adapter for the car, here’s what I learned.

    We do some telecommuting on the drive between the city and the country. And NYC being what it is, the power inverter we had is gone now. Remember to lock your car doors…

    So I ended up buying two power inverters. A power inverter is a box of electronics that allows you to plug a 110 volt plug into a cable that plugs into the car power outlet. AKA cigarette lighter socket.

    I bought a Bestek 200 Watt power inverter that has this neat design. It has the same shape as a large cup of coffee, and sits nicely in a car cup holder.

    car power inverter

    Thinking I should have one of these also for our second car, I bought a second power inverter. This time I opted for the more box shaped model.

    car power inverter

    After using each of these for a while, the box type has become my favorite. While I like the design of the coffee cup model, it is best located in the cup holder, and there’s only two in the front of our car. We usually each have a drink in those holders.

    AND I have managed to lose the power cable for the cup holder model. The wire is not permanently attached to the inverter. Not good in my world. I lose small things. They fall out of the car somehow.

    So, for the vast majority of you all, the 300W Power Inverter is the way to go. Plug in your laptop to charge, a few USB cables – what more do you need?

  • Lawn Mower Oil Change, How To Do It Easy – GF Video

    Lawn Mower Oil Change, How To Do It Easy – GF Video

    Here’s my how to video on doing a lawn mower oil change. Its not rocket science, its actually pretty easy, AND it will extend the life of your mower. Ready? Watch the video and scroll through the instructions below:

    Lawn Mower Oil Change, Step By Step

    Check the manual to see what kind of oil your engine uses. Most use 30W, but just check, OK? By changing the oil, you are already helping the engine last much longer. Do a lawn mower oil change a few times a year and your mower could last forever, mbe!

    Run the mower to warm up the engine. This gets the oil hot and the debris that settles up and moving. Turn off the mower.

    Place plastic food wrap over the gas tank fill and screw the cap down. Not so tight that you can’t get it off again, but snug. Now we are going to gently turn the mower on its side. Position a plastic tub such that when you tilt the mower on its side, the oil fill tube will pour into the tub.

    If your mower has an oil drain plug instead of a fill tube, you will have to tilt the mower on its side, remove that plug, then place the mower over the bucket. This may take some finesse and a friend to help.

    lawn mower tune up
    See how the gas cap is on the high side of the tilt?

    Be sure to tilt the mower so that the gas cap is on the higher side of the mower, so no gas could leak out if the cap leaked. Tilt the mower into the bucket and let it sit while the oil drains out. You can prop up the mower and let it sit for a while.

    Get your fresh oil ready and a funnel. You can make funnel out of a piece of paper if need be. Tilt the mower back onto its wheels, and slowly add the new oil into the oil fill tube. Use the dipstick to make sure there is just enough oil.

    Do Not Over Fill The Oil. Bad things can happen.

    AND recycle the used oil. Take it to a quick lube shop or a car repair shop, they will recycle the oil. Don’t dump it in the woods or a stream, OK?

    See More Lawnmower Tune Up and Oil Change Tips Here

    This same process can be used for your generator oil change or your riding mower.

    lawn mower

  • How I Get Rid Of Deer Flies

    How I Get Rid Of Deer Flies

    Tired of being dive bombed? Here’s how I get rid of deer flies when I’m working in the yard or woods. Yes, it looks weird, but it works.

    Get rid of deer flies

    Deer flies like to attack from behind and land on your head or neck. Put on this double stick tape, and they tend to aim for the strip of kinda sorta flesh colored tape instead of your neck. Then their feet get stuck in the tape. No more deer flies buzzing you.

    Being the DIY guy, I first bought this online, and I thought, I can get rid of deer flies myself. So I went out and got a roll of double sided carpet tape. But it doesn’t work nearly as well. I’m not sure what’s up with this special tape, but its cheap enough that its totally worth it for peace of mind.

    Get the Deer Fly Tape Here.

    I can’t stand the dive bombing of the flies. And while I do get stung while beekeeping, the deer flies drive me crazy. Not sure why. Their bite seems to last longer.

    According to Wikipedia, only the female deer fly will bite. The male eats pollen. And the deer fly can be a vector for anthrax, nice! But the deer fly also has predators: nest building wasps and hornets, birds such as the killdeer, and dragonflies. This is why I don’t remove wasps nests unless they are in an area where we are walking around. Leave them be to get the deer flies!

  • Kallux Ikea Hack, Rolling Shelving Unit

    Kallux Ikea Hack, Rolling Shelving Unit


    kallux ikea hack

    I’m calling this the Kallux Ikea hack, as it turns a shelving unit into so much more. This one is at a friend’s photo studio. I’ve done a few projects with Ikea Kallux or Expedit bookcases, and have put wheels on them to make them in to a rolling shelving unit.

    kallux ikea hack

    You can buy rolling wheels online here, or get them at the Ikea store. Be sure to get good solid rubber ones, not the cheap kind. And pay attention when securing the wheels into the bottom of the bookcase, the wood is composite. Its best to use carriage bolts, drilling through the bottom board of the unit, just inside the outer wall of the bookcase.

    You can also buy these wheel base kits

    Either method makes it very easy to do the Kallux Ikea Hack, just a few screws.

    kallux ikea hack
    My friend’s Black Lab!

    Either way, be sure the wheels are secure, and you have a mobile wall unit.

    I have also made these shelving units into a solid wall divider. I get some luan type lightweight plywood, and cut it to size. I then polyurethane the plywood with stain that matches the color of the Kallux. Several coats of poly do a good job of making it look more like furniture, FYI.

    If you go the room divider route, I would not use drywall or homosote as a backing board on the Kallux, (aka Expedit) its too heavy. Get a thin plywood, with a nice finish if possible.

    When applying the plywood to the back of the unit, pay attention to where there center vertical divider is on the shelving, and tack the finished plywood to that divider, as well as the sides, top, bottom.

    If you are going just for the wheels, think about what kind of weight the Kallux Ikea Hack is going to be carrying and buy wheels that will support that. Its better to buy a bigger wheel than a small one, plus it will be easier to move around that way.

    Check out the Ikea Kitchen Island I made here.

    Save

  • To Replace An Outdoor Outlet, Don’t Go Cheap

    When you replace an outdoor outlet, spend the money on a good cover, or you will be replacing the outlet again soon. I wrote about a GFCI outlet I replaced that was hit with a power washer, and in the project below I use a higher quality outdoor outlet cover. This kind of cover is better, I think, and allows for power cords to be plugged in for the long term without getting water into the outlet.

    Replace Outdoor Outlet
    Old outlet cover gasket had failed.

    What breaks first here is the gasket protecting the GFCI outlet from the elements. When the gasket fails, water can get in and fry the outlet. A bad thing. Same thing happens when you hit it with a power washer. Another bad thing.

    So when you want to replace an outdoor outlet, go buy one of these high quality outdoor covers. They are worth it. Your outlet will last a lot longer. Plus when you are plugging in your Christmas lights, you will realize how well this cover works.

    I like this one because it has knock-outs that allow a cord to be plugged in yet still be protected by the clear plastic cover. Pry out the notched holes to allow the cord to run out the bottom of the outlet.

    Replace Outdoor Outlet
    See the knock outs on the bottom of this cover, remove one or both.

    Another plus of putting on a new cover is the new gasket that comes with the outlet kit, and the best thing is included in the kit are new screws! One might not get excited about that, but when you are jammed behind a large shrub, using new screws makes your day.

    I see broken outdoor outlets all the time, and they can be a pain to replace. Many times they are tucked below large plantings, and are near the ground, so you have to kneel down to work. Not fun. So do this right the first time, and save your knees and time.


    Buy a weatherproof cover on Amazon here.


    Some more posts you might like:

    Homemade Pallet Compost Bins By Greg

    5 Great Seed Starting How To Videos

    Plant A Window Flower Box – GF Video

    Save

    Save

    Save

  • Skil Right Angle Grinder Repair

    Skil Right Angle Grinder Repair

    I wanted to walk you through the Skil right angle grinder repair  I did this week. A while back, the plastic slide switch on this tool flew right off when I went to turn it on. Right angle grinders are not very expensive, but I hat the idea of tossing out a perfectly good tool just because the switch is bad. Here is the repair I did.

    Skil right angle grinder repair
    Where the on switch used to be

    I thought the switch mechanism was right where the switch tab comes out of the body of the grinder, so I took apart the most of the tool to get to the switch.

    Skil right angle grinder repair
    4 screws hold in the spindle. Easy enough to remove.

    Its always fun to see how tools are built, at least I think its fun. So in addition to completing the Skil right angle grinder repair, I just like taking things apart to see how they work.

    Skil right angle grinder repair
    Armature removed

    But I discovered that the switch wasn’t where I thought it was. But this was after I pulled the armature and the brushes popped off the commutator. I knew then getting those back onto the  motor would be a challenge.

    Skil right angle grinder repair
    Brushes that would have to be slipped back over commutator.

    The switch itself was in the back of the grinder, near the power cord, and a long plastic rod connected the switch button and the switch mechanism. Why did I not first just pop the back of the tool open? It was just one screw holding the case together.

    Skil right angle grinder repair

    When I first looked at it, the back of the grinder looked like it was all one piece, only after unscrewing the one screw did I see the back end came apart easily to reveal the switch.

    Skil right angle grinder repair

    After trying to jumper the switch internally, meaning bypassing the switch so the grinder was always turned on, I opted to slide in a piece of plastic wedge to push the switch into its ‘on’ position permanently. Plastic glue holds it in place. The plastic I used is from one of those composite wedges one buys for carpentry projects, I think its a combo of sawdust and plastic. It worked perfectly here. Any piece of plastic would do fine.

    Skil right angle grinder repair

    With the grinder always on, I wired an inline switch into the power cord. This is the hardest part for me, as you have to cut the wire just right for it to fit into the switch case. Be sure to use the black wire in the switch, and the white wire passes through the switch untouched. If you cut too much of the insulation, you can use quality electrical tape to wrap the wire that sticks out of the switch case.

    Skil right angle grinder repairSkil right angle grinder repair

    Now I have my grinder back, and saved some landfill space as well.