Author: Eric

  • How To Install A Dishwasher – GF Video

    How To Install A Dishwasher – GF Video

    Learn how to install a dishwasher with this video I made for you. Installing a dishwasher is not hard, nor is it rocket science. If you have to remove an old dishwashwer, see my video on dishwasher removal. The hardest part might be buying a new dishwasher and then reading the installation instructions.

    How to install a dishwasher, the GardenFork way

    To remove the old dishwasher, you’ll need  a screwdriver, a pliers, and an adjustable wrench. Be sure to turn off the water supply and make sure the power to the dishwasher is turned off or disconnected. Most new dishwashers plug into a wall outlet under the sink, older models may be hard wired.

    Hard wired means there is that metal cable attached to the dishwasher or it may be what is called Romex, the vinyl covered electrical wiring. Either way, turn off the circuit breaker that the dishwasher power wire is connected to, then disconnect the power wire. Put wire nuts on the bare wires. If the machine is plugged into a wall outlet, usually under the sink, just unplug it. Simple!

    One thing to keep in mind: Have a bowl handy, as when removing the hoses, they may need to be drained. You don’t want dishwasher water draining all over the floor.

    If the floor has been tiled after the cabinets and original washer was installed, you may have problems getting the old washer out. The new tile floor is higher than the original floor, so the dishwasher can’t slide out.

    Make sure the insulation wrapped around the new machine is intact and goes in neatly, this is key to reducing the noise of the washer.

    A common misconception I see is people using teflon tape or pipe sealant on the compression fitting from the water supply line. You should not use tape on that joint. You will need to use teflon tape on the right angle fitting that comes out of the dishwasher. See the photo below for how to hook up the water supply line. Make sure the right angle fitting points toward the back of the dishwasher. Remember that the dishwasher is hooked up to the hot water supply.

    It helps to have a friend help when figuring out how to install a dishwasher, and remember, if all else fails, read directions.

  • Make Salami At Home with WrightFood – GF Radio

    Make Salami At Home with WrightFood – GF Radio

    We talk with Matt of WrightFood about how to make salami at home, and talk in general about home cured meat, and most important, food safety with home meat curing.

    Check out Matt’s blog here

    .

  • Heirloom Simple Squash Soup Recipe – GF Video

    Heirloom Simple Squash Soup Recipe – GF Video

    Here’s a simple squash soup recipe that uses heirloom winter squash- Blue Hubbard – instead of the usual Butternut Squash. You can use any type of winter squash in this soup, but we wanted to trumpet the use of more heirloom vegetables in our recipes here.


    We grow heirloom and hybrid squash in our neighbor’s field, using the weed stop fabric. We made a how to video about using the weed free plastic gardening mulch, which you can watch here.

    Winter Squash are easy to grow. The biggest problem we have with growing squash is the Squash Vine Borer, and we have 2 videos on dealing with them

    An organic method to prevent the Squash Vine Borer Video

    How to deal with a Squash Vine Borer infestation Video

    You can cook winter squash several ways, steaming, frying, baking… I prefer to roast squash. You need to be careful when cutting winter squash, it’s quite dense, and you need a sharp knife. Take care to steady the squash and yourself when cutting it up, if you slip, its a bad thing with a knife.

    Baking or roasting squash helps sweeten the flavor of the squash, i think. I split the squash in two, put both halves face up in a pan, and stick in the oven; don’t cover with foil.

    Heirloom Simple Squash Soup Recipe
    Ingredients
    •    1 Heirloom Squash, such as Hubbard
    •    1 medium onion, chopped
    •    1 small handful sage or thyme or a mix
    •    2 cups lowfat milk
    Cooking Directions
    1. Split the squash in half, scoop out the seeds, place face up in roasting pan and roast for 1 hour at 350 or until squash flesh is soft. you can check this when a knife easily inserts into the flesh.
    2. When squash is roasted, put 2 glugs of oil in a dutch oven or deep pot, toss in oinion and cook till just golden and kinda clear
    3. Add cooked squash flesh to the pot along with chopped herbs
    4. Mash the squash with a potato masher and add some of the milk.
    5. You can use a hand blender or masher to cream the squash, adding more milk to get the consistency you want. A blender will work also, but its more messy.
    6. Salt and pepper to taste and ladle into individual bowls.
    7. You can add in home made croutons, which makes the soup more of a filling meal.

  • A picture of the camera operator

    A picture of the camera operator

    The Camera Operator does not appear on GardenFork.TV . You only hear her wry commentary. Some people have asked for a photo of the CO, here’s one.

  • GardenFork Featured On iTunes!

    GardenFork Featured On iTunes!

    The guys at iTunes Podcasts had a poll on their Facebook Page, asking people who their favorite cooking podcast was, and GardenFork got the most votes! They then featured GardenFork on the main podcast page of iTunes. How cool is that?

    A big thank you to the iTunes crew. Really appreciate that!

  • Pirate Pup Charlie! GF Radio

    Pirate Pup Charlie! GF Radio

    Rick and Eric talk about the GF Kickstarter campaign, an update on Charlie Pup’s eye, being nice to nurses and what its like to be drunk in the Bellevue Hospital emergency room. Then Rick and Eric reflect on the beekeeping season.

  • Oyster Mushroom Identification, Foraging, Hunting – GF Video

    Oyster Mushroom Identification, Foraging, Hunting – GF Video

    Foraging for Mushrooms this fall, I found a bunch of Oyster Mushrooms, and made this Mushroom Identification Video. Oyster Mushrooms are edible and delicious. They grow on dead or dying trees. The trees can be standing or on their side. I’ve found oyster mushrooms growing out of the ends of cut logs, and the stumps of dead trees.

    Oyster mushrooms grow in clusters, and are usually stacked on top of each other, the individual mushrooms are kidney shape. It has gills and doesn’t have much of a stem. Oyster mushrooms are white to tan colored, they are usually darker in color later in the season. The mushrooms in this video were harvested in late November.

    When harvesting, I always leave some mushrooms on the tree to allow the mother plant to spread spores to create more mushrooms. So don’t strip a tree of all its mushrooms, you may get a second growth of mushrooms on the same tree, so check back a week later, or after a rain.

    Be sure to be very sure what you are doing when foraging for mushrooms! Learn from someone who is a practiced mushroom hunter, or consider taking a class. Do a web search for your state or county or city and “mycological society” and you may find a group offering classes. Also check nearby nature centers.

    Click here to see our other mushroom identification posts

    Cross check the mushrooms you find with several sources, books are best, I think. I use several books for identifying mushrooms , below are the mushroom identification books I recommend:


    Click Here To Buy From IndieBound

    Click Here To Buy From Amazon


    Click Here To Buy From IndieBound

    Click Here To Buy From Amazon

  • Pizza Oven Plans by Kathlean Video

    Pizza Oven Plans by Kathlean Video

    GardenFork Viewer Kathlean made a brick pizza oven based on our How to make a backyard brick oven video, and put together this great video of how she made a pizza oven out of brick. Kathlean found the brick on freecycle.org, which is brilliant – i’m all about use what you got, and these bricks fit the bill. These bricks have holes in them, our brick oven bricks did not, but Kathlean puts the holes to good use, making the roof of the oven out of brick and black pipe that slides through the brick and supports it.

    We’ve gotten a bunch of photos of back yard pizza and bread ovens, and i plan on putting together a photo gallery of the backyard ovens people have made inspired by our brick oven. Next on my list is an enhanced oven to bake bread. I need to increase the mass of the oven with more brick, and make a door to cover the front opening. Then we’ll heat up the oven with firewood to about 700F, let the fire die down, and slide in some loaves of bread. Neat.

    Have you built a brick, stone, or cob oven? I’d like to hear about it, you can leave comments below:

  • The Holiday Gift Guide 2012

    The Holiday Gift Guide 2012

    We asked some of the GF contributors for their suggestions for Holiday Gifts, here are their responses:

    Monica
    • I’m doing my best to buy from my local shop owners, many of which are friends. It’s a happier season all around that way. Between the Green Home Store, the Wine shop, the fancy dog treat store, we’re basically covered for everyone.

    • For product lovers: a Birchbox subscription.

    • Tip: Hold off shopping until the last possible minute. The best deals are on or around December 22nd.

    Mike
    •    Arduino Starter Experimenter’s Kit
    ($34) – This generation’s Erector Set.

    •    A Lodge Cast Iron Skillet
    ($19) – The most versatile pan in the kitchen. I never put mine away.

    • A Bicycle Tune Up gift certificate from a local bike shop ($50 – $150 depending on the services) – Cables stretch, chains stretch, oil wears away, derailleurs get out of alignment, grease gets old, people don’t get their bikes tuned up enough, the riding difference can be night and day. Here’s an example from my local bike shop.

    •    Gerber Needlenose Multi-Plier 600
    ($43) – The pliers can be deployed one handed. That’s extra handy when holding a bass by the lip with one hand and getting the pliers out to remove a hook with the other.

    •    Apple iPad
    – I use mine for hours every day. Music, magazines, looking things up, I have electronics tools on it, social stuff, schematics, data sheets, games. Most people I know who didn’t think they’d use it much end up attached to it. (Rick agrees and adds: The older ones eyes get, the more you gravitate away from smartphones and toward tablets.)

    •    Get someone a bunch of really boring stuff that they use all of the time – something day to day they will no longer have to worry about. Imagine if you didn’t have to buy toilet paper for 6 months.
    Rick

    •    Apple TV box ($95) – and then cut the expensive cable. You can access Netflix and Hulu through the box, then buy TV shows from Apple on a pay-as-you-go per show basis. We’re saving tons of cash and we’re watching less TV. More importantly, all the TV we watch now is meaningful, not mindless habit.

    •    Flashing LED front and rear lights for a bicycle to use day and night. The front flashing light has saved me a couple of times when people started to left turn in front of me and across my path.

    •    Lewis N. Clark WaterSeals Waterproof Pouch
    ($16) – A waterproof swim pouch with waterproof earphones for an MP3 Player. I slip an old cheapy MP3 player loaded with quality podcasts (like Gardenfork) and swim without fear.

    •    Jabra STREET2 Bluetooth Stereo Headset
    ($58) – Allows me to carry my iPhone on my belt but have the headset cord in my shirt and out of the way while gardening. It’s pretty much impervious to heavy sweat.

    •    Becoming Jefferson’s People
    by Clay S. Jenkinson – The most Gardenfork-y book I know of: self reliance, gardening, cooking, education, optimism, citizenship, philosophy.

    •    What’s Wrong With My Plant? (And How Do I Fix It?)
    by David Deardorff, Kathryn Wadsworth ($17) – One of the most helpful gardening books I own. The books is a flowchart with logic gates – starting with stem, roots, leaves, fruit, or flower – and then follows a branching logic tree to a diagnosis.

    Tony
    •    In the DIY vein, make a printed certificate for some task that you can do, and give it to someone who’s not so capable, or who may not have much time. Some ideas: paint a bathroom, make a four course roasted duck dinner (or something else nice they wouldn’t normally make), organize a garage, or hang shelving units

    Sarah

    •    OXO Good Grips Salad Spinner
    ($30) – For anyone who is a member of a CSA, has a vegetable garden, or otherwise eats a lot of greens. It makes cleaning greens so easy that it’s well worth the real estate it takes up in the kitchen.

    •    Mr. Beer Home Microbrewery System
    ($33) – A great introduction to how to brew. Buyer beware: May instigate lifelong obsession with homebrewing.

    •    Knife sharpening services – This is one of those things I don’t get around to nearly as often as I should and am always so happy when I do. A sharp knife isn’t just safer, it’s also far easier to use.

    •    Vitamix 1782 TurboBlend, 2 Speed
    ($380) – The theory here is you can go through five $100 blenders that don’t meet your expectations or invest in a Vitamix upfront. My husband and a handful of family members went in on one for my birthday one year and we use it often throughout the week to process soups, puree winter squash, make baby food, and even grind our own flours.

    •    Framing a sentimental photo – In the digital age we take so many pictures but rarely look at them months later. I love the idea of restoring an old photograph so that visual memory is not lost.

    photo by mconnors

  • Cast Iron Cooking Outdoors with Charcoal

    Cast Iron Cooking Outdoors with Charcoal

    With our recent Superstorm knocking out power to large parts of the East Coast, I wanted to share with you a way to cook food outdoors with cast iron.

    Here are some photos demonstrating how to do campfire cooking in your backyard with charcoal. You can use a campfire if you are camping, or if you want to camp in your backyard, but charcoal works well here.

    What I like is this kind of cast iron dutch oven, called a chicken fryer, I believe, can be used as a shallow pan or a deep dutch oven. Either way it makes a great outdoor baking setup. Here we are making Toad In The Hole for a GF Video, but you can use this for baking breads, cakes, whatever you use your oven for, you can use this outdoor cast iron cooking method for. We used this in our GF Video on baking banana bread in a cast iron dutch oven here.

    Browning sausages before adding batter

    I use balled up foil to create a heat proof space below the dutch oven, and i place 5 or 6 charcoal briquets under the dutch oven. You could also use pieces of fire brick or other heat proof material.

    Much like making a stew or other dishes that require browning, I browned the sausages first, then added the batter. Keep in mind how hot this cast iron can get. Start with a few briquets and add more if you want more heat.

    You don’t need a lot of briquets, they get hot and stay hot.

    After the meat is browned, I place the other half of the dutch oven in place and add more coals. Use tongs and oven mitts, the coals are hot!

    Click here to watch us make Toad in a Hole

    How do you use cast iron? for fireplace cooking? charcoal cooking? Let us know below:


  • Hang a TV on a brick or concrete wall

    Hang a TV on a brick or concrete wall

    Hang a TV on a brick wall, or hang a tv above the fireplace? Here’s how to do it right. Below the how to photos is a video of how to drill into brick or cement and links to other DIY articles.

    Sleeve or Wedge Anchors are best for cement or brick walls
    Sleeve or Wedge Anchors are best for cement or brick walls

    Working in older buildings, many times I’m asked to hang a TV on a brick or cement wall. In brownstones, many times people want to hang a HDTV or flat panel TV over the fireplace. Most of the fireplaces no longer function, being old coal or gas fireplaces. Be sure not to drill holes into the chimney of  functioning fireplace. If you’d like to hide the wires, like we did in the top photo, we use plastic raceway molding.

    To hang a TV on a brick or cement wall, you will need sleeve or wedge anchors. You could also use lead anchors and lag bolts, but I prefer to use sleeve anchors. You will also need a hammer drill.

    drill into brick video insert

    Hammer drills are not that expensive. Click here to see some drills you can buy online. Or you can ask one of your friends if they have one. You’ll also need masonry bits for a hammer drill, they are also called percussive bits in some places.

    Hammer drill and the dust it creates

    Hammer drills are loud, so use ear protection, and eye protection is of course an always must have.

    Search On Amazon For TV Wall Mounts Here

    Hanging a TV with a HDTV mount is one of those projects that falls into the “if all else fails, read directions” . So read the directions before trying to do this.

    Attach the brackets to the back of the flat panel TV, and attach the wall mount to the TV brackets. Then get two friends to hold the TV up on the wall and find the perfect spot to mount the TV on the wall. Reach behind the TV while on the wall and with a pencil mark where the wall bracket be mounted on the wall.

    Be sure the person in charge of the interior of your house is present and has a say in the placement of the TV, because once you hammer drill holes in a cement wall, they’re kind of permanent.

    Put the TV down somewhere safe, and take the wall bracket,  place it on the wall and line it up with the marks you made. Mark where you are going to drill holes to put in the sleeve anchors. ( see the mount instructions for how many bolts are needed for your tv )

    Cover the area where you are going to drill with plastic. Brick or cement dust will come out of the hole you are drilling with the hammer drill. If you have a shop-vac, have a friend hold the hose just below where you are drilling, it will save you a lot of cleaning up.

    I usually use 4 inch long 3/8″ sleeve anchors if you are hanging on a plaster wall with brick behind it, and 3 inch long sleeves if its a bare brick or cement wall. After drilling the holes, make sure the nuts are on the ends of the sleeves, and tap the sleeves into the holes.

    Don’t hammer the sleeves too far into the wall, you need enough of the threaded end of the sleeve protruding out of the wall to hang the mount. You have the nuts on the end of the sleeves to keep the hammer from damaging the threads of the sleeve while tapping them in.

    Wall mount attached with sleeve anchors

    Remove the nuts and hang the wall mount on the wall, use washers and tighten down the nuts to secure the wall mount to the wall. Then read the directions again to remember how to hang the TV on the wall mount. Then you’re done.

    Here is a how to drill into brick or cement video we did to give you an idea of how to hang a tv on a brick wall:

    hang-a-tv-on-a-brick-or-concrete-wall-6Watch how to drill into brick and concrete here.


  • Special: Diary of a Misfit & Documentary Filmaking

    Special: Diary of a Misfit & Documentary Filmaking

    We talk with co-directors Casey Parks and Aubree Bernier-Clarke about their documentary video they are raising funds for on Kickstarter here. We also talk about how you can use kickstarter to fund creative projects and some tech tips on shooting a video documentary.

  • Fall Garden Tour 2012  GF Video

    Fall Garden Tour 2012 GF Video

    GardenFork viewers have asked for a tour of the yard, so we walked around a bit to show you what is going on in the garden and yard and the kitchen, plus of course, the Labradors.

    What are you doing in your garden and home? What are you plans for the winter? Lets us know below:

  • Grow Vegetables in Winter with a Cold Frame : GF video

    Grow Vegetables in Winter with a Cold Frame : GF video

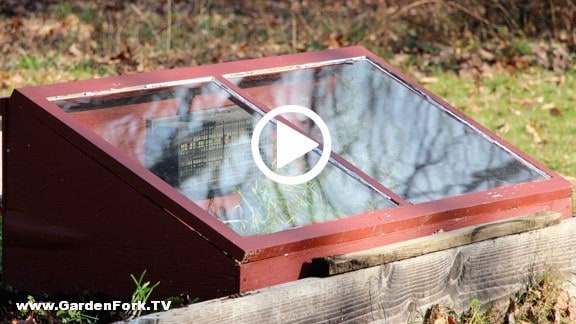
    Cold frames have been used to grow vegetables in winter since glass was invented. Winter gardening is made possible with cold frames and hoop houses. Using a recycled window, we built a cold frame last year – see our how to build a cold frame video here – and had good success growing vegetables in the winter and starting plants early in the spring using the cold frame.

    This year I took volunteer plants that had sprung up around the garden: Mustard Greens, Swiss Chard, Garlic, Chives, and parsley and transplanted these plants into the cold frame. These plants all do well in colder weather, so we’ll have some nice greens for salads in the middle of winter. How cool is that?

    The key to using a cold frame to grow vegetables is controlling the temperature inside the cold frame. We use an automatic vent that has louvers that open at about 45F, letting hot air out of the cold frame. It is called a crawlspace vent at the hardware store. You can buy the automatic vent online here.

    The recycled window we used is a single glaze, meaning it has only one sheet of glass, you can also use double glazed windows. As we say at GardenFork: Use what you got.

    You can make a larger cold frame, aka a plastic hoop house greenhouse, by watching our hoop house video here.

    Let us know your cold frame and hoop house tips and suggestions below, thx, eric.

  • The Mike Show! GF Radio

    The Mike Show! GF Radio

    Mike joins Rick and Eric to update us on his life, and teaching his son about how stuff works with hands on lessons on snowmobiles. And we talk about the human genome. We also read some great viewer mail.


    photo by zero-silence.

  • Hydroponics plus Fish Farm equals Aquaponics; a how to

    Hydroponics plus Fish Farm equals Aquaponics; a how to

    How to build a hydroponic system, or an aquaponic system, has been a continuing theme here on GardenFork.TV . If are interested in building hydroponic or aquaponic or aquaculture systems, the following how to by GF contributors Stephen and Abbie on building an aquaponics system is full of great photos, click on the Next Page link at the bottom of each page to get to the next one. Eric.

    We started with a greenhouse (a rebuilt shed) ( size: 7’ wide by 15’ long ) in 2006.

    Aquaponics Shed & Fish Tank

    We used a 300 gallon “Rubbermaid brand” stock-tank (recessed in the ground) for the fish tank.
    Use 3….55-gallon “food-safe” plastic barrels, cut them in half lengthwise so you have 6 grow-beds, approximately 2’ wide by 3’ long by 12 inches deep. By the way a 300 gallon fish tank will allow 8 such grows-beds…

    [wide][wide]
    Use another 55-gallon drum, cut out the top (leave the rim, for strength) this is a dump-tank for the “Flood and Drain” system. Inside the dump-tank you need a syphon, attached below, to fill line for grow-beds.


    Use some PVC (polyvinyl chloride) pipes to run water feed-lines from the “bottom of the syphon” (of the dump-tank) to each grow-bed. I used two lines running down both sides of the greenhouse to feed the 6 beds (three beds on each side). Or you could have all beds “side by side” on one side of your greenhouse using one line. (we tried that, but they didn’t fit “in a row” in our building). Position the grow-beds higher than the fish tank. (We need the dump-tank to flow into the grow-beds and the grow-beds to flow into the fish tank).
    Place a waterfall/pond pump at the bottom of the 300 gallon fish tank, and run a pipe (from the pump) up to the top (and inside) the dump-tank so it will fill the dump-tank. This pump will be the only pump in the system and it will run 24-7 (all the time).


    OK, so at this point we have the water leaving the fish tank entering the dump-tank, that fills until the water level reaches the top of the syphon, which then activates, the water will start to flow through the syphon pipe, down to the feed-line going to the grow-beds, which will fill with nutrient rich water (from the fish waste/poop). OK, we’ll need additional syphons (to drain the grow-beds) and a drain-line to return water to the fish tank. The white “upright” pipe attached through the grow-bed, with a covered/capped pipe slotted on the base (allows water into the syphon), and down into the drain-lines to the fish tank…
    NOTE: IF for some reason the pumps stops…. most of the water (in this system) will drain back into the fish tank… some may remain in the dump-tank… some may remain in the grow-beds… but the majority of the water will return to the fish tank, keeping the fish alive… we’ve lost electricity for three days, the fish and plants were fine. Our system is stocked with goldfish and KOI (pronounced like “Koy” …as in Roy– with a K).
    The grow-beds should be dry on the surface (which is good); about 1 inch lower, it will be moist/wet.
    We fill the grow-beds: We use “pea-stone” or “pea-gravel” (normal gravel that is screened to allow only pea sized rock to remain); we fill the beds up to within 1” of the top of the grow-beds…


    Make sure the grow-bed syphon is installed and add pvc drain-lines from bottom of grow-bed to the fish tank. The top of the syphon should be 1 inch lower, than the gravel surface…
    Continued on next page

  • A Logging Tool For Part Time Loggers

    A Logging Tool For Part Time Loggers

    After the hurricane, there were several trees down on the road to the camp, so I rounded up a few friends and drove up to the first downed tree, a large white pine.

    One friend brought along what he called a Peavey, which looks like a large tool from the 19th century, which it probably is. But its an amazing tool to have when cutting down trees.

    You don’t need to be a logger to own a peavey, its super handy to have when cutting trees or clearing an area. What the peavey does is make moving logs and downed trees very easy.

    The Peavey has a large hook and a pointed end, and using simple leverage, allows you to move logs or turn a tree that is lying on its side. You engage the hook on the side of the log and push up on the handle. The engaged hook allows you to turn the log, thus moving it. With practice you can turn the log with the peavey too.

    Engage the hook of the peavey, then turn the log

    With the peavey, you can cut a downed tree into lengths. First cut 2/3 of the way through the tree at firewood sized intervals, then using the peavey, you can rotate the tree and finish the cuts without getting the chainsaw chain in the dirt. Keeping your chainsaw chain out of the dirt is very important, it dulls and damages the chain.

    I have a variant of the peavey called a timberjack, its a peavey with a T bar attached that allows you to raise a log or tree up off the ground to cut it up without getting the chainsaw chain near the ground. Neat tools. To order a peavey, click here

    Do you use logging tools when cutting up wood? Let us know below: