I’ve been making the No Knead Bread recipe, by Jim Lahey, made famous by The New York Times and Mark Bittman for a while now. I have also been making the Artisan Bread in 5 Minutes a Day recipe, watch our original artisan bread recipe video here. In this video I show you an improved way to make the No Knead Bread and the Artisan Bread Recipes. Flipping the dough has always been a problem for me, and now I’m using parchment paper. You can watch our original video ‘How to bake bread with the No Knead Bread Recipe” here. Watch the video and let me know your suggestions and thoughts below, thanks!
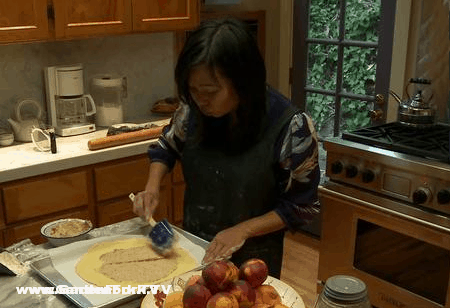
Trying to actually chart how I find cool people and neat stuff on the web can be interesting. I was showing my sister the Tartine Bread video made by 4SP films, and I saw that 4SP also had produced a video about Chez Pim making a pie – pastry crust. The recipe is super simple, what really interested me was the technique of making the dough by hand on a piece of marble. So many of us – me included – pull out the food processor to make pie crust. Next time I’m using Chez Pim’s method shown here in this well done video:
Pim has published a book, The Foodie Handbook, information is on her website here.
Tracy joins Eric for a brother sister show, and talk about their recent dinner at the Oakhurst Diner in Millerton, NY , and Eric’s penchant for spaghetti sandwiches. Then we talk about Atomic Ranch magazine, and mid-century ranch homes, furniture, and design. Campers and Trailers from the 50s and 60s come up next, a Vagabond Trailer is in Eric’s neighbor’s field. How to repair your toilet, Tracy tells of how she fixed her toilet tank flapper and tank valve, then we segue into how to repair your vacuum, as tracy tells of how to repair your vacuum. The wonder bar crowbar, a super handy tool, is used by Tracy to pull up and remove the old carpet from her dining room. Then we move into our vampire power video and how your cell phone charger is always using power, not just when its plugged into a cell phone. Smartphone apps Instapaper and Read It Later are discussed, and Eric likes Evernote. Tell us your thoughts on the GF Radio voicemail line: 860-740-6938
I’ve been making bread using the Artisan Bread in 5 Minutes a Day method, ( we made a GF video about artisan bread here ) and the original recipe calls for placing the dough on a bread peel to rise, then sliding it onto a pizza stone in the oven to bake. This pizza stone method yields a good loaf, but after baking bread with the No Knead Bread Recipe, ( here’s a video we made about the No Knead Bread Recipe ) I wanted to get that crunchy bread oven style crust on the Artisan Bread, so I thought I’d try using a dutch oven to bake the artisan bread. I’ve been baking the Artisan Bread in a cast iron dutch oven with good success.
the dough stores in the fridge in this container
If you are new to the Artisan Bread in 5 minutes a day method, you make a large amount of bread dough and it stores in your fridge. The beauty of this is that you don’t have to think ahead if you want to make bread. Just grab a hunk of dough, preheat your oven and dutch oven, and bake.
risen dough floured and scored
I had been having problems scoring or cutting the top of the dough to get those neat cuts in the bread, then I read that flouring the top of the loaf before scoring it allows the knife to cut easier.
not bad for baking in a propane oven I got out of a camper
I let the dough rise on a piece of parchment paper, then grab the corners of the parchment paper and lower the risen dough into the preheated dutch oven. Its ok to have some of the parchment paper sticking out of the sides of the lid.
To bake the Artisan Bread in 5 in a dutch oven, I bake it in a 450F oven, and bake the dough with the dutch oven lid on for 30 minutes, then I remove the lid and bake the bread for another 20-30 minutes with the lid off.
I’m really amazed at the bread I’ve been able to make with this and the No-Knead Bread Method. Check out the Artisan Bread in 5 Minutes site here.
What have your experiences been? let us know below:
Want to build a trellis for our vegetable garden that uses recycled wood and twine? I made this video to show you how. We grow peas, beans, & cucumbers on this simple trellis. (Want to learn how to grow peas? It’s easy: Watch how to here.)
Enjoy the video I made for you below, and then read through the steps to build your trellis.
If you have raised beds, you can build a trellis by attaching the vertical posts to the sides of the bed. I put the posts just inside the bed and drill into them from the outside wall. Two screws in each post will hold it. Make sure the screws do not jut out past the wood, the point could hurt someone digging in the raised bed.
If you are not using raised beds, I’ve found it helpful to cut a point at the bottom of your vertical posts, then hammer them into the ground where you want the trellis.
If you are building a trellis for a in-ground use, attach a cross bar about 18″ above the bottom of the vertical posts and drive the trellis into the ground. You may want to attach some wood triangles where the posts meet the top crossbar to make it sturdier and keep it from swaying side to side.
For a trellis on a raised bed vegetable garden, I don’t use a bottom cross piece. I staple the bottom loops of the twine right to the wooden sides of the bed. I do screw the top cross piece into the two upright supports. I then cable staple the twine up and down. Pretty easy.
If you want, you can just loop the twine across the top cross support. I’m all about making it simple.
I don’t think you need to use pressure treated wood for to build a trellis. I use regular pine or recycled wood from other projects, and they have weathered just fine. If you have some fallen trees nearby, the limbs work great for this, just cut them to size.
I like vertical gardening like this, it saves tons of garden space. I make sure that my trellises do not shade too much of the rest of the vegetable garden, because sun is already limited in my yard.
Why do I use twine for the trellis? In the fall, I can easily cut down the string with the plants, chop it up a bit, and toss it into the compost pile. The string will break down. For peas I run the string up and down, for a cucumber trellis, I will also run the twine across the posts, as they need more support. My favorite tool for attaching the twine to the wood supports is a cable staple gun.
I am all about keeping it simple and use what you got, but if you want to go fancy, see what my friend Erin has done with a super fancy trellis.
This is only the beginning of how you can DIY make a trellis. Let me know how you build a trellis in the comments below. Thx!
How to cook sous vide in a slow cooker or crock pot leads to many tangents on GardenFork Radio this week. GF listener Joe wrote in to tell of how he uses an older slow cooker, aka Crock Pot, to cook steaks sous vide. And Eric updates us on the honeybees, re-queening a weak hive. Then we talk about melding baking bread with the Artisan Bread in 5 Minutes a Day ( how to video here ) with the Jim Lahey’s No Knead Bread dutch oven method ( how to video here ). and of course, viewer mail.
Eric got his new honeybee queen from John at Warm Colors Apiary in Deerfield, MA
Dog toys are expensive, here is a video & plan for a simple homemade dog rope toy. Our Labs love this toy, and after they destroy it, we can easily make another one. Moose and Charlie Pup are the tug of war toy dogs in our house, the others are tennis ball fixated. I came up with the idea of this homemade rope toy at the hardware store while looking at the different rope they have for sale. I bought a 100 feet hank of 3/8″ nylon rope and started experimenting with different dog toy designs. The dog toy we show you how to make in this video is the most popular and its simple to make.
Briefly, to make this rope toy:
1. cut 3 or 4 lengths of rope about 4 feet long.
2. bunch together one end of each rope in your hand, so the all the ropes hang down from your hand holding the rope ends.
3. while holding all 4 ropes together, tie an overhand knot at one end of the ropes.
4. continue tying overhand knots along the length of the ropes, making sure the space between knots is not large enough for the dogs to get their head stuck.
5. play tug of war with your dogs.
Do you make your dogs rope toys, or other homemade toys? let us know below, we’d like to see what GF viewers are doing.
How not to sand a wood floor is just part of this week’s GardenFork Radio. We also talk about hydroponics, aquaponics, composting, chainsaw safety, and some new viewer mail! Call our Listener Voicemail 860-740-6938
Cast Iron Cookware hasn’t changed much since the turn of the century. That’s about to change as Jason and John, owners of Borough Furnace, bring cast iron cookware into the 21st century. John and Jason have launched a Kickstarter campaign to raise funds to build a modern day foundry to create cast iron cookware and more, and I talked to them by phone for GardenFork Radio.
Here Eric shows you how to use a chainsaw to cut up tree logs into firewood. Keep in mind Eric is not a professional lumberjack, just your average DIY guy who likes to use his chainsaw to cut down trees, and cut the logs to fireplace length. Use this information at your own risk. Always follow all the safety instructions that came with your chainsaw.
Proper placement of the chainsaw relative to your body, especially your legs and feet is real important here. Think about how the chainsaw may slip down, or up and what part of your body it may hit, which would be a bad thing. What may seem like a comfortable position to hold the saw, especially while you are kneeling to cut up trees, may not be the best way to do something. Steel toed boots are a must have when cutting firewood.
A sharp chainsaw chain is mandatory, if your chainsaw is spitting out fine sawdust while cutting, its time to switch out the chain with a sharp one. A sharp chain makes large wood shavings when its cutting, not fine wood dust.
Cast Iron cooking startup Borough Furnace, bag gardening with mike, anonymity on the web, Table Saw safety with SafeStop.com from an article on NPR.org, and viewer mail! acadia’s book is at www.acadiamcgee.com
call our listener voicemail line with your thoughts or comments. 860-740-6938
Chef Erica Wides joins us today to talk about how to cook radishes, how to use soy sauce, Worcestershire sauce, and toasted sesame oil to enhance your home cooking, and to answer the question that vexes us all, why does restaurant food taste better than my home cooking. Plus Erica’s thoughts on knife sharpening, good saute pans, and more.
Priscilla, tomato expert and my neighbor, joins us for another talk on how to grow tomatoes. we talk about how to plant tomatoes, and the different varieties we like. Priscilla grows a ton of tomato seedlings and sells them at her roadside stand, and all our tomatoes come from her. Our favorite tomato last year was Juliette, which grew really well despite the poor weather.
Summer Choice is one of the tomatoes i planted last year
Want to protect your email and make it secure? Listen as Eric and Mike and Monica talk about email security, email scams, gardening, starting carrots, and making sure your passwords are safe. Mike is what i call an expert on email security, and Monica and I use email, so this is a good topic.
We have a real bear problem in our town with bears, and bears really like to tear apart beehives. So to hedge our bets, we decided last year to start a second beeyard in another part of town. Our second beeyard is near the center of town, right next to the cemetery. The honeybees and their hives are on the edge of a large hayfield, where they are protected by the prevailing winds and get excellent daylight throughout the day.
We hived two new packages, using medium supers on these hives. I put our hives on small tables. The height of the table makes it much easier to work the hives, and we can grease the legs of the tables to keep carpenter ants and other insects from entering the hives.
We use a few techniques to bear proof our beehives. First we have a solar powered electric fence made by Premier 1 Supplies. Premier 1 gave us the electric fence they sell to protect beehives from bears. So far it has worked. Its also very easy to set up and move. You can watch our how to bearproof beehives video here.
Second we use a ratcheting strap to strap together the beehives. The thinking here is that if a bear does get to the hives, the straps may keep the hives together despite the bear trying to take the hive apart. I’ve read where this has worked for a few people, so it doesn’t hurt, I don’t think. We may need a heavier ratchet strap, the kind used on semi trucks.
Newly hived beesSolar powered fence from Premiere 1 SuppliesI like the rectangular net pattern of this electric fence. wide view of the hayfield where the beeyard is
Its only been a week since we hived all the bee packages, and our bees are already firing on all cylinders. When you hive a package – you can watch our how to hive a bee package here – you pull out one of the frames to make room for the queen cage that will fit in that space.
The queen is in a separate cage so the worker bees can slowly become used to her unique scent. The bees in your package more than likely have been pulled from a number of hives, and the queen they are paired with is not one they are familiar with.
One end of the queen cage has a small hole plugged with sugar candy which the worker bees will chew through to release the queen into the hive. It takes a while for the workers to chew through the candy plug, and that allows the workers be become acclimated to the new queen’s scent.
You usually leave the bees alone for a week to allow the bees to release the queen and become accustomed to their new surroundings. But, while we are waiting, bees will fill any spaces in their new hive larger than 3/8″ with honeycomb. Which is exactly what all 4 new hive packages did this year.
Every hive we opened had 3 or 4 big pieces of burr comb where the bees had filled up the space around the queen cage. Here are a few pictures showing how industrious the bees are. Nature hates a void.
Burr comb is honeycomb the bees have drawn down that is not on the frames. It messes up the working of the hive, and most of the time your remove it. We’ll use the burr comb to make candles.
Burr comb that surrounds the queen cagethis beeswax comb is less than a week old. note the very light yellow colorThe queen cage in the new hive. You can see the space around it that the bees fill with burr comb
Need to replace your damaged car fender? Learn here how to replace that car fender that hit guard rail, or got mashed by someone who couldn’t stay in their lane, or whatever accident damaged the fender, learn here how to replace your truck or car fender with a replacement from an auto recycler or a new fender from a auto body supplier.
Have you done any body work on your car? Let us know some good tips on repairing the bodywork on your car or truck below, thanks.


 Dog toys are expensive, here is a video & plan for a simple homemade dog rope toy. Our Labs love this toy, and after they destroy it, we can easily make another one. Moose and Charlie Pup are the tug of war toy dogs in our house, the others are tennis ball fixated. I came up with the idea of this homemade rope toy at the hardware store while looking at the different rope they have for sale. I bought a 100 feet hank of 3/8″ nylon rope and started experimenting with different dog toy designs. The dog toy we show you how to make in this video is the most popular and its simple to make.


