Why does Eric always poke fun at Chris Kimball: ? Mike asks the question everyone wants answered.
Today we’re doing a Skype podcast with our good friend Mike in Chicago. Mike and I met when I was doing an appearance at the Chalet Nursery in Chicago, where Gardenfork friend Freya Wellin is in charge of the perennials.
Inspired Heather of the Wiggly Wigglers podcast, I walked around the garden and house today and give an update about what all is going on with the garden, my truck and stuff in the kitchen.
Build a simple raised bed with this DIY video. With this raised bed plan we show you how to make raised vegetable or flower beds without using pressure treated lumber The current raised beds in the garden have been there about 8 years now. So we must have done something right. how unusual… If you want to build raised beds, the ones we have are good for vegetables and flowers, check it out, let us know your thoughts.
Our raised beds are 4 feet wide and 12 feet long, make sure the raised beds are 4 feet ( 48″ ) wide on the outside dimension. This will make it easy to use floating row fabrics or plastic sheeting that comes in 48″ wide rolls. I learned this the hard way.
DIY raised bed plan complete
You may want to consider putting 1/2″ galvanized wire screening across the bottom of the raised bed frame before siting it and loading in all the dirt, this will keep out moles and voles. We haven’t had a huge problem with that, but I see how it could for some people.
For our garden soil, we had a delivery from a local nursery that sells a garden soil mix. It can be hard to find a company nearby that sells what you want, you may end up mixing it all up yourself. Let me know how you have built your raised beds below:
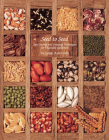
Learn here how to start seeds in pots or trays with the experts. In the city we live near the Brooklyn Botanic Garden, and they showed us some great seed starting tips. By starting your own seeds, you can get a lot more plants for less money, and you get to grow plants that are not available at your local nursery. neat.
The Brooklyn Botanic Garden uses bark as a seed starting medium. I can’t seem to find that stuff, so i use coir, which is compressed coconut fiber, and mix in vermiculite or perlite to add some air to the mix.
One of the keys i think, is to not have the seeds too wet, over-watering your seed starting trays can cause a bunch of problems and kill the seedlings. Its also important to have the seed trays in direct sun, I use a grow light, you can watch our how to build a grow light video here. Having the seeds in a window will cause the seedlings to get leggy – spindly.
Other GardenFork DIY seed starting videos you may enjoy:
A number of our neighbors tap maple trees to make maple syrup, here is a video about using sap buckets and taps.
Learn how to identify Sugar Maples trees, make sure you are tapping the right kind of maple trees with this neat tree identification book, Bark. The great thing about this book is that its based on bark identification, not leaf identification, because when you think about tapping trees, there aren’t any leaves on the trees, you know..
Here is the tree identification book we like to use:
Buy From An Indie Bookstore Here Buy From Amazon Here
Watch all our maple syrup videos here on the site!
Here is the first Gardenfork Radio Show. This audio show talks about all the cool stuff i run across each week that doesn’t make it into a Gardenfork.tv video show.
Caroline from Holland sent me an email with questions about the Sullivan Bread recipe, and my sister Tracy had some suggestions. Caroline then sent me these great picts of bread success. Its very cool that people in Holland watch Gardenfork.
Due to spam, comments have been turned off, please visit The Greenhouse to share your thoughts.
This is a great recipe for all those cherry tomatoes you have at the end of the season. This dish is sort of a cherry tomato salad over pasta. I don’t think this dish needs cheese, but if you do, go ahead.
Cherry Tomato Pasta Recipe
3 pints of cherry tomatoes ( about 4 good handfuls )
Red Wine Vinegar
Extra Virgin Olive Oil
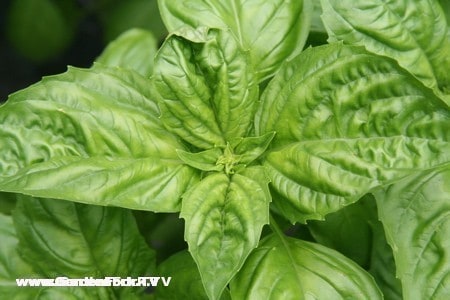
1 handful of Fresh Garden Herbs: oregano, chives, thyme, rosemary
1 lb spaghetti or other pasta shape you like. I use the thin spaghetti
Put the water on the stove to boil, go out to the garden and pick tomatoes.
Add pasta to pot and cook to taste.
While pasta is cooking, slice all the tomatoes in half, place in a bowl.
Chop the fresh herbs, add to tomatoes.
Add about 3 tablespoons of olive oil to the bowl
Add about 1 tablespoon of red wine vinegar
with your hand, mix the dressing into the tomatoes, and squish some of the tomatoes at the same time, so their juices come out and mingle with the oil and vinegar. Add salt and pepper to taste.
Put colander into a serving bowl, place in sink. When pasta is cooked, pour pasta into colander. [ the hot water will warm the serving bowl as it drains ]
Remove colander and drain hot water from serving bowl. Put pasta in the serving bowl and pour tomatoes over pasta.
When I was a kid, ( wow, not used to saying that too often ) we would be in the yard or the woods whenever we were home and there was daylight. Now, it seems that kids lives are over-scheduled.
Today’s kids are increasingly disconnected from the natural world, says child advocacy expert Louv (Childhood’s Future; Fatherlove; etc.), even as research shows that “thoughtful exposure of youngsters to nature can… be a powerful form of therapy for attention-deficit disorder and other maladies.” Instead of passing summer months hiking, swimming and telling stories around the campfire, children these days are more likely to attend computer camps or weight-loss camps: as a result, Louv says, they’ve come to think of nature as more of an abstraction than a reality. Indeed, a 2002 British study reported that eight-year-olds could identify Pokémon characters far more easily than they could name “otter, beetle, and oak tree.” Gathering thoughts from parents, teachers, researchers, environmentalists and other concerned parties, Louv argues for a return to an awareness of and appreciation for the natural world. Not only can nature teach kids science and nurture their creativity, he says, nature needs its children: where else will its future stewards come from? Louv’s book is a call to action, full of warnings—but also full of ideas for change. [Publishers Weekly]
One reviewer on Librarything.com summed it up this way: “Leave no child inside”
I’ve been making the No Knead Bread, invented by Jim Lahey and made famous by Mark Bittman, and this time I used 1 cup of all purpose flour, 1 cup whole wheat flour, 1 cup bread flour. All King Arthur brand flours. Worked well. Not a lot of rise, but it was cold in the house this weekend.
Sullivan Bakery Bread, The No Knead Bread Recipe, the Gardenfork version
I’ve made this bread about 20 times now, and it comes out great every time. I’ve learned a few things doing this. It really helps that the dough be in a warm place during the long rise time. I let it sit overnight, so I bring it up to the bedroom, as the rest of the house cools down at night ( thanks to our programmed thermostats ).
A viewer emailed me to say that you can also put the dough in the oven and leave the oven light bulb turned on, this will keep it warm enough as well. You don’t have to turn on the oven itself, just the oven light.
3 cups all purpose flour. I use King Arthur brand flour.
1/4 teaspoon instant yeast
1 tablespoon salt
Cornmeal, preferably coarse ground.
Mix together flour, yeast, and salt in a large bowl. Add 1 1/2 cups of warm water ( about 100 degrees ).
Mix with a spatula. The dough will look like it needs more water. It doesn’t. Mark Bittman has the best word to describe it, the dough will look “shaggy”
Cover the bowl with plastic wrap and place in a warm spot for about 12 hours. You can let it rise longer if you want. The dough will have a good amount of bubbles in it.
Get out two large cutting boards.
Flour a large cutting board and turn the dough out onto the board with the spatula.
Put a clean towel on the other board and dust the towel with cornmeal.
Take the dough, dust it with a bit of flour and fold it over on itself front to back and side to side.
Then turn the ball of dough so the folds are on the bottom and place in the center of the towel dusted with cornmeal.
Fold the towel ends over the dough and let rise for about 2 hours. The dough should roughly double in size. The dough will not rise up a lot, but will grow outward on the board.
30 minutes before its time to bake the bread, put your dutch oven in the oven with the cover on, preheat the oven to 450 F.
When the dough has risen and the oven is preheated, remove the dutch oven, put it on a wire rack next to the dough on the towel which is on the cutting board.
Slide your hand under the towel and dough, lift up the dough and flip it over into the dutch oven. What you want is the folds of the dough, -what was on the bottom of the dough during the rise – to be on top when it sits in the dutch oven.
Be careful doing this as the dutch oven is very hot.
The dough never lands perfectly in the middle of the dutch oven. I use a wooden spatula to gently nudge it toward the center, pushing down any part of the dough that may be sticking to the side of the dutch oven.
Cover the dutch oven and place in oven for 30 minutes.
After 30 minutes, remove cover, the dough should look like bread and be starting to brown. Remove the cover and bake for another 15 minutes.
The bread should now look like great bread. The crust should be golden brown. You can bake it longer if need be.
When done, remove bread from dutch oven and cool on a wire rack.
You can double this recipe, but be careful with the water, add not quite twice the amount of water, you can always add more.
NEW INFO
my house is quite cool in the winter, and i remember someone suggesting putting the dough in the oven with the oven turned off, but the oven light turned on. so first I had to finally fix the oven light in our 50’s era propane stove salvaged from a Vagabond camper trailer. I fixed the light, and left the dough in the oven overnight with the light on.
Being the gadget geek, I put in my temperature probe to see at what temperature the dough would maintain. It stays at about 78 F. Great.
Learn more about this and other fun stuff at our viewer forum, The Greenhouse. Comments have been turned off here, but you can post your thoughts, pictures and videos at The Greenhouse.
My friend Brian, who helps shoot Gardenfork, is in Madrid for the summer, shooting a documentary about these village painting contests held all over Spain. He sent me some pictures of his tomato plants on his balcony, and they are not doing well. Any suggestions?
Learn more about this and other fun stuff at our viewer forum, The Greenhouse. Comments have been turned off here, but you can post your thoughts, pictures and videos at The Greenhouse.
A really nice article in the Litchfield County Times magazine LCT about Gardenfork. The writer, Rebecca Ransom really ‘got’ what Gardenfork is all about, and the photographer, Robin Gourd, took some great picts.
Learn more about this and other fun stuff at our viewer forum, The Greenhouse. Comments have been turned off here, but you can post your thoughts, pictures and videos at The Greenhouse.
I spent the morning in my neighbor’s field, helping him harvest garlic scapes. We did an episode last year about grilling them [search thru the ‘guide’ in the video player or watch on iTunes ]
So I came home with a huge sack of them, thinking that I could somehow pickle them. I ran across several ideas on the web, making scape pesto is what many people do, and I liked how Vanessa at What Geeks Eat prepares them.
[It ends up Vanessa and her husband and I attended the same university, Southern Illinois University, all at the same time. interesting.]
So, though Henry & Mij are lounging in the yard after attacking each other all morning, I’m going to go to the store and see about pickling some of these, and making pesto.
Wow. what fun it was to make and can our own rhubarb jam.Rhubarb Jam Recipe
5 cups of chopped rhubarb
2 cups of sugar
1 cup of water
2 to 4 packets of unflavored gelatin
optional:
1 carton of strawberries, chopped
1 20 oz can of crushed pineapple
zest of one orange, or whole orange slices
Place all ingredients except gelatin in a large pot, and cook for 15-20 minutes, until rhubarb has broken down to your liking . Turn off heat, and add gelatin. How much gelatin depends on how thich you like your jam. More gelatin means a thicker jam.
Can jam according to canning instructions that come with your canning jars.