Category: Cooking – Recipes

  • Easy way to make yogurt by Tish

    Easy way to make yogurt by Tish

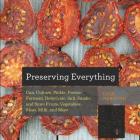
    From a GardenFork Fan, an easy way to make yogurt using your oven. You don’t need special equipment, its easy to make, here’s how. Below this yogurt recipe are links to our how to make yogurt videos and more fermentation stuff.

    I recommend one special tool; a probe thermometer with an alarm that notifies you when your food has reached the desired temperature. I use this one. There are lots of them on the market ranging from $15 to $60. However any thermometer that will read from 100 to 200 degrees will tell you what you need to know.

    Tish’s Easy Way To Make Yogurt Recipe:

    Warm your milk in a non-reactive pan over moderate heat to 180 degrees Fahrenheit. go slowly with this step for two reasons. First you don’t want to scorch the milk and second, slow warming allows for some evaporation of water in the milk and that makes a thicker, creamier yogurt. The probe thermometer is a big help here because you don’t have to stand over the milk and stir it. I set this up when I have other kitchen jobs to do and give the pan a quick stir every now and then.

    Once the milk has reached 180 degrees, you can hold it there for more evaporation or remove it from the heat right away. You do not want your milk to boil. Allow the milk to cool to 110 degrees (re-set your programmable thermometer to alert you when the milk has cooled). Spoon some of the warm milk into your yogurt culture and stir it in. Keep stirring in milk, a spoonful at a time, until the mix is smooth and thin enough to blend easily with the full pot of milk. Add the culture to the milk in the pot and stir it thoroughly. Pour the cultured milk into your clean containers and cover the containers.

    Many ovens can maintain a perfect temperature for yogurt, just by keeping the oven light on. Before you begin, test this by leaving the oven light on for several hours with the probe thermometer sitting on the rack. If the bulb keeps your oven at 100 to 115 degrees, you’ve found your yogurt machine. If this doesn’t work, use a personal sized cooler – the ones designed to hold one or two six-packs of drink cans. Wash the cooler out with hot tap water, even if it’s already clean because you want to warm it. Set the containers of cultured milk in the cooler, add enough hot tap water to come right up to the tops of the containers, cover and move the cooler to a quiet spot in the kitchen.

    Leave your yogurt alone for 8 to 12 hours then move it to the refrigerator. Enjoy!

    I use pasteurized milk. Many national brands of milk are now ultra-pasteurized and I don’t know how that will do for yogurt. It won’t make cheese so I haven’t tried it with yogurt. You can use any fat content you like from whole milk to skim.

    You can buy yogurt culture from New England Cheesemaking. I have done that. However I have had really good results using plain yogurt from the grocery store. In the past I have had problems with the flavor of the yogurt (made with grocery store starter) changing from batch to batch but for the last year that has not happened. Any unflavored yogurt with live cultures will do, but I use the Giant grocery store house brand. Look for live cultures and an ingredient list that includes no more than three items (Milk, live cultures, and maybe milk solids). You need about a tablespoon per quart of new milk.

    If you like your yogurt thick, you can add non-fat dry milk to the milk while you warm it. I add a lot – a cup of dry milk per quart of new milk. This gives me yogurt that is almost like Greek yogurt. I get very little whey separation with this much added milk.

    I warm my milk while I fix dinner, cool it while I eat, and leave it in the little cooler overnight. I make two quarts every ten to fourteen days.

    I just want you to know that you don’t need expensive tools or yogurt-specific equipment. Yogurt is a simple food and it’s easy to  make.

    easy way to make yogurt

    Our How to make yogurt video

    Listen to Sandor Katz talk about fermentation, how to make sauerkraut and yogurt on GF Radio here.


  • Pressure Cooker Reviews, What To Buy?

    Pressure Cooker Reviews, What To Buy?

    Here are a couple of pressure cooker reviews if you’re thinking of buying a pressure cooker, and a good cookbook to go along with it.

    Electric Pressure Cookers

    I have become a convert to the electric pressure cooker, notably the Instant Pot. You can buy the Instant Pot model I use here. (affiliate link) Watch the video and then read on about some of the reasons  I like it.

    pressure cooker review

    Instant Pot Pressure Cooker Review:

    • Turn it on and walk away, no monitoring cooktop burner flame.
    • Built in keep warm setting.
    • Smart technology monitors internal temperature.
    • Easy to close lid.
    • It makes yogurt!

    pressure cooker reviews

    Stove Top Pressure Cookers: I own two of these. I recently bought a Fagor pressure cooker which was highly recommended as a Best Buy by the people at America’s Test Kitchen. I found the Fagor to be easy to use and pretty straightforward. Here is a link to buy the Fagor Pressure Cooker. (affiliate link) I suggest buying the 10 quart.

    The Fagor has a nice thick bottom and the lid is fairly easy to attach. You’ll find pressure cookers can be a little clunky fitting the lid on because it has a gasket. But this one drops on pretty quickly and it has a couple of guide marks to help you with that.

    As far as price it lands about in the middle of what a pressure cooker costs. Don’t buy a cheap pressure cooker, it’s just not worth it, it’s going to not work well and you’re going to be unhappy and then you’re not going to like pressure cookers. You get what you pay for with most things in life and that’s true with pressure cookers as well.

    I also own a Magafesa pressure cooker, it is the first one I bought about 10 years ago. It got a good rating from Cook’s Illustrated back then. Now it does not make the recommended list on Cook’s. It works, but I find if the relief valve gets any food debris in it, it can take some time to clean it up.

    Do not buy a pressure cooker with what has a jiggle top, this is an old technology, go with the current models. Also don’t buy a used one at a garage sale, you don’t know if it works properly. Take your money and go buy new one.

    Listen to me talk about Pressure Cooker tips on GardenFork Radio here. We also have some pressure cooker videos for you here.

    What to look for in a pressure cooker

    I use a 6 quart cooker, but I would opt for a larger cooker (8 or 10 quart) if you have the cash and kids. This allows you to make a bigger meal that can be lunch or dinner the next day too. Putting the lid on a cooker can take some practice, none of them are like butter, but the one you buy should go on easily. Make sure the bottom of the cooker has a thick base, much like regular pots, a thin base burns food.

    I imagine there are a ton of pressure cooker reviews online, this is my take on it. Please let me know yours in the comments

    When I bought my Fagor pressure cooker I also picked up a book, Pressure Cooker Perfection, which is from the people at America’s Test Kitchen.
    pressure cooker reviews
    It has a lot of good information in the front of the book. I mean it’s what you expect when you get something from the Cook’s Illustrated – America’s Test Kitchen people. It’s researched to death – lot of good information and the recipes are good as well. I think the recipes are good for those of us who follow directions and then you can jump off from these pressure cooker recipes and make your own dishes. The Bolognese is kind a good one to start with, I skipped the Mortadella called for in the recipe.

    The authors of Pressure Cooker Perfection cookbook haven’t really broken any new ground but they do list out here some nice recipes they have good pictures it shows you step-by-step and that typical America’s Test Kitchen way they do things. I like them for that I applaud them for that.

    I also like Lorna Sass’s Cooking Under Pressure cookbooks, they have good recipes and charts for cooking times.

    Let me know what you guys think in the notes below what kind of pressure cooker do you own.

    cook with a pressure cooker

    Watch all our pressure cooker recipe videos here.

  • Easiest Best White Bean Soup in 30 Minutes

    Easiest Best White Bean Soup in 30 Minutes

    I didn’t really know what to make for dinner last night, and I had a bunch of onions in the refrigerator which I had bought at the Costco. So I thought okay, I’m going to chop up an onion and start cooking it and go from there. I took a large onion and I cut it in half and then cut it into half ring things.

    easiest-best-white-bean-soup

    I think you need to cook onions in more oil than people seem to think on the cooking shows, so I dumped a bunch of blogs of oil into a pot and dropped in the onions. I then just kinda looked around and I saw that I had just bought a can of small white beans from the grocery store. The Goya brand, which I like. I guess it’s a 28 ounce can or so of small white beans. I cooked down the onions and I threw in  two clothes of chopped up garlic. I first put the lid on and let the onions sweat and steam. Then I take the lid off and let them cook until they are almost burnt – by accident – because I walked away from the stove. I dropped in the white beans and a tablespoon of the Italian seasoning mix that I have. I went into the fridge and pulled out some Parmesan Reggiano cheese rinds that I had been saving and I threw those in. Heated it long enough to cook through, let the cheese rinds get kind of soft and boom done.

    That was the most amazing white bean soup I’ve ever made and it was like nothing to it. Of course we have some bean dinner videos here for you to check out. So what do you think, how do you make white bean soup? Let me know below:


    Easy White Bean Soup Recipe

    1 can medium size 28 oz or so small white beans. I used the Goya brand

    1 large onion, cut in half, then sliced into 1/4″ rings

    1 tablespoon italian seasoning mix

    2 cloves garlic chopped up

    Cheese rinds if you have them.

    In a medium sized pan, glug in vegetable oil. Don’t just skim the surface, glug enough.

    Heat this up till it shimmers, and drop in the onions. Stir around and cover the pan for a few minutes. You want to steam the onions a bit,

    Take off the cover, throw in the garlic and cook down the onions until golden, medium heat, but keep an eye on it. Kinda burnt is OK.

    When the onions are golden, add in the can of white beans and the cheese rinds.

    Top with the italian seasoning, stir in and warm up the mix to bubbling.

    Don’t over cook this, but let the cheese rinds soften, so some of their flavor moves into the beans.

    I had this with grilled cheese. nice.

  • Locavore Garden Salad instead of PBJ for lunch

    Locavore Garden Salad instead of PBJ for lunch

    OK, what is a locavore garden salad? Its when you walk out to your garden and cut some salad greens. This all started with lunch.

    locavore-garden-salad-instead-of-pbj-for-lunch

    We were about to have lunch, and it was going to be PBJs, since it was simple and all the ingredients were there. But I have been on this kinda sorta gluten free before 6 pm thing – we talk about gluten free on GF Radio here – so I grabbed my scissors and went out to the garden.

    There was kale, and young salad greens that had sprouted 2 weeks ago, plus arugula, which grows like a weed anyway. I cut the greens to that they would grow again – this is going to be our hoop house raised bed this winter – and was back in the kitchen in 5 minutes.

    Put water on to make some poached eggs – kinda like the neato Salad Lyonaise video we did – and washed the salad quickly. It almost didn’t need washing it was so young, but… I made a quick vinegarette salad dressing in the mixing bowl. You can use just the egg yolk as a dressing, like in the Salad Lyonnaise recipe, but I wanted the balsamic in there.

    locavore-garden-salad-instead-of-pbj-for-lunch-2

    And its good I did make the dressing, because I overcooked the eggs, they were no longer soft poached, but they were still good. Not bad for a quick switch from PBJ.

  • Core your apple before you eat lifehack

    Core your apple before you eat lifehack

    Here’s a neat little lifehack that I thought of while wanting a snack while in the home office. I don’t keep cookies or sugar type snacks in the house, because I will eat them!

    But I do keep fresh fruit, dried fruits, and nuts in the house to snack on, because I eat constantly.

    Back from a morning meeting, I had rode my bike to and from the meeting, so that was about a 40 minute workout, but I wanted something to take up to the home office, and I saw the bowl of apples.

    But here’s the issue I have with apples at the desk. The apple core. Yes, you could put it in the trash, but we compost our food waste, so the core will have to lie around the desk while I work. Then I had the eureka lifehack moment: Core the apple.

    core-your-apple-before-you-eat-lifehack-2

    I had just cored a bunch of apples for an upcoming apple recipe video, and this might have put the idea in my head. So I cored my apple with my neat OXO apple corer gizmo tool, and I was on my way.

    Of course, I do have my intrepid bio-composter at the ready here, who loves apple:

    core-your-apple-before-you-eat-lifehack

    Get your own apple corer here:

  • Easy Spaghetti Meatballs Recipe – GF Cooks Video

    Easy Spaghetti Meatballs Recipe – GF Cooks Video

    What’s not to like about this easy spaghetti meatballs recipe? Bake the meatballs, cook the pan sauce, add pasta and eat. Simple and easy to do, and you could use this recipe to make meatballs sandwiches as well. Nice.

    Our simple recipe uses meatloaf mix and a bunch of italian seasonings. We buy about 1.5 pounds of meatloaf mix, which around us is half pork and half ground beef. The beef I bought for this project was 90% lean, and I’d rather have it around 80% lean. You could toss in a few tablespoons of bacon drippings or butter to amp this up a bit. It all works.

    A key thing here is to not over mix the meat mixture, it will make the meatballs tough. You can use your hands or a spoon to mix it all up, use what you got. Be sure to wash your hands after handling meat.

    This is different than in the video, but I have found out that I like the cheese to be coarse grated with the large holes of a box grater instead of the fine grating of the microplane. It just tastes better, and i think the cheese stands out more, you run across pieces of cheese in the meatballs, which I like.

    easy-spaghetti-meatballs-recipe-gf-cooks-video-2

    Easy Spaghetti Meatballs Recipe

    1.5 pounds of meatloaf mix, preferably 80% lean beef and pork

    4 tablespoons Italian seasoning herb mix

    3 ounces of tomato paste, half a small can

    1- 28 oz can of crushed or pureed tomatoes, buy a good quality brand.

    1 large yellow or sweet onion chopped up

    2-3  cloves of garlic

    2 slices of bread toasted and ground up in a mini chopper or similar gizmo

    1/2 cup milk

    2 eggs

    2 cups coarsely grated pecorino romano cheese

    Preheat the oven to 375F

    Boil up a pound of your favorite pasta.

    Put the onion in a large pan or pot with good slick of oil on the bottom of the pan. Its best to slow cook these onions, but do what you can. Golden color on the onions is best for flavor. Chop up the garlic and add in to toast for a few minutes at the end of the cooking.

    Add half the onion to a bowl with the meatloaf mix, 2 tablespoons Italian seasonings, eggs, ground up toast, milk, cheese, some salt and pepper.

    Add the can of tomatoes and paste and seasoning to the pan with the cooking onions and simmer the sauce while we make the meatballs. Halfway through the simmer, at about 15 min, add a half cup of water and some sugar to taste.

    Mix the meatball ingredients together, don’t overmix the meat!

    Roll the meatballs into about  1.5″ diameter balls and put in a baking pan or sheet. Put in the oven for about 20 minutes, check with a thermometer, 145F is done.

    In a perfect world, this all comes together at about the same time, so you an assemble the dish and sit down, but you can cover the meatballs with foil while prepping the other stuff.


  • Homemade Sauerkraut – Fermentation Progress Report

    Homemade Sauerkraut – Fermentation Progress Report

    We are basing our new homemade sauerkraut how to on Leda Meredith’s new book, Preserving Everything, which shows how one can make sauerkraut in a mason jar. We talked with Leda recently on GF Radio: listen here. Links to buy book at end of post ↓

    homemade-sauerkraut-fermentation-progress-report1

    I like this mason jar sauerkraut method, it makes it less daunting than having to go find or buy a big glass jar or crock. Most of us already have a couple of mason jars somewhere. I might have too many jars, according to some family members…

    But this is pretty simple, chop up cabbage, add salt, put in jar, wait.

    homemade-sauerkraut-fermentation-progress-report2I couldn’t find the shredding blade for my food processor – not surprising – so I cut up the cabbage by hand. Its my experience that shredding with a food processor will yield a much more shredded cabbage, and that will start fermenting much faster than cabbage cut up with a knife.

    The reason for this is that with a food processor, the cabbage is cut finer, exposing more leaf surface area to the salt. The salt draws some moisture out of the cabbage, and the brine starts to form. With the knife sliced cabbage, this process is much slower. Its also important to basically massage or kinda crinkle the cabbage to break down some cell walls and allow the salt to do its work.

    After your cabbage in a jar has let out enough water to create a brine that covers all the fermenting kraut, we will let it sit in a dark place for a few days. We’ll be looking for bubbles, a sign that the lacto fermentation has kicked in.

    In our case, because of the knife cut leaves, I had to add salt brine to the jar. I set out a pint of water overnight – because our water is chlorinated – and then added a teaspoon of kosher salt to it, and topped off the kraut so that all the leaves were covered in liquid.

    You can get Leda’s Preserving Everything book here:


    Buy Preserving Everything On IndieBound

  • Bread Free Lunch from what’s in the fridge.

    Bread Free Lunch from what’s in the fridge.

    As I stick to my basically gluten free diet before 6 pm, which I have found to be very helpful in not having that late afternoon crash, lunch has been a challenge. I would usually make a peanut butter sandwich, or a grilled cheese sandwich, but I can’t do that anymore. ( I talk about the gluten free thing here on GF Radio ) So now I see what’s in the fridge and put together lots of salad kind of things.

    Being gluten free during the day is not as hard as it might sound. I have oatmeal or eggs for breakfast, and usually some sort of salad thing for lunch, here is one of them:

    bread-free-lunch-whats-fridge

    A recent trip to Costco yielded a giant container of cherry tomatoes for about $5. They weren’t the greatest tomatoes, but I can’t complain, they are what they are. And I managed to find the smallest giant block of blue cheese at the Costco. I’m experimenting with freezing cheese, btw.

    I’ve gotten better at buying tofu on a regular basis, so its in the fridge and ready to go when I want to use it. Plus the Labradors love tofu, not sure why, but they inhale it. I imagine its healthy for them.

    Last night we had miso soup with buckwheat noodles, and I had some leftover noodles, so in they went into the bread free lunch salad thing as well. I warmed up the noodles in the microwave, which warms up stuff faster than I think it would on a regular basis. Powerful thing that machine. This started me thinking I could cook extra noodles going forward for the lunch project.

    So this all goes into a bowl and I made the regular GardenFork vinaigrette salad dressing to drop on top. Boom done. There you go, simple gluten free lunch recipe for you all. This was filling for me, the buckwheat noodles did the trick on that front. Let me know what you think.

    bread-free-lunch-whats-fridge2

  • Where to buy that cast iron skillet with sections?

    Where to buy that cast iron skillet with sections?

    In our recent pumpkin cornbread recipe video, we use a round cast iron skillet with sections, a pan with the pie sections already divided. I love this pan. I can’t remember where I got it, but I figured out where to buy it.

    buy-cast-iron-pan-pie-sections-2

    Why Love a Cast Iron Pan?

    This skillet has edge wedge already sectioned off, and after you preheat this pan in the oven, you oil the sides of each section, and pour in your batter. The cool thing is each slice of the pan is like getting a corner piece. Each section has that crunchy edge thing going for it.

    I learned early on that this pan needed to be well seasoned, and before putting in the batter, use one of those silicon brushes to slather on butter or oil. You don’t want the batter sticking, its a pain to clean.
 Be sure to put the pan on a wire grate when you pull it out of the oven, else that burned circle on your countertop will haunt you for a while.
 And cast iron is HOT when you pull it out of a pre-heated oven, use a good oven mitt or gloves, OK? Burned hands = bad.

    This pan can be kinda difficult to clean, but for this I pull out an old toothbrush that I keep in the kitchen drawer for this special purpose. You can brush off the baked corn bread batter fairly easily. One could also use one of those small wire brushes, but be gentle. The plastic bristles of the toothbrush work better. Go pull a toothbrush from the bathroom.
Some cast iron pans will come already seasoned. Pre-seasoned is what its called.

    Here’s one of our how to season cast iron videos:

  • Go buy those mangoes in the store

    Go buy those mangoes in the store

    I’m not sure if mangoes are sold all over, but they are available in the NYC area. I find them at fruit & vegetable stands on the street and in greenmarkets, and at Whole Foods as well.

    mangoMangoes were on sale this week, I found this smaller ones, the brand name is Champagne. Most mangoes are larger than these, but these smaller ones have the benefit of not having as much fiberous material near the seed. On larger mangoes, the flesh closest to the seed can be kinda stringy. With these smaller mangoes, after you slice off the flesh, you can nibble on the seed, you can’t really do that with larger mangoes, the fibers get stuck in your teeth.

    Mangoes are also available sliced and prepared on the street. Prepared mango transcends a single ethnic group. I find these for sale on street corners in several neighborhoods. The mango is usually sliced, and placed in a zipper type sandwich bag. You can then have your choice of seasonings added. Hot sauce, salt, pepper, or lemon juice.

    And mangoes are healthy. They are high in Vitamin C and beta carotene, plus they taste great. So go buy those mangoes in the store.

  • Meatloaf Sandwich Nirvana

    Meatloaf Sandwich Nirvana

    I love meatloaf, and not just for dinner, but for the leftovers as well. Yes, its a comfort food, and it tastes even better after spending a night in the fridge. The same thing for meatballs. I’m thinking the flavors meld. That word meld is used a lot when we talk about overnight foods. But the fridge works wonders on meat mixed with spices and onion, aka aromatics.

    meatloaf

    So, last weekend I made meatloaf, and it was underwhelming stylistically. I didn’t use enough bread to bind the meat together, and it has split apart. And maybe I added too many frozen peas, so the meat would not stick together. But it still tasted good. And after spending the week in the freezer, I put it in the fridge to defrost. Then came lunch Saturday.

    Whole wheat bread, some mayonnaise, lettuce, and of course, additional ketchup tops it off. Not sure why ketchup works so well this way, but it does.

    This sandwich wasn’t perfect, as the meatloaf had crumbled apart due to the lack of binder, but it tasted great.

    Here’s a video I made with my mom about her meatloaf recipe

    We will be doing more meatloaf recipe videos. Let us know your recipe below:

  • Quick Cherry Tomato Recipe

    Quick Cherry Tomato Recipe

    An easy cherry tomato recipe for last minute dinner.

    You’re tired, and not sure what’s in the fridge, and you need to make dinner: this is me all the time. I saw some cherry tomatoes on the counter and thought about our roast cherry tomato recipe video. So in go the cherry tomatoes under the broiler and the pasta on the stove top.

    quick-cherry-tomato-recipe

    I debated in my head, should I put some Italian seasoning on cherry tomatoes before they go in the broiler? I figured the broiler would just burn the oregano and all, so I didn’t.

    I didn’t time the tomatoes, I just waited for them to start popping. I didn’t want them all popped and deflated, just starting to crack and the juices to be hot. So when that all started happening I pulled them out of the broiler. 2 servings of this fits nicely into a 8 x 8 pan, btw.

    I like this kind of thing because it makes you look like a genius but is wicked simple. Olive oil certainly helps make you look like the genius you are… Olive and salt on the cherry tomatoes before they go in the broiler mix with the tomato juices in the broiler to make a nice sauce for the pasta. And of course some more simple magic, good cheese, makes this work too.

    Don’t cheap out on Romano or Parmesan cheese, OK? I bought some inexpensive parmesan at the store the other day, because that’s the only thing they had , and it tasted like soap mixed with cream cheese. Not good.

    Cherry tomatoes are pretty forgiving, they last a while on the countertop. The fresher ones pop more in the broiler, the off-season cherries have a tougher skin, but they still work for this just fine. Not sure why some stores put cherry tomatoes in a cooler, I think it affects their texture.

    So this works for me, its easy to make and then you’re done. What works for you? let us know below

    Quick Cherry Tomato Pasta Recipe
    Ingredients
    •    1 pint Cherry Tomatoes
    •    1 tablespoon Italian seasonings, oregano, marjoram, etc.
    •    4 glugs Olive Oil
    •    1/2 lb pasta of you choice
    •    1 chunk Parmesan or Pecorino Cheese
    Cooking Directions
    1. Start the pasta to cook. Be sure to add salt to the pasta water.
    2. Turn on the broiler
    3. Wash the cherry tomatoes and place in a 8 x 8 baking pan
    4. Drizzle the olive oil over the cherry tomatoes and put under the broiler
    5. When the tomatoes start to pop, pull them out of the broiler
    6. Scatter the Italian seasonings over the tomatoes and mix the whole thing while still in the baking pan.
    7. Portion the cooked pasta onto two plates and pour the tomatoes over the pasta.
    8. Grate cheese over the pasta, salt and pepper to your taste.

    quick-cherry-tomato-recipe-2

  • Zucchini Recipe – Squash Pancakes Recipe

    Zucchini Recipe – Squash Pancakes Recipe

    An easy zucchini recipe for your zucchini squash harvest: Zucchini Pancakes!

    zucchini-recipe-squash-pancakes-recipeI had bought a load of yellow squash and zucchini at the general store and thought i’d just saute some of it for dinner. Then I saw the Mark Bittman Cook Everything Vegetarian tome that I had pulled out earlier to look through. In it is a recipe for vegetable pancakes, and it reminded me of my fondness for latkes ( see our latke reipe video here ) and I decided to make zucchini pancakes. what fun.

    The ingredients for this use the usual ingredients, eggs and flour, which work well to make a batter that coats and glues together the shredded zucchini. You can use a box grater to shred the zucchini, especially if you want to wear out some kids, but I use the food processor, which makes quick work of the job.

    I also added carrots to the vegetable pancakes, aka squash latkes, because i like carrots. You can add in potato, sweet potato, beets, most any root vegetable. The title is Zucchini Recipe, but again, Use What You Got™.

    The key to this Zucchini recipe

    They key to this zucchini recipe is to remove some of the liquid from the mix. Summer squash has a lot of water in it. Salting it will draw out some of that water. You can put the salted shredded mix into a towel and wring out the liquid, or let it sit in a colander. You can skip this step, but the pancakes will be wetter on the inside. Its up to you.

    zucchini-recipe-squash-pancakes-recipe
    Zucchini & Squash Pancakes in cast iron

    This zucchini recipe tasks great with applesauce, sour cream, or thick yogurt. Have some suggestions? Let us know below.

    BTW, if you have a bunch of beets, check out this Beet and Egg Salad Sarah posted on her site, Punctuated With Food.

    Zucchini Recipe – Squash Pancakes Recipe
    Recipe Type: Dinner
    Cuisine: Vegetarian
    Author: Eric Rochow
    Prep time:
    Cook time:
    Total time:
    A zuchhini recipe to use up that huge summer squash harvest.
    Ingredients
    • 8 medium 8\” long Zucchini or Yellow Squash
    • 2 carrots
    • 1 cup flour
    • 2 eggs
    • 1 tablespoon salt
    • 2 teaspoons pepper
    Instructions
    1. Shred the zucchini, squash, carrots in a food processor
    2. Toss the squash with salt and place in a colander to drain.
    3. After 5 minutes, press the squash to remove some of the liquid.
    4. Put the shredded squash, carrots, flour, eggs, pepper in a large bowl and mix together.
    5. Heat a large fry pan – cast iron is good – with 1/4\” of vegetable oil.
    6. When the oil is hot enough that a drop of water splatters in the oil, add the pancake batter.
    7. A 1/3 cup measure works for us, it makes good size pancakes.
    8. Cook the pancakes, when the the underside is brown, carefully flip it to brown the other side.
    9. Place pancakes on a plate layered with paper towels in a warm oven while you cook the rest of the batter.
    10. Serve with applesauce, sour cream, thick yogurt.


  • Spiced Pearsauce Muffins Recipe

    Spiced Pearsauce Muffins | GardenFork.TV

    Sometimes I literally work for food, like last week when Eric brought by a mix of Bosc and Bartlett pears. They were speckled and imperfect but still beautifully fall, boasting shades of yellow and green fit to make the barely-changing leaves here in Brooklyn jealous.

    We ate some with the most minimal of processing – a scrub and some spot- and worm-removal, but I saved just enough to make an adaptation of one of my favorite bundt cakes. The family recipe for pearsauce cake is one I treasure but sometimes hesitate to replicate because it never tastes quite as spectacular as at the farm, where it is executed not only with pears from the property but also estate walnuts and raisins (well, estate-grown grapes, also dried on premises). These muffins didn’t disappoint, though – buttery, sweet, and bursting with warm spices, in particular a hefty dose of ground cloves. I skipped the raisins and swapped walnuts for toasted pecans because they were what we had on-hand, but feel free to use whichever you like best. You can also substitute the pearsauce with 1 1/4 c applesauce, although you’ll miss out on that ever-so-slight and I daresay delightful grittiness from the pears.

    Spiced Pearsauce Muffins
    18 muffins
    Ingredients
    •    4 c peeled, chopped, fresh pear
    •    1 cinnamon stick
    •    pinch freshly grated nutmeg
    •    1 1/2 c all-purpose flour
    •    1/2 tbsp (1 1/2 tsp) baking soda
    •    1/2 tbsp (1 1/2 tsp) ground cinnamon
    •    1/2 tbsp (1 1/2 tsp) ground cloves
    •    3/4 tsp freshly grated nutmeg
    •    1/4 tsp salt
    •    8 tbsp (1 stick) butter, room temperature
    •    3/4 c sugar
    •    1 egg
    •    1/2 c roughly chopped walnuts or toasted pecans
    •    1/2 c raisins (optional)
    Cooking Directions
    1. Make the pearsauce. Add the fresh pear, cinnamon stick, and pinch of nutmeg to a medium pot over medium heat. Cover and cook, stirring occasionally, until the pears are completely soft. Add water if the pears start to stick to the bottom before they are fully cooked. Use a potato masher to mash the pears until only small chunks remain. Cook uncovered until the pearsauce is reduced to 1 1/4 c. Remove the cinnamon stick and cool to room temperature.
    2. Preheat the oven to 300 degrees F. Line a muffin tin with liners. (I have never tried greasing/spraying the pan so I\\\\\\\’m not sure whether that would do that job.) In a medium bowl, whisk together the flour, baking soda, ground cinnamon, ground cloves, nutmeg, and salt.
    3. In the large bowl of a stand mixer, cream together the butter and sugar on medium-high using the paddle attachment until light and fluffy. Reduce speed to low, add the egg, and beat until just incorporated. Add the flour mixture and beat until just combined. Add the cooled pearsauce (1 1/4 c, see step 1) and beat until smooth. Stir in the nuts and raisins.
    4. Fill each muffin cup about 3/4 full and bake until a toothpick inserted comes out clean, about 45 minutes. Serve warm or room temperature. Store in an airtight container.

    Love pears? Try my pear and carrot soup recipe on punctuated. with food.


  • Foraged Oyster Mushroom Risotto

    foraged oyster mushroom | GardenFork

    After getting back from vacation I was pretty lacking in the grocery department, but fortunately Eric graced us with some of these beautiful foraged oyster mushrooms. I made mushroom risotto – a pretty common occurrence in our kitchen but made special by these particular specimens. I typically use creminis from the grocery store because they are affordable and have decent flavor, but these oyster mushrooms are much heartier in texture and woodsier in taste – the perfect addition to creamy, slightly sweet risotto. To make it a meal, we added a fried egg to each serving, the vibrant, runny yolk as a colorful finishing sauce.

    In true GardenFork style this “recipe” won’t include much in the way of precise measurements. Risotto is more art than recipe, and lovers of the dish have a good time debating the precise way to make it perfectly. In our show with Lynne Rossetto Kasper we talked a little about the process of making good risotto. Her tips: stir most of the time and use a wooden spatula with a flat tip so that you move a lot of rice with each stir. My method is below, along with a simple recipe for sautéed oyster mushrooms.

    foraged oyster mushroom risotto | GardenFork

    Oyster Mushroom Risotto
    Serves 4
    Ingredients
    •    1 onion, finely chopped
    •    1 c arborio rice
    •    dry vermouth
    •    Chicken or vegetable stock (I used a homemade chicken stock that included some leftover corn cobs, making it slightly sweet)
    •    1/2 c grated parmesan cheese
    •    2 tbsp butter
    •    4 c cleaned and sliced oyster mushrooms
    •    1/2 tsp dried thyme
    •    balsamic vinegar
    •    4 eggs
    •    chopped chives, to garnish
    •    salt, pepper, olive oil
    Cooking Directions
    1. Heat the stock (I start with a quart) in a medium pot over high heat. Once hot, reduce the heat to low to keep the liquid warm.
    2. Coat the bottom of a medium or large pot over medium-high heat with olive oil. When the oil is hot, add the onions and a big pinch each salt and pepper and sauté until translucent. Add the rice and another pinch of salt and pepper and sauté for a couple minutes. Add a couple big splashed of vermouth and continue to stir and cook until the liquid is absorbed.
    3. Add a ladle full of warm stock and stir the rice until when you run your wooden spoon along the bottom of the pot and the rice does not immediately run back together to cover the line you made. At this point, add another ladle full or two of stock. Continue this process until the rice is creamy and just cooked through, about 30-45 minutes. It may take you a few times to get the consistency just right, but rest assured that all attempts, as long as the rice isn\’t hard, will be delicious, if imperfect.
    4. When the rice is where you want it, turn off the heat, add the cheese and butter, and stir to melt and combine.
    5. Coat the bottom of a large saucepan over medium-high heat with olive oil. When the oil is hot, add the mushrooms and thyme and give them a quick stir to evenly coat with the oil. Let the mushrooms brown deeply, resisting the urge to stir. Once browned on one side, give the mushrooms a stir to brown the other side. Add a splash of balsamic, turn off the heat, and stir to distribute the vinegar evenly. Add a pinch each salt and pepper.
    6. Fry the eggs. Distribute the risotto evenly among four plates, top each with a fourth of the mushrooms and an egg, garnish with fresh chives.

  • Simple Rhubarb Cake Recipe : GF Video

    Simple Rhubarb Cake Recipe : GF Video

    Make this simple rhubarb cake and and learn how to cook rhubarb in this easy cake video. This rhubarb recipe is based our Peach Dump Cake Dessert Recipe video, link here. What’s great about this recipe is that it doesn’t take long to bake and you’re ready to go out in the yard instead of being in the kitchen.

    This rhubarb recipe can be adapted to use most any fresh or canned fruit. Like its cousin, the Peach Dump Cake recipe, it uses a quick cake recipe and adds in fruit. We found that simmering the rhubarb in some sugar before adding it to the cake batter works really well. Our oven usually takes longer than most to bake cakes, so this recipe should take about 30 minutes in  your oven.

    If you want to make this recipe and its winter, you can buy frozen rhubarb in larger supermarkets now. Neat. I imagine frozen would not need to be cooked as much beforehand, as the freezing breaks it down some.

    simple-rhubarb-cake-recipe-1

    We have a bunch of how to grow and cook rhubarb videos on our site, here is the link. Our first rhubarb video we did when our Yellow Labrador Henry was just a pup, and she was eating my notes while we were shooting the show. Watch our first rhubarb recipe video here.

    Let us know your thoughts and suggestions and ideas in the comments below, are there new ways to use rhubarb in recipes? Have you ever eaten it raw? I have, it has quite a taste!

    Simple Rhubarb Cake Recipe
    Ingredients
    •    1 cup All purpose Flour
    •    1 1/2 Teaspoon Fresh Baking Powder
    •    1/2 Teaspoon Salt
    •    1 stick Butter
    •    1 cup milk
    •    1 1/3 cups sugar – use less if you want
    •    2 cups rhubarb
    Cooking Directions
    1. Preheat the oven to 375F
    2. Cut the Rhubarb into 1/2\’ pieces, toss into a small pan with 1/3 cup sugar over low heat, simmer for 5 minutes or until the rhubarb is slightly soft. You may want to drain off some of the water from this to keep the cake batter from being too wet.
    3. Mix all the dry ingredients together
    4. Add the milk and slightly cooked rhubarb. The batter may look pretty wet
    5. Pour the batter into a greased 8 x 8 cake pan. I like to use a glass pan for this. It browns the cake nicely.
    6. Bake for 30 minutes and test for doneness. The top of the cake should be nicely browned, but not too toasted.
    7. This rhubarb recipe goes well with ice cream.

  • Dandelion Greens : Info, Recipes, Videos

    Pulling some dandelions in our of our raised vegetable garden beds this weekend, I was able to pull some of the dandelion greens out whole, with their taproot. wow. The raised beds have great garden soil in them, and they weed easily; with little work the long taproot came out with the dandelion plant. Dandelions can be persistent if one does not get out the taproot, they will grow back if you just snap off the greens; which can be a good thing if you are growing dandelion for food, no need to reseed, just snap off the top.

    dandelion-greens-info-recipes-videos

    These dandelion greens were in the wrong place in our garden, so I pulled them for salad. They were in what was our tomato bed last year, peeking out from the side of the black plastic I use as a mulch and thermal blanket to keep weeds down, heat up the soil in the early spring, and conserve moisture in the soil.

    Dandelion Greens are super healthy for you, they are high in Vitamin A, C, & K. They taste great in salads, soups, and whatever else you would toss a hardy green leafy vegetable into. The greens can be bitter, and sometimes people blanch them to get rid of some of that bitterness.

    All parts of the dandelion plant are edible, most people think of dandelion greens, and dandelion wine, but what about the taproot?

    The dandelion taproot can be used to make a coffee alternative, much like burdock root is used to do the same. The taproot is also used to make a British drink called Dandelion and Burdock, and is used in making root beet. Perhaps this is where the ‘root’ part of root beer comes from.

    I’ve got burdock growing the the yard near the woodshed, this year I’ll look into making this english drink.

    We’ve made a few videos about dandelion greens and how to cook with dandelion with these recipes:

    Harvesting Dandelions Greens & Salad Recipe

      Dandelion Greens with Bacon

    Here is a good book on foraging to get you started;


    Order From An Indie Bookstore Here

    Buy From Amazon Here

  • Whole Wheat Tuna Dog Treats Recipe – Adorrable Dor

    Whole Wheat Tuna Dog Treats Recipe – Adorrable Dor

    Wholewheat Tuna Dog Treats -Adorrable Dor

    Hey Allemaal! -which means everyone in Dutch-
    Finally we are getting some decent spring weather, and boy do we need it. I think we are about 3 to 4 weeks behind normal spring growth and my garden is poised to explode with greens and all kinds of flowers. Now comes the really difficult part of teaching Roshi to stay on the paths and grass and out of the vegetable and flower beds. As she is a darling Labrador in full puberty this is a hit and miss experience at the moment. But I already decided to keep the veggies limited to lettuces and legumes this year so if she damages anything in youthful folly it can be replaced easily.
    A note about the Sweet Potato dogtreats I made early March, because there is a high moisture content they must be either used within 10 days or so or be kept in the refrigerator. The last couple of treats I made spoiled I’m sorry to say.
    Wholewheat-Tuna-Dog-Treats-Recipe-2

    These Tuna Treats are also quite high in moisture but should keep 2 weeks without problems, that is if you can keep your dogs from stealing them. That’s what happed to Ellie -Roshi’s breeder- when I made her these treats for her 5 grown Labs. Within half an hour Roshi’s mom Esmer stole the container full of treats from the kitchen counter and all Labs pounced and devoured the lot, destroying the plastic tub in the process. The garlic in this recipe is optional but most dogs seem to have no problems with it and garlic helps with flea and tick control.
    The picture shows Rosh enjoying her new bowl rack –is that what you call this contraption in English- so she does not stretch her neck and spine too much when eating. Credit goes to my husband, he cleverly fashioned it from an Ikea IVAR bookcase sidepanel.

    Wholewheat-Tuna-Dog-Treats-Recipe-3

    Wholewheat Tuna Dog Treats
    If you have tuna in water no problem, substitute the 2 tablespoons of water for olive or vegetable oil.
    1 small can of tuna in oil
    2 tablespoons of water
    300 grams or 10.5 ounces of whole wheat flour
    2 eggs
    4 cloves of chopped garlic

    This recipe uses a kitchen blender but you can easily mix and knead this dough by hand, just chop the garlic very finely.
    Preheat your oven at 200 C or 395 F.

    Blend the tuna, water and garlic in the machine, add flour and eggs. Whizz again until it forms a firm but slightly sticky dough.
    Remove from the blender and add a little flour if it is too sticky to roll out comfortably.
    Using a rolling pin, glass or just your hands, roll or push the dough to a thickness of about 1 cm or 1/3 inch. It will puff a bit in the oven, so will make a substantial treat.
    Distribute the treats evenly on a baking sheet lined with greaseproof paper. Bake for about 30 minutes until nicely golden brown. You can leave them in the cooling oven for an hour or so, they will crisp up even more.
    I use Roshi’s Labrador cookie cutter but you can use any shape that takes your fancy, this is a very well behaved dough.
    Of course using a glass or the empty tuna can, even cutting into strips will work just as well.
    This recipe is adapted from the Hondenkoekjes met Tonijn recipe from the www.hondenkoekjes.nl site.