Wade from up north asked if we could help with this strawberry pest identification, so I am posting his email to us below, along with some photos.
________
Last summer we decided our hoop houses in the middle of the yard were unsightly, and just not performing that well. We tore them out and built a single (building a second next week) 3×8′ box on the north fence. I transplanted 6 sad little strawberry plants and had low expectations. All summer they thrived and shot off as many runners as they could. About 20 plants were well established and still bearing in late fall.
We had a very mild winter and early spring. The little strawberries kept trying to poke up through the snow in February!
I picked my first ripe berry Jun 2nd (last frost by almanac is 25 May) and now I have to go out and pick 3 cups of strawberries every other night! This is starting to feel like work! 😉
I’ve started to notice some berries are chewed on and caught this little guy in the act. Can you identify him, and is there anything I can do other than hose down my delicious strawberries with pesticide (this is not an option). I had chicken wire over the box to keep the birds out, but have now removed it in hopes they’d rather eat bugs than berries.
_______
Any ideas on the strawberry pest identification? At first glance, I do not recognize this caterpillar, but it clearly has a taste for strawberries. Let’s hear your thoughts in the comments below:
I got a wasp identification email from a friend this weekend.
“Not sure if these are bees or hornets. Any thoughts? We have two nests.”
I get a lot of these ‘are these honeybees?’ photos. I am always surprised when I do get this question, because I think most everyone knows basic insect identification. But maybe I might have the same lack of knowledge when it comes to cat breed identification. They are pretty much all the same to me.
Kelly of the Root Simple website wrote about wasps recently, and that’s what prompted me to action this time. Without getting into the weeds of insect names, these are not honeybees. They are wasps. The common name is paper wasp or umbrella wasps, and if the nest is in an out of the way place, leave them be.
Wasps are pollinators and eat problem insects in your garden. Some of them also eat apples, especially fallen apples that have been split open or mashed by the lawnmower. This is a bit of a problem in our yard when we have a large apple crop. As one of our Labradors, Charlie Pup, likes to eat fallen apples as well.
Wasps, also known as hornets, generally are only aggressive if you mess with their hive. Yellow Jackets, while part of the wasp family, can be quite nasty. Quick Tip: Yellow Jackets nest in the ground or rock walls, you usually find them when mowing the lawn and you run over a nest.
The nest in the photos above will have to be removed, as it is right next to the door of the house.
Paper wasp nest start out as a paper comb of cells that looks like an umbrella, when it is small, it is tended to soley by the mated queen. As the nest grows, the hatched young take over many of the jobs of running the nest. The wasps will then start to cover the nest with a papery covering. If you’ve seen one of those giant wasps nests, its probably a bald faced hornet nest.
Bald Faced Hornet Nest
Wasps do not re-use the same nest every year, so if you find one intact after a hard frost, you can take it down and save it. They are amazing, I think.
If you need to neutralize a wasp nest, I suggested buying the foaming wasp spray that can shoot 10 feet or more. Get as close as you can while having a clear exit path, and spray the nest at dusk or at night. If you spray the nest during the day, you will not kill all the wasps, and wasps will return later in the day and buzz around the dead nest.
Unless they are right near the door of the house, I leave wasps nests alone. We get them under the gutters of the house, but they don’t bother us, and I know they are eating up insects in the garden.
Back in the middle of winter I got an email from Troy-Bilt asking if I would like to work with them this year. I’ve known Troy-Bilt for their rototillers, which are the Mack truck of garden power equipment, for as long as I can remember. My neighbors have Troy-Bilt equipment from 40 years ago that works to this day.
So yeah, I said yes.
In early March Troy-Bilt flew me and 5 other DIY – Garden bloggers to Charleston, SC for a 3 day get together. Why Charleston? Because when I got off the plane it was 80F outside. What a change from freezing New England. Sap season hadn’t even started and I’m in a t-shirt testing out mowers and tillers.
I got to meet people from Troy Bilt and their media agency, plus the 5 other bloggers, we are called The Saturday6. We toured Charleston, which is a beautiful city full of history, and had several great dinners.
Really humbling was meeting Katie Stagliano, a 14 year old who founded her own non-profit, Katie’s Krops, to grow food for America’s hungry. Troy-Bilt works with her organization, which inspires and helps kids start vegetable gardens to grow food for the hungry. The Saturday6 will be working with Katie’s Krops this summer.
Yes, My eyes are closed.
We spent a morning learning the history of Troy-Bilt, and their plans for the future, and the new products they have for this summer. More on the new products here soon, plus some videos demonstrating their gear.
Then after lunch we went outside and tested the new gear. I’ll be making videos about Troy-Bilt outdoor power equipment and writing about their gear this summer, but in short, they have some great new tools:
The Mustang Pivot is a zero turn riding mower that doesn’t cost a fortune. I was skeptical until I drove it around in Charleston, but it does what the name says.
The Flex system is a power unit with multiple accessories – mower, power washer, snow blower, leaf blower.
The Bronco Axis. A Troy Bilt walk behind tiller with blades that turn vertically. Think of a kitchen egg beater made of steel.
Erin testing out the Axis TillerVertical tines like an egg beater. This rig doesn’t jump around like a regular tiller will.
Full Disclosure, I am being compensated by Troy-Bilt, plus they are giving me some of their products. I wouldn’t work with them if I didn’t truly like their products and the company behind them. As usual, i’ll be open and honest with my opinions about Troy-Bilt and life in general.
We have all sorts seed starting pots, but how about seed starters that have their own roofs? A neat idea that includes a solution for plastic bottles that function as a mini greenhouse for each seed starting pot. Jeremy sent me this photo and email about making these mini greenhouses with recycled bottles.
“I just want to thank you for all you have done for everyone over the years. You have been a huge help to me and an inspiration since last spring when I started gardening again after the loss of my mother.It was the best therapy I could ever hope for and You helped me more than you would ever imagine. Now I want to try and help you out if possible.
While starting my seeds this last week I had come up with a cheap way to make a little green house by just getting a 2 piece disposable baking pan with large dome lid for a dollar at the dollar store and the smaller peat pots that you could fit 16 of them into each pan. Well I had a little too much moisture in there and had to open it up and kill the fungus on a few of the pots and it got me thinking.
I drink bottled water a lot and I grabbed an empty bottle cut the top off and it fits perfectly over the peat pot and has a resting ledge on the ribbing of the bottle where it stops making each pot have it’s own personal mini green house.
You can set them on a window sill if you are low on space and line the whole thing with them. If it works out well I was thinking it would also be a good way to keep infestations contained to one or two seedlings instead of a whole tray. Here are some Pictures in case you wanted to see it and give it a try. It’s a great way to recycle some of the water bottles and keep them out of a landfill. “
Beautifully simple and something I had never thought of. I am always wanting to over-engineer everything, and make it bigger than it needs to be. A big thank you to Jeremy for taking the time to send that. Do you make seed starting pots? Let me know in the comments below!
If you live in the northern areas of the world, its time to start seed starting pots with sugar snap peas, and then some tomatoes too. Below are links to check out our how to make seed starting pots and how to start seeds videos.
We took a Mulberry tree out of our backyard, the neighbors were complaining about the berries, the pups ate the berries, not a good thing. In its place we are planting Leyland Cypress evergreens. These trees grow fast and are good at creating a green fence, which makes good neighbors.
But we had to deal the Mulberry tree stump, plus two other stumps from previous tree removals. I have been delaying this project for a while, but the cool weather means its time to get this in gear. So out comes the reciprocating saw.
A large tree root crossed right where we wanted to plant on of the trees, so I bought a pack of wood cutting blades for the saw and started cutting the large root. It wasn’t as hard as I had imagined, but it took a bit of time. The larger roots have lots of smaller roots coming off of it going downward. Lots of lifting up a root to find it still attached underneath.
I don’t dig a large hole for planting things. The instructions say dig twice as wide and deep, but this doesn’t work for me. I’ve done well planting how I plant so far in life. I have found that as the hole gets deeper, its not easy to use a shovel to get out all the dirt. A scoop of some sort works much better after one had broken up another layer of dirt with the shovel. One more reason to save those yogurt containers!
I wanted to re-use the plastic pots that the trees came in – not sure for what yet – so I pulled the trees out of the pots by laying them down and having help. One person grabs the pot, one pulls the tree trunk. Out it comes.
I think the most important thing in planting in general is plenty of water after planting. I plant things a bit lower than the soil layer, and build a moat of dirt around the plant so I can fill it with water. It will slowly drain into the soil and water the plant. It needs to grow roots, so water it a lot the first few weeks. What are your plant planting methods? Let us know below.
How to start seeds? Watch these seed starting videos from the GardenFork video archive.
Simple Seed Starting Pots Video
Cardboard Pots Video
Origami Newspaper Pots
Our Super Easy Grow Light How To Video
Here’s how to build the grow light stand for your cheap grow lights:
Some Seed Starting Thoughts from Eric
Do Not Overwater Seedlings or seed trays.
Damp sponge consistency is good. Wet is not good.
Keep the grow lights right on top of the seedlings, they tops of the plants should be touching or almost touching the bulbs.
Keep the grow lights on 16 hours a day.
Not enough light and over-watering are the two biggest mistakes people make when seed starting. I don’t believe in using a window to start or grow seedlings, the weak light makes the plants leggy and weak, in my opinion.
If you want to save money and avoid having more plastic pots around, consider using cardboard or newspaper seed starting pots. The videos above show how easy it is to make these.
I use coir as a seed starting medium, I avoid using peat moss, which isn’t the most renewable resource we have. We seem to have a ton of coconut shells and fiber around. With coconut water being the new cupcake and all…
I add vermiculite and perlite to the coir fiber to give it some air and drainage. Easy enough to buy this stuff in the local garden shop. The exact amount is not important, use what you got, but you want a majority of the seed starting mix to be coir.
Break down the coir bricks in warm water. It helps to break them up with a hammer or some sort of smashing type object. I tend to add too much water to the coir bricks, and end up draining off a lot of it.
What are your seed starting practices? Thoughts? Let us know below:
Pulling some dandelions in our of our raised vegetable garden beds this weekend, I was able to pull some of the dandelion greens out whole, with their taproot. wow. The raised beds have great garden soil in them, and they weed easily; with little work the long taproot came out with the dandelion plant. Dandelions can be persistent if one does not get out the taproot, they will grow back if you just snap off the greens; which can be a good thing if you are growing dandelion for food, no need to reseed, just snap off the top.
These dandelion greens were in the wrong place in our garden, so I pulled them for salad. They were in what was our tomato bed last year, peeking out from the side of the black plastic I use as a mulch and thermal blanket to keep weeds down, heat up the soil in the early spring, and conserve moisture in the soil.
Dandelion Greens are super healthy for you, they are high in Vitamin A, C, & K. They taste great in salads, soups, and whatever else you would toss a hardy green leafy vegetable into. The greens can be bitter, and sometimes people blanch them to get rid of some of that bitterness.
All parts of the dandelion plant are edible, most people think of dandelion greens, and dandelion wine, but what about the taproot?
The dandelion taproot can be used to make a coffee alternative, much like burdock root is used to do the same. The taproot is also used to make a British drink called Dandelion and Burdock, and is used in making root beet. Perhaps this is where the ‘root’ part of root beer comes from.
I’ve got burdock growing the the yard near the woodshed, this year I’ll look into making this english drink.
We’ve made a few videos about dandelion greens and how to cook with dandelion with these recipes:
GardenFork viewer Rich sent us this photo of the paper seed pots he made after watching our how to make paper seed pots video. He’s got a ton of them here. Great to see people making cool stuff for starting seeds! thanks to Rich for sending this.
How to build a hydroponic system, or an aquaponic system, has been a continuing theme here on GardenFork.TV . If are interested in building hydroponic or aquaponic or aquaculture systems, the following how to by GF contributors Stephen and Abbie on building an aquaponics system is full of great photos, click on the Next Page link at the bottom of each page to get to the next one. Eric.
We started with a greenhouse (a rebuilt shed) ( size: 7’ wide by 15’ long ) in 2006.
Aquaponics Shed & Fish Tank
We used a 300 gallon “Rubbermaid brand” stock-tank (recessed in the ground) for the fish tank.
Use 3….55-gallon “food-safe” plastic barrels, cut them in half lengthwise so you have 6 grow-beds, approximately 2’ wide by 3’ long by 12 inches deep. By the way a 300 gallon fish tank will allow 8 such grows-beds…
[wide][wide]
Use another 55-gallon drum, cut out the top (leave the rim, for strength) this is a dump-tank for the “Flood and Drain” system. Inside the dump-tank you need a syphon, attached below, to fill line for grow-beds.
Use some PVC (polyvinyl chloride) pipes to run water feed-lines from the “bottom of the syphon” (of the dump-tank) to each grow-bed. I used two lines running down both sides of the greenhouse to feed the 6 beds (three beds on each side). Or you could have all beds “side by side” on one side of your greenhouse using one line. (we tried that, but they didn’t fit “in a row” in our building). Position the grow-beds higher than the fish tank. (We need the dump-tank to flow into the grow-beds and the grow-beds to flow into the fish tank).
Place a waterfall/pond pump at the bottom of the 300 gallon fish tank, and run a pipe (from the pump) up to the top (and inside) the dump-tank so it will fill the dump-tank. This pump will be the only pump in the system and it will run 24-7 (all the time).
OK, so at this point we have the water leaving the fish tank entering the dump-tank, that fills until the water level reaches the top of the syphon, which then activates, the water will start to flow through the syphon pipe, down to the feed-line going to the grow-beds, which will fill with nutrient rich water (from the fish waste/poop). OK, we’ll need additional syphons (to drain the grow-beds) and a drain-line to return water to the fish tank. The white “upright” pipe attached through the grow-bed, with a covered/capped pipe slotted on the base (allows water into the syphon), and down into the drain-lines to the fish tank…
NOTE: IF for some reason the pumps stops…. most of the water (in this system) will drain back into the fish tank… some may remain in the dump-tank… some may remain in the grow-beds… but the majority of the water will return to the fish tank, keeping the fish alive… we’ve lost electricity for three days, the fish and plants were fine. Our system is stocked with goldfish and KOI (pronounced like “Koy” …as in Roy– with a K).
The grow-beds should be dry on the surface (which is good); about 1 inch lower, it will be moist/wet.
We fill the grow-beds: We use “pea-stone” or “pea-gravel” (normal gravel that is screened to allow only pea sized rock to remain); we fill the beds up to within 1” of the top of the grow-beds…
Make sure the grow-bed syphon is installed and add pvc drain-lines from bottom of grow-bed to the fish tank. The top of the syphon should be 1 inch lower, than the gravel surface… Continued on next page
Part of our Foraging and Urban Homesteading Video Series, we show you how to forage for foods in your backyard. This foraging video is about the Staghorn Sumac and the tea or sumac-ade you can make from the seedhead of a sumac tree.
Staghorn Sumac
I remembered this drink you can make from a report I did in 6th grade, it was a cookbook of sorts of Native American foods, I think my teacher was underwhelmed by report I did, but this must have had an influence on me, in some subtle way.
In addition to the tea you can make from foraged sumac, the sumac seed pods are used in middle eastern cooking. The seeds are ground and used as a spice powder, added to dishes such as hummus and salads. neat!
According to Wikipedia, the center stem of the sumac was also used by native americans as pipe stems. Sumac also had medicinal uses in Medieval times.
Sumacs grow along forest and field edges, fence rows and the sides of the road. They are called a pioneer plant, they are one of the first bush plants to grow where a field is turning into a forest, or where the soil has been disturbed.
Their leaves are an easy way to identify the plant, especially in the fall, as they have a great red-yellow color to them.
Be sure to know the difference between Staghorn Sumac and Poison Sumac. The names of the plants are similar, but the plants do look quite a bit different. Staghorn sumac has a very unique upright seed head, usually red in color. Poison Sumac looks much more like poison ivy, and its seeds hang downward.
Poison Sumac looks like Poison Ivy – USDA photo
What can you add to our knowledge of Staghorn Sumac and foraging? Let us know below:
Bitten by the urban foraging bug, I’m always looking at plants and trees in New York City now. There’s lots of food around if you look. On the way to the subway in Park Slope is a Horse Chestnut Tree, and every year the sidewalk is littered with the empty chestnut shells – the squirrels have gotten most of the nuts.
The nuts are called conkers, which were used to play a game in the UK called conkers as well. The nuts are considered slightly poisonous, though deer eat them.
The beekeeper and tree nerd in me was wondering whether horse chestnuts were self pollinated or needed a second chestnut tree for pollination, and whether they were insect pollinated or wind pollinated. According to wikipedia the trees are pollinated by birds and insects, and I found a second horse chestnut tree around the corner from this tree. neat.
“Raw Horse Chestnut seed, leaf, bark and flower are toxic due to the presence of esculin and should not be ingested.” says Wikipedia. There are a number of medicinal uses for some of the compounds found in the Horse Chestnut conker, which doesn’t surprise me for this cool looking plant.
Horse Chestnut in Park Slope, Brooklyn, NY
What interesting nut trees have you found in your area? Let us know below:
Here’s a great way to get rid of slugs organically in your vegetable garden. This DIY slug trap was sent to us by Laurel who has slugs on her vegetable plants. Great way of practicing organic slug control.
I enjoy what you do, and love the dogs… Now that strawberries are ripening, there are always slugs. I have a trap that I like, and you might like it too. It’s easy.
Take an empty small coffee can to start. About 1/3 of the way down, drill 3 or 4 holes that measure 3/4 to 1 inch. Spray a little bit of oil on the inside.. Now, bury it, just to where the holes are. Then you pour about 1 inch of beer in the can and top it with the plastic lid.
Voila, a slug trap, with “no chemical or dyes”, just beer. Slugs like beer, they go in and down to eat, but have a hard time getting out because of the greased sides. Have the dirt come up to the hole so it’s easy for the slug to crawl through.
You are like a friend that comes into my house
DIY slug trap
How neat, super simple way to deal with slugs and you get to drink some beer too! Do you have a way to get rid of slugs? Let us know below:
A friend made these DIY Self Watering Plant Containers for his green roof, and I wanted to share them with you. He built a small deck on the roof of his building in Gowanus, Brooklyn, NY, and watches GardenFork to learn how to do stuff. neat.
These self watering planters are homemade, he stacked two 5 gallon buckets on top one another, cut a hole in the bottom of the upper bucket, slid a perforated pipe in there, and cut a slot in the side to fill up the water reservoir. I’m going to have to make a GF how-to video on how to make self watering containers.
Rooftop gardens need constant watering in the summer, the plants dry out in the hot sun quickly. In Brooklyn you add to that the breeze coming off New York Bay, and you get dessicated plant leaves quickly.
Vegetable plants that work well for rooftop gardens are ones that do well in the summer heat. Peppers are great, lettuce not so great. Squash, especially winter squash, do well, and because their vines sprawl all over a roof, they also create a cooling effect for the roof, shading it with the large squash plant leaves.
Herbs like basil, sage, rosemary – those from the Mediterranean – are good for rooftops.
Here’s a easy container patio garden in front of one of my favorite food places in Brooklyn, Brancaccio’s Food Shop. Its square foot gardening on steroids, and it works really well. Take a few oak wine barrels and a few plastic plant containers, and stuff them full of plants, and your done.
Container Garden using wooden barrels
The container garden looks great, basil, tomatoes, mustards, parsley, eggplant, chives, chard all mixed together.
Joe’s container garden does not have a drip irrigation system, so it needs to be watered almost every day, but its in a perfect spot in front of his store, with plenty of sun, and its right on the sidewalk, an added bonus to everyone who walks by. ( here is a GF Drip Irrigation Video )
You can use all sorts of containers for a patio garden, the mix of wood barrels and plastic plant pots here shows that mantra: ‘use what you got or can get’
Regular potting soil, the kind you buy in bags works fine for container gardens, just make sure whatever pot you are using has drain holes in the bottom.
As we ate our amazing meatball sandwiches, ( read about this great meatball sandwich here ) I realize Joe had fig tree growing out of one of the containers in his patio garden. Neat.
Joe appears in this easy pasta recipe GardenFork video, pasta with poppy seeds.
Garlic Mustard is an edible wild plant food. Here is video on how to cook garlic mustard, we made a great pesto recipe. You can forage for the leaves, but you can also eat the flowers and the seeds.
Other names for Garlic Mustard are Jack-by-the-hedge, Poor Man’s Mustard, Garlic Root, Hedge Garlic, Jack-in-the-bush, Penny Hedge, Sauce-alone.
This wild mustard is a non-native invasive plant, its just plain bad to have it growing in North America. It takes over the growing areas of trilliums, bloodroot, and other slow growing woodland and hedgerow plants, taking up sunlight, nutrients, water. Deer do not eat Garlic Mustard, btw. When you harvest it, be sure to remove the entire plant, including the roots. I bring along a garden trowel or forked digging tool to remove the whole plant and roots.
The plant is a biennial, it grows over 2 years, the first year the plant is a low to the ground rosette, the second year the plant grows up and flowers. The leaves are spade shaped with ridges and about 2″ across. After the plant flowers, the seed heads are upright, they look like small string bean pods, about 2″ high and green. You want to remove the plants before they go to seed, as spreading the seed is a bad thing.
So until we eradicate this mustard green from North America, lets enjoy as what I call ‘free food’. In other words, yet another plant we call a weed yet is actually a nutritious plant that should land on our table. According to Wikipedia, mustard plants in general are a rich source of vitamins A, C, & K. I didn’t really think about the vitamin value, I just think its always good to have more greens in your diet. Maybe we can add this to some sort of power smoothie? What do you think? Let me know below.
Nettles, aka Stinging Nettles are a wild food that is edible. Here is video about how to cook nettles for a pesto recipe we made. Foraging for nettles is easy, they grow like the weeds they are considered, and are easy to harvest. Nettles have hairs along the stem that will sting you if you grab the plant, so wear gloves. The key to eating nettles is to blanch the leaves and stems in boiling water for 5 minutes, then drain. Nettles taste like spinach, and have been used to treat numerous ailments.
For some reason I associate Nettles with medieval times, not sure why, it just seems like the people of that age would use Stinging Nettles to treat ailments in addition to harvesting nettles to eat.
The nettles that grow in our area are perennial, and have squarish stems, like mint does. It grows up to about 3 feet high in summer, and spreads by rhizomes. Stinging Nettles are native to North America, but I don’t think harvesting them for personal use will put a dent in the number of them in our world. To harvest nettles you can cut the stem or pull out whole plants with the roots. You can transplant young nettle plants into your edible medicinal plant garden if you like. The plants will spread, so you might want to keep the roots contained.
I ran across this soaker hose drip irrigation setup in Park Slope, Brooklyn. Using drip irrigation to water a container garden is great, as the soil in containers dry out fast, especially those pots made out of terra cotta. The setup shown in the pictures here is similar to the one we built for our DIY container garden drip irrigation GardenFork video here.
I like how the supply hoses are tucked away, you don’t see them unless you look closely. The supply hose runs around the end of the fencing and into the building, where its hooked up to a water timer. I can’t tell if this is a system the owner bought or they built DIY from hardware store components.
There are brass fittings to connect the soaker hose to the supply lines between each container, which you can source in the plumbing department of your hardware store. The hose used looks like black vinyl, it works well because it disappears visually, I think.
Putting the soaker hose system on a timer is essential, it keeps you from forgetting to water the plants, and it keeps you from over-watering the plants. Overwatering is one of the reasons plants die, one can drown their plants in water, which causes all sorts of fungus and disease.
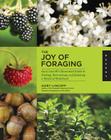
On the topic of container gardening, here is a good book on that:
Aquaponics and Aquaculture How-to has been taking up a lot of Rick’s time. Below Rick tells us what he has learned about how to build an aquaponics system. Eric
The backbone of the inner tunnel is just 1" ID PVC for ribs
I haven’t been around the Gardenfork site very much, been busy in the greenhouse. But for the last few days rain and, particularly, mud has kept me away from the greenhouse, so I thought I’d update you on my progress on the aquaponics project.
Of course, everything is harder and takes way more time than you think it will, so I have not made as much progress as I though I would by now.
4 mil plastic from the Blue Store comes in 20 ft widths on 100 ft rolls, just what I needed.
Last time I wrote that I wasn’t going to build the inner tunnel inside the greenhouse because the winter was so mild here in Tidewater, but I changed my mind.
I’ve got 40 tomato seedlings just sprouting in the spare bedroom at our house, snuggled in and just getting a start in life. And I am already 2 weeks behind in getting the seeds sprouted, so any more setbacks would be devastating.
Clamp-On PVC over tubing to hold plastic to frame and tension the skin. 4 clamps, two per end.
That’s because, as I mentioned previously, this project has to pay. So if this crop craps out, I’m losing much more than 40 seeds; I’ll lose the early crop.
Not only do the tomatoes have to “make,” but they have to be early enough in the spring to demand a higher price at the Farmers Market. Early local tomatoes are worth gold. Late July tomatoes are nearly giveaways. So we decided that it would be pound foolish to not go ahead with the inner tunnel.
inside the inner cover (that's the Dutch Bucket system in the back left, waiting for the tomato sprouts)
I’ll be growing the tomatoes in Dutch Buckets. (I’m working up another post soon explaining how Dutch Buckets work.)
Dutch Buckets (also called Bato Buckets) are something you can do in your house, as long as you have enough light and enough warmth, particularly for tomatoes and peppers.
It’s a flimsy, wobbly affair. It won’t stand a gust and in even moderate heat the ribs will sag. But it’s quick and cheap. I’m using all 1-inch ID PVC in my plumbing, so as the temperature goes up and the inner cover comes down, I’ll be repurposing the PVC to the irrigation system as I expand.
What’s Aquaponics without fish?
The Fish Tank, is another matter all together. Here’s my first try at the platform:
first try at platform
The problem is that I didn’t show this design to anyone before I built it. She, who must be obeyed, took one look at it and said, “why not have the 4x4s tall, to help contain the tank?”
–Doh…
Fortunately, I put it all together with screws so –after another run to the Blue Store– I had some 5 ft long 4x4s for along the outside edges. I also added more of the cement blocks, so that no span is unsupported for more than two feet.
Redone…with the 5 ft supports all around.
Temperature control is important in Aquaponics. And it’s easier…it says here…to warm up a tank than to cool it off. So temperature control of the tank is important. That’s so your fish are comfortable, but most importantly, that so because the bacteria must be comfortable as well.
The key to Aquaponics is the bacteria. You can have all the fish you want and all the plants you want, but they’ll both DIE if the proper kinds of bacteria do not colonize your system or if the bacteria are unhappy.
If it dries off enough so that I can get back there with a truck this week, I’ll deliver the –damn heavy!– 4 x 8 ‘ sheets of 3/4-inch treated plywood for the sides. I’ll put sheets of interior insulation and a fish-safe pond liner inside the tank so it’s water proof. I’ll also band the top, middle and bottom of the tank around the outside of the 4 x 4s.
The finished Fish Tank will be 8 x 8 x 3 ft or 192 cubic feet. That’s about 14,000 gallons of water, which is 5.8 tons of water. Once I finish the fish tank, I’ll start on the grow beds. I’m hoping four 4 x 8 foot to begin with.


 If you want to save money and avoid having more plastic pots around, consider using cardboard or newspaper seed starting pots. The videos above show how easy it is to make these.


 [wide]


 There are brass fittings to connect the soaker hose to the supply lines between each container, which you can source in the plumbing department of your hardware store. The hose used looks like black vinyl, it works well because it disappears visually, I think.


_nest.JPG)