As many of you know, and have thankfully listened to my whining. Jim and I are having the upstairs of our very old house remodeled. One of the things that drew us to this house was that the former owners did very little in the way of updates. Ok, did nothing in the way of updates to the house. We thought that they left us with some nice bones to work with. Under the plaster was, well, a disaster.
Luckily we found a great contractor, Bob Morton. Jim and I work crazy hours and couldn’t handle every little thing ourselves. Bob really stepped up and handled all the plumbing upgrades, weird electrical things, down right lack of adequate duct work and vents, and came up with a cool way to repair the whole roof not really being attached to the house thing.
What was a three, four week job is on it’s fifth week, going on it’s sixth. Yes, things have cost more than we expected. Yes, we figured most of this into our budget before we started. I just really want to have a bed room and not sleep in the living room. Jim and I know we’re going to be in this house for a while. We have awesome neighbors and are in a great community. This project is going to make our house much more comfortable for us.
We can see the end, and like we hoped for in the beginning. This little house has potential. You just have to coax it out.
A friend of mine called me and asked if I would help him with a plumbing problem. His utility sink in his laundry room was leaking whenever you would turn on the water. The washing machine also drains into this sink and whatever was always leaking. Not a good thing. I crawled underneath and I took a look; sure enough there was what we would call some ‘unprofessional plumbing’ under the sink.
Arrow shows the leak site, notice how crooked the drain trap is.
As you can see from this first picture here there’s a 2″ plumbing drain coming out of the wall and then a rubber coupler connected to a huge brass trap that connects to an 1.5″ brass drainpipe. The rubber coupling does not have enough strength to hold that brass trap in place without any support . Rubber couplings are really good for plumbing but they’re not built to hold up that much brass. Looking at the picture here you can see that the heavy brass trap would put stress on the pipe that’s going up to the sink itself and the pipe started the corrode at the point where the brass drainpipe meets the trap. And before you know it just falls apart
So I took apart the trap and the brass drainpipe and the rubber coupling to find that there was a stub of metal pipe attached to the 45° angle pipe that’s coming of the wall.
2" metal stub with no threads. fun.
My plan, and of course all great plans never come out how we want them to, but I wanted to remove the 2″ stub pipe and put in a PVC adapter. The PVC pipe adapter I would use has a 2 inch pipe thread on one end to thread into the existing metal pipe, and and then you can glue PVC pipe to the other end of the PVC adapter. I would then connect a PVC trap to the adapter and then connect the PVC trap to the drainpipe coming down from the sink.
Two pipe wrenches in a very tight spot against the wall
Because the existing metal pipe stub was not threaded, I had to remove it. I put a pipe wrench on this stub of metal pipe and it would not move. I got two pipe wrenches on there and I could not get the thing to move. Part of the problem being that the drain pipe is coming out of the corner of a very small utility room wall so it was really hard to get any leverage on the wrenches. I even tried what I call a large chain pipe wrench – its a plumbers wrench that uses a chain rather than a regular jaw grip – I couldn’t get the thing the budge.
Chain Pipe Wrench can't budge the pipe
Another way to get this to ancient metal stub out of the 45 degree angle piece it was connected to would be to use a reciprocating saw a.k.a. a sawzall. You could take the sawzall and make two cuts or perhaps three cuts from the inside of the pipe out, cutting the stub in the three pieces and it would fall out.
But then I thought of a Plan B that would be much cleaner and simpler than having to use the sawzall to cut out the metal stub.
My plan B was to go to the plumbing supply store and get a rubber coupling that accepts 2 inch diameter pipe on one side and accepts 1.5″ diameter pipe on the other side. my thinking here is that the rubber coupling will attach to the to 2 in metal stub that’s coming out of the wall and then have a short piece of 1 1/2 inch PVC pipe sticking into the other side of the rubber coupling.
rubber coupling allows PVC to connect to metal stub
From that 1 1/2 inch PVC pipe I can attach a PVC trap and reattach the sink to the trap with a brass drain pipe i already had.
The trap i used is called PVC solvent weld trap. This kind of trap allows you to connect it to a PVC drain pipe on the drain end, and on the inlet side you can connect it to a PVC or brass 1 1/2 inch drain pipe from the sink with a slip joint. I glued the trap to the stub of PVC pipe that was coming out of rubber coupling and then connected the trap to the 1.5″ brass drain pipe that was sticking down from the bottom utility sink.
its a beautiful thing, this plumbing stuff.
I’ve found that sometimes slip joints aren’t always completely waterproof, so I always use some TFE plumbing paste with Teflon. It goes under different brand names but it’s basically it comes in a tube or a jar with a brush and it’s a white plumbing paste that has Teflon in it. I dab this around the circumference of the slip joints and it works really well plus it keeps you from having to take the plumbing apart again to figure out why it’s leaking
So after using the Teflon paste on all the joints I put it all together turned on the hot water and it was a beautiful thing. It did not leak.
So there you go, one of those things where your friend asks you to do something and you actually know what you’re doing, and didn’t blow up on you. Do you have stories about helping your friends and whether went really well or went really wrong/ I can tell you more stories about how someone went really wrong but tell us below about the good and bad one.
With GardenFork’s audience, I’m sure that I’m preaching to the choir on this, but I still felt compelled to say what I want to say and share the video.
In the video is Waverly, a 9 month old Weimaraner pup. With two Weimaraners already in our home, our cup runneth over long before she showed up. We do love the breed and we love our dogs. Friends of ours know this and when others have Weims, we tend to hear about them.
This particular pup was bought by an elderly couple who thought Weims were beautiful and friendly, which they are. However, they didn’t know how much energy they have and what dangers the breed bring along with them.
Weims are super friendly and VERY attached to their family. However, Weims don’t understand that running up to their 110 pound owner, or 40 pound child to give them a “full body greeting” is, at best, traumatic for the receiver.
Also, these dogs are smart. To a fault. If you don’t exercise them, challenge them, and give them something to do, they’ll find stuff to do on their own — Like dismantling a couch, one thread at a time.
If you decide to cruelly lock them up in order to keep them “good”, you’ll find that a locking up a Weimaraner is like winding the spring on a toy; when you let them go, all of that energy is going to be released at once. And the longer they’re in there, the tighter that spring gets!
Really, this isn’t meant to be a lesson in Weimaraners. It’s meant to be a lesson in preparing for getting a dog properly. Also, if you know about dogs, making sure your friends who are thinking of getting a dog know everything they need to know.
Before we got our first Weimaraner, we read every guide on the breed we could find. They are all over the internet and in book stores. We spoke to others with the breed and we visited as many Weimaraners as we could find.
I knew very well that if I fell asleep on the couch, I would wake up with two 70 pound dogs sleeping on or under me.
I also knew the costs. A spay, shots, licenses, food, toys, crates, and everything else. We made sure we could afford the dog(s).
It’s easy to sympathize when someone can’t keep a dog because of an illness, injury, or worse. It’s infuriating when I feel compelled to take on a third dog because someone didn’t do some simple homework. We were told that “It’s either you take her, or she ends up in a shelter or just released in a field. PLEASE… Take her.” How do we NOT take her?
Sure the people were heartbroken and ashamed, but is that enough? I don’t have the answer to that question, but I do hope this is the last dog we need to rescue. She’s only here temporarily, but in my house, fostering a Weimaraner “temporarily” is like “temporarily” touching one finger to the other when there is super glue on them.
My son has been wanting a third dog, I’ve been saying “No”, but I may be powerless against the cosmic powers behind the prayers and wishes of a 14 year old boy who loves his dogs.
Watching her sleep peacfully with the other two dogs, it’s easy to imagine that some angel brought her to us…
… actually, watching the video again, it may be repayment for something bad I’ve done. I’m not sure yet.
This weekend I went down to New York City to go to Brooklyn to be part of Megan’s BKswappers event which was held at the Brooklyn Kitchen in Williamsburg Brooklyn or perhaps it’s Greenpoint – the border there is a bit fuzzy – but it was really fun as you can see from these pictures.
From the potluck snack table
The Brooklyn kitchen has a really nice large space that they use for classes and demonstrations and they were nice enough to allow Megan and Jane to host the BKswappers there. They opened the store a little bit early for us on a Sunday morning and we all just moved in. I forgot one detail but the food swap is also potluck and I forgot to bring anything – not surprising – but there was a ton of food there as you can see from these pictures.
some of the foods offered for tradeHard Cider being bottled on premise for the swap
How does a food swap work? We talked about how to have a food swap on GardenFork Radio with Megan, one of the hosts of BKswappers. To start you can email a group of friends and have everyone meet at someone’s house. Invite your friends to bring foods that they have made that they would like to trade for foods that other people have made. ( As your food swap gets larger, you can use meetup.com for or eventbrite.com to organize your group )
I brought honey, applesauce, pickles
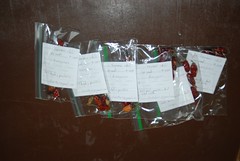
Everyone gets together at the appointed time and place ( name tags are suggested ) and they set out the foods they have brought on a table. Each food item, be it an apple pie or a jar of applesauce has a piece of paper ( an ‘offer slip’ ) in front of it describing what the item is and perhaps a brief note about how it was made, or what foods go well with, like hot dogs go well with ketchup. Underneath the description are five numbered lines for swap offers.
An offer to swap is made by writing on the slips
Perusing the table of food that is to be swapped, people decide what they would like to trade for and jot down on the ‘offer slip’ next to the food item they are interested in what they want to offer that person in trade.
There’s also a lot of socializing that goes on while everyone is checking out the table, and people are eating all the fun food brought for the potluck. People brought apple pie, donuts with bacon, egg salad, duck rillet, several cheese plates, a citrus salad. All really great stuff.
Bacon Donuts. wow. Food-a-rama at the potluck table
So while you’re looking at the foods that you want to swap for, you’re getting to eat food as well. nice.
Some people put on the potluck table a sample of what they’re offering to trade. For example, someone brings bags of cookies they want to trade; they might put out one bag of the cookies on the potluck table to give people a taste of the cookies that they are offering up for trade. Which is pretty cool.
There is a lot of socializing the goes on the whole time while everyone’s eating all the snacks from the potluck.
At a given time Megan and Jane announce: okay it’s time to do the swaps. People then look at slips of paper ( the offer slips ) next to the food items that they have offered up and see what people are offering. It is usually five or six people that offer to trade. You pick which one you like to trade for you go find the person and “say sure I’d like to trade my pickles for your applesauce”. Then your trade is done.
An action photo of the swapping of food
The BK swappers event is is really well-established now, they were written up in the New York Times recently ( article link here ) and that made the turnout even higher. I think there were about 40 people, from the pictures you can see it’s jam packed with super nice people.
While at the food swap I learned about making sauerkraut from a fellow food swap attendee. I spoke with another guy that made hard cider – there is a picture of him drawing off a little mini keg here. The best item from the potluck table were some little mini doughnut pillows with the icing and bacon on them , yum.
Megan, aka Brooklyn Homesteader, is one of the hosts of BKswappers
Don’t throw out that rice! Instead make this twice-cooked side dish. It’s easy to make and it only takes about 15 minutes. It’s rich and creamy and similar to risotto but closer to a Japanese onigiri (rice ball). This recipe serves two.
You’ll need;
a small covered sauce pan
a wooden spoon
a square or round cooking ring
1 1/2 cups cooked, leftover rice
3/4 cup chicken broth
2 tbsp butter
1 tbsp olive oil
1/4 tsp of spices to your taste: powdered onion, garlic, parsley, pepper, oregano, thyme… etc.
1/4 cup grated Parmesan cheese.
1/2 tsp sea salt, to taste
Add chicken broth, butter, salt, and spices to a small sauce pan and bring to a boil. Lower heat to medium and add cooked rice. Stir often with a wooden spoon until most of the liquid is absorbed. Remove from heat and add grated Parmesan cheese and olive oil, mix well, cover, and let it set for 5 minutes. Put rice into cooking rings and pack well, then remove the ring. If the rice does not release easily from the ring, run a wet butter knife around the inside edge. Top it with more grated Parmesan or dried bonito flakes. You have to admit this is pretty impressive for leftover rice.
It was pretty toasty in my greenhouse yesterday, and while cleaning up I ran across this mouse nest inside a terra cotta garden pot. The mice had moved out, but this shows how industrious they are when building a nest. All sorts of materials in this nest to make it cozy.
Azuki, a small dark red bean, is the second largest Asian crop next to soybean. It’s the main ingredient in sweet Red Bean paste. Red bean paste and candied Red Bean are sold in Asian markets all year round, but usually they’re used in fall harvest desserts as pastry filling (Chinese moon cakes), light snacks (Japanese zenzai and anko), and sweet soups (Korean patjuk). This highly prized confection can be coarse or smooth. It has a taste similar to chestnut puree and pine nuts and is as smooth as pumpkin filling. It’s easy to make… and even easier with a blender. This recipe makes 4 cups.
You’ll need:
a large pot with lid for soaking and boiling
a blender
a large mixing bowl
a large colander
2 cups of dried azuki beans
lots of water
3/4 cup sugar
1tbsp salt
1 tsp powdered ginger
four drop of vanilla
1/2 cup unsalted butter (optional)
Soak Your Beans
As with most beans, azuki must be soaked and rinsed. In a large pot add beans and enough water to cover up to 2″ above the beans. Cover and soak overnight in a cool place (the fridge). Soaking overnight conditions the beans for boiling. Next day, drain and rinse beans until the water runs clear, then soak them again in clean water for another 6 hours at room temperature. Be sure to add enough water as before.
Boil ‘Em
Place the covered pot on hight heat until it boils, then lower the heat to medium and cook until the beans are very soft — roughly 2 hours. Add more water to the pot if the needed and stir every 20 minutes. When they are done, the skins should separate from the beans and they should mash easily with a wooden spoon. Check by crushing them on a cutting board. Be sure to rinse the pot clean, you’ll be using it again.
Puree
Drain the beans and reserve the hot liquid. In a blender add 1 1/2 cups of beans and enough of the reserved liquid water to cover 1″ above the beans. Set to puree and blend until smooth. Pour half the batch back into the clean pot. Add another cup of beans to the blender and puree, add more of the reserved liquid if needed. Repeat until the entire batch is blended.
Simmer Down
Set the heat to medium, add sugar, salt, ginger, and vanilla to the pureed beans and stir constantly to prevent burning. Simmer and stir until it is reduced to the consistency of thick fudge. Pour the finished bean paste into a mixing bowl and allow it to cool. It should have a deep purple-red color. For a velvet smooth texture add unsalted butter and mix well before it cools down completely. Store away into sealed jars and keep refrigerated.
Foot note: Although butter is not a traditional ingredient, my grandmother would add refined lard to preserved red beans and Red bean Paste. It gave these preserves an incredibly smooth texture and a deep red color. In this age of chocolate covered bacon and rendered duck fat spreads this is not so far-fetched. If can find a quality refined leaf-lard, use this instead.
You can keep red bean paste refrigerated for up to two months, but it’s best when used fresh. Use it as a sweet spread on pancakes or as a pastry filling. I like it with cream cheese on a toasted bagel at breakfast. If you make your own ice cream try this as a new flavor.
Ever wonder what to do with that drawer full of Ketchup and Plum sauce packets? The answer is Sloppy Joe! I have such fond memories of the 70’s and Sloppy Joe Night that I barely remember that we were in a recession. Sloppy Joe served on a TV tray while watching gun Smoke! This is one of my favorite cheap eats, and you probably have most of the ingredients already. This recipe feeds four.
You’ll need:
a medium size skillet with lid
3/4 pound ground beef
1/2 pound of diced canned tomatoes (6. oz.)
1/2 cup each, chopped: onion, bell pepper, parsley
12 packets of take-out ketchup (1/2 cup)
6 packets of take-out duck sauce (1/4 cup)
2 tbsp Worcestershire Sauce
1 tbsp hickory BBQ sauce (1 packet)
3 tbsp olive oil
1 tsp salt
liquid smoke (optional)
Use these dried spices or an equal amount of a good dried BBQ seasoning.
1/2 tsp each: cumin, oregano, thyme, black pepper
1 tbsp dried basil
1 tsp powdered garlic
Step 1: Add 1 tbsp of oil to a hot skillet and brown ground beef, drain and discard excess liquid. Remove from the pan and set aside.
Step2: Add 2 tbsp of oil to the skillet and add onion, bell pepper, and parsley and cover. Cook until bell peppers are soft. Lower heat to medium and add browned ground beef, dried spices, and salt. Cook for five minutes. Now add all the wet ingredients: ketchup, plum sauce, canned tomatoes, liquid smoke… etc. or a pack or dried BBQ seasonings. Cover and cook for 15 more minutes, stirring once or twice. It’s ready when the liquid has thickened. Serve it up on toasted bread topped with a crumbled layer of crushed potato chips… be sure to have it with a hot bowl of tomato soup.
Tostones are fried twice — that's what makes them so good.
Plantains, a close cousin to bananas, are eaten when they are green, reddish black, or black depenging on the variety. The flesh is very firm, higher in starch and lower in sugar. They are prepared more as a root vegetable would be. A popular South American and Caribbean dish is tostones — twice-fried plantain chips. Tostones are easy to make, but there is a little trick to peeling plantains.
Start by cutting off the tips and ends from each plantain, then cut three to four shallow slits from tip to end.
Loosen one section with your thumb and peel, then remove the rest of the skin. You’ll notice the skin peels off easily. The flesh should be very firm and creamy white or very light pink in color.
Cut plantains into pieces that are 3/”4 to 1″ thick. If you’re not ready to cook, put them into a bowl of ice water and a little lemon to prevent them from turning brown. Drain and dry them when you’re ready to cook.
Add vegetable or canola oil to a hot skillet — about 1/2″ deep or so. Check if oil is at frying temperature by placing a wooden spoon or chopstick into the pan. When bubbles form it’s fryin’ time. Place the plantain pieces into hot oil and fry until they are golden. Place them on a paper towel to drain.
Deep frying soften the plantains, which is important for this next step: pressing. Flatten them gently, but don’t mash the hell out of them. I use a small “tostonera,” a wooden press, but the bottom of a coffee mug works just fine.
Finally, place the flattened pieces back into the hot oil and fry them again until they are golden brown on both sides.
Drain them on a paper towel and lightly salt while they’re still hot. I like adding a little powdered garlic and black pepper too. Tostones go well with eggs — they’re good with any dish that you’d serve French fries. If you make a big batch you can re-heat them in a toaster oven.
I’m really getting into these cooking rings. Here’s another square egg dish: Mushroom Frittata with red pepper, parsley, cheddar cheese, and onion. It’s important not to over-fill the rings, otherwise they’ll flow over the tops of the rings as they cook. You’ll add the eggs into the rings to make layers. Since this dish is finished by steaming in a non-stick, you won’t need much butter, but that’s entirely up to you.
You’ll need:
non-stick pan with glass lid
2 square cooking rings, 2.75″ square X 1.5″ deep
a flat spatula
1/3 cup each, minced: onion, parsley, red pepper
2 medium size Crimmini mushrooms, sliced
1/8 cup course breadcrumbs
1/8 cup grated cheddar cheese
4 large eggs
1/8 cup milk
1/2 tsp powdered onion
dried chives
1/4 cup water
salt and pepper
butter
Cook the mushrooms. In a hot non-stick pan, melt a pat of butter and lay the mushrooms in flat, sprinkle a little salt. Lower heat to medium, and cover. The mushrooms should release liquid in about 5 minutes. Remove from pan when both sides are evenly browned.
Melt another pat of butter in the pan and add bread crumbs, red pepper, onion, parsley and sprinkle them with a little salt and powdered onion. Cook until the red peppers are soft, then set them aside.
Make this frittta in layers. With the burner on high, place 2 well-greased cooking rings in the pan and melt 1/2 tsp into each ring. Beat 2 eggs with a little milk and pour about 5 tablespoons into each ring. Lower heat to medium and let the eggs cook form a solid base — it’s OK if some egg spills out, just trim it off later. Now add some of bread crumb mixture, cover the pan and cook until the eggs start turning opaque.
Remove the glass lid and add more bread crumb mixture and cheese. Pour the rest of the egg halfway up the ring. Cover and let eggs cook as before. Now pour the final layer — arrange mushrooms and pour the rest of the egg with some dried chives. Make sure the eggs sit about 1/4″ away from the top of the cooking ring. Turn heat up to high, add water to the pan and cover. Let the eggs steam until the tops rise slightly over the rings.
Remove the eggs and rings from the pan — don’t be a hero, use a flat spatula. Let them sit for a minute to cool, the eggs should shrink away from the edges. If they do stick use a sharp knife to free the edges. Plate them and serve with cocktail sauce and aside of buttered toast with strawberry jam. Make this breakfast for two this weekend for someone special, use what you like for filling.
I’ve been in a lot of houses and apartments that have been renovated or are new construction, and I’m never surprised by what I see. Take this expensive bathroom vanity as an example:
right side is a bit off here…
Here the bath vanity is falling off the wall, not a good thing. Especially for a brand new renovation.
Vanity counter separating from wall
Crawling underneath the vanity and searching around, I found that the whole vanity, with this heavy counter top, had been installed with 4 drywall screws. And two of screws did not hit a stud.
On the right side of the vanity the drywall screws had sheared. wow.
Before starting to fix this, I explained to the homeowner that it was possible the vanity top would crack when we raised it back into place. Always warn people.
I got the car jack from our car and with some scrap lumber, raised the vanity a bit higher than its original location. I did this because I knew the vanity would probably drop just a bit when screwing it back in to the wall.
I then got my hammer drill out – the right wall is the common wall between 2 brownstones, hence its a double brick wall- and drilled a 3/8″ hole thru the tile deep into the brick.
concrete sleeved anchors are bulletproof
I drove in a sleeved anchor, and tightened the vanity to the wall. If you have to hammer in a sleeved anchor, put the nut on the anchor before hitting it with hammer to save the threads. These anchors hold a lot of weight and are easy to put in, the hardest part is drilling the hole. I use them to hang TVs on brick and cement walls.
What surprises have you found when doing repairs? Tell us below
I’ve been wanting to show you all how to make cheese for a while now; basic soft cheese like ricotta or queso blanco is easy and gives you the basics to move into more involved cheeses. The homemade cheese recipe and some book recommendations are below the video.
On February 27th, Forest Park Community Garden hosted it’s first public seed swap and it was a great success and tons of fun!
A seed swap is where a group of gardeners get together to trade seeds, information about the seeds, and just have a great time hanging out. I’ve gone to one prior that was held in a friends house and she hosted about 15 to 20 people, but the Community Garden hosted about 75 people. We laid out five tables filled with seeds. Three tables alone to held all the fruit and veggie seeds. People brought in everything from garlic to hyacinth, amaranth to zucchini. Every Vegetable, Herb, Flower that does well in our area was represented.
There was also demonstrations about seed starting and one of the committee member’s daughters showed how to use seeds in greeting cards. It was very cute.
All in all, it was a great success. We had a ton of fun and got to spend the afternoon chatting with the neighbors.
Now, I’m just on edge waiting for the snow to stop and the weather to finally warm up. Have Seeds! Need Planting!
This is not a Photoshop trick, these poached eggs ARE square. I stopped into a baking supply store to pick up some Vanilla. As I passed by the kitchen gadgets section, I spotted cooking rings and recalled the podcast that I did with Eric: “How to Poach an Egg…”
After looking over stainless steel diamonds, ovals, and circles, I picked the squares. I’ve found that a thicker bands distributes heat more evenly, a thinner gauge of metal is
better suited for making stacked presentations. I wouldn’t call this a recipe, this is more of a description of how I used a metal cooking ring.
You’ll Need:
a metal cooking ring, large enough for large 2 eggs
a non-stick frying pan with a glass lid
flat spatula for flipping
2 large eggs
dried chives
salt or grated Parmesan cheese
1/2 tsp unsalted butter
1/2 cup water
small bowl
Place cooking ring into the frying pan and bring pan to medium heat. Crack one egg into a bowl and let the egg white settle. Melt 1/2 tsp of butter in the cooking ring and pour some of the egg white into the ring to form a solid bottom, then add the rest of the egg. Add 1/2 cup of water to the pan and cover with glass lid.
When the egg yolk starts to form a slightly opaque film, remove the glass lid and sprinkle some dried chives and salt or Parmesan cheese. Crack the other egg on top of the first egg, return cover and cook on medium heat for another 5 minutes, or longer if you like your eggs well done. With a flat spatula, transfer the cooking ring and egg to a plate. Let it cool for a minute and carefully remove the ring, and serve.
When you slice through, you’ll notice that bottom egg will be more well-done, than the top layer of egg. Here’s an idea: beat an egg with ham, smoked salmon, red pepper, or caramelized onion and make the first layer into scrambled egg, then make the top layer a poached egg — two for one!
Joshua Stokes, chef with the answers to your questions, GrillAChef.com
I’ll be on from 1-4 pm Monday and Tuesday. You can listen to Sirius ch 112 – XM ch 157 on your computer and smartphone. They offer a 30 day trial, you can learn more here.
Some Brits fondly refer to blancmange (blə-mɒnʒ) as “shape,” probably because this rich, almond flavored dessert is usually set in small molds. It’s hardly diet food — made with milk, cream, egg, and sugar; and thickened with Irish moss (carrageen). This custard from the UK is similar to other puddings such as Bavarian cream, vanilla pudding, and panna cotta. This recipe requires whole milk — non-lactose milk, soy, or skim milk will not set properly.
Carrageen, better known as Irish moss is used a thickening agent, just as agar (red algae) is used in Asian foods. For this recipe I used dried carrageen, not “carrageenan” the commercially prepared extract. 1 oz. of dried carrageen will roughly set up as one cup of liquid. Irish moss can be purchased in dried bundles from online stores or from health food stores. Although not authentic to recipe, you can also substitute with gelatin or agar. Follow instructions to make 1/3 cup.
Blancmange is a very rich dessert and is best plated as small servings with a flavored syrup or treacle drizzled over the top. This recipe makes 4 small servings, double the recipe to serve more.
You’ll Need:
a medium size sauce pan
a medium, and a fine mesh sieve
4 small molds or ramekins
a rubber spatula
3/4 oz dried Irish moss (carrageen) or
1/3 cup after soaking and rinsing
3/4 cup whole milk
1/2 cup cream
vanilla and almond extract
1 whole star anisette
6 cardamom pod, or 1/4 tsp ground cardamom
sliced rind of 1 lemon
1 large egg
2 tbsp caster sugar (fine sugar)
In a sauce pan, bring whole milk and cream to a boil, add washed Irish moss, lemon rind, cardamom seeds (crush the pods first), star anisette, 1 tbsp caster sugar, and a few drops each of vanilla and almond extract. Lower heat and cover, allow to simmer for 25 to 30 minutes stirring occasionally. The Irish moss will have dissolved into the milk mixture to make a thick sauce. Remove from heat.
Strain milk mixture through a medium mesh sieve, and with the spatula gently rub any remaining Irish moss. Be careful not to grate the dense fiber into the mixture. Strain once more through a fine sieve. The liquid should be smooth and thick.
While the milk mixture is cooling down, separate egg white and egg yolk. Beat egg white until it forms stiff peeks. Add 1 tbsp caster sugar to egg yolk and mix well. Stir egg yolk into the milk mixture with a rubber spatula, then fold egg whites in until everything is evenly incorporated.
Spray each mold with water then pour mixture evenly into small decorative molds. You can also use ramekins, or small round bowls. Tap the bottoms of each mold to free any air bubbles. Set molds on an even surface in the fridge for at least four hours, or overnight. The blancmange will set into a firm custard as it chills.
Bet you didn't think you could make one of these in a slow cooker.
A slow cooker brings to mind meals like all-day-long beef stew, chicken noodle casserole, and Super Bowl chili. But if you’re stuck at home all day, make a slow cooker meatloaf. It’s ready in just… five hours. So why would anyone use slow cooker to make meatloaf? It’s a great no-fuss meal that you can make while doing your chores. The first two meatloaves I made in my slow cooker were a bit dry in the center, even though it made a lot of liquid. After a little experimenting I found two things that help this stay moist and full of flavor: using moist, fresh, finely minced vegetables (onion, celery, bell peppers, zucchini, etc.); searing the entire meatloaf before slow cooking.
So get your mashed potatoes in order, make a small salad, and give this recipe a shot. This recipe feeds three people, it may sound like a lot of food, but it actually shrinks down in the slow cooker.
Slow Cooker Meat Loaf Recipe
You’ll Need:
a large electric slow cooker with a temperature setting (and timer)
a mixing bowl
a large nonstick frying pan
2 wide flippers
Ingredients:
1/2 lb ground beef
1/2 lb ground pork, or veal
1/2 lb ground turkey
2 tbsp olive oil
1 large egg, beaten
3/4 cup plain bread crumbs
1 tbsp sea salt
1 tbsp granulated garlic
1 tbsp dried basil
1 tsp dry thyme
1 tsp, black pepper
1/2 cup each: finely minced bell pepper (red or green), onion, celery, parsley
1/2 cup chicken stock or other cooking liquid
Glaze:
3 tbsp ketchup or cocktail sauce
1 tsp liquid smoke
1/2 tsp dried mustard
1 tsp Worcestershire
Put ground meat into a mixing bowl with all dry ingredients and spices, mix well. Then add all finely minced vegetables (pssst, use the food processor) and egg and mix again until all ingredients are evenly distributed. On a cutting board, form a rectangular loaf that is shaped more like rounded brick than a loaf of bread. You’ll round off the top in the slow cooker later. Let it rest in the fridge for about half an hour.
Add olive oil into a hot non-stick pan. Carefully lower the loaf into the pan and sear the bottom until its firm enough to flip over. Sear all sides evenly, to a light golden brown.
Set the slow cooker to high, add a little olive oil, and set the meatloaf in carefully. With the back of a spoon round the top of meatloaf and adjust the sides to a good fit. Make sure there is about a 1/2″ of space from the inner edge of the slow cooker. Now add the chicken stock (or other cooking liquid). Cover and let it cook on high for two hours, then flip it over. Baste every hour or so. The meatloaf should release more liquid. If the liquid is deeper than 1/2″, remove some of it with a turkey baster.
After four hours, turn the slow cooker down to medium heat and flip the meatloaf over once more. Mix up the ketchup glaze and spoon it generously over the top of your meatloaf. Replace cover and let it cook on medium for another hour. Set the slow cooker to warm until you’re ready to eat, then let it sit for 10 more minutes on a cutting board before serving.