Category: Articles

blogs

  • No Knead Bread: How to flip the dough

    No Knead Bread: How to flip the dough

    I’ve been constantly fine-tuning the Mark Bittman Jim Lahey No Knead Bread recipe. We’ve made a GardenFork Video here, and I’ve done blog posts about No Knead Bread. For a while there I was having No Knead Bread failure, and I finally found that I was not letting the dough rise long enough for the initial rise, and that the kind of all purpose flour changes the dough. Not every all purpose dough has the same amount of protien, it varies.

    I also have started to rise the dough in a towel lined bowl instead of just on a board. I think it helps with the shape a bit.

    I think the hardest thing about No Knead Bread is flipping it into the dutch oven.

    So we took some pictures of how I do it. I’m never able to get it to flop right in proper, so I take a wooden spatula and scrape the dough off the sides of the dutch oven, and jiggle the pot to get the dough to even out. I don’t touch the dough.

    The flip is a fluid motion, don’t hesitate, and don’t flip too fast, or too hard. The less you think about it the better. How’s that for advice?

    What techniques do you have for better No Knead Bread? or any recipe variations? please tell us below:

    flip1

    flip2

    flip3

    flip4

    flip5

    flip6
    use a wooden spatula to scrape the dough off the sides of the pot

    flip7

    flip8

  • Salted Caramel Strawberry Recipe GF Video

    Salted Caramel Strawberry Recipe GF Video

    Home Made Halloween Treat or decadent dessert, this salted caramel strawberry recipe is good. And you don’t have to make the caramel from scratch.

    I asked Jaden Hair, author of the cookbook Steamy Kitchen and the website SteamyKitchen.com, on Twitter which of her recipes I should make on GardenFork.TV and her answer was immediate: a salted caramel strawberry recipe.
    Caramel Strawberry Recipe

    I asked that the recipe be simple, ( this is Eric cooking after all ) and this is super simple and super good. wow. yum

    I used popsicle sticks for this recipe, but you could also use bamboo skewers, ideally cut in half. Or use what you got, if you have something that will work for you. You could also dip the strawberries using a skewer and then lay each berry on wax paper to cool, and be finger food.

    At times, I’ve found supermarket strawberries to be under-ripe on the inside. There’s really no way to see if the strawberries are ripe inside even though they look red. If you can press on a berry, if they are hard, you know they are not ripe inside.

    caramel strawberry recipe-2

    Be very careful with the caramel. Its hot and its sugar, and it can burn you. Slow and steady wins the race here. Start out with a small batch of the caramel to get the hang of melting the caramel if there is some trepidation.

    this recipe is based on the Southern Living Farmer Market Cookbook

    Salted Caramel Strawberry Recipe GF Video
    Recipe Type: Dessert
    Author: Based On Jaden Hair
    Prep time:
    Cook time:
    Total time:
    Serves: 10 Treats
    An easy dessert or Halloween treat recipe
    Ingredients
    • 10 large fresh strawberries
    • 20 caramels
    • 1 1/2 tablespoons whipping cream
    • 1/4 teaspoon sea salt
    • 
1 cup coarsely chopped mixed nuts (peanuts and almond slivers)
    • 
Wax paper
    Instructions
    1. Soak strawberries in a ice bath for 5 minutes to restore their perky leaves
    2. Pat strawberries completely dry with paper towels
    3. Microwave caramels, whipping cream, and salt in a microwave-safe bowl at MEDIUM(50% power) 2 minutes or until smooth, stirring at 1-minute intervals.
    4. Dip each strawberry halfway into caramel mixture.
    5. Roll in nuts, and place on lightly greased wax paper.
    6. Let stand 15 minutes.
    7. Serve immediately, or cover and chill up to 8 hours.
  • SOS! The Six O’Clock Scramble to the Rescue. Earth Friendly, Kid Pleasing Dinners for Busy Families.

    SOS! The Six O’Clock Scramble to the Rescue. Earth Friendly, Kid Pleasing Dinners for Busy Families.

    I love cookbooks. It’s the first section of the library that I hit. Then gardening and home repair. Finally sparkly  vampires and romantic comedies. I got a copy of The Six O’Clock Scramble: Quick, Healthy, and Delicious Dinner Recipes for Busy Families
    to review and as much as I love a big, colorful, well photographed cookbook, like David Chang’s Momofuku, SOS would more likely find a place on my bookshelf.

    Aviva Goldfarb

    SOS is a practical cookbook. It’s the kind of cookbook that doesn’t overcomplicate things. The recipes are great for a beginner cook or someone who has just started to cook for a family. Nutritional Information is listed for all recipes, which a lot of cookbooks don’t do. I can’t tell you how many dishes that I’ve made, that I’ve thought were lower calorie or lower fat, and they just weren’t. One dish in particular, was from a Garden Fork Favorite, Chris Kimball and a Best of the Year cookbook series.

    Impressively, SOS breaks down into seasonal chapters. Each season lists menus and has a nice little blurb about what’s available and seasonal goodness. I showed SOS to my sister and cousin and they liked this feature. They don’t always know what’s in season, so the seasonal food section was helpful. There’s also great information through out the book about healthful snacks or different meal idea.

    SOS doesn’t jump off the shelf at the bookstore. There’s no color photographs or food porn. It’s nice to see how some food will turn out before you cook it. Other than that, it’s a great book and I recommend that everyone check it out.
  • Dandelion Identification: is it Edible?

    Dandelion Identification: is it Edible?

    Yes, dandelion is edible. There you go. Below the video here are a bunch of photos and info, scroll down after watching!

    Dandelion can fall under the subject heading of urban foraging. It is ubiquitous in yards in America. Just make sure it hasn’t been sprayed with anything if you are pulling it up out of someone’s yard.

    I was weeding the mesclun salad greens bed, which i have covered with our Hoop House Cold Frame ( you can get plans for our hoop house and video here )

    A lot of dandelion has already come up, and I was surprised at how large the tap root was for such small plants. wow. look at the picture below:

    Dandelion has a large taproot. Both the leaves and the tap root are edible, and are used in herbal medicines.
    Dandelion has a large taproot. Both the leaves and the tap root are edible, and are used in herbal medicines.

    Dandelion is edible. It tastes a bit like arugula, it has a tang to it, if the leaves are mature, it can be a bit bitter.

    But bitter can be good in a salad! It offsets raspberry vinegar really well, and it goes well with blue cheese. So stop pulling those weeds and instead harvest them for your dinner plate.

    I pulled bunch of dandelion out of our mesclun bed
    I pulled bunch of dandelion out of our mesclun bed

    The younger plants are better, I think, after dandelion has flowered the leaves get tougher, but  you can still eat them. Best way for tougher leaves is to saute them in some olive oil with garlic.

    Dandelion is super healthy,  according to the USDA, Dandelion is high in Vitamin K, Carotene, Vitamin A, and Lutein. neat. And this grows in your yard.

    When weeding a garden bed of dandelion, I try my best to pull out the tap root along with the top of the plant using one of my weeder tools. If you snap the plant off at the top of the taproot, the plant will send up new leaves. This is a good way to harvest if you have an area of dandelion which is a designated growing area for the plant.

    You can buy dandelion seed. I buy a kind called Italian Dandelion, which I believe is not a true dandelion, but it grows really well in my garden, and we like it.

    Dandelion after running it through the salad spinner
    Dandelion after running it through the salad spinner

    After I harvest the dandelion, I snap off the taproot, and shake as much dirt off as I can. I then put the greens in a salad spinner and fill up the bowl of the spinner with water. I slosh the greens around, pull up the basket and dump the water. I do this twice usually, then spin the greens. Then I eat them.

    Do you eat dandelion? How? Tell us below:

  • Rain Gutter Repair

    Rain Gutter Repair

    As part of my family visit, I am always repairing my sister’s house. First was the motion sensor light repair, and now on to the rain gutter repair.

    The hanger bracket and nail. Screws work better.
    The hanger bracket and nail. Screws work better.

    Her rain gutters were starting to pull away from the house, so I climbed up to find the gutter hangers had been nailed in instead of screwed in, and the nails were now pulling out of the wood behind the gutters.

    Be careful on the ladder, don't over-reach.
    Be careful on the ladder, don't over-reach.

    I picked up some rain gutter screws ( more like lag bolts, actually ) that I used on my  own house. Once you put these in, the gutter doesn’t come off, unless the wood behind it does. The plastic sleeve keeps the screw from compressing the rain gutter.

    These screws work well
    These screws work well

    With these gutter screws, I’ve found it best to drill a pilot hole in the front lip of the rain gutter. Then I use a powerful cordless drill or a corded drill to sink in the screws. You have to put some weight behind this, so make sure the ladder is secure, and don’t over-reach, you’ll fall off the ladder – a bad thing.

    Be sure to position the spacer in the gutter before screwing in the screws.
    Be sure to position the spacer in the gutter before screwing in the screws.
    You have to put some weight into driving these puppies in.

    The gutter screws reconnect the gutter to the house.
    The gutter screws reconnect the gutter to the house.

    Have you done gutter repairs? Tell us your solutions in the comments section below:

  • Switching out a Motion sensor light with a dusk to dawn light

    Switching out a Motion sensor light with a dusk to dawn light

    Whenever I go to my sister’s house, there is a quid pro quo. She makes choc chip cookies, I fix her house. This trip we removed a TV antenna, fixed the rain gutter, and swapped out a broken motion sensor light.

    Eric, electricity, power tools, what will happen next...
    Eric, electricity, power tools, what will happen next…
    The original motion sensor light
    The original motion sensor light
    The existing lights had broken in only a short time
    The existing lights had broken in only a short time

    I like motion sensor lights. I’ve installed many. But I’ve found that the ones I buy at the large home improvement stores tend to stop working after a few months to a year.

    My sister had a motion sensor light at her back door, and she was using its dusk to dawn setting. The sensor had broken, and one of the lamp assemblies just fell apart.

    I suggested a simpler light assembly with just a dusk to dawn sensor. I made sure the one we bought allowed us to replace just the sensor if need be.

    Here's the dusk to dawn lights we installed
    Here's the dusk to dawn lights we installed
    Removing the old motion sensor light
    Removing the old motion sensor light

    I switched out the lights. To test the light sensor, you need to turn on the power to the light and wait a few minutes for the sensor to adjust to the sun. Then put some electrical tape over the sensor and wait a few minutes. If the lamp does not go on, something is not working correctly. First to to check is your wiring, many times the wire nuts supplied are not great, I always use better ones from the hardware store.

    The black object is the dusk to dawn sensor, easy to replace
    The black object is the dusk to dawn sensor, easy to replace
    Put electrical tape over the sensor to simulate night time
    Put electrical tape over the sensor to simulate night time

    We wanted to use compact fluorescent bulbs in the outdoor light, but all the outdoor rated lights, most of them flood lights, were too bright for just lighting up the back door. We didn’t want to light up the whole back yard.

    Proof that the light is wired correctly, unusual on a first try for me
    Proof that the light is wired correctly, unusual on a first try for me

    We bought some lower wattage CFLs that were similar to the floods, but not rated for outdoor. We’re using those for now, and we’ll have to figure out if they can stay outside. The lamp housings protect the bulbs from the elements, but I’m thinking the ballasts may not be rated for cold temperatures.

    What has your experience been with motion sensor lights? Do yours break? Let us know in the comments below:

  • Honeybee starvation, a video by Terry McBelle

    I came across this video on the Jim’s Natures Nectar blog. This is done by Terry and shows her cleaning out a dead hive. I learned that you can take the honey and pollen stores from a dead hive and add it to another hive to help it get thru the rest of the winter. This video also shows really well how to place a pollen patty on top of a cluster. Thanks to Terry for doing it.

    You can watch more of her videos on YouTube here

  • What honeybee starvation looks like in a beehive

    What honeybee starvation looks like in a beehive

    A neighbor lost a hive, and as we took it apart, I saw for the first time what honeybee starvation looks like.

    Bee starvation
    Bee starvation

    Bee Starvation can happen for a different reasons, here are a few:

    • There just isn’t enough food to get them thru the winter. This can happen if the beekeeper has taken too much honey off a hive, especially a young hive, and/or has not fed the bees enough 2:1 sugar syrup in the fall, it can also happen for no discernible reason at all. Bee Starvation can happen to the best beekeepers.

    • Brood Rearing can start in the late winter, and if the weather has a cold snap, the bees will not leave the brood, even though there may be food in comb a short distance away. Read more on Jim’s blog

    • Nosema, a bee disease that impairs the bee’s digestive tract, can cause winter starvation.

    Note the bees face in to the comb, looking for food I think.
    Note the bees face in to the comb, looking for food I think.

    I didn’t see any brood on these frames, and there was no honey in the frames, so I’m guessing it was a lack of food stores, but I am not the expert here. What do you know about bee starvation, have you lost bees over the winter?

  • Cold Frame Hoop House Plans and Update

    Cold Frame Hoop House Plans and Update

    Here are some hoop house plans and photos of the small hoop house we use for cold weather greens. We had a really warm weekend last week, so i pulled out the cold frame hoop house that we built in the How to make a hoop house cold frame video here. I put in a mix of salad greens and mesclun mix, place a wireless thermometer in, and left it to grow.

    I’ve gotten many requests for plans for the cold frame hoop house, you can get more info on all our hoop house cold frame plans here. Below i’ll post a few key photos to guide you along. This Cold Frame Hoop House plan is perfect for our raised garden beds.

    hoop house cold frame


    These hoop houses work really well with our raised vegetable beds. You can watch our How to Make Raised Garden Beds video on our site here.

    build a frame that will fit in your garden bed with 2x4 lumber
    build a frame that will fit in your garden bed with 2×4 lumber
    use narrow diameter PVC to arch across the frame
    use narrow diameter PVC to arch across the frame
    use electrical pipe holders to secure pipe arches
    use electrical pipe holders to secure pipe arches
    cut a plywood end that matches the arc of your hoop house cold frame. cut out a hole for the thermatic vent in the plywood
    cut a plywood end that matches the arc of your hoop house cold frame. cut out a hole for the thermatic vent in the plywood
    attach the plywood to one end of cold frame
    attach the plywood to one end of cold frame
    the view of the cold frame hoop house from inside.
    the view of the cold frame hoop house from inside.
    The cold frame hoop house fits just inside the raised bed. nice.
    The cold frame hoop house fits just inside the raised bed. nice.

    If you want to learn more about growing vegetables year round read Eliot Coleman’s Four Season Harvest book and Nikki Jabour’s Year Round Vegetable Gardener.

  • Late Winter Check and Feeding of the Honey Bees

    Late Winter Check and Feeding of the Honey Bees

    We’ve had a cold winter here, and we’ve had few opportunities to open up our hives to check on the bees.

    It depends on which expert you are asking, but you should only open up a hive if its above about 45F. The rule I’ve read is if you have to wear a heavy jacket, you should not be opening up a hive.

    Why open up a hive? Many hives perish in late winter or early spring when they may have run out of food. You want to get a quick peek to if there is food in the comb and if they bees are alive.

    After reading and talking to our bee mentors, we decided to slip some fondant into our hives, as well as new grease patties. Fondant can be bought at a bakery supply or some craft stores, or you can make it yourself. There is a good discussion of making fondant on the Bee Source forum here. Pressed for time, we picked up some fondant at a craft store.

    Bees entering thru inner cover gap
    Bees entering thru inner cover gap

    We finally had a day where the weather was in the 50s F, we opened up our hive at Maple Knoll Farm. We found a lot of dead bees on the bottom board, and we cleaned these out. The bees were out, already bringing in pollen ( we think from maple trees ), and they were entering the hive through the small gap in the inner cover.

    Honey bee with pollen in late winter
    Honey bee with pollen in late winter

    To put the fondant on top of the frames, I built a simple spacer to allow the fondant to sit on top of the top super. We did a quick check of the frames in this top super – do not pull out the frames, just look down into them – and we found ample food in the comb. We decided to add the fondant and a grease patty just to be safe.

    Spacer or shim allows for block of fondant
    Spacer or shim allows for block of fondant and grease patty
    Honeybees brining in a yellow pollen in late winter
    Honeybees brining in a yellow pollen in late winter

    We watched the bees, and despite us cleaning out the dead bees from the bottom board, they continued to use the inner cover entrance.

    Dead bees pile up at the bottom of the hive during winter
    Dead bees pile up at the bottom of the hive during winter

    A few days later we decided, since it had been so warm, to put a sugar feeder on top of the hive, with a 1:1 sugar syrup ( 1 lb of sugar to each 1 pint of water ). We pulled off the polystyrene and inner covers to find they bees had barely touched the fondant. They had been using the grease patty.

    We left the fondant and spacer on, then put on the sugar feeder. We saw the feeder had warped, and there were gaps along the edge that mates with the hive body. The honeybees were trying to get into the hive between the feeder and the spacer. ( When adding a sugar feeder to the top of the hive, you do not use the inner cover, as it would allow bees to get into the syrup reservoir and drown. )

    Bees trying to enter hive under warped feeder
    Bees trying to enter hive under warped feeder

    Remembering in some of my beekeeping books, people do drill entrances into upper hive bodies, i opted to drill a hole in the spacer to allow the bees to enter the top of the hive. I also screwed the warped edges of the feeder into the spacer.

    With no inner cover on the hive, I made an upper entrance.
    With no inner cover on the hive, I made an upper entrance.

    All the time we were at the hive, the bees were bringing in pollen, which i was suprised by. I’m thinking it was probably maple tree pollen and some other early flowering plant that was a nice yellow color, perhaps pussy willows.

    Each hive got a gallon of sugar syrup, as well as leaving the fondant on the hive. This week I will probably remove the fondant and top up the sugar syrup.

    What have your experiences been with late winter beekeeping? Please let us know below:

  • The Allison House Weather Station Update

    The Allison House Weather Station Update

    A while back on GardenFork Radio I was saying how much I’d like one of those weather stations that sit on your roof and you can hook up to the internet.

    Then Allison House, a weather data company, sent us one. ( I like how this works )

    The Allison House Weather Station
    The Allison House Weather Station

    We assembled the weather station, which is an Oregon Scientific WMR968. It has an anenometer, wind direction, rainfall, temperature, humidity and barometric pressure sensors, which are all solar powered and connected via wireless to the central display in our house.

    here is the inside of the rain guage. always wondered how that worked
    here is the inside of the rain guage. always wondered how that worked

    This display is then connected via USB to our internet router, and bang – our super microclimate weather data in our yard is on the web and on my iPhone. We use WeatherUnderground to post the weather data, this site aggregates weather info from a ton of personal weather stations. You can search by zip code to see if there is a weather station near your. You can use the smartphone version of their site for remote check-ins.

    I installed this in 16F weather. fun.
    I installed this in 16F weather. fun.

    AND the best part is the graphs and historical data is collects. I can go to the site, and see graphs for the past 24 hours, past week, past month, etc. This has been good to have with our bees, as I can tell when the bees have probably been leaving the hive during the late winter, early spring. Its also great for gardening, when we have a few years of data, we can see the average frost date for our yard. One of our neighbors down the hill has a weather station as well, and I can check his now for frost dates , though his date will be earlier than mine, as he is lower in a valley.

    This daily graph tells me the Honey Bees were out in the afternoon. And its interesting to watch the barometric pressure drop.
    This daily graph tells me the Honey Bees were out in the afternoon. And its interesting to watch the barometric pressure drop.
    Temps above 50F means the honey bees are out working
    Temps above 50F means the honey bees are out working

    Hooking up the weather station to the net took a bit of work, it was not plug and play, but not too hard either. The enclosed instructions are good, and there is an active community of users online.

    A big thank you again to Allison House for providing the weather station. You can follow them on Twitter at http://twitter.com/allisonhouse

    Do you have a weather station? Let us know, be cool to compare equipment and uses.

  • The ground is still frozen, time to plant Peas

    The ground is still frozen, time to plant Peas

    The Labradors and us people all love sugar snap peas. Thankfully they are pretty easy to grow. Someone has trained the pups to eat them right off the vine.

    My method of planting peas is simple:

    As soon as I can get a trowel in the raised bed, I plant peas. They will grow. They love cool weather.

    I also throw in some legume inoculant. Some people suggest wetting the seeds and dusting them with the inoculant, but I think spreading a bit on top of the seeds in their hole is just fine.

    In the picture below I am planting them where our tomatoes will be, they’ll both use the same trellis-cage. Peas grow, produce pods, and then burn out pretty quickly, so they will be done before the tomatoes need the wire cage.

    That’s about it for peas, growing them does not require any rocket science. You can plant them as soon as you can dig the soil. An advantage of using raised beds is the raised beds warm up quicker than the surrounding ground. So go plant peas.

    I plant sugar snap peas about an inch deep
    I plant sugar snap peas about an inch deep
    The peas will grow up this tomato cage, then the Labradors will eat them
    The peas will grow up this tomato cage, then the Labradors will eat them
  • Honey bees bringing in pollen in late March

    Honey bees bringing in pollen in late March

    Its was real warm this weekend, and the bees broke cluster a while ago, and this weekend they were out collecting pollen. i think its from Maple Trees.

    bees fondant march 2010 pollen-4

  • Replaced Doorbell

    Replaced Doorbell

    Doorbell repair by Mike

    My doorbell stopped working. While it was nice that I didn’t hear sales people ringing my doorbell, occasionally friends or family would feel ignored.

    A doorbell is a pretty simple circuit. There is a transformer that steps the electricity down from 120 volts to somehwere between 13 – 18 volts. There is a wire going to a momentary switch (doorbell button) and to the doorbell itself. When someone presses the button, the circuit is closed and the bell rings. If it’s not working it can only be one of a few problems. Broken wire, broken button, broken doorbell, broken transformeer, or no power at all!

    Warning!  Even though we should only be seeing low voltages here, locate the breaker or fuse for this circuit and shut it off whenever you will be touching the bare wires. Clearly, if you are testing voltages the circuit should be on, but if you are replacing any of the bits (transformer, doorbell, doorbell button, doorbell wiring) the circuit should be turned off. Even a 12 volt short can cause a fire and you never know, something may have been wrongly connected to a 120 volt line.

    01-Transformer

    Above is a picture of what the transformer looks like. 

    02-Multimeter18v

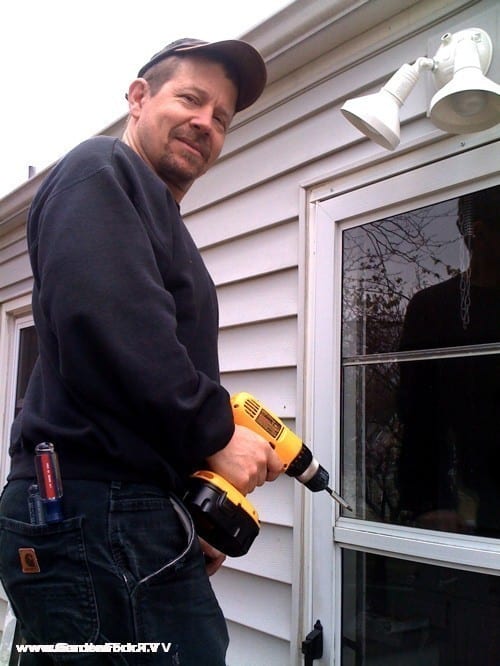
    A quick test with an inexpensive multi-meter shows here that there is 18 volts coming off the transformer. So there is power, and the transformer is OK.

     03-DoorbellButton

     This particular doorbell switch has visible leaf springs that make contact. Inspect the springs to make certain they are not broken. You can see here that the wire was showing a little bit of copper. There is no charring so I don’t think it caused a short, but this should be fixed.

    04-18vatbutton

    Do a quick voltage test here to make sure you’re getting electricity through the circuit. This way you know the wire isn’t broken somewhere in the circuit.

    05-Tape

    I’ve wrapped some fancy blue electrical tape around the wire to cover the small bare spot. There’s no significance to the color of tape, I just happened to have blue handy.

     06-OldBell

    Here is the old doorbell on the wall. Notice where the last person missed with paint. Wasn’t me!

     07-Plunger

    I removed the cover (the cover just snapped off) and unless you make it a habit to dust the inside of your doorbell, this is what you’ll see. Ick. You can see that something isn’t right just by looking at it. The doorbell has a solonoid in it, which is basically an electromagnet. 

    When electricity flows through the magnet, it makes a steel plunger pop out of it. When the electricity is stopped, the spring returns the steel plunger into the solonoid. You can see that something is wrong with the plunger. I checked it closer and it was frozen in place, this is clearly broken and for $18 I can buy a new one.

    08-Flippy

    All you need is a screwdriver. This is the flippy screwdriver thing Eric and I discussed in the “Pinball is 50v” episode of GardenFork Radio.

    09-6in1

    It’s six tools in one! I can almost dismantle my whole pinball machine with this tool.

    10-open

    Just to be certain that this did not break because of a short. I test the voltage at the coil. If it was showing any voltage, I would know that there is a short in the line and that would have caused my problem. Here there is no voltage so I know the doorbell probably just broke after 15 years of use.

    11-pressed

    I sent my daughter outside to press the button while I was checking the voltage. You can see that it is now registering 13.4 volts, so the circuit is good and I’m certain that this doorbell isn’t working properly. I read the manual on my camera after this blurry picture to figure out what I did wrong. I need to have the little picture of the flower on the LCD when I’m up close like this.

    12-DoorbellINPlace

    Here the new doorbell is in place. I just reused the same screws. One slotted and one phillips. It’s good I had the flippy screwdriver thing. Normally I’m more meticulous about things like this, but I didn’t have a phillips electical box screw handy and I have no slotted drywall screws. Someone will be complaining about me in 15 years.

     13-Done!

    Done! (I have a video of it working but I haven’t figured out how to post that yet!)

  • The latest GardenFork.TV @Ford : an @FordTrucks F150

    The latest GardenFork.TV @Ford : an @FordTrucks F150

    Not sure if I told you this, but I tore the rear end of my 82 Ford F150 off towing Bill’s car out of a ditch, and after that my favorite truck was no longer the same. The shackle brackets were broken, the rear half of the exhaust system was gone… you get the picture.

    So I picked up a 93 Ford F150, in black of course. I drove it to work in the city, and already got a parking ticket. Thank You New York City.

    eric 93 F150

  • How to make yogurt : more info and use

    How to make yogurt : more info and use

    Inspired by my friend Brian, I have been making more of my own yogurt. And after making our How To Make your Own Yogurt video, and our Solar Oven Yogurt Maker, i was thinking of how you could use at  hand items to make yogurt.

    Then I saw one of my neighbors had thrown out a styrofoam cooler, the kind that Omaha Steaks uses to ship people their frozen steaks. I took it home and saw that a heating pad blanket fit in it quite well. I cut a notch in the wall to allow for the cord.

    steak cooler as yogurt fermenter
    steak cooler as yogurt fermenter

    It works really well.

    heating pad fits nicely in this
    heating pad fits nicely in this

    AND, I bought some yogurt starter, Yogourmet is the brand, to see if it was any better than just using some leftover store bought yogurt. And it is much better. The yogurt is much firmer, and i think tastes better.

    Yogourmet works better than just using yogurt as starter, i think.
    Yogourmet works better than just using yogurt as starter, i think.

    Wikipedia tells us about the origins of yogurt:

    There is evidence of cultured milk products being produced as food for at least 4,500 years. The earliest yoghurts were probably spontaneously fermented by wild bacteria Lactobacillus delbrueckii subsp. bulgaricus native to and named after Bulgaria.

    The oldest writings mentioning yogurt are attributed to Pliny the Elder who remarked that certain nomadic tribes, including the Bulgars, knew how “to thicken the milk into a substance with an agreeable acidity”. The use of yoghurt by medieval Turks is recorded in the books Diwan Lughat al-Turk by Mahmud Kashgari and Kutadgu Bilig by Yusuf Has Hajib written in the 11th century. Both texts mention the word “yoghurt” in different sections and describe its use by nomadic Turks. An early account of a European encounter with yoghurt occurs in French clinical history: Francis I suffered from a severe diarrhea which no French doctor could cure. His ally Suleiman the Magnificent sent a doctor, who allegedly cured the patient with yoghurt.Being grateful, the French king spread around the information about the food which had cured him.

    What are your yogurt recipes and tips? how do you make yogurt? please tell us below:

  • I washed my USB Flash Drive, now what?

    I washed my USB Flash Drive, now what?

    I am famous for this kind of thing. Its always when I hear the clunk of some foreign object bouncing around the clothes dryer that I realize I’ve done something un-smart.

    This time I discovered the problem early. I learned I had put my two best largest USB Flash Thumb drives in the washing machine when I was emptying the washer.

    I was not pleased. One of the drives is a 16 gig flash drive that I use to transport GF video files around. And there might be a bunch of photos from our Canon EOS Rebel that don’t exist anywhere else on that drive.

    After getting over the initial ‘Doh!’ moment, I remembered a NY Times article on what do to for electronic gadget emergencies. The article suggested putting the flash drives in a bowl and covering them with rice. ( I can’t find the article online right now, so no link )

    So I did this. I used brown rice, as that’s what we had in the cabinet. Don’t cook and/or eat this rice afterward.

    Rice will absorb water out of electronic devices
    Rice will absorb water out of electronic devices

    I let it sit for a few days, and then plugged the drives into a laptop.

    They both turned on. wow.

    Every once in a while the wind tilts in your direction.

    Have any Doh! stories of your own? tell us here:

  • Fireplace Grilled Salmon : Eric’s Recipe

    Fireplace Grilled Salmon : Eric’s Recipe

    Grilled Salmon done with Fireplace Cooking, neat. Fireplace cooking means you don’t have to fire up the stove and your house doesn’t smell like fish or steak the next day. Watch as we grill salmon steaks with this simple recipe .

    Do you cook in your fireplace? Please come tell us about it below!


    Fireplace Grilled Salmon Steak Recipe:

    4 Salmon Steaks, as fresh as possible

    Olive Oil, Salt, Pepper

    Start a fire in the fireplace a few hours before cooking, allow the wood to break down into coals, kinda like charcoal.

    Place your cooking grill over the coals in the fireplace – be careful doing this.

    Allow the grill to heat up and clean the grill with half an onion rubbed over the grill.

    Drizzle olive oil and then salt and pepper to each side of the steaks.

    Place the steaks on the hot grill, and let each side cook about 5 minutes. This time may vary depending on how hot the coals are.

    Flip the fish, and check in a few minutes for done-ness. The flesh will flake easily when its done. Ideally you will take the fish off the grill just before the desired done-ness.

    Please let us know your fireplace cooking recipes here: