Category: Cooking TV

  • Roasted Sweet Potato Wedges Recipe Video

    Roasted Sweet Potato Wedges Recipe Video

    This Roasted Sweet Potato Wedges recipe is one of those overlooked but super easy dishes that makes me realize how simple it is to cook with what’s already in the kitchen. These sweet potatoes are dusted with a bit of cinnamon to give them even more of a earthy warm flavor that offsets their natural sweetness. Watch our recipe video and then tell us your sweet potato recipes in the comments below.

    When I first made this recipe, I added too much cinnamon, so I dialed it back for the recipe. You can add more if you like, but I suggest starting with a small amount. I was surprised at how such a small amount of a spice can overwhelm something like a sweet potato, but it can, as I learned. And I’m always learning.

    The same thing goes for the  honey, less is a lot in this recipe, and too much and it will burn on the potato wedges. I’m repeating myself here, but please try to get local honey, or at least honey that is from the U.S. . Honey can be adulterated, like olive oil. If you don’t have honey, a bit of maple syrup works or brown sugar, or just leave out the sweetener and it will taste great.

    You may want to double this batch, as this recipe makes one sheet of roasted sweet potato wedges, and it depends on who you are feeding as to how much you should make. I like to line my cookie pan with foil, it makes clean up easier, but please recycle the foil, ok? Then we can use it again.

    Roasted Sweet Potato Recipe

    Roasted Sweet Potato Wedges Recipe

    2 large or 3 medium sweet potatoes, washed and skin on

    1-2 tablespoons of olive oil

    1/2 teaspoon salt

    4-5 grinds of black pepper

    1 tablespoon honey

    1/2 teaspoon cinnamon

    Cut the sweet potatoes in half lengthwise, from end to end, so the potatoes will lay flat on a cutting board.

    Cut the sweet potatoes into half circles about 1/4″ thick.

    Put in a bowl large enough toss them in. This bowl is larger than you think.

    Add in the oil, salt, pepper, honey, and cinnamon.

    Use a rubber spatula or similar tool to toss the ingredients together, scraping the sides of the bowl to get the seasonings onto the potatoes.

    Scatter the wedges on a foil covered baking sheet, its OK if the potatoes overlap a bit.

    Turn on the oven to 375F and roast the potatoes for about 45 min.

    They are done with a knife slides into the wedges easily.

    These are best served warm or hot, they aren’t great colder.

    Turn the oven on to 375F

  • Cook With A Pressure Cooker – GF Video

    Cook With A Pressure Cooker – GF Video

    Learn how to cook with a pressure cooker in this GardenFork Cooks video. I cook recipes with a pressure cooker all time in the kitchen. Its perfect for last minute meals where you decide you want beans, but forgot to cook them ahead of time. People claim you can cook foods in 5 minutes, which isn’t exactly true, but its a great kitchen tool.

    One of my favorites is our how to cook with a pressure cooker pork roast recipe video. Its very  popular because its so darn easy. And it makes you look like a genius when you have people over for dinner. Put in the pork, add beans if you like, some seasonings, maybe  you did a dry rub to the pork before hand, and cook.

    Tips when you cook with a pressure cooker:

    • Pay attention to how much liquid you add. Your cooker should have a mark inside the rim showing the maximum liquid level. Don’t go over that. The liquid could expand too much and clog the relief valve.
    • Be sure the gasket and lid are clean after each use, you don’t want any food debris to compromise the seal.
    • Read the directions that come with the cooker. You don’t usually read these, I know, but its important here, OK?
    • If steam coming out of the pressure cooker is louder than a low hiss, turn down the heat.
    • Most pressure cookers have a high pressure and low pressure setting, check the recipe to see which setting you should use.

    Some people  have a fear of cookers, which is understandable, but they are super safe. Modern day cookers have numerous relief systems in place, so cook on.

    I wrote about how to buy a pressure cooker here. I own two cookers, and based this on my experience and what some of the leading food publications recommend.

    Two of my favorite pressure cooker cookbooks are the Cooking Under Pressure series by Lorna Sass, they have great charts in them, plus recipes.

    cook with a pressure cooker

    Watch all our pressure cooker recipe videos here.

  • Batter Bread Sandwich Loaf Recipe – GF Video

    Batter Bread Sandwich Loaf Recipe – GF Video

    This batter bread sandwich loaf recipe is similar to the no knead bread recipe we have done, but its even easier. Plus it makes a sandwich loaf bread, which is a lot easier to use for making sandwiches than artisan bread.

    batter-bread-sandwich-loaf-recipe-2


    batter bread sandwich loaf recipe

    Batter Breads have been around for a long time, but recent recipes by Fleischmann’s and Cooks Illustrated have offered some improvements, our recipe is adapted from them.

    1 1/2 cups bread flour   9 ozs  260 grams

    3/4 cup whole wheat flour   3.4 ozs  96 grams

    1 packet or 2 1/4 teaspoons active dry yeast

    1 1/4 cups hot water 10 ozs  283 grams

    1 tablespoon honey

    2 tablespoons melted butter

    1 teaspoon salt

    2 tablespoons hot water

    1 egg optional egg wash before baking

    2 tablespoons wheat germ or bran optional

    Add the bread flour, whole wheat flour and yeast into a standing mixer with a dough mixer blade attached. Put in the wheat germ/bran if you want to use it.

    Mix in standing mixer for one minute on low speed.

    Add in the melted butter,  honey, and 1 1/4 cups hot water, not boiling, just 100 – 120F hot, OK?

    Then mix the batter for 4 minutes on medium speed. If the dough sticks to the sides too much, stop halfway through and scrape down the sides.

    Be careful about putting the spatula in the mixer bowl while it is running. Learn from me.

    Detach the dough blade from the mixer and remove it and the bowl from the mixer. Scrape the dough off the dough blade, but let the blade sit in the dough in the bowl.

    Cover the bowl and blade with a towel. Let rise for 20 minutes in a warm place. I use the oven that I have preheated for a few minutes. A warm furnace room, or a hot sunny window works also.

    Put the mixer bowl back on the mixer. Dissolve the salt into the 2 tablespoons of warm water then add to bowl of dough, mix on low speed to incorporate.

    Use vegetable oil spray to coat a 8 1/2  x 4  1/2  loaf pan. This is the more narrow kind of loaf pan, it will give a higher rise.

    Pour the bread dough into the loaf pan.

    Cover the pan with plastic wrap that has been sprayed with oil. When the dough has risen to just below the lip of the loaf pan, remove the plastic wrap and let the dough rise to just above the rim of the loaf pan.

    Optional: you can glaze the dough with an egg wash at this point. Scramble the one egg and apply lightly.

    Bake in a 375F oven  for about 45 minutes, when the internal temp of the loaf is about 208 – 210 degrees, its done.

    After putting on a cooling rack, unwrap the end of a stick of butter and rub it over the top of the loaf to give it a sheen and more flavor.

  • 5 No Knead Bread Recipe Tips – GF Cooks Video

    5 No Knead Bread Recipe Tips – GF Cooks Video

    Make better bread with these 5 no knead bread recipe tips I’ve learned from baking this great bread. The original recipe is great, but with a few baking tips, its even better. Below are links to our other no knead bread videos. Watch our tips video here and then tell us your bread baking tips in the comments below.


    The basic no knead bread recipe can be changed up several ways, we did a steel cut oatmeal no knead recipe video here, that adds a neat oat flavor to the bread.
    First a big thank you to Jim Lahey, and his book, My Bread, The No Knead Method. He also has a pizza book, My Pizza.

    Using parchment paper has been a lightbulb for me. I’m not sure where I learned it from, but I used to flop the dough in to the dutch oven with some unfortunate results. Now I simply lower the bread dough in to the hot dutch oven. Its OK that the parchment sticks out of the lid, not a problem.

    5 no knead bread recipe tips

    Using a digital scale to measure your ingredients makes a huge difference! Yes, I am a convert to this method, as you can tell. The drag and scoop method makes for inaccurate measuring. Why does the bakery bread taste better? They use a scale to measure their ingredients.

    We love our dutch oven, but you don’t absolutely need one to bake the no knead bread recipe. Any oven proof bowl that has a lid that wont melt will work. Corning Ware kind of stuff is what we are talking about here big casseroles, etc.

    You can make cool designs in your bread, we use scissors, but you can use some serrated knives, and this fancy bread baking tool called a Lame. Dust the top of the dough before you cut into it. What kind of flour do you dust your bread with? I’d like to read about what people are using.

    Yes, you can make a whole wheat no knead bread, but from what I’ve found, the 100% whole wheat breads don’t come out great. We usually add up to 30% whole wheat to bread flour. Works pretty good.

  • Oatmeal No Knead Bread Recipe – GF Video

    Oatmeal No Knead Bread Recipe – GF Video

    I love the simplicity and versatility of the no knead bread recipe, this no knead bread variation being a great example of taking the basic recipe, adding a few tweaks, and baking an artisan bread that rivals those in the bakery.

    I don’t often use steel cut oats for anything, but I saw this recipe and I thought, wow that’s a great reason to buy some steel cut oats. After we made this recipe, I cooked the steel cut oats in the pressure cooker, making a nutty oatmeal that was a lot of fun.

    This recipe is based on one on the Breadtopia website, a great source for all sorts of bread baking info and tools. Go check them out, the site is run by a web food guy named Eric, so you know its good.

    But back to the no knead bread recipe. I’ve become a big convert to using a digital scale for measuring out the flour for recipes. I’ve learned that it makes a big difference and I talk about it in this video: Five No Knead Bread Tips
    Pay attention when you’re toasting the steel cut oats on your stovetop. Use a nonstick pan or cast-iron pan. You want to heat this up, but stay right there while it’s toasting. I burnt the first batch of these because I walked away, the oats go from toasted to burnt in very short order. So watch out for that; once again, learn for me.
    oatmeal no knead bread recipe

    But once you get those toasted oats into the bread dough, it’s a great thing. It adds a neat texture and flavor. It’s subtle, it’s not like super oatmeal bread ,but I think it’s just enough. I also added whole wheat flour – I’m trying to eat more whole grains rather than refined flour. I think it works really well here. you can watch our other no knead bread videos here

    Let me know your thoughts, have you made the artisan bread recipes or the no knead bread?

    Oatmeal  No Knead Bread Recipe

    10 ozs  (2 1/4 cups) bread flour

    3 oz (3/4 cups) whole wheat flour

    3 oz (1/2 cup) steel cut oats

    1 tablespoon coarse salt

    heaping 1/4 teaspoon active dry yeast

    1 5/8 cups water filtered preferably


    Toast the oats in a pan on the stove, you want them toasted, not burnt.

    Add the flour, salt, yeast, and oats in a large bowl and stir together

    Pour in the water, (warm water is best, I think) and mix.

    Cover the bowl with plastic wrap and place in a warm area overnight. 12-18 hours.

    Flour a board or counter and shape the risen dough into a ball. Turn the ball into itself several times as shown in the video.

    Place the dough on a piece of parchment paper larger than your dutch oven.

    Place this in a bowl and cover with a towel, let rise for about an hour.

    Preheat the oven and dutch oven at 500F for 30 minutes.

    Dust the dough with flour if you like, and cut a design into the top, as shown in the video.

    Use the parchment paper to lift the dough out of the bowl, and place in the hot dutch oven.

    Cover and bake for 30 minutes at 450F. Take off the lid and bake an additional 15-2o minutes.

    You want the crust browned and the internal temperature to be about 190F.

    Remove from the dutch oven and cool on a wire rack. Do not cut it right away, let it cool.


  • Microwave Polenta Recipe – GF Video

    Microwave Polenta Recipe – GF Video

    Our fav way to cook polenta is with a pressure cooker, but here we show a microwave polenta recipe and a stove top polenta recipe. I call these kitchen hacks, since we are showing you how to get a step ahead in the kitchen and cook polenta faster than you can using traditional methods.


    Microwave ovens are not all the same, so pay attention the first time you do this. I overflowed the dish in our first test, not a lot of fun to clean this one up!

    microwave polenta recipe

    Polenta becomes transcendent when you add in some butter and Parmesan or Pecorino cheese.

    microwave polenta recipe
    Our first attempt at a Microwave Polenta Recipe

    Microwave Polenta Recipe

    3 1/2 cups of water

    1/8 teaspoon baking soda

    1 cup of polenta or corn grits

    Mix the polenta and baking soda into the water in a large microwave proof bowl.

    Cover with plastic wrap and put in the microwave on high for 5 minutes.

    Remove the plastic and stir the polenta, be careful, the polenta will be real hot.

    Cook for another 5-6  minutes at 75% power, keep an eye on it to make sure it doesn’t boil over.

    Remove from the microwave and stir, let sit for 5 minutes.

    Add salt and real good cheese and eat.

    Watch our grilled polenta recipe and pressure cooker polenta recipe video here:

    microwave polenta recipe

  • Pressure Cooker Polenta Recipe – GF Video

    Pressure Cooker Polenta Recipe – GF Video

    Here’s our pressure cooker polenta recipe, and it couldn’t be easier, but that’s why we love the pressure cooker.


    Polenta doesn’t have to be hard to cook. So many people think to make polenta you have to stand over the stove and constantly stir the polenta in a sauce pan for hours and that’s not true. You can use your pressure cooker to make polenta quickly and easily and you don’t have to stir it.

    Our pressure cooker polenta recipe is based on one from Lorna Sass who has several pressure cooker cookbooks I have her Great Vegetarian Cooking Under Pressure book and I like it

    This is a great example of how a pressure cooker can make things go much faster in the kitchen and they taste great of course polenta always taste really good with butter and cheese I especially like pecorino reminder cheese with the polenta

    pressure cooker polenta recipe

    I usually make a double batch of polenta because I like to take the leftover polenta and pour it into an oiled loaf pan to make grilled polenta slices the next day would you can fry up for breakfast lunch or dinner they taste great anytime do you have a favorite polenta recipe or do you use polenta in a dish that you make I like to hear about that in the comments below.

    Watch our Microwave and Stovetop Polenta Recipe Video here:

    polenta recipe video

    Grilled Polenta goes great with a simple tomato sauce, vegetables, or Braised Short Ribs.

    pressure cooker polenta recipe


    Pressure Cooker Polenta Recipe

    Quick polenta recipe that doesn’t require constant stirring that uses a pressure cooker. I’ve cooked polenta many ways and i think this pressure cooker recipe is the best and easiest way to do it.

    Ingredients

    • 1 cup
      Polenta or Corn Grits
    • 4 1/2 cups
      water
    • 1 teaspoon
      salt

    Cooking Directions

    1. Take your polenta, also called corn grits and put in the pressure cooker
    2. Add the 4 1/2 cups of water and salt.
    3. Close the pressure cooker and lock the lid.
    4. Bring up to high pressure, and then cook for 5 minutes.
    5. Take the pressure cooker off the heat and allow to cool for 10-15 minutes, allowing for a natural release
    6. When you open the pressure cooker, the polenta needs to be mixed together, best tool for that is a whisk.
    7. If you want to make polenta slices, pour the cooked polenta into an oiled loaf pan and cool overnight.

  • Coconut Banana Bread Recipe – GF Cooks Video

    Coconut Banana Bread Recipe – GF Cooks Video

    Not your bland banana bread recipe, this one has a few twists to make banana bread stand on its own. Too often, banana bread is this dense wet slice of cake that is overpriced in the artisanal cafe. Not this one. Watch the video, the recipe is below.

    Banana bread brings up those memories of being raised in the Midwest. You came home from school and your mom had made banana bread. You carved off a big slice and life was good.
    My aim here was to make a banana bread that wasn’t like that kind of dense stuff that they sell in coffee shops now. I put in a couple of twists that I’ve been thinking about for a while: first I added whole wheat flour, which I think adds a different flavor definitely in a little bit better structure I think. And I added coconut which I happen to love – if you’re not a big coconut band that’s okay this banana bread recipe taste great without coconut.

    coconut banana bread recipe www.GardenFork.tv

    Source your bananas from the discount rack at your grocery store. Somewhere in the produce section in the far corner is probably a rack of vegetables and fruits that have been discounted because they might have some dents or they might be a little brown or have some spots on them, but they’re perfectly edible. And they’re super cheap! I got this bunch of bananas for $.69 which is a beautiful thing.

    coconut banana bread recipe www.GardenFork.tv
    If you want a higher loaf you should use a slightly smaller loaf pan. There is a standard loaf pan which is 9″ x 5″, but there’s also one that they sell that just slightly narrower 8.5″ x 4.5″ (buy here) and that’ll make this pop up a bit more. You could also amp up the baking soda, but the careful if you add too much baking soda it starts to have kind of a chemical taste to it.
    What are your banana bread recipe favorites any suggestions you have any thoughts about the recipe or just your memories of banana bread let me know in the comments below thanks.

    Coconut Banana Bread Recipe

    4 super ripe bananas – ok to use less than super ripe

    1/2 cup Whole Wheat Flour

    1 cup all purpose flour

    1 1/2 tsp baking soda

    1/4 teaspoon salt

    1/2 cup sugar

    1 cup sweetened coconut

    1/2 cup (1 stick) melted butter

    1 egg, scrambled

    1/4 cup milk

    Mix the dry ingredients together in a bowl.

    Add in the wet ingredients, be careful with the butter, its better if its cool, don’t want to burn anyone.

    Pour into a buttered or oiled loaf pan, I like butter better for this one.

    Bake in a 350F oven for about an hour, the sides may smell toasted before the center is done.

  • Lentils Recipe with Carrots and Coriander Video

    Lentils Recipe with Carrots and Coriander Video

    Here’s a lentils recipe we make often when its cold. I call it wow winter comfort food. I don’t remember the first time I had lentils but I’m pretty sure it was probably a can of Progresso lentil soup, which is not the worst thing, but again it wasn’t the greatest thing. But now you can make the greatest thing: a lentils recipe with carrots and coriander.

    I’m not a vegetarian, but this is a vegetarian and vegan recipe, and that doesn’t mean it doesn’t tast great. It tastes more than great. Wow winter comfort food. I’m pretty sure I read about the addition of coriander seeds first in the NY Times, Martha Rose Shulman has written about lentils there.

    There are many different kinds of lentils, for this recipe, I like to use the Goya Pardina lentils. You could also use French green lentils or just a regular round brown lentils. The brown lentils tend to break apart, but then, that’s what that kind of lentil is supposed to do. I recently went to an Indian food market, and there were shelves with all kinds of lentils. They are called Dal by the way, so don’t ask for lentils, just look for Dal, OK?

    Lentils Recipe

    Canada, interestingly enough, produces the most lentils in the world. India is the second biggest grower, understandably. Lentils are a great protein source and has good fiber, besides tasking great. Green lentils have more fiber than red lentils, FYI, according to Wikipedia.

    The secret to this dish is coriander seed coriander powder or ground coriander you want coriander seed would you contact might have to search all of it if you have a Indian grocery store or a light room foods grocery store coriander seed little later

    Coriander seeds are like little flavor bombs. This is one of those simple recipes where the sum is greater than the ingredients.

    Lentils Recipe with Carrots and Coriander

    Lentils Recipe with Carrots and Coriander Video
    Recipe Type: Vegetarian
    Prep time:
    Cook time:
    Total time:
    Serves: [url:1][img:1]
    Healthy lentils make a great weekday dinner.
    Ingredients
    • 1 cup pardino or green lentils, if possible
    • One medium onion, chopped as you like, not super fine.
    • 1 heaping tablespoon coriander seeds
    • One lb bag of carrots chopped into 1-2″ pieces
    Instructions
    1. Pour a few glugs of vegetable oil into a medium pot, you want to coat the bottom of the pot, and not a thin coat either.
    2. Drop in the chopped onions when the oil is hot.
    3. After about 5 minutes, add in the coriander
    4. Brown the onions until they are clear and the edges are getting the burn brown look to them.
    5. At the same time, in a medium small saucepan, bring 2 1/4 cups of water to a boil.
    6. Rinse the lentils, and when the water is boiling, add in the lentils.
    7. Set the lentils to simmer covered.
    8. When the onions are cooked down to your liking, add in the lentils and chopped carrots, and cover the pot and simmer for 20 minutes.
    9. Take off the lid of the pot, and allow the liquid to cook down a bit.
    10. Check the lentils, they should not be crunchy.
    11. Add salt, mustard, and vinegar to your taste.

    Lentils Recipe With Carrots


  • Pressure Cooker Short Ribs Recipe – GF Video

    Pressure Cooker Short Ribs Recipe – GF Video


    This pressure cooker short ribs recipe really shows just how great a pressure cooker is. Pressure cookers are great for easy cooking and last-minute cooking – if you decide you want some short ribs at the last minute you can cook them up fairly quickly with a pressure cooker. If you were to cook short ribs in the oven or on your cook-top it would take quite a while. But with the pressure cooker, you toss your ingredients in the cooker close it up, bring it up to temperature, cook it happen hour and you’re done. And that my friends is amazing!
    For this pressure cooker short ribs recipe, I like bone-in short ribs you can also get boneless short ribs those short ribs will cook much faster in the pressure cooker but I think the bone adds flavor so that’s why I use bone in short ribs.

    pressure cooker short ribs recipe
    sear the short ribs, don’t cook them

    You want to make sure to cut big chunks of carrot. If you make the carrot pieces small I think they’re going to fall apart in the pressure cooker. They’re in there for half an hour if they are too small the pieces breakdown, maybe even like turn to mush. Which would be a bad thing.
    For this pressure cooker short ribs recipe I use half red wine and half water. I think if you use all wine for the braise it’s just too strong I use a medium bodied Malbec box wine. Good box wine is just fine. K?
    When cooking food in the pressure cooker, it’s actually better to under estimate the cooking time than to over estimate. If you overcook the ribs, they’re not as good. If you undercook them you can always close the lid back up and bring them up to pressure and cook them for a few more minutes. When you open the lid, some of the meat will be falling off the bone, some will still be sticking to the bone, but either way your friends are going to love this. My friends did. Let me know what you think in the comments below, do you make short ribs or do you have some good pressure cooker tips and recipes?

    Here is my pressure cooker review and purchase suggestions post.

    Pressure Cooker Short Ribs Recipe

    4 large pieces of bone-in short ribs

    1 medium – large sweet onion chopped coarsely

    1 lb carrots, chopped into 1″+ chunks

    1 cup medium body red wine, like a Malbec or Cote Du Rhone

    Sear the large sides of the meat in a few glugs of vegetable oil in the pressure cooker without the lid on. Just brown the meat, don’t cook it.

    When all the meat is browned and in the pot, add in the carrots and onions, and pour in 1 cup of wine and 1 cup of water.

    Attach the pressure cooker lid and lock it according to the manufacturers instructions.

    Cook on high pressure for 30 minutes.

    Turn off heat and let pressure cooker cool down for 10 minutes. Release any remaining steam per instructions and open the lid away from you.

    Gently pour the meat and vegetables into a colander and collect the braising liquid in a bowl. Use a fat separator or a glass container to pour off most of the fat in the braising liquid.

    Put the meat and veg into a serving bowl and pour the braise liquid over it. You could thicken the liquid if you wish with cornstarch.

  • Best Cast Iron Seasoning Instructions – GF Video

    Best Cast Iron Seasoning Instructions – GF Video

    The best cast iron seasoning instructions, hands down. First watch the video, then read more about our easy step by step process to restore cast iron.

    At the end of this article are links to how to remove rust from cast iron and how to remove the seasoning from cast iron, where to buy cast iron, and cast iron videos.

    So you have a brand-new cast iron pan you just bought or you have an older pan that you just strip the seasoning off of. I ruined the seasoning of one of my pans awhile back, and is one of the reasons I created this cast iron seasoning and care video series. While we show a skillet, this process works for how to season a cast iron dutch oven or griddle as well.

    Our cast iron seasoning instructions are based on a blog post by Sheryl Canter, who did a lot of research into this and saved us all from having to do that same research. The secret to cast iron seasoning is you want use an oil that is called a drying oil. When drying oils are applied to a surface like cast iron and heated, the oil goes through what’s called polymerization. The best edible drying oil is Flax oil. You have to buy this in the health food section of a food store and it has to be kept refrigerated, as it can go rancid fairly quickly. Flax oil is the food grade version of linseed oil,  I would not suggest you use linseed oil to season your cast iron pan.

    But a more affordable and easier to find oil that works well is Sunflower Oil. I have found its great. And if you can’t find any of these oils, regular old vegetable oil or Crisco does just fine.

    Best cast iron seasoning instructions

    For this cast iron seasoning method, the more oil application and heating cycles you do, the better the seasoning. Our cast iron seasoning instructions are based on Sheryl’s, I modified it a bit. This process is for new pans, or pans that have had all the previous seasoning removed, watch our video here for how to remove cast iron seasoning.

    Cast Iron Seasoning Instructions

    1. On the stove top, heat up the cast iron pan. This makes sure the pan is dry and opens up the pores of the metal a bit.
    2. Add in a tablespoon or two of oil into the pan. Use a paper towel to coat the whole pan, inside and out, with the flax oil.
    3. Grab a new paper towel, and wipe out excess oil. You only want a thin film of flax oil in the pan. No drips or globs of oil.
    4. Turn the oven to 500F and place the pan – you can do more than one, stack them if you want- into the oven.
    5. Heat for one hour, turn off the oven, allow the pan to cool.

    Repeat the oil coating and heating 2-3-4-6 times. Whatever works for you.
    The more you do this initial seasoning, the better the pan will be.

    cast-iron-seasoning-instructions-6
    The outdoor gas grill is great for cast iron seasoning.

    The cast iron seasoning process puts out a bit of smoke, so I’d suggest using your outdoor gas grill. Turn the grill burners on high, close the lid to heat it up, put in the pans. My gas grill will not get to 500F, but it got close, and that worked well for me.

    I oiled and heated one of my pans 4 times and it looked great, more and it is even better.

    I think new cast iron is just as good as old cast iron, but there are many arguments about that. You can get good cast iron on amazon here. This post may contain affiliate links which won’t change your price but I earn a commission from. Thx!

    cast-iron-seasoning-instructions-7

    Soap On Cast Iron? Video               Remove Old Seasoning From Cast Iron Video

    cast-iron-seasoning-instructions-9

    Remove Rust From Cast Iron Video       Cast Iron Skillet Cornbread Recipe Video

  • Rugelach Recipe From My Grandmother – GF Video

    Rugelach Recipe From My Grandmother – GF Video

    Our rugelach recipe is based on the on my Grandmother and Mom for the Christmas holiday. We also called Rugelach ‘roll-ups’ not sure why, maybe it was easier to say. But, Rugelachs are easy to make, and with Eric’s recipe for rugelach, you can too. Our family’s version of rugelach used the classic nut – sugar mix, but we also used jam or jelly. Its important not to use too much jam or jelly; when you bake the rugelach, some of the jam may seep out and burn you cookie sheet. Not a good thing.

    rugelach recipeThere are some people that say rugelach and croissants are related but after reading this Wikipedia entry, I don’t think so. Rugelach is a much older treat and croissants only came about in the 19 century. Nonetheless rugelach are found in a lot of different cultures and in a lot of different countries, especially in Eastern Europe. Take some flour, a little sugar, add some nuts and something sweet, roll it up and bake it and you got this excellent dessert.

    Here’s my modern take on rugelach I add cream cheese to the pie dough and it works out really well. The dough might be a little wet, so use a little less water. You can always add a little more as you go along. If you find the dough is too wet after comes out of the fridge, you can add a little bit of flour to soak up the moisture.

    Eric’s Rugelach Recipe

    2 cups all purpose flour

    2 sticks butter – cold – cut into 1/2 cubes

    3 teaspoons sugar

    8 ounces cream cheese – cut into 1 inch blocks

    1 teaspoon salt

    2 cups chopped walnuts

    1/2 cup brown sugar

    1 teaspoon cinnamon

    lemon zest – optional

    Preheat oven to 350F

    In a food processor, pulse the flour and butter together until the flour coats the butter and the mix starts to look like large cornmeal.

    Add in the cream cheese and pulse to mix it all together, it should start to form small marbles, and also just some fine powder as well. ( it never looks like it does on the food TV shows, don’t worry )

    Put the flour mixture into a large bowl, and start to add small amounts of ice water, about 2 tablespoons at a time. Mix the water into the flour until you get a dough that is wet, but dry enough to handle.

    Shape the dough into a big disc, wrap in plastic wrap, and put in the freezer for about 10 minutes, or the fridge for 30 minutes. You can also leave the dough in the fridge until the next day if you want.

    Mix the walnuts with the brown sugar and cinnamon. You can also add lemon zest to the nut mix.

    On a floured counter or plastic wrap, or whatever you like to use for dough, try to shape the dough into a big circle, like a pizza. If it isn’t perfect, don’t worry, use a pastry scraper to cut out a rough circle, save the extra pieces.

    Pour the nut mixture onto the circle of dough

    Cut pizza slices into the dough. the outside of the slice should be 1.5 – 2″ wide.

    Roll up the slices so they look kinda like croissants.

    Place on a greased baking sheet, bake at 350F for about 30 min. The crust should be slightly golden, you can bake them more if you like, just don’t burn them.

  • Soap On Cast Iron and Restoring Cast Iron Videos

    Soap On Cast Iron and Restoring Cast Iron Videos

    I’ll be posting a more thorough how to season cast iron series here soon, with more photos and information, but I wanted to get these up on the site for you all. And the last video in this list here is our excellent cast iron cornbread, check it out.

    remove-cast-iron-rust-pin-play
    Watch our how to remove rust from cast iron video here.

    cast-iron-cornbread-recipe-video-2

    Watch our Cast Iron Cornbread Recipe Video here.

  • Cast Iron Cornbread Recipe Video

    Cast Iron Cornbread Recipe Video

    Here’s my go to cast iron corn bread recipe for most weekends at the house. Cornbread goes with so many of the dishes we make, I have the ingredients in my head.

    Melt fat, mix dry, add wet, pour into pan.
    cast-iron-cornbread-recipe
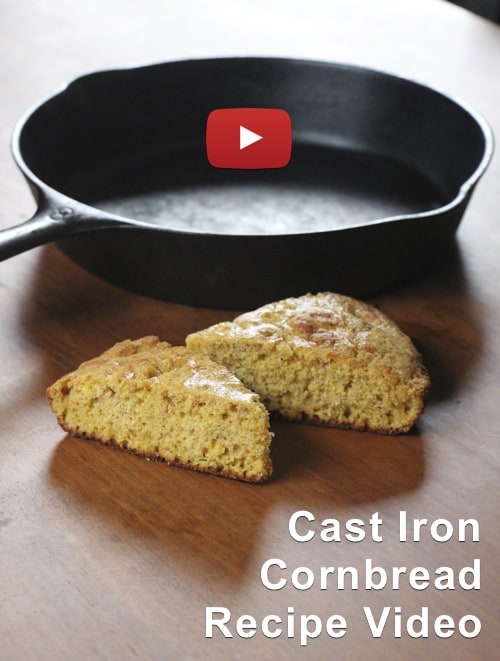
I love cornbread. I’m not sure when the first time I ever had cornbread was, but I’m pretty sure it was probably at the Friday night fish fry when we lived in Wisconsin.

    We would go to Etzel’s Country Inn and sit in what looked like someone’s basement recreation room. There was a bar next-door, and we would have fried perch, french fries, and corn bread. All this and a polka band playing with accordion music.
    And it was that his fish fry that the epiphany that I want to learn how to play the accordion. We see how well that turned out.
    But what I love about this cast iron cornbread recipe is it’s easy super simple. You literally throw the oil in the pan, put the pan in the oven to heat up. You mix the dry ingredients dump, the wet ingredients and mix it all together. Pour in a hot pan, if it sizzles be careful. I’ve never had it spit at me but you got to becareful these days or else someone’s gonna get mad at you you know.
    Drop it in your oven half an hour later, boom: delicious cornbread.
    In this recipe I use a bacon drippings. You don’t have to do that if you don’t want to, it does give it a neat taste, but you could also use butter or you could use a vegetable oil. Really what ever makes you happy go do it. Okay?
    Full disclosure: I am a northerner and I like cornbread that’s a little sweeter maybe than my southern friends. I know I like it sweeter than my southern friends because when I serve them cornbread there’s always a raised eyebrow that I got from them.

    If you want to buy a cast-iron skillet here’s a link.

    See our how to season cast-iron videos as well.

    Here is our Jiffy cornbread recipe hack video.

    Eric’s Cast Iron Cornbread Recipe

    4 tablespoons of bacon drippings, veg oil, or butter
    1 1/2 cup cornmeal, medium or coarse ground
    1/2 cup whole wheat flour
    1/2 cup sugar, less if you like.
    1 1/2 teaspoons baking powder
    1 teaspoon salt
    1 cup milk
    2 eggs

    You can also use a glass or metal pan for this. I would opt for the glass pan if i didn’t have any cast iron.
    Fire up the oven to 375 with the cast iron pan in it.
    After assembling your ingredients, pull out the pan.
    Drop the oil into the cast iron pan, and put back into the oven.
    Mix together the dry ingredients using a fork or similar tool.
    Add the two eggs into the milk and scramble them. Don’t over-scramble, K?
    When the cast iron pan has melted the oil, pull it out, and place on a rack, as it will be hot.
    Pour the batter into the pan. The oil will puddle up, that’s ok.
    Bake for 30 minutes, test with a clean knife for done-ness.

  • Pressure Cooker Braised Pork with White Beans and Peas Video

    Pressure Cooker Braised Pork with White Beans and Peas Video

    I love cooking with my pressure cooker and this braised pork recipe what white beans is to me the quintessential fall and winter recipe.


    Cut up some pork, with some dried beans, add onions, some herbs, in for the pressure cooker 30 minutes later you’re done. Isn’t that amazing?
    I could probably eat white beans every day all winter. They just have this kind of magic quality and you really haven’t done anything. Maybe you added some onions and garlic, some olive oil – just a little bit of something and boom amazing. What I really like to do is save with the cheese rinds from Romano and Parmesan cheese, and when I’m cooking white beans, I throw them in. I chopped up the cheese rinds into 1 inch chunks, and throw them in while I’m cooking the beans. The rinds gives off a magic flavor quality which I love.

    This pressure cooker recipe works really well for this recipe. If you wanted to go a little faster you could add in frozen carrots at the end of the dish  instead of chopping up carrots in the beginning. Just one little cheat that might work and make it a little faster for you. I posted about pressure cooker reviews and a really good pressure cooker cookbook I like here.

    Pressure Cooker Braised Pork with White Beans and Peas Recipe

    This is for your average 6 quart pressure cooker, if you have a larger pressure cooker you can increase the dried white beans to 1 pound.

    2-3 pound boneless pork shoulder or pork butt, or a pork shoulder you have deboned. Cut into 1″ or so cubes. Cut off large pieces of fat.

    8 ounces of dried white beans, Northern, Cannenelli, or whatever you have

    2 Medium Onions, or one large one chopped into 1/2″ pieces

    6-8 cloves of chopped garlic  depending on how big the cloves are

    2 tablespoons Italian Seasoning herb mix, or Herbs de Provence herb mix

    4 bay leaves

    1 cup white wine  dry wine is better, I think

    3 cups chicken broth  you can use beef broth if you want a bigger flavor

    2 lbs of carrots chopped into 1″ lengths

    16 ounce bag of frozen peas.

    Rinse the white beans, put in a bowl and cover with hot water, add in 1 tablespoon of salt and let sit for an hour or longer.

    Heat a glug of oil in a skillet and add in the chopped onions and chopped garlic, you want them to start to brown.

    Heat a glug of oil in the pressure cooker and brown the cubed pork shoulder. You don’t want to cook the meat, just brown it.

    When the onions-garlic is browned, put them in with the meat. Pour some white wine into the onion pan, deglaze the bottom, and pour this into the pressure cooker with the meat and onions. Add in white wine to 1 cup or so.

    Add in the carrots to the pressure cooker.

    Drain the beans in the salt brine – do not rinse them – and add to the pressure cooker.

    Pour in the 3 cups of broth.

    Drop in the herbs. I go kinda heavy on herbs, follow your nose…

    Important: follow your model’s instructions on how full you can fill the pressure cooker, most limit it to 2/3 or 3/4 full. You may have to hold back on some of the beans or carrots.

    Close up the pressure cooker and bring to high pressure, lower the heat and cook at high pressure for 30 minutes. Let it sit for 10-15 minutes and then quick release any residual steam.

    Drop in the bag of frozen peas, stir into the mix.

    If you have any cheese rinds from Romano or Parmesan, you could cut these into big chunks and drop them in. Carve off the hard edge or wax rinds themselves, as they will dissolve.

    If you want make this a bit faster, omit the chopped carrots and when the pork is done, drop in a bag of frozen sliced carrots when you put in the frozen peas.

  • Oyster Mushroom Hunting – GF Video

    Oyster Mushroom Hunting – GF Video

    Here’s a mushroom hunting video about some really amazing oyster mushrooms we found growing along the side of the road right near our house

    A few things to keep in mind when you’re going mushroom hunting:

    • bring along several identification books we like a couple that we listed at the end of the video here
    • learn from someone who already knows what they’re doing take a class or ask if you can tagalong with someone who is a mushroom expert
    • Join your local mycological society, in other words your local mushroom group. You can learn a lot from these people and they might even take you long to show you some really cool spots to go mushroom hunting.

    When you find some mushrooms you want to harvest, don’t take all of them. Leave one third of the mushrooms there so the mushrooms can propagate they will release their spores and they will grow more mushrooms that you would go in harvest.
    After a while you’ll be able to recognize some of the common edible mushrooms in your area but bring along several mushroom identification books anyway. I really like the Audubon guide and there are also several regional guides. We  have a few for the Northeast United States or New England listed those below.

    Avoid mushrooms that have slugs or bugs in them, yes they are a protein, but many don’t taste that great. You can wash mushrooms, but they usually only need to  be brushed off. You can use a towel, I’ve seen mushroom brushes that look like a whisk broom/porcupine thing. So again, if you’re not quite sure don’t eat it or check with your friend who is an expert OK?

    Want to grow mushrooms, watch this vid: How To Grow Mushrooms From Plug Spawn – GF Video

    Here are more mushroom hunting and mushroom identification videos for your here on GardenFork:


    Oyster Mushroom Identification

    cook-mushrooms-play
    How To Cook Mushrooms

    oyster-mushroom-hunting-2
    Wild Mushrooom Risotto Recipe

    Click here to see our other mushroom identification posts

    Cross check the mushrooms you find with several sources, books are best, I think. I use several books for identifying mushrooms , below are the mushroom identification books I recommend:


    Click Here To Buy From IndieBound

    Click Here To Buy From Amazon


    Click Here To Buy From IndieBound

    Click Here To Buy From Amazon

  • Best Stove Top Pizza Recipe – GardenFork Video

    Most fry pan pizza ain’t great, but this stove top pizza recipe is truly the best. Why? Its a thin crust pizza with a nice snap, and it can be made in about 5 minutes, and you don’t have to make pizza dough the day before.

    The key ingredient to this pizza is tortillas. Who knew? I’ve seen many recipes that say to use a pita bread as the pizza crust, and its real underwhelming. The torilla is already thin, and it crisps up nicely in some oil in a cast iron pan. You can also use a Calphalon style pan, but it has to be oven proof.


    But where to get tortillas? In your grocery store. From what I can tell, they are now sold all over the country. Yes you can use those tortillas that you have to cook first, just cook the top side bit first, then flip it and add your sauce and toppings.

    The pan does not need a lot of oil, as the excess oil can smoke when you put this in the broiler. Learn from my experience. The ideal tortilla is one that covers the bottom of the fry pan, mine did not, but it wasn’t a big deal, it still tasted great.

    best-stove-top-pizza-recipe

    My tomato sauce is super simple. Quality pureed canned tomatoes are already cooked and only need some salt and I add a few tablespoons of italian seasoning mix. Done.

    For cheese, I used chopped up fresh mozzarella, and quality Pecorino Romano. Do not fill the whole crust with cheese, it will spread out nicely.

    For toppings, its really use what you got. I always keep a can of sundried tomatoes in the fridge, and I had some nice dry sausage that I chopped up.

    Best Stove Top Pizza Recipe

    1 can quality pureed tomatoes

    2 tablespoons italian seasoning mix

    1 bag tortillas that fit your fry pan

    1 chunk of pecorino romano

    1 ball of fresh mozzarella

    Few slices of quality dried sausage

    1 cup sun dried tomatoes

    Preheat the broiler

    Heat the cast iron fry pan on the stove top, add enough vegetable oil to coat the bottom of the pan. When it shimmers, drop on the tortilla.

    Spread the tomato sauce mixture lightly on the tortilla, and drop on chunks of mozzarella.

    Add dried tomatoes and sausage.

    Sprinkle romano cheese.

    By now the fry pan will be hot, so be careful. Take this pan and put it in the broiler, the closer the better to the broil element.

    Keep an eye on it, but in about 2-3 minutes, the top of the pizza will be melted and toasted.

    Pull out, let cool a bit, and cut into slices.

  • Chocolate Halloween Treats Recipe – GF Video

    Chocolate Halloween Treats Recipe – GF Video

    Here’s a Halloween Treats Recipe for those of you who want to go the DIY way and make their own treats for the trick or treaters.

    As you know I love chocolate almost in any form, and I was watching Jacque Pepin’s TV show More Fast Food My Way and he did a quick little recipe for these DIY Halloween treats,  he called them Chocolate Rochers, similar to my last name. Very simply just melted chocolate with a couple different crunchy items dropped onto parchment. They were brilliant, really simple and I thought that’s a GardenFork Halloween treat if I ever saw one. Click Here to buy Jacques Pépin’s Book More Fast Food My Way

    Our Halloween Treats Recipe is based on his, pretty straightforward. Taking crunchy items like Rice Crispies, Cornflakes, toasted almonds, you could also use toasted hazelnuts or toasted walnuts. It’s really what do you like, if it’s crunchy and goes good with chocolate, it probably works. I’m a big fan of peanuts as well, you could have peanuts that you toasted in the fry pan.

    chocolate-halloween-treats-recipe-pin


    As far as what kind of chocolate to use for the chocolate Halloween treats, we were using semi sweet baking chocolate which I preferred or a big bar of Hershey’s dark chocolate, both of which you can buy at almost any grocery store. Experiment and buy a couple different ones and see what you like.

    Be very careful when melting the chocolate! You can melt it in the microwave with short pulses of about 30 seconds and you wait a minute or two and then zap it for another 30 seconds. I found that a simple homemade double boiler works fine for mem. A small saucepan pan with about an inch of water in it,  a metal bowl on top works very well as a double boiler.
    So there you go, our version of a DIY Chocolate Halloween Treat. What is your favorite kind of halloween treat that you can make? I would love to hear in the comments below, it’s great to hear from you all.

    Chocolate Crunchers, a DIY Halloween Treats Recipe

    1 box of semi sweet baking chocolate or whatever chocolate you like.

    2 cups of Rice Crispies, Corn Flakes, roasted nuts such as almonds, walnuts, hazelnuts.

    In a double boiler, break up the chocolate bar into pieces and melt the chocolate. Do not over-melt it, you want it such that it is thick.

    Take the bowl off the boiling water and add in the chosen ingredient(s). Be careful as the bowl is hot.

    If you are working with kids, scrape the melted chocolate into another bowl.

    How much of the crunchy ingredients is up to you. I prefer most of the nuts be covered in chocolate.

    Drop tablespoon sized amounts of the melted chocolate onto parchment paper and let the chocolate cool.