Category: DIY TV

  • Split Wood With A Log Splitter – GF Video

    Split Wood With A Log Splitter – GF Video

    If you have a lot of wood to split, you should split wood with a log splitter. We borrowed our neighbor’s wood splitter to tackle a large cherry tree that had died. We made a lot of firewood in a few hours, watch the video:

    Some safety tips when you split wood with a log splitter

    watch more axe

    Know how to stop the machine immediately.
    Where is the off or reverse switches? Know how to back up the piston real quick or to turn off the rig. Don’t become lax about operating the log splitter, its a powerful machine.

    split wood with a log splitter

    Be aware of everyone near the machine.
    Accidents will occur if more than one person is operating the log splitter. Don’t assume your co-worker knows where you and your fingers are at all times.

    Always wear ear and eye protection, and steel toed boots.
    Its obvious, but prolonged exposure to loud noise, like that from a small engine, takes it toll on your hearing. Eye protection is a must have, after all, we’re splitting wood here. And good boots will save your feet. You need them to get along in life, OK?

    split wood with a log splitter

    Block the machine wheels to keep it from rolling.
    Log splitters are on wheels so they can be moved around, so chock the wheels when its where you want it, so it doesn’t roll. Remember, round wheels will roll. Gravity wins.

    Keep fingers out of log splits.
    When splitting wood, its easy to get you fingers in the openings of the wood, don’t do it. Those cracks can just as easily close back up, with your fingers in them. A bad thing if you ask me.

    split wood with a log splitter

    Square the ends of the log.
    You want the logs to sit flat on the back plate of the splitter. If that isn’t square, the log can twist, and potentially move in a way you’d rather it not to go. Square straight logs = good.

    If you’ve borrowed the log splitter from your neighbor, return it in better shape then you got it. And fill up the tank with fresh gas that has gas stabilizer added. Your neighbor will be impressed and let you borrow it again.


  • Split Wood With An Axe – GF Video

    Split Wood With An Axe – GF Video

    Learn here how to split wood with an axe and get some exercise the same time. Using an axe to split wood is one of those zen activities for me. Its very analog and rhythmic, its you, an axe, and some firewood.

    You can split wood with an axe if you are working on lighter woods, or wood that is not too large in diameter. If you find yourself using a sledgehammer or wedge to drive the axe through a log, you should consider using a maul instead.

    watch more wood splitting machine

    If you have a pile of wood to work on, you might consider borrowing a powered wood splitter, we made a video about using one.

    split wood with an axe

    Couple of safety tips when splitting wood:

    • Wear safety goggles
    • Use steel toed shoes
    • Keep kids and pets out of the area
    • Split wood on a solid axe friendly surface

    Whenever you hit a metal object with another metal object, like a sledge and an axe, you should be wearing safety glasses.

    Steel toed shoes save your feet. Logs rolling onto unprotected feet is not a fun thing, trust me.

    split-wood-with-an-axe-1

    Its obvious, but when you are swinging a weighted sharp tool, you don’t want anyone nearby, not a good thing to get near when its flying toward a log being split.

    Put the wood to be split on a surface that can take axe blows. A large diameter log is great, and it get the wood up higher and makes it easier to swing at. I use a large wide piece of thick lumber. Also avoid splitting wood on wet ground, makes for a mess.

    Wood needs to be dried usually before you split wood with an axe. There are a few trees that split easily when freshly felled, but its easier to let them dry out, aka ‘season’. The birch logs above have cracks in them, called ‘checking’ that shows they have dried out.

    Your choice of axes ranges from really nice to use what you got. What’s most important is to use a sharp axe. You can sharpen it yourself using a hand file or a metal grinder. The wood or plastic handle should be in good shape, not split or cracked. If the axe head is starting to shows signs of damage, like a mushroom back end or the handle hole is bowed out, do not use the axe, OK?

  • Drill Into Brick or Mortar When Hanging Something? – GF Video

    Drill Into Brick or Mortar When Hanging Something? – GF Video

    Do you drill into the brick or mortar when you are going to hang a picture, TV, or shelves on a brick wall? I get this question all the time when people watch our first how to hang shelves on a brick wall video.

    There are all sorts of experts on the web, with varying degrees of expertise, who will weigh in on this topic. I work 80% of the time in 120 year old brownstone row houses, where there are many brick walls. I have hung many TVs, heavy mirrors, large pictures, etc. on brick walls. So I have an opinion about what is best that is based on experience.

    Do You Drill Into Brick or the Mortar?

    I’ve seen lots of crumbling mortar in the old buildings I work in, and some bad brick, but I always drill into the brick. If you are drilling into cinder block or cement block, I drill into that and not the cement pointing around the block.

    drill-into-brick-or-mortar-1

    In my mind, bricks are stronger than the mortar around them. They can hold an anchor and a screw or bolt well. I suggest using plastic anchors for lightweight objects, and lead anchors for medium weight items. For heavy things like TVs, you should use sleeved anchors. Be aware that once you put a sleeved anchor into brick or block, it probably won’t come back out, its permanent. Something to consider if the house is a rental.

    When drilling into cinder block, aka cement block, most blocks have hollow spaces in them, so you may be pressing on the drill and then you will hit the hollow space, and the drill will slam into the cement face. If the cinder block is an outside wall, the hollow spaces may be filled with cement and rebar (reinforcing rod) if you hit rebar with the drill bit, its not good. The drill bit will be damaged and you can’t drill through rebar with a masonry bit.

    Image of drilling into wall linking to a videoBTW, here is detailed post on how to hang a TV on a cement wall using sleeved anchors.

    For tools, you can buy a decent hammer drill for not a lot of money. Here are some links to buy a hammer drill and masonry drill bits

    You get what you pay for when buying tools, especially with masonry bits. Don’t cheap out on them.

  • Troy Bilt Flex Review – GF Video

    Troy Bilt Flex Review – GF Video

    After using the Flex system all summer, here is our Troy Bilt Flex review video. We used the lawnmower and pressure washer attachments with the Flex power base around the house, here’s our take on it.

    Note: This is a Sponsored Post sponsored. Troy Bilt sent me the Flex and compensated me for my time, but all opinions are my own

    The GardenFork Troy Bilt Flex Review

    I like the Troy Bilt Flex concept of one engine that connects to multiple pieces of outdoor power equipment. Its much easier to maintain one engine than 4 or 5 of them every year.

    Troy Bilt Flex Review

    The power base has a 208cc engine with ample  power to run everything that attaches to it. I like that the engine has an oil dipstick and an easy oil drain plug, plus a solid gas cap. The wheels are air filled knobby tires and the power base is self propelled. The handles fold back onto the unit for space saving storage, a nice feature.

    The lawn mower has a 28″ wide deck, which is 8″ wider than most walk behind mowers. The front wheels are solid and can be set to free wheel or lock straight for when you are mowing on inclines. Two blades under the deck work nicely. I used the deck in mulching mode, but you can set it for side discharge or you can order a grass collection bag for it.

    Troy Bilt Flex Review

    The pressure washer is quite nice, it will do everything I will ever need a pressure washer to do. It has 5 quick connect nozzles and can generate 3,000 psi of power. You can attach a hose to the pump for cleaning solution injection. I really like that it has a 40′ hose on it. I need to wash the clapboard on our 2 story house, and I don’t have to buy an additional length of hose to reach the 2nd story. This will come in handy if you are washing down large equipment.

    Troy Bilt Flex Review

    The Troy Bilt Flex also has a snowblower and leaf blower attachments that we did not test. I don’t blow our leaves, and it being summer, well, no snow.


  • How To Mud and Tape Drywall – GF DIY Video

    How To Mud and Tape Drywall – GF DIY Video

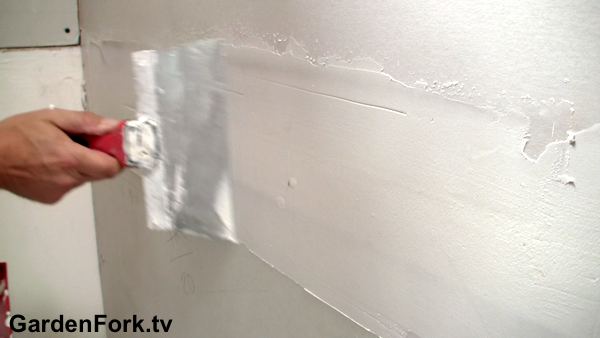
    To mud and tape drywall aka sheetrock, you have to practice, but if I can do it, you can do it. I don’t do it perfectly, but I made a video here of how I mud and tape drywall while working on our renovation projects. I also have a video about how to mud and tape drywall corners.

    It’s one of those things where having the right tools and the right materials pays off. Your first attempts at mudding and taping will not go perfectly, but keep doing it. You will attain that ‘Ah Ha’ moment.

    Tip: Listen to our podcast, GardenFork Radio, while taping drywall.

    I like to use lightweight compound, and use a 5 gallon paint mixer paddle to whip it up into a whipped cream – cupcake frosting consistency. Some add water or plaster, I do not. BTW, adding plaster is called a ‘hot mix’ and can cause the compound to crack. The hot mix is used when you want the compound to dry quickly. I let the stuff dry overnight. Position the tray just below the area you are applying the compound to.

    mud and tape drywall

    When you mud and tape drywall, slow and steady wins the race,  OK? Its a lot easier to do it better the first time than to make a mess that will take a long time to fix later. And several thin layers is better than one thick layer. When mudding bevel joints, its ok to use more than a thin layer for the first pass, as you want to fill in the bevel and get the mud into the mesh tape.

    mud and tape drywall

    Tools I use to mud and tape drywall

    Ideally, all these tools are stainless steel, I have a carbon steel blade ( you can see it in the video ) and it rusts despite everything I do to protect it.

    6″ knife aka, a spatula

    10″ knife

    12″ knife

    Plastic rectangular mud tray

    Tile Sponge, aka small pore sponge

    Shop on Amazon for drywall taping knives & tools here.

    You can also experiment with what is called ‘setting mix’ compound. This is a dry powder you mix with water, it comes in several drying times. Its more work, but it dries faster, and can fill in deep cracks better. The tub type compound will shrink and crack in large voids.

    mud and tape drywall

    Its important that the drywall screws are screwed below the surface of the wall, as you see in the video, some of the screws are not, and the blade hits them. Also key is clean compound. You can see in the photo above the streaks you get if you get some junk in your mix.

    How To Mud And Tape Drywall Corners – GF Video

    How To Mud And Tape Sheetrock Video
  • Plant A Window Flower Box – GF Video

    Plant A Window Flower Box – GF Video

    Learn here how to plant a window flower box,  like the one we built in a previous DIY video. Watch as we show a few tips for window box plantings. The first tip: simple is good. Here we go!

    A few things to keep in mind in planning how to plant a window flower box

    • Choose heat tolerant plants, especially if these window boxes are on the sunny side of the house.
    • Use a good quality potting soil with a time release fertilizer.
    • Water window boxes regularly, they will dry out faster than you think.

    For this window box, we used some shade plants as this side of our house is shady most of the day. The few hours of sunlight are ok on these guys. Plus its on ground level, so its easy to water – a big plus not having to haul water upstairs.

    Here’s what Erin, of The Impatient Gardener, has to say about window box flower design:

    The more window boxes you have, the simpler the design should be. Window boxes are great but they are, as Tim Gunn would say, “a lot of look.” If there are too many colors or textures going on, your house is going to look like the little shop of horrors. Keep your plant choices to one, maybe two or three at an absolute maximum (and then only if they relate closely to each other, such as a light pink and a dark pink petunia) and then plant every box the same. I know it’s hard to pick just a few plants when there are so many great ones around, but pick one or two this year then do something totally different next year. Just don’t do it all at the same time.

    Erin also suggests moving away from sweet potato vines, which do appear in our flower box video.

    Better than most anything I’ve said yet. But then Erin is more of the designer kind of person than I am. I make stuff. Like flower boxes:

    watch build a window box video


  • DIY Storage Racks For Basment or Garage – GF Video

    DIY Storage Racks For Basment or Garage – GF Video

    Build these DIY Storage Racks to store long stuff in your basement or garage using recycled lumber. These storage racks are good for long things, like lumber, kayaks, poles, canoes, etc.

    I had some 2″x3″ lumber left over from a project, and I didn’t want to throw it away, so this recycled lumber became these cool DIY storage racks to hold lumber. What’s nice about this is you don’t need long pieces of lumber to make this happen, each piece of the brackets aren’t that long. You can adjust this design to the lengths of lumber you have.

    DIY storage racks

    I used 2 1/1″ coarse drywall screws to put this together and to secure it to the wall. I have a few favorite tools, and one of them is the Flip Bit, which is a screw bit and a drill bit in one piece that makes drilling pilot holes and screwing stuff together go real fast. I used 3 screws in each bracket to attach it to the wall. This DIY storage rack will hold quite a bit of weight, if you plan on something very heavy, switch out the drywall screws for wood screws, which have more lateral strength.

    DIY storage racks

    I use a laser stud finder to locate the studs in the drywall. If you are going to set these brackets into brick or cement, use a hammer drill and masonry bits. The cheaper stud finders don’t work, I think. You get what you pay for when buying these. The good ones last and will save you time in future DIY projects.

    DIY storage racks

    As a bonus, I had some metal shelf brackets laying around, and I screwed them to the bottom of the rig and hung my ladders. So I was pleased at what a space saver these DIY brackets are, one step further in my declutter project! Its great to get stuff up off the floor. Makes it much easier to clean and move around.


  • How To Build A Maple Syrup Evaporator – GF Video

    How To Build A Maple Syrup Evaporator – GF Video

    I figured out how to build a homemade maple syrup evaporator because I was burning through a lot of propane when making maple syrup. I don’t make enough syrup to warrant buying one, but a DIY maple syrup evaporator was just what I needed. Watch the 2 videos below and step through the photos of the evpaorator build.

    The Making Of time lapse video:

    How to use the Homemade Maple Syrup Evaporator

    This is made out of a metal 4 drawer file cabinet and a few steam table pans, plus some stuff you may already have or can get cheaply or for free. If you can find a 5 drawer file cabinet, even better, it will allow you space to have another pan for boiling.

    This is not an original idea of mine, I learned about it through Annie Corrigan of Earth Eats, a WFIU radio program and podcast. She produced a story about Mike Bell of the Hinkle Garton Farmstead, who made this great homemade maple syrup evaporator. You can see photos of his rig here.

    We have two videos of this evaporator. One is a fun time lapse of me building the rig, the second is a walk through of how to use make maple syrup with it. Below the videos are photos of building the evaporator and more videos on how to make maple syrup

    Before I built this evaporator, I was using a lot of propane to boil down sap into syrup, you can watch a video of how we use a propane turkey deep fryer to make maple syrup here. The turkey fryer method works, but you burn through the propane, and make a bunch of trips to the hardware store buying refills.

    I did not keep close track of how many gallons of sap I boiled down in a day, but if you keep on top of it, I imagine you can boil down about 50-70 gallons a day, depending on the sugar ratio of your sap and how hot your fire burns. Pallets and scrap lumber burn hotter than firewood, I found.

    how to build a maple syrup evaporator
    Click Here
    to go to the next page for photos and instructions on how to build the homemade maple syrup evaporator.

    After reading through photos for the homemade maple syrup evaporator, check out how I improved the original design in this video:


    Watch all our Maple Syrup How To Videos here.

    Steam Table Pan Maple Syrup Evaporator Improvements – GF Video

  • Tap Maple Trees Update Video

    Tap Maple Trees Update Video

    A new how to tap maple trees video for you. We just tapped our sugar maples, getting ready for maple syrup season, and we made another video about how to tap your sugar maple trees. We have more great how to make maple syrup videos below this video.

    We use tubing and tree saver taps to tap our sugar maples. You can buy tree saver taps here. The tubing leads to a barrel made of food grade plastic. You can also line a 30 gallon trash can with a food grade plastic bag.

    You can also have 5 or 6 gallon buckets at the base of each tree and run your tubes into them. But its easier to empty one big barrel instead of a bunch of small buckets in deep snow.

    This year the maple syrup season started late and we have so far only had a few days of sap running. We need warm days and cold nights for the sap to run, and we have had way too many cold days.

    I am tapping trees on my neighbor’s land this year as well. They  have some nice sugar maples right on the road, which makes hauling sap much easier. Imagine walking through the woods carrying buckets of water through deep snow. Now you know why I use lines and tap trees near the road!

    We have a bunch of how to make maple syrup videos here on GardenFork. It is super fun to tap your own trees and boil down sap into syrup. Watch our videos to learn how.

    maple syrup videos
    Watch our How To Make Maple Syrup Videos here


  • External Hard Drive Repair and Replacement DIY Video

    External Hard Drive Repair and Replacement DIY Video

    You can do an external hard drive repair. Learn how to replace the hard drive of your exnternal hard drive or backup drive with our DIY video here. Below the video are links to buy replacement hard drives and a computer toolkit.

    External Hard Drive Repair Tips

    Be sure to discharge any static charge you have by touching a water pipe.

    Take pictures as you take apart the external drive.

    Use the right tools, or you will strip the screws.

    Its best to remove the broken hard drive and then order a replacement drive. Click here to shop for hard drives. That way you know exactly what kind of hard drive it is. You can also probably buy a larger size drive for a few dollars more.

    external hard drive repair

    When is a drive broken and must be replaced?

    Most of the time. Really, its rare to be able to repair a drive if it is damaged. If you hear mechanical noises, scratching, metal on metal kind of sounds, the drive is toast. It is sometimes possible to fix a drive if its a software driver issue, but if you hear unhealthy sounds coming from the drive, its a bad sign.

    When taking apart the external hard drive, keep all the parts in a container, and keep your workspace clean. Its possible there will be some dust in the drive housing, so be prepared for that. Use some canned air to remove dust from the electronics, do not use a brush, bad things can happen.

    external hard drive repair

    Most drives slide right out of the chassis holding it. The drive has a set of pins that line up with the chassis to connect it all together. Here are some computer tool kits: http://amzn.to/1ExWh1u

  • How To Remove A Dishwasher – DIY GF Video

    How To Remove A Dishwasher – DIY GF Video

    Learn here how to remove a dishwasher with our DIY video. It’s pretty easy, and only takes a few tools. It helps to have someone helping you, never hurts to have a second set of hands and more important, eyes. We also have a video on how to install a dishwasher here.

    The most important thing is to make sure the electric running to the dishwasher is turned off and the water supply is turned off. Only then can you remove the dishwasher.

    How To Remove A Dishwasher

    • Turn off the power going to the unit. The dishwasher may be hard wired or have a power plug.
    • Turn off the water supply. Hopefully there is a valve under the sink that controls this.
    • Disconnect the drain tube by removing the clamps.
    • Remove the screws holding the dishwasher in its space.
    • Pull it out gently.

    Watch the video for the details, and take your time and you will know how to remove a dishwasher.

    electrical wiring of dishwasher
    Cover power wires with wire nuts when removing dishwasher, be sure power is off!

    Some stuff to think about. Pay attention to the floor, you don’t want to scrape it when you pull out the dishwasher. The appliance has small leveling feet, and they can drag on the floor. Also, there is likely some debris under the unit, be careful with that too, might be some surprises!

    I’ve heard stories where someone has installed a wood or tile floor after the dishwasher was installed, and this makes removing the dishwasher real hard. you may be able to lift the counter above the washer a bit to slide it out, all while having warm thoughts about whoever did this to you.

    Breathe.

    The drain hose of the dishwasher will have water in it. Hold it up in the air and dump the water in to a bowl. Learn from me.

    Dishwasher Installation photo

    bathroom sinkWatch More DIY Videos Here.

    So there you go, a fine video on how to remove a dishwasher for you. Let me know your comments below.

  • DIY Rolling Garage Shelves – GF Video

    DIY Rolling Garage Shelves – GF Video

    Build these DIY rolling garage shelves and make your basement or garage more organized and save some bucks. Shelving units with wheels are expensive, here’s how I added caster wheels to my existing garage shelving units.


    You can build the DIY rolling garage shelves either as a light-duty or heavy duty version. Light duty would be for a shelving unit that doesn’t have a lot of heavy material on it. Light stuff might be beach towels, blankets, pillows, things like that. A duty shelf would be one that has tools, screws, nails, that sort of thing on the shelves.

    diy-rolling-shelves-pinYou can build this with scrap lumber that you have laying around. One special tool that you will need is called a hole saw. If you don’t have a hole saw kit you might be able to borrow one from a neighbor or you can buy a hole saw kit here online. Don’t buy the cheapest hole saw kit, it will break.

    I used 1 1/4″ and 1 5/8″ drywall screws to pu this together, it depends on if you are using 2x4s or something thinner. Its good to have a box of both on hand anyway. For the lumber, you can use cast off studs from a renovation, spare pieces of plywood, metal studs (for the lightweight version). This is really a use what you got kind of project.

    I got the caster wheels for this project from an IKEA desk that I had taken apart, but you can find these wheels at the hardware store or at tool supply stores. I have also taken wheels off of furniture that has been put out for the trash. You can also buy wheels online here.

    Adding wheels to your shelving units does increase the height of the shelving unit. So if you have low ceilings in your basement, keep that in mind. Your new DIY Rolling Garage Shelves might hit the ceiling now if you have tall stuff on the top shelf.

    Assembly of the DIY rolling garage shelves:

    holes line up with legs of shelf
    holes line up with legs of shelf
    Done
    Shelf sits in holes of the wheel base
    Have an assistant
    Have an assistant
    Assemble upside down
    Assemble upside down
    Heavy Duty Shelves
    Heavy Duty Shelves
    Light Duty Shelves
    Light Duty Shelves
  • DIY Dog Tug Toy – GF Video

    DIY Dog Tug Toy – GF Video

    Learn how to make a dog tug toy in this DIY GardenFork Video. Our dogs tear through store bought toys, maybe the toys are made for smaller dogs, not sure. So I bought 100′ of rope and now we make our own dog rope toys. This video is one of several we are working on for Dog Toy series. Sign up for our newsletter to find out when we post new vids.

    One precaution here: In this video we are using a polyester rope, and some dog have issues with this kind of rope, it can get stuck in their stomach. Our pups do not have this problem. I suggest you use cotton rope, which you can get at a camping supply store or a good hardware store.

    diy-dog-tug-toy-gf-video2

    This tug toy is not perfect, the dogs manage to tear it apart in a week or two, but then I just make up another one. And they love it when they see me with the large hank of rope making them a new toy. Moose, the black lab, loves to get hold of the whole hunk of rope, which makes a mess of it.

    Charlie Pup and Moose are the main users of the tug toy, Henry will want to play with Moose, and then Charlie Pup jumps in. Not sure if this is a dominance thing or just Charlie Pup being jealous, or maybe its just dogs being dogs. But it is a blast to watch, below is a video of the dogs playing with the tug toy. You can watch more Lab videos on their YouTube Channel here. As you can see, it works very well, and it wears them out, which is a big goal of mine. Sleeping dogs are a good thing at the end of day, and this works well for that.

    I can barely hold onto the rope when I play with them, its amazing how much pull strength they have. Their jaw clamps onto that rope and then they pull back with their hind legs. I let go the rope, lest I wreck my back.

    Do you make your own dog toys? Let us know below:

  • DIY Rain Barrel System – GF Video

    DIY Rain Barrel System – GF Video

    Easy Rain Barrel System we built with spare lumber and trash cans and some PVC. What I like about this rain barrel system is that you don’t have to go buy or find some rain barrels, you just go to the hardware store and buy some garbage cans. Done.

    How to build a rain barrel system

    Below is a slide show of photos I took while we assembled the rain barrels. The exact dimensions of your project will vary, depending on the size of your trash cans and how high up in the air you want to put your system.

    Important: Be sure to screen the slot where the downspout enters the barrel or use mosquito dunks to control mosquito breeding.

    A list of the items used:

    Gutter Downspout Diverter, available here: http://amzn.to/1mf6ENG

    • 2″ male and female electrical PVC connectors to attach the PVC drain pipe to the trash cans
    • 2″ PVC plumbing pipe to connect the rain barrels to the garden hose spigot. The length of pipe you need depends on your trash cans and the stand you build.
    • Two 2″ PVC 90 degree elbows
    • One 2″ PVC T connector
    • One 2″ PVC 30 degree elbow
    • Assorted PVC adapters to fit the garden hose spigot to the end of the PVC pipe
    • One each 3″ male and female electrical PVC connectors for overflow pipe
    • One 3″ PVC street elbow for overflow
    • Various 3″ PVC elbows to divert overflow to where you want it to drain.
    • Sections of downspout pipe to connect downspout diverter to your rain barrel system
    • Quality silicone bathtub caulk

    We built the stand for the rain barrels out of scrap lumber. Be sure to build the stand to support a heavy load, and do not site the rain barrels where they could fall over, they are heavy! If the stand is sitting on soft earth, put bricks or pavers underneath the legs of the stand.

    The top of the stand has a gap in the middle of it for the pipe that comes out of each rain barrel, plan for this ahead of time.

    Our overflow pipe is 3″, which might be overkill for some designs. This system takes in water from a large flat roof, and in a hard downpour, a smaller overflow pipe would be overwhelmed, we believe. If you are doing rainwater collection from a smaller roof, your overflow pipe could be smaller.


  • Cutting Firewood With A Chainsaw – GF Video

    Cutting Firewood With A Chainsaw – GF Video

    We dropped a tree that was dead last fall, of course we made a video about that click here, and we needed to cut the tree up into firewood for the wood stove at the camp, so I had my phone camera with me while we worked. So out come the chainsaws, safety gear, and camera. It took a while to cut this hardwood cherry up, dead wood can wear out your chain quick.

    In this video we use a peavey to move the tree and the logs. Its a great tool to have, makes it much easier to roll stuff and save your back. We talk some about using the peavey here.

    The most important thing when cutting firewood is to keep in mind what it is going to be used for. This is for a woodstove, so we measured the wood stove opening and then marked the tree accordingly to make sure each log was just the right length to fit in the stove. Don’t want to do all that work and then find out the firewood wont fit, not a good thing.

    This tree had been dead a year, so it was good to be split and ready to burn. If you are cutting down a fresh tree, let the firewood dry a year, I say. We used a hyrdraulic wood splitter to break up these big logs, there’s a video about that in the links below.

    I keep two or three newly sharpened chains with me when cutting down trees or firewood. There’s nothing worse than a dull chain, your saw will overheat, and you wear out your saw and yourself. Chains are cheap, buy a few, and sharpen them regularly.

    Always keep safety in mind when using a chainsaw, they are dangerous tools. Note that I am wearing a helmet, ear protection, eye protection, chainsaw chaps, and steel toed shows. Links below to sources for these items. Be smart and be safe.

    chainsaw-video-player

    Click Here To Watch All Our Chainsaw Videos

    An all in one helmet is the #1 piece of gear you need:


    Click Here to Shop For Chain Saw Gear

  • Tap Sugar Maples for Maple Syrup with Buckets – GF Video

    Tap Sugar Maples for Maple Syrup with Buckets – GF Video

    Its time to tap sugar maples to make maple syrup in our area, and I went out with my neighbors to help them tap with buckets and spouts. This is the traditional method of tapping trees, many people now use plastic taps and tubing. See the links below for our videos on tapping using tubing. My neighbor Bill puts out about 150 buckets, mainly along the roadsides in our town.

    If you are thinking of what method you’d like to use to tap sugar maples, I have no strong opinion between buckets and tubing. The buckets are better for smaller operations, and for tapping on other people’s property. Most tubing stays up year round, and not everyone likes how it looks in summer.

    I use tubing and plastic taps, and I take down the tubing every spring. I tap the same trees each year, and I can put back up the tubing. Its work, but so is hauling sap buckets.

    tap-sugar-maples-maple-syrup-buckets
    This is a hard to find attachment for your chain saw

    I’ve also seen people use plastic bags and milk jugs to tap trees. I have no experience with these, but at least with the milk jugs, i can see how they would overflow easily when the sap is running. That wastes a lot of sap.

    Ask around your town or check on craigslist for buckets to tap sugar maples, I’m sure there are some in a garage. You can also buy them new, though I believe the new buckets are made of aluminum.

    We have a bunch of how to make maple syrup videos, check them out below:

    Click Here To Watch All Our Maple Syrup Videos


  • Beginning Snowshoe How To – GF Video

    Beginning Snowshoe How To – GF Video

    We love to snowshoe and wanted to show you how to snowshoe yourself. When the snow is knee deep, its the best way to get around the yard or go on a hike. Plus its a great outdoor exercise. Watch our video here and read on to learn about snowshoes:


    We bought our snowshoes at the end of the winter season, they were on sale and we saved quite a bit. You can also find snowshoes for sale on eBay in addition to your online stores. Click here to find snowshoes on Amazon.

    Like most things in life, you get what you pay for when buying snowshoes. While you probably don’t need the über professional snowshoes, you don’t want to cheap out either, else they will break when you really need them. I use them a lot to get to the wood shed, it keeps me from falling down in the snow with a load of firewood.

    Our snowshoes have a metal cleat or gripper underneath for walking across ice and frozen snow, and I suggest you be sure your snowshoes have them. Look underneath for a wide claw thing about 4″ wide. You might also consider gaiters or some sort of snowpants to keep snow from falling into your boots  or shoes, real handy when you are throwing up snow as you walk.

    Snow shoes will not keep you floating above the snow, you will still punch down into the snow a bit, but its much less than going completely up to your knees. They can be a bit clunky, so look for shoes that are easy to put on. Keep in mind you will be putting these on in the cold, not inside your house. Ours have easy release clips, makes it easy to take them off at the end of a hike.

    So let us know your snow shoe experiences below, be good to hear from you.


  • DIY Greeting Cards – Paper Crafting – GF Video

    DIY Greeting Cards – Paper Crafting – GF Video

    DIY greeting cards are an easy paper crafting project using lino block printing. You can make homemade cards for Christmas, wedding announcements, birthday cards, you name it. The method we are using is called block printing, or linoleum block printing. Super easy to do, and a great kids art project.

    Our guest crafts expert is Jessica Kaufman, who is a crafts instructor in the NYC area. You can learn more about Jessica at her website: happygocrafty.com

    Paper Crafting GardenFork Style

    I have done some block printing and paper crafting in grade school. I made some DIY Christmas cards using the linoleum block printing method. Looking back, this was the start of my love of print media. I moved on to silkscreen and letterpress printing later in school, loving it all.

    block-printing-clip-9

    Now that we have everything digital, I thought we should go super analog and revisit some neat paper crafting projects that you can do. Projects such as these are great for kids. The ink we use is a non-toxic water based printing ink, just wear a homemade art smock and you are ready to go.

    We bought some blank cards and envelopes at the art supply store. You can also get these at retail stores such as Paper Source, or an at arts and crafts store.

    You will also need a tool to carve the block, we used a Speedball brand lino cutter tool. The actual printing block comes in several forms, we suggest using the more flexible carving blocks, the hard ones are harder to carve for kids and adults. A breyer is a roller that applies the ink to the lino, get a rubber one.

    block-printing-roller

    We built a simple carving board, this allows you to safely do lino block printing. Get a scrap piece of plywood, put a small piece of trim on each side, and you are done.

    simple carving holder thing
    simple carving holder thing

    What do you think? Have you done block printing or other paper crafting projects? Let us know in the comment section below:

    block-printing-copy-pin-600