Category: Gardening TV

  • Garden Problems: Deer, Bears, Weeds, Caterpillars  GF-Video

    Garden Problems: Deer, Bears, Weeds, Caterpillars GF-Video

    Garden Problems never end in the vegetable garden. So I made two videos with Erin from The Impatient Gardener about how to deal with Deer in the garden, and much more. Like bears…

    These videos are sponsored by Troy-Bilt, a long time supporter of me. Erin and I are working with them for #FenceTalks, solving people’s garden issues.

    Deer, Weeds, and Moss In Your Yard and what to do:

    Beer, Weeds, Caterpillars in Your Yard

    What do to about Deer in your garden?

    Oh, if there were only a true fix for this plague of many gardens, including mine. All we can aim to do is discourage deer from hanging out in our yards. Erin from her blog post

    As Erin says in the video, plant deer resistant plants and use deer repellant sprays on your fav plants. The sprays only smell for a short while. If you want to go big, you can put in a high fence, or two shorter fences right next to each other.

    Moss growing in your grass and yard? I have watched over the years moss take over part of my yard. Its kinda nice and soft, but it tears up easily. The best way to get grass back there is to aerate the soil and cut back shady branches. Moss likes shade, grass does not.

    Invasive weeds? We are getting creeped on by Garlic Mustard. I have seen it slowly take over the town. About the only way to deal with it is to remove it. Thankfully, it pull out easily.

    There are tougher invasives coming in to our area. Japanese Honeysuckle is a vine that takes over. One of the few ways to deal with it is glycophosphates like RoundUp.

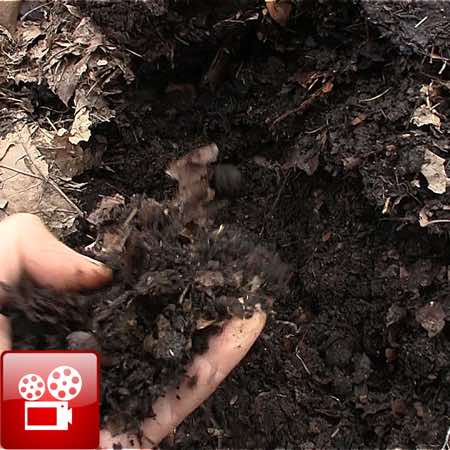
    Bears in my compost. Yes, the bears have torn open my pallet compost bin. Not fun. Then my Labradors  have gone in and start eating the half composted food scraps. Even more fun.

    Erin tells me that I need to avoid putting any meat or fats in the bin. I pretty much to that, but I’m wondering if the eggshells attract the bears? Another tip Erin gave me was to cover the new food waste with leaves.

    I’m always learning here.

    Holes in you Kale? Every year the precious kale gets its leaves eaten. Erin tell us its the cabbage looper doing the damage. Easy enough to deal with, cover the plants with row fabric to keep the cabbage moth from laying eggs. Done.

    What are your garden problems? Let me know, thx! Eric.


  • The Best DIY Mini Hoop House For A Raised Bed

    The Best DIY Mini Hoop House For A Raised Bed

    Here is the best DIY mini hoop house I have built yet. I’ve crafted bunch mini greenhouses and cold frames, taken that info, and made this mini hoop house for my raised bed vegetable garden.

    So, why build a DIY mini hoop house? The big answer is that it extends your growing season. You can start seeds earlier in the spring, and grow vegetable later into fall and even winter if you do it right.


    I’ve built and made videos about each of the mini hoop house builds I’ve done. And with every build, I’ve learned some more about how to build them.

    Greenhouse

    These season extending rigs are also called a mini greenhouse. I’ve built mine to fit on top of a raised vegetable bed. AND I’ve added a major upgrade to make it easier to lift and open the mini hoop house as it sits on the raised bed.

    I’ve had hoop houses slip off the raised bed with high winds, or when you open it, so I crafted a simple solution for that, read below for the details.

    Building The Raised Bed DIY Mini Hoop House

    I used scrap lumber I had around. I’m all about use what you got. So we had these 2x4s. The mini hoop house sits right on top of the wood sides of the bed. Make your hoop house frame the width of your bed, and however long you want it. Mine is 8′ long. Build the frame so that the long ends of the hoop house sits right on top of your bed, not inside the bed sitting on the soil. This will make it easier to open and close, and it will last longer.

    close up of wood framing

    For brackets to hold the wood frame together, I think these metal shelf hangers work great. I salvaged mine from some shelves a neighbor was throwing out. These brackets will last longer than the wood they are holding together. And it is completely fine to use coarse drywall screws to connect them. The screws will last longer than the wood as well.

    Some tools and supplies:

    close up of greenhouse frame

    I’ve used 3/4″ pvc for the hoop. Use a tape measure to determine how high you want the top of the DIY mini hoop house to be. You can also experiment with a piece of PVC to see how tight of a bend you can do with it.

    I was able to take an 8′ piece of 3/4″ PVC and bend it to fit within the 4′ width of the hoop house frame. The peak of the hoop house is 40″ high. I have found a higher peak with steeper sides really helps winter snow slide off the mini greenhouse.

    Eric Rochow and greenhouse

    I slid in one of the bent PVC pipes at the very end of the frame. I then placed a 4’x4′ piece of plywood behind the pipe and drew the arc of the hoop onto the plywood and cut it out. It is best to use outdoor rated plywood for this project. If you can’t find or afford outdoor rated plywood, paint whatever wood you are using with outdoor paint after you cut it but before you assemble it. greenhouse

    These automatic thermatic vents are brilliant for a DIY mini hoop house. The vents open and close around 50ºF, and they are adjustable. Do not buy the cheap ones, they will stop working. For this design, I place one high, to let out hot air, and one low, to let in cooler air. I may add two more of these automatic vents, so each end has two of them. When you get a really warm day in spring or fall, the hoop house can heat up right quick.

    Use UV rated plastic to cover your greenhouse. If you use inexpensive plastic, you will be replacing it in a few years. And the plastic breaks and splits apart and gets all over your garden. No fun.

    greenhouse being built

    I put in a long 1×2 to support the top of the arch. I drill a pilot hole through each pipe and screw the arch into the cross support. I then cover each screw head and the plywood ends with recycled hose so the plastic is not cut open by the sharp edges of the screw heads or plywood ends.

    greenhouse closeup

    greenhouse close up

    I attached the mini greenhouse to the raised bed with two recycled hinges. Make sure the hinges you use have a removable hinge pin, so you can just slide out the pin to remove the hoop house from the raised bed edge. If not, you can just remove the screws to disconnect the frame from the bed.

    This hinge improvement makes the hoop house green house much more stable on top of the raised bed. It wont blow off in a storm. Learn from me…

    interior of greenhouse

    A metal handle from my box of salvaged hardware makes it much easier to lift the DIY mini hoop house, and makes it easy to prop open. Note how the rig sits nice on the other side of the bed because of the two hinges.

    greenhouse and plants

    Watch More Of My Hoop House Builds:

    Mini Greenhouse Ver 3.0

    Mini Greenhouse Repair Fail


  • How To Restore A Weed Infested Garden

    How To Restore A Weed Infested Garden

    My blueberry bushes are the epitome of a weed infested garden. But I want to show you how I restore the weed infested garden bed, with some help from Troy-Bilt. They sponsored this post and provided some fine outdoor power equipment for me to use to restore this blueberry patch.

    I neglected my blueberries this year, not sure why, but there’s always a ton to do, and the weeds took over. It was time for drastic action to remedy the weed infested garden. Look at the ‘before’ photo and see for yourself.

    weed infested garden

    In this overhead drone photo, you can’t see the blueberry bushes, but they are there.

    So my plan was to clean up the area, make a raised wood bed border, and smother the weeds in the raised bed with cardboard, and lay down wood chips on top of the cardboard for a permanent mulch. The cardboard will break down in to the soil, and the wood chips will keep new weeds at bay.

    First I cut down the all the plants that were overwhelming the berries. The brush cutter attachment on the string trimmer worked well for this.

    weed infested garden

    I then outlined what was to be the new raised bed with string and cut a slot for the pressure treated 2×6 lumber to sit in. This area has a slight slope so for the end nearest the woods, the lumber will sit right on the soil.

    For the long end of the bed, I used a mending plate to connect two pieces of lumber to span the length. And in the corners, used corner brackets. You can find these in the roofing hardware area of a home improvement store.

    It was nice that the box that our chipper shredder came in was large. Perfect for the layer of weed suppressing cardboard. Be sure to leave room around the plants, keep the cardboard about 4-5″ away from the stems.

    Then came the fun part. I had already dropped a dead apple tree, so I had plenty of material to run through the Troy-Bilt CS 4325 Chipper Shredder.

    What fun! Nothing like running power equipment and turning brush into useful wood chips. The chipper shredder had no problem with most of the wood we put through it. You have to go slow with bigger branches – it handles up to 3″ limbs – especially because this was fresh hardwood, very different than a soft pine.

    We made A LOT of wood chips. Nice. The bag filled up right quick and we got rid of all the branches from the tree we dropped.


  • Eric & Troy-Bilt Volunteer In Savannah – GF Video

    Eric & Troy-Bilt Volunteer In Savannah – GF Video

    This year Troy-Bilt flew me to Savannah, Georgia to meet the other Troy-Bilt brand ambassadors and to do some volunteer work at a local botanic garden. Watch the video:

    Working with Planet In Action, we upgraded a children’s garden at the SACGC Botanic Garden. This was quite the project. As usual I was the least qualified gardener on the team, but I did run the rototiller and watered plants.

    Here is an area that will be a outdoor classroom for the kids, surrounded by some edible and fragrant plants.

    More good things happening here with a bridge over a wet spot in the garden.

    Here I am with Kenny Point, vegetable garden expert. Check out his website, Veggie Gardening Tips.

    A 4WD Self Propelled Mower Review, The Troy-Bilt 4×4 XP – GF Video

  • Lawn Mower Oil Change, How To Do It Easy – GF Video

    Lawn Mower Oil Change, How To Do It Easy – GF Video

    Here’s my how to video on doing a lawn mower oil change. Its not rocket science, its actually pretty easy, AND it will extend the life of your mower. Ready? Watch the video and scroll through the instructions below:

    Lawn Mower Oil Change, Step By Step

    Check the manual to see what kind of oil your engine uses. Most use 30W, but just check, OK? By changing the oil, you are already helping the engine last much longer. Do a lawn mower oil change a few times a year and your mower could last forever, mbe!

    Run the mower to warm up the engine. This gets the oil hot and the debris that settles up and moving. Turn off the mower.

    Place plastic food wrap over the gas tank fill and screw the cap down. Not so tight that you can’t get it off again, but snug. Now we are going to gently turn the mower on its side. Position a plastic tub such that when you tilt the mower on its side, the oil fill tube will pour into the tub.

    If your mower has an oil drain plug instead of a fill tube, you will have to tilt the mower on its side, remove that plug, then place the mower over the bucket. This may take some finesse and a friend to help.

    lawn mower tune up
    See how the gas cap is on the high side of the tilt?

    Be sure to tilt the mower so that the gas cap is on the higher side of the mower, so no gas could leak out if the cap leaked. Tilt the mower into the bucket and let it sit while the oil drains out. You can prop up the mower and let it sit for a while.

    Get your fresh oil ready and a funnel. You can make funnel out of a piece of paper if need be. Tilt the mower back onto its wheels, and slowly add the new oil into the oil fill tube. Use the dipstick to make sure there is just enough oil.

    Do Not Over Fill The Oil. Bad things can happen.

    AND recycle the used oil. Take it to a quick lube shop or a car repair shop, they will recycle the oil. Don’t dump it in the woods or a stream, OK?

    See More Lawnmower Tune Up and Oil Change Tips Here

    This same process can be used for your generator oil change or your riding mower.

    lawn mower

  • How To Grow Mushrooms From Plug Spawn – GF Video

    How To Grow Mushrooms From Plug Spawn – GF Video

    If you want to learn how to grow mushrooms from plug spawn, I just did it, and made a how to video about it. Watch the video then step through the photos below:

    What we are doing here is imitating nature. The mushroom plug spawn I bought is for oyster mushrooms, which grow in dying trees.

    Research what mushrooms grow well in your area, then Order your mushroom plugs here.

    How to grow mushrooms
    Wild Oyster Mushrooms

    With the mushroom spawn or plug spores, we are inoculating recently felled logs with the spore of a particular kind of mushroom, and providing ideal conditions for those spores to flourish and produce edible mushrooms for us.

    How to grow mushrooms
    Plug Spawn

    First thing to figure out is what kind of logs you have available, and then determine what kinds of mushrooms will grow on those logs. The ideal logs are taken from trees that have just been cut or pruned. I was lucky that my neighbor was dropping some oak and birch trees, so I rode over and picked up some 4″ diameter logs.

    How to grow mushrooms

    Its OK if lichen is growing on the logs, but not mushrooms. You want fresh logs, not some that have been sitting on the ground for months or years. Those logs have already been taken over by other mushrooms and other organisms.

    Follow the directions that come with the plug spawn. I drilled holes spaced 4″ apart on the logs and hammered in the spawn  using a rubber mallet.

    How to grow mushrooms

    Coat the ends of the logs with beeswax or food grade soy wax. I found the soy wax to be much easier to use. An old rice cooker works well to melt the wax and keep it warm. Put a weight on the pot and hit the on button to get it to heat up to melt the wax. After the wax has melted, you can remove the weight and the cooker goes into a keep warm mode.

    How to grow mushrooms

    After pounding in all the plugs, you have to seal them in. Plus seal any wounds or gashes in the bark. You are sealing up the log to keep other fungi and organisms from competing with the mushroom spawn.

    How to grow mushrooms

    How to grow mushrooms

    Place the inoculated logs on a pallet in the shade. You will need to water the logs every week. If it rains, that is better, less work for you. Be sure to follow the directions for how to grow mushrooms that comes with the plug spawn. This is one project where details are important.

    If you’d like to learn about mushroom foraging and how to identify mushrooms, here are some videos.

  • Generator Wont Start? Time To Replace The Carburetor – GF Video

    Generator Wont Start? Time To Replace The Carburetor – GF Video

    If your generator wont start, I bet the carburetor is toast, here’s how to replace it. First, watch our how-to video.

    When Your Generator Wont Start:

    I bet the last time you ran your generator was over a year ago. In that case, the carburetor is full of old gas that has broken down into gunk, and clogged the carb. Now, you can take apart the carburetor and clean it, even buy a rebuild kit. But for most of us, this is a higher level of skill than we posses. We can, however, buy a replacement carburetor and install it. You have the skills to do this, as  long as you watch GardenFork, I bet.

    First step is to order a new carburetor (here is one example, find one that matches your engine). Find the engine model number stamped on the engine somewhere. This may be several lines of numbers, and they are all relevant. If you can, photograph the numbers with your smart device. On Briggs & Stratton engines, the numbers are often on the valve cover. The numbers on the generator chassis are probably not the ones you need, find the engine numbers. Search online for “engine serial number location (name of your generator)”. I have found that there is sometimes one replacement carb that is used on many small engines for a certain brand. I had to search a bit to make sure I was getting the right carb, but the comments made by other purchasers really helped.

    Your replacement carburetor may come with several choke handles, as the new carb fits several models of engine. I had to cut a small piece of metal off the back of the air filter mount to allow the new carb choke handle to fit properly. Not a big deal.

    Check out the instructions that come with the carb. You may need special torx bits. I did, and only learned this after I started the job. Fun.

    To remove the old carburetor, start by draining the old gas out of the fuel tank. Turn off the fuel line that runs to the carburetor, pull the hose off the carb, and put it into a gas can. Turn on the valve, open the fuel tank cap, and drain. Don’t dump this gas in the woods or a creek, OK?

    Generator wont start Generator wont start

    Big thing to remember: take photos throughout this process, so you can refer to how it all came apart, OK? Remove the spark plug wire from the spark plug. This may seem unnecessary, but its a good practice to get into, especially if you have a electric start generator… Now remove the fuel line from the carb and remove the air filter and the frame that holds it to the carburetor.

    Generator wont start

    The carb may have what look bolts or nuts that are star shaped, these are usually called Torx nuts. You may already have a set of tools to remove these, or you can borrow them or you can buy them.

    Generator wont start

    Generator wont start

    Remove the governor control rod and spring assembly. A new rod and spring may come with your carb, use the new one, but hold onto the old one in case there is an issue. The rod may be concealed under a plastic or metal shroud, it may take some time to remove it.

    Remove the carb from the engine carefully. There is at least one gasket that may tear, and you may not have a new one to replace it. Some gas may drip out of the carb, that’s ok.

    The new carburetor will go back in about the same way the old one came out. The hardest part is getting the governor control rod and spring reconnected. There should be a diagram that comes with the new carb showing how it connects.

    Also the choke handle may be different or require a little cutting to get it fit. The carb I bought came with several choke handles, and you may have to remove and replace the one that is installed on the new carb.

    While you are doing the generator repair, you might as well put in new spark plug and change the oil. Spark plugs die out suddenly, and you’re already deep into small engine repair mode, this will take 2 minutes.

    Generator wont start

    If your generator wont start and has been sitting, I bet the oil is the color of mud. This is a bad thing. Muddy oil can mean there is water in the oil, and will ruin the engine. Take the waste oil to a oil change or car repair shop, they will recycle it for you. Don’t dump it in your yard. Generator wont start

    Going forward, always use gas stabilizer in your small engines. Then you don’t have to wonder what to do when your generator wont start. Whenever I fill up my gas cans, I immediately add in the gas stabilizer. My engines start on the first pull, even after a winter in the garage.


    Generator wont start

    A good follow up to this is our small engine tune up and oil change video:

  • How To Plant Garlic In The Fall – GF Video

    How To Plant Garlic In The Fall – GF Video

    I made this video to show you how to plant garlic in the fall, which is the best time to plant garlic, FYI. Watch the vid then read through the how to notes below, there’s lots of info here!

    To Plant Garlic, Do These Things:

    • Order garlic ahead of time
    • Prepare the garden bed
    • Separate the cloves
    • Plant root side down
    • Wait Until Next July

    Probably the biggest mistake people make when they want to plant garlic is to wait too long before ordering some seed garlic. The stuff sells out fast, so order early. The seed garlic supplier will ship just before planting time in your area. I order from Filaree Farm. Most seed garlic is not cheap, but keep in mind you will get many plants from one bulb. You can save your own seed garlic going forward.

    You can obsess about prepping the garden bed for the seed garlic, or just do as I do. I make sure the bed has a good mix of compost and soil. Loosen the soil up with a garden fork. Garlic likes some nitrogen, so I sprinkle over the bed some time release fertilizer. I do add some rock powder like azomite, but I can’t say it makes a big difference, its just feels right. I can say that garlic does not like clay soils, or soils that are too sandy, but isn’t that true for most garden vegetables?

    The ideal is to plant garlic 2 weeks before the hard frost in your area. For those in warm weather areas, you will usually plant between November and January.

    How To Plant Garlic

    Why Separate The Day Before?

    Depending on who is doing the talking, some say you must separate the cloves of the garlic bulbs the day before, I don’t. Usually because I forget, and I have yet to see a difference in doing so. I would suggest getting some help splitting up the bulbs. Many hands make light work.

    I plant garlic about 6″ apart in rows about 8-10″ apart. Its not rocket science. Garlic doesn’t like to be crowded, and it doesn’t do well with weeds. Plant about 2″ down, with the root tip facing down. The grow tip should be about an inch below the soil.

    I don’t mulch my garlic with straw. I will put down a light layer of leaves I have run through the mulching mower, but its not a thick layer.

    If your garlic starts to grow in the fall, don’t worry, the green tip will die back a bit with the frost, and will restart in the spring.

    What to do in spring? Watch more of our how to grow garlic vids here.

    How To Plant Garlic


  • Grow Salad Greens In Fall And Winter – GF Video

    Grow Salad Greens In Fall And Winter – GF Video

    You can grow salad greens in fall and winter, its not rocket science, even I can do it. Watch the video and read on below:

    Couple of key things to grow salad greens in fall and winter

    • Plant cold hardy lettuces, mustards, kale.
    • Use a mini greenhouse
    • Start seeds earlier than you think
    • Plant in your sunniest raised bed

    Luckily, most salad greens don’t do well in hot weather, they actually like cold weather. You have that going for you when you want to grow greens in winter or fall. I usually have too many packs of mescluns, greens, etc, so I drop them into a shallow row right next to my soaker hoses [video here]. Fedco sells fall and winter salad seed mixes, which make this even easier.

    Be sure the seed rows are on the sun side of the soaker hoses. The way my raised beds are oriented, one side of the hose gets more sun than the other, so I drop seed on that sunnier side.

    Grow Salad Greens In Fall and Winter

    The other key ingredient here is a mini greenhouse, aka hoop house, to extend the growing season [how to videos here]. The mini greenhouse will keep the plants warmer in the fall and early winter months, and can extend the season greatly.

    If you don’t have a mini greenhouse, you can surround the salad greens with hay bales. Lay an old storm window over the bales. The bales will hold in the heat nicely.Grow Salad Greens In Fall and Winter

    In the northeast U.S., where we are, the salad greens will eventually freeze, and stop growing. But if you can manage not to let the frost melt and drown the plants in late winter, you can get the salad greens to start growing again. They may bolt, so plant new seed as well.

    hoop house cold frame

    How do you extend your growing season? Let us know below.

  • How To Put In A French Drain – GF Video

    How To Put In A French Drain – GF Video

    I want to show you how to put in a french drain, which will help keep water out of your basement and away from your house.

    A french drain is what i call a surface drain, or a drain just below the soil level. For this one, the gravel is exposed, sometimes the french drain is covered with dirt or sand. I prefer to keep the gravel exposed.

    What you need to put in a french drain

    • Perforated pipe – either PVC or corrugated
    • Filter sleeve for the pipe Avail Here
    • Silt fabric – don’t cheap out on this Avail Here
    • Clean 1/2″ or 3/4″ stone (aka gravel)

    I was fortunate to have my neighbor bring his backhoe over and he dug a trench along the wall of the house where I have a water issue. You can also dig this by hand, its not hard unless there are a lot of rocks. I would dig down a minimum of 8″.

    You want the trench to pitch toward where ever the water is exiting, aka going to ‘daylight’. The pitch can be very gradual, 1/4″ per foot is fine.

    Put In A French Drain

    The first thing to go in the trench is the silt fabric. Run it all the way to the drain exit. Be sure there is enough on each side of the trench so it can fold over on itself after adding half the gravel.

    Then lay in the perforated pipe. If you are using the PVC pipe, the holes along the pipe face DOWN, OK? Slide the filter sleeve over the perf pipe. Close off the filter sleeve at the top end of the trench and tuck the  other end into the pipe itself when it connects to the solid drain pipe.

    Put In A French Drain

    Shovel more stone over the top of the perf pipe about 2″ and then fold the silt fabric over itself on top of this gravel. Then add more gravel to bring it level with the ground. You can also bury a french drain, and grow grass on top of it. Be sure to put a grate over the daylight end of the pipe to keep animals from nesting in the pipe.

    One more thing when you put in a french drain, do not connect any roof gutter downspouts to the drain pipe. The rain water can overwhelm the drain and fill the pipe and gravel with more water, when you are actually trying to drain the water.

  • Troy Bilt Rototiller Review Of The Bronco Axis Tiller – GF Video

    Troy Bilt Rototiller Review Of The Bronco Axis Tiller – GF Video

    Here’s my Troy Bilt Rototiller Review video of the new vertical tine Bronco Axis Tiller. All the rototillers I have used have always been horizontal tine machines that break your back. Watch how this machine goes through sod to make a new garden bed.

    FYI, GardenFork was provided this tiller, but my Troy Bilt rototiller review is my own opinion, I don’t say yes to many companies.

    What is the Bronco Axis vertical tine tiller? Its pretty amazing. The tines are similar to a dual blade food processor that cuts through sod and soil without bucking like most tillers do.

    Troy Bilt Rototiller Review

    I used this at a friend’s house, he wanted to convert part of his lawn into a vegetable bed. We fired up the Bronco Axis and it churned through the grass quite well. I was able to steer the tiller with one or two hands, and it never jumped up and out of the path we were cutting.

    It has a hood that sits over the tines, so the dirt is not flying, and any rocks the rototiller kicks up stay in the dirt.

    Troy Bilt Rototiller Review

    One issue is the tiller stalls on rocks about 3-4″ in diameter. This happened to us a few times. The rock can get stuck in the tines, we used a long chisel or piece of rebar and hammer to drive it out.

    The wheels are powered and pull the tiller along nicely. It has only one speed, slow. But for the most part, that is good. I found I could push the tiller across the yard faster than using the powered wheels, then fire it up to start tilling. Also, this tiller does not require you to be the ballast, keeping the machine in line and digging into the soil like horizontal tillers do. Much easier on your back muscles that way.

    Troy Bilt Rototiller Review

    The tines are powered at all times, so if you are driving the machine across your yard, the tines are rotating. The rear wheels, which are tucked under the rear hood, hold the tines up off the lawn, but it be good if you could turn off the tines when driving it to the job site.

    This tiller is completely different than any tiller i have tilled with, its quite easy to use, and doesn’t destroy your back in the process.

    Teresa of Seasonal Wisdom also checked out this tiller on her site.

    You can find more info on the Bronco Axis on the Troy Bilt site here.

  • Drip Irrigation for a Container Garden – GF Video

    Drip Irrigation for a Container Garden – GF Video

    Here’s a DIY project to provide drip irrigation for a container garden, easy to do watch the video to see how.

    Container gardens dry out quickly, which is why I built this system. This is based on using soaker hoses to wrap around the inside of each container, and attaching the hose to a water timer.

    Drip Irrigation Container Garden

    The hardest part of this drip irrigation for container garden system is getting the water. I can’t answer that one for you, as each situation is different. For this rooftop, we were able to bring the water up through a kitchen window in the back of the building. If you are going to bend the hose over a ledge, be sure to provide support where it bends over the wall, it can rub and leak.

    watch more drip irrigationjpgThe first thing to do when starting this is to uncoil the hose in the hot sun, and let it sit there for a few hours. This will allow the hose to straighten and you can work with it easier. Try to find 3/8″ soaker hose for this project. It bends easier.Drip Irrigation Container Garden

    To keep the hose inside the containers, you can use coat hanger wire cut into a U shape and pushed over the hose into the soil. Or use cable ties with holes drilled into the plastic pots. Rocks can also hold down the hose, but then you have to get rocks onto your balcony or roof. Not fun.

    If you have a container garden on a patio, this is perfect. Water is easy to get to. I push the pots together to create a mass planting, and to hide the hose as it goes from pot to pot. As you can see from these photos, this system also works great for urban areas. How are you planning on using this? Let us know in the comments below.

  • DIY Soaker Hose Irrigation System – GF Video

    DIY Soaker Hose Irrigation System – GF Video

    I put together this DIY soaker hose irrigation system for my raised bed vegetable garden and made a video for you. With this and a timer, I don’t have to spend time watering by hand, and wasting water. Soaker hoses are great for slowly watering your garden while saving water. In another video I show how to run a garden hose underground to your garden beds.

    Steps to build your DIY soaker hose irrigation system:

    The video explains it quite well, I think, but here are some photos and tips to make it all work.

    soaker hose irrigation system being installed

    Soaker hose is available in a few different diameters. Lately I’ve been seeing mostly 3/8″ diameter hose. Buy the hose tubing connectors that match your diameter. Either a farm supply store or a hardware store will probably have the T and elbow connectors.

    soaker hose connection to a garden hose

    Soaker hose is easiest to work with when it has been sitting in the sun for a few hours. Lay it out flat, use some rocks to hold the ends and keep it from curling. It cuts easily with a wire cutters or scissors. Be sure to cut off about 6″ of hose with the feed end of the hose before cutting the lateral lengths that run down the bed.

    soaker hose ends capped off

    soaker hose right angle connection

    If your hose pressure is enough to pop out the elbows and Ts, use wire or cable ties to connect the hoses. At the hose ends, I use a wooden dowel or bend over the end of the hose. Sometimes bending the hose doesn’t work.

    Parts needed for this project:

    Easy To Program Water Timer

    Good quality soaker hose

    soaker hose weeping water

    Here is a diagram of the watering system for my raised bed vegetable garden:soaker hose irrigation system layout diagramFor my beds, I run a hose across the bottom end of the bed for a trellis. I usually plant snow peas or beans on a trellis at both ends, and the lateral soaker hoses don’t do a great job of getting to all the seeds I plant along that edge.

    For connecting the garden hose to the bed, I show in this soaker hose installation video how I bury the hose so the lawn mower doesn’t run over it.

    watch more drip irrigationjpg

    I have found it best to use your soaker hose drip irrigation system once or twice a week in the early morning, you want long deep watering, not short shallow watering. Here is a garden hose timer that works well for automated watering.

  • Best Homemade Tomato Cages – GF Video

    Best Homemade Tomato Cages – GF Video

    These are the best homemade tomato cages I have made. They hold up every year, and are easy to put away, and they don’t break like those cheap tomato cages. Watch the video to see how to make tomato cages my way.

    How to make the Best Homemade Tomato Cages

    I use concrete reinforcing wire to make tomato cages. These come 9′ long, and we will cut them down. There are two gauges of wire avail for concrete mesh, buy the thinner kind if  there is a choice.

    watch tomato videos 2Lay down the wire on the ground, and cut the mesh in to pieces as shown in the video. Be sure to wear eye and ear protection if you are using a power tool. You can also use bolt cutters to cut the wire.

    Best Homemade Tomato Cages

    I bend the end wires over the adjoining piece of wire mesh, you could also use wire or cable ties to connect them. If you use wire, you could dis-assemble the best homemade tomato cages for storage. Wear gloves when working with the mesh or wire, it saves your hands from cutting cut and being stained with rust from the metal.

    To keep the cages upright, I weave a 1×2 stake through the mesh once or twice. Drive the stake in and the cage wont go anywhere. If you are using raised beds (video to build them here) screw the stake into the side of the bed, works great for stability.

    Best Homemade Tomato Cages

    An alternative is to buy a roll of concrete mesh. You can cut off a length of it and tie it together. My issue with this is that the roll of mesh isn’t very wide, so you get a short tomato cage, and most tomatoes do well in a tall cage, I think.

    I find these cages work really well for cherry tomatoes. Those stalks grow all over the place and tend to get taller than most other tomatoes, and these cages are up to the challenge. I like taller plants because my dogs will eat the cherry tomatoes off the vine at their level, so tall plants are necessary!

  • Make Better Compost With This Addition – GF Video

    Make Better Compost With This Addition – GF Video

    You can make better compost by having the ideal carbon nitrogen ratio. Unfortunately, most home compost bins don’t have that ideal ratio. There are several compost accelerators on the market, here is one by our sponsor, Eco Scraps.

    How to make better compost

    The ideal carbon to nitrogen ratio, or browns to greens mix, according to Cornell University, is 30:1 by weight. That means 30 pounds of brown leaves to 1 pound of green grass. Coffee grounds are also high in nitrogen, btw.

    If you compost pile smells like ammonia,  it has too much nitrogen. I worked at a community garden with a large compost operation and found that by adding wood shavings from a local wood shop made a huge difference in the ammonia smell. Plus the curly nature of the shavings helped us make better compost. The woodworker was happy to get rid of huge bags of shavings, saving him carting fees and landfill space. Pretty amazing how they broke down quickly.

    But too much nitrogen is rare, the average home compost pile has too much carbon (browns) in the mix, so a compost accelerator like Eco Scraps adds nitrogen. I suggest layering the accelerator as you add material to your pile. Just tossing it on top of an existing pile wont help.

    make better compost
    From Cornell University

    Another key if you want to make better compost is to provide air to your pile. This can be done just by turning it, but if you have the pile in a bin (like my pallet compost bin) that’s not always easy. You can buy a compost auger, Augers on Amazon link, I have used these and the good ones work well. (You get what you pay for) You can also find a neighbor who is throwing out some 1″-3″ pvc pipe, drill holes in it, and layer these in the pile as you build it.

    more compost videos

    We have a bunch more composting videos here, let me know your thoughts below.

  • How To Build A Raised Garden Bed – GF Video

    How To Build A Raised Garden Bed – GF Video

    Learn how to build a raised garden bed in this video we made while building some for our own vegetable garden. This isn’t rocket science, not hard to do at all. Watch the video and start building.

    Steps To Build A Raised Garden Bed

    • Figure out the size of the bed.
    • Purchase the lumber and hardware.
    • Assemble the bed.
    • Add soil and plant.

    I like to build 4′ wide raised beds. The width is good for me, I can reach across the bed from either side. Plus, this width is great if you use floating row fabric or plastic mulch. You can cut the fabric to one width for all your beds. The mini greenhouse I built drops right on top of these beds. So yeah, I like this width.

    Build A Raised Garden Bed

    For brackets to attach the sides of the bed, I use whatever I have. Shelf brackets, angle brackets, or the metal brackets you use for roof trusses, use what you got. They will all work and last longer than the wood itself.

    Build A Raised Garden Bed

    Position the lumber where you want the bed to be, and build it in place. Don’t worry about making the bed super level. You can shovel out high spots, and some dirt will come out the bottom of the bed to fill in low spots.

    After you are happy with the placement and assembly, drive in some pipes or rebar or metal stakes in the middle of each long board and secure with metal banding. This keeps the sides of the bed from warping out. You could use wood stakes, but I wouldn’t, it wont hold as well.

    Build A Raised Garden Bed

    What kind of soil do I fill the raised bed with? I’m a big fan of the lasagna gardening method of filling up raised beds. Again its some of the ‘use what you got’ thing here, but assemble a mess of cardboard, straw, compost, soil. Watch this video.

    If you don’t want to do the lasagna method, don’t use pure top soil, see if someone nearby sells a garden soil, its needs to have a mix of materials, not straight topsoil. Let me know your comments or questions below.

  • Pressure Treated Wood For Raised Beds? – GF Video

    Pressure Treated Wood For Raised Beds? – GF Video

    Can you use pressure treated wood for raised beds? Watch our video to find out if pressure treated wood is safe for gardening.

    This question gets asked many times each season, and I thought I should see what new research has been done, and what the current thinking is.

    Part of the issue here is that for years treated wood was infused with arsenic, which is bad stuff. In the last decade, two types of new treated woods have arrived in stores, and arsenic treated wood is no longer sold in the U.S. I don’t know if it is available anywhere else.

    Untreated wood exposed to soil.
    Untreated wood exposed to soil.

    So, Can You Use Pressure Treated Wood For Raised Beds?

    The new pressure treated wood contains an insect repellent and a mold inhibitor. From Wikipedia:

    Alkaline Copper Quaternary (also known as ACQ) is a water based wood preservative method recently introduced in countries where there is a demand for alternatives to Chromated copper arsenate (CCA).[1] The treatment is made up of copper, a bactericide and fungicide which makes the wood resistant to biological attack, and a quaternary ammonium compound (quat) which acts as biocide, increasing the tolerance of treated timber to copper-resistant bacteria and fungi, and also acting as an insecticide.

    In other words, it has chemicals to repel insects and fungus, the two main culprits in rotting wood.

    Copper is the main ingredient in treated wood. If you’ve ever wondered why it has a green tint, its because of the oxidized copper. And we already use copper in our gardens to fight fungus in spray-on products we buy at the garden store.

    Pressure Treated Wood For Raised Beds

    Plus, we are exposed to copper in our home water pipes, many of which are made of copper. I read that one will ingest more copper from their household water than they will from copper from treated lumber.

    From The University of Missouri Div Of Plant Sciences:

    A 2007 study of the safety of ACQ published in Human and Ecological Risk Assessment concluded that exposure to copper from contact with ACQ-treated wood is not expected to have adverse effects on the health of adults or children.

    So there you go. Considering how many airborne chemicals rains down on our gardens from the air, and we haven’t perished from that yet, it looks like its OK to use pressure treated wood for raised garden beds.

    If you are still not convinced, you can line the inside of your raised garden beds with plastic as barrier between the treated wood and the garden soil.

    Thoughts or questions? Let us know below.


  • How To Grow Peas – GF Video

    How To Grow Peas – GF Video

    I can show you how to grow peas because they are my favorite vegetable, bar none. So I made you a video about it, watch and let me know your thoughts.

    How to grow peas, what you need to know:

    Peas like cool weather, when the summer starts to heat up, they wilt quickly. So its key to get the seeds starting quick. You have two choices, seed directly in the garden, or start them in seed starting trays or pots. Both have advantages.

    watch seed starting videos

    How To Grow Peas

    I now prefer to start pea seeds in pots and transplant them outside. I have found that the seeds germinate faster and better than seeding them directly. A big reason is that the soil outside is cold, and the seed starting mix is warm, because its inside. Took me awhile to figure that out. I also direct seed a bit when the weather starts to warm up, as a back up measure.

    Have the bottom of your trellis right where the plants are. Peas start to climb right away, or else they will fall over. You can set some small sticks alongside the plants to lead them to the trellis above, if need be.

    how-to-grow-peas-1

    I do not have any problems with insects or diseases with my peas. I mainly plant sugar snap peas and snow peas. Many of them don’t make it out of the garden, we and the Labs eat them standing there in the garden.

    You can shade the pea plants to keep them growing a bit longer, but I have not had much success with this. Part of the problem is the trellis is quite high. There are some pea varieties that don’t grow as tall, you could try those.

    how-to-grow-peas-2

    When the sugar snap peas start to fade, I plant string beans below the trellis, and leave the fading peas on the trellis. The beans will climb up and work just fine. This way you have used the trellis for two plants in one season. Nice.