Category: Video

  • Best Rice Pudding Recipe : GF Video

    Best Rice Pudding Recipe : GF Video


    How To Make Rice Pudding Recipe Video. I love rice pudding, here I show you how to make rice pudding in the oven. There is also a stove top rice pudding recipe, which we will show you soon. Rice pudding is a comfort food, it reminds me of diners and maple syrup. Plus rice pudding is super easy to make, even I can make it .
    Many people make a bouron sauce for rice pudding, but I prefer honey or maple syrup. I’m not big on the bourbon sauce, I find it too sweet and boozey.

    Plus this is another use what you got recipe, in that you can put in nutmeg or cinnamon or a combo of both. At the local diner, they sprinkle the cinnamon over the dish of rice pudding just before baking it rather than mixing it into the batter.

    Other additions that I’ve seen are chopped apple, lemon or orange zest, dates, currants, and other dried fruit. Try some stuff in your cupboard and let us know what works for you in the comments below.

    In testing for doneness, its eye of the beholder, some people like pudding firm, and others like it more loose pudding like. I think a lot of it depends on what you ate as a kid. I remember a lot of Jello pudding as a kid, so i tend toward the firm side of puddings.


    rice pudding small

    Best Rice Pudding Recipe
    Ingredients
    •    2 cups cooked rice, long, short, or brown
    •    1 1/2 cups milk
    •    4 eggs
    •    1/3 cup sugar
    •    1 tsp vanilla
    •    1 tsp salt
    •    1 tsp cinnamon or nutmeg
    •    1/2 cup walnuts or raisins ( optional)
    Cooking Directions
    1. Preheat Oven to 325F
    2. Mix together everything but the rice.
    3. After the eggs are well mixed, add in the rice.
    4. Pour the batter into a greased 8×8 or 9×9 dish
    5. Bake for 25-30 minutes
    6. Pudding is done when its the consistency that you like pudding, some like it firm, some like it jiggly.
    7. I prefer to serve warm with honey or maple syrup.

  • How To Cook Mushrooms : GF Video

    How To Cook Mushrooms : GF Video

    Learn how to cook mushrooms in our latest foraging – mushroom identification video. We made a oyster mushroom identification video, and people asked us to show how to cook mushrooms, so here is our mushroom cooking video!

    The oyster mushrooms we use here were cultivated mushrooms, and you can grow your own mushrooms, here’s post about growing mushrooms here, but we bought these at the food coop. In the growing season you can go mushroom hunting, but be sure to learn from an experience mushroom foraging person, and bring your mushroom identification books with you. Below are a few of the mushroom books we like and use.

    To clean mushrooms, I just brush them off with a towel, you can also wash them, but its not always necessary, I feel, but you should do what you want, because you’re going to do that anyway…
    how-to-cook-mushrooms-2

    Butter, Salt, & Pepper are the key ingredients in this simple sauted mushroom recipe, and the cast iron pan is great for cooking mushrooms, holds heat nicely and its evenly distributed too.

    You can store mushrooms in your fridge or a cool basement, I keep them in a paper bag that’s not closed tight. Plastic bags will cause the mushrooms to go bad quickly, I think. Also when you are foraging for mushrooms, bring along a few paper bags, its the best way to store them while you hike around, IMHO.

    Below is my favorite book I use for mushroom identification, let me know any other suggestions you have in the comments below:


    Click To Buy From An Independent Bookstore

  • Simple Paper Seed Pots : GF Video

    Simple Paper Seed Pots : GF Video

    Learn how to make simple paper seed pots, the best paper seed pots, I think. These paper pots are for those of us who can’t make origami paper plant pots, OK? Simple method to make paper pots for your seedlings and seed starting trays. If you want to make a pack of paper pots, just glue or tape them together, use what you got.

    Most newspapers print their paper with soy based inks now, so I’m ok with using regular newspaper for vegetable paper pots. And the newspaper will break down in the garden soil; you just open up the bottom of your paper pots just before planting to allow the roots to easily grow out the bottom of the paper pot.

    You can use different size jars to make different size newspaper pots. I used a peanut butter jar to make paper pots for tomato seedlings, and used a small mason jar for lettuce transplant paper pots.

    simple-paper-seed-pots-pin
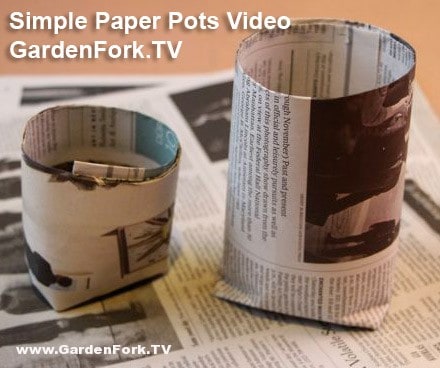
Its best to bunch the paper pots together under grow lights, as the paper can wick away moisture from the seed staring soil, packing the pots close together cuts down on that evaporation. You can watch our how to build a simple grow light video here, and our other seed starting videos here.


    How do you start your seeds in the spring, what kind of pots or trays do you use? Let us know below:

  • Cooking Pizza In A Fireplace – GF Video

    Cooking Pizza In A Fireplace – GF Video

    Cooking pizza in a fireplace is not rocket science! No need to build a pizza ove, let me show you how to cook pizza in the fireplace. This is totally a “Use What You Got” GardenFork moment. I wanted to make pizza in our portable backyard pizza oven, but it was freezing outside, and staring at the fireplace, the light bulb went off in my head. I already had a built-in pizza oven in our living room.

    Cooking Pizza In A Fireplace, How To Start

    For this pizza oven method, you’ll need a cast iron dutch oven combo cooker, You can buy a combo cooker dutch oven here
    And a cooking or camping grate. you can buy the camping grate here

    We make our pizza dough – watch our pizza dough recipe video here – the day before and let it do a slow rise in the fridge overnight.

    Be very careful when working with the fire! Fire burns – don’t wear loose clothing, wear gloves and use fireplace tongs or other metal tools.

    After the fire in the fireplace pizza oven dies down bit, put the camping grate over the fire and preheat both parts of the dutch oven. You may need to adjust the height of the camping grate over the fire, I used bricks under the legs of the camping grate. Have all your ingredients prepared ahead of time, as well as the dough rolled out.

    Hardwoods make the best firewood, my wood shed is primarily stacked with oak and maple. The maple takes longer to catch, so I use a mix of what I have.

    Have you used your fireplace as a pizza oven? Let us know in the comments section below.

    Here are the links again to the combo cooker dutch oven and the camping grate:

  • Electric Clock Repair GF Video

    Electric Clock Repair GF Video

    Electric clock repair video I made with my sister. She bought an Empire style electric clock that needed to be rewired, so we made a how-to video on rewiring an electric clock. Make sure the clock is unplugged while you work on it!

    When repairing an electric clock, pay attention to whether the old plug is polarized. Polarized plugs have one power lug larger than the other. If so, be sure that the wire from the polarized lug on the new plug attaches to the same place in the clock that the old polarized plug wire did. Its important to pay attention to this detail, it can reduce the risk of shock.

    Push Connectors for Electric Clock Repair

    We use push connectors to fix this electric clock. I like push connectors because they make stripping the wire insulation unnecessary. All you do is push the ends of the old wire and the new wire into the push connector and press the metal blade down through the wires to make the connection, then close the plastic tab to seal the deal.

    This same technique could be used for other electric appliances that need rewiring or new wires. However, make sure these old appliances are OK to use, and are not a fire hazard.

    Here is a good book I like if you want to learn basic home wiring:

    Have a question or suggestion or story? Let us know below:


  • How To Install A Dishwasher – GF Video

    How To Install A Dishwasher – GF Video

    Learn how to install a dishwasher with this video I made for you. Installing a dishwasher is not hard, nor is it rocket science. If you have to remove an old dishwashwer, see my video on dishwasher removal. The hardest part might be buying a new dishwasher and then reading the installation instructions.

    How to install a dishwasher, the GardenFork way

    To remove the old dishwasher, you’ll need  a screwdriver, a pliers, and an adjustable wrench. Be sure to turn off the water supply and make sure the power to the dishwasher is turned off or disconnected. Most new dishwashers plug into a wall outlet under the sink, older models may be hard wired.

    Hard wired means there is that metal cable attached to the dishwasher or it may be what is called Romex, the vinyl covered electrical wiring. Either way, turn off the circuit breaker that the dishwasher power wire is connected to, then disconnect the power wire. Put wire nuts on the bare wires. If the machine is plugged into a wall outlet, usually under the sink, just unplug it. Simple!

    One thing to keep in mind: Have a bowl handy, as when removing the hoses, they may need to be drained. You don’t want dishwasher water draining all over the floor.

    If the floor has been tiled after the cabinets and original washer was installed, you may have problems getting the old washer out. The new tile floor is higher than the original floor, so the dishwasher can’t slide out.

    Make sure the insulation wrapped around the new machine is intact and goes in neatly, this is key to reducing the noise of the washer.

    A common misconception I see is people using teflon tape or pipe sealant on the compression fitting from the water supply line. You should not use tape on that joint. You will need to use teflon tape on the right angle fitting that comes out of the dishwasher. See the photo below for how to hook up the water supply line. Make sure the right angle fitting points toward the back of the dishwasher. Remember that the dishwasher is hooked up to the hot water supply.

    It helps to have a friend help when figuring out how to install a dishwasher, and remember, if all else fails, read directions.

  • Heirloom Simple Squash Soup Recipe – GF Video

    Heirloom Simple Squash Soup Recipe – GF Video

    Here’s a simple squash soup recipe that uses heirloom winter squash- Blue Hubbard – instead of the usual Butternut Squash. You can use any type of winter squash in this soup, but we wanted to trumpet the use of more heirloom vegetables in our recipes here.


    We grow heirloom and hybrid squash in our neighbor’s field, using the weed stop fabric. We made a how to video about using the weed free plastic gardening mulch, which you can watch here.

    Winter Squash are easy to grow. The biggest problem we have with growing squash is the Squash Vine Borer, and we have 2 videos on dealing with them

    An organic method to prevent the Squash Vine Borer Video

    How to deal with a Squash Vine Borer infestation Video

    You can cook winter squash several ways, steaming, frying, baking… I prefer to roast squash. You need to be careful when cutting winter squash, it’s quite dense, and you need a sharp knife. Take care to steady the squash and yourself when cutting it up, if you slip, its a bad thing with a knife.

    Baking or roasting squash helps sweeten the flavor of the squash, i think. I split the squash in two, put both halves face up in a pan, and stick in the oven; don’t cover with foil.

    Heirloom Simple Squash Soup Recipe
    Ingredients
    •    1 Heirloom Squash, such as Hubbard
    •    1 medium onion, chopped
    •    1 small handful sage or thyme or a mix
    •    2 cups lowfat milk
    Cooking Directions
    1. Split the squash in half, scoop out the seeds, place face up in roasting pan and roast for 1 hour at 350 or until squash flesh is soft. you can check this when a knife easily inserts into the flesh.
    2. When squash is roasted, put 2 glugs of oil in a dutch oven or deep pot, toss in oinion and cook till just golden and kinda clear
    3. Add cooked squash flesh to the pot along with chopped herbs
    4. Mash the squash with a potato masher and add some of the milk.
    5. You can use a hand blender or masher to cream the squash, adding more milk to get the consistency you want. A blender will work also, but its more messy.
    6. Salt and pepper to taste and ladle into individual bowls.
    7. You can add in home made croutons, which makes the soup more of a filling meal.

  • Oyster Mushroom Identification, Foraging, Hunting – GF Video

    Oyster Mushroom Identification, Foraging, Hunting – GF Video

    Foraging for Mushrooms this fall, I found a bunch of Oyster Mushrooms, and made this Mushroom Identification Video. Oyster Mushrooms are edible and delicious. They grow on dead or dying trees. The trees can be standing or on their side. I’ve found oyster mushrooms growing out of the ends of cut logs, and the stumps of dead trees.

    Oyster mushrooms grow in clusters, and are usually stacked on top of each other, the individual mushrooms are kidney shape. It has gills and doesn’t have much of a stem. Oyster mushrooms are white to tan colored, they are usually darker in color later in the season. The mushrooms in this video were harvested in late November.

    When harvesting, I always leave some mushrooms on the tree to allow the mother plant to spread spores to create more mushrooms. So don’t strip a tree of all its mushrooms, you may get a second growth of mushrooms on the same tree, so check back a week later, or after a rain.

    Be sure to be very sure what you are doing when foraging for mushrooms! Learn from someone who is a practiced mushroom hunter, or consider taking a class. Do a web search for your state or county or city and “mycological society” and you may find a group offering classes. Also check nearby nature centers.

    Click here to see our other mushroom identification posts

    Cross check the mushrooms you find with several sources, books are best, I think. I use several books for identifying mushrooms , below are the mushroom identification books I recommend:


    Click Here To Buy From IndieBound

    Click Here To Buy From Amazon


    Click Here To Buy From IndieBound

    Click Here To Buy From Amazon

  • Fall Garden Tour 2012  GF Video

    Fall Garden Tour 2012 GF Video

    GardenFork viewers have asked for a tour of the yard, so we walked around a bit to show you what is going on in the garden and yard and the kitchen, plus of course, the Labradors.

    What are you doing in your garden and home? What are you plans for the winter? Lets us know below:

  • Grow Vegetables in Winter with a Cold Frame : GF video

    Grow Vegetables in Winter with a Cold Frame : GF video

    Cold frames have been used to grow vegetables in winter since glass was invented. Winter gardening is made possible with cold frames and hoop houses. Using a recycled window, we built a cold frame last year – see our how to build a cold frame video here – and had good success growing vegetables in the winter and starting plants early in the spring using the cold frame.

    This year I took volunteer plants that had sprung up around the garden: Mustard Greens, Swiss Chard, Garlic, Chives, and parsley and transplanted these plants into the cold frame. These plants all do well in colder weather, so we’ll have some nice greens for salads in the middle of winter. How cool is that?

    The key to using a cold frame to grow vegetables is controlling the temperature inside the cold frame. We use an automatic vent that has louvers that open at about 45F, letting hot air out of the cold frame. It is called a crawlspace vent at the hardware store. You can buy the automatic vent online here.

    The recycled window we used is a single glaze, meaning it has only one sheet of glass, you can also use double glazed windows. As we say at GardenFork: Use what you got.

    You can make a larger cold frame, aka a plastic hoop house greenhouse, by watching our hoop house video here.

    Let us know your cold frame and hoop house tips and suggestions below, thx, eric.

  • Deep Fry Turkey How To  GF Video

    Deep Fry Turkey How To GF Video

    Learn how to deep fry turkey in this GardenFork.TV cooking video. We received a bunch of requests to make a video about how to make deep fried turkey, so just in time for Thanksgiving, here is the our simple method for deep frying turkey. We bought our Turkey Deep Fryer Kit on Amazon here
    .

    [social type=”fblike” float=”right”]

    There are a bunch of precautions when using a deep fryer, remember, the oil is real HOT and can burn you.

    • Wear long sleeves and heavy gloves
    • Turn off the burner when lowering or raising the turkey
    • Defrost the turkey fully
    • Keep a fire extinguisher nearby
    • Slowly lower the turkey into the hot oil, takes 1-2 minutes to fully immerse the turkey
    • Make sure the oil temperature thermometer is not accidentally stuck in the turkey itself. You want to use the large round dial thermometer that comes with your deep fryer kit to measure the oil temperature.
    • Do not let the oil go above 350F, bad things can happen, like spontaneous combustion, not a good thing.
    • Follow all safety rules that come with the turkey deep fryer kit
      .

    The secret to great deep fried turkey is temperature, you want cook the breast to 145F, then turn off the burner, lift out the turkey, drain and let it rest for 20 minutes. It will continue to cook a bit. I’ve found that if you cook the turkey past the 145F mark, it tastes dry and crumbly.
    [box bg=”#FFCC33″ color=”#000000″]Be extremely careful when using a deep fryer! Hot oil will burn your skin. Follow all directions and precautions that come with you deep fryer.[/box]

    We could go into the science of protein strands tightening up when they are heated too much, but we’ll leave that to America’s Test Kitchen. Just remember to check the temperature after about 25 minutes in the thick part of the breast.

    Here is where we bought out deep fried turkey kit:

  • What would you like to see?  GF Video

    What would you like to see? GF Video

    I get ideas all the time for new GardenFork videos, but I’d like to hear from you guys what you’d like to see. I have a list of show ideas in my Evernote file, but some of the best ones come from you guys. Like the video we did on garden hose repair!

    I’d appreciate you taking the time to post below your suggestions and thoughts, i’d appreciate it. Thanks, eric.

  • Garden Hose Repair Video  GF TV

    Garden Hose Repair Video GF TV

    Broken Garden Hose? Learn how to fix your leaking garden hose in this Fix a broken hose video. We’ve run over the garden hose with a lawnmower a few times, and instead of throwing out the hose, we fix the leak in the hose, or the cut off end of the hose with a few repair parts from the hardware store. A few things to keep in mind with garden hose repair, don’t buy cheap repair parts or hose washers, you get what you pay for in most of the world , and this applies in the garden hose fix it department too.

    Rubber or flexible washers go between your hose and the spray attachments, and keep the water from leaking out the hose. You might try buying a few different kinds of hose washers, as i’ve found some garden hose attachments don’t work with the thicker hose washers. And buy a bunch of them, you’ll save yourself time later when you need them. Hang them near the hose storage hooks or on the wall of your workshop so you can find them quickly. Put them in a drawer and they are lost.

    I’ve found a number of hoses in the neighbor’s trash that were easily fixed with a garden hose repair kit, and I saved a bunch of money and kept a fine watering hose out of the landfill.

    What do you do to repair your hoses? let us know below:

  • Foraging for Edible Plants: Purslane  GF Video

    Foraging for Edible Plants: Purslane GF Video

    Learn how to forage for edible wild greens and identify edible plants in this Foraging for Purslane video. Edible plants like Purslane are sometimes considered weeds, but you can eat them, watch and learn here in this GardenFork foraging video.


    Purslane grows all over the place, ( it grows well in compacted and dry soils ) so all you urban homesteaders rejoice, here’s a free salad green that grows like a weed. Purslane is considered a succulent, it kinda looks like the leaves of a jade plant, that whole family of plants. We have purslane volunteering in our garden, so if I run across it, I usually just let it grow and harvest it before it takes over whatever plants are next to it.

    From the Purslane Wikipedia entry, I learned a lot about purslane. Purslane is eaten all over the world, just not here in the states. The leaves and stem are edible, not sure about the taproot. It is eaten raw and cooked, and it has a ‘mucilangious quality’ it is also cooked into soups and stews and can thicken dishes.

    Greeks fry the leaves with sage, in Turkey it is cooked like spinach, and again, here, we pull it out as a weed.

    What I found cool is that it has high levels of Omega 3 fatty acids, which few plants have. One usually has to eat fish to get high omega 3 levels. This edible wild green also has antioxidant properties.

    Do you eat purslane? what is your favorite wild edible green?


  • Supersedure Queen Cells – Beginning Beekeeping Video

    Supersedure Queen Cells – Beginning Beekeeping Video

    I found these supersedure cells, sure sign of a queenless beehive, yesterday. Supersedure cells are a beehive’s way of raising an emergency queen. Something has happened to the queen, either it died, or the workers killed it because it was injured or not laying well, and the honeybees are raising a new queen. There were no signs of freshly laid eggs in this hive, and very little capped brood.

    Supersedure cells are different than swarm cells. Swarm cells are queen cells that the hive is raising to create a new queen to take over the hive after the hive swarms. When a hive swarms, the current mated queen leaves with the swarm, leaving the new queen raised from the swarm cells to take over.

    This hive had already swarmed, and I was thinking the new queen probably wasn’t well mated, considering we only have two hives in the yard here, and there is only one other hive nearby of Italians that I know of – there are probably feral hives nearby as well.

    How do bees raise a new queen? They take some freshly laid eggs, usually 1-3 days old, and place them in these enlarged queen cells, and feed the larvae a diet of royal jelly. They don’t feed these larvae anything else, and the 100% royal jelly diet causes them to develop into queens rather than workers.

    I happen to have just raised a new queen in my queen nuc, so I pulled out the frames with the supersedure cells on them, placed them in a nuc with some honey frame and workers, to make new queens.

    I then took the nuc with the mated queen I just raised, and did a hive combine of the queenless hive and the mated queen nuc. I shot some video and we’ll be posting a video of that soon.

    Added: Beekeeping nomenclature can be vague and confusing, because there is no one beekeeping terminology authority, here is a description of supersedure cells from my favorite beekeeper, Rusty, of HoneyBeeSuite.com :

    A cell hanging off the middle of the frame somewhere is usually a supersedure or “emergency” queen cell. A cell hanging off the bottom of a frame is usually a swarm cell.

    Supersedure cells are often begun after the eggs are laid. The bees, knowing they need to replace the queen, begin feeding royal jelly to a young larva they have selected. They build a supersedure cell around this larva (or several larvae) and it hangs down from the face of the comb. Swarm cells, however, are built in preparation for swarming and are not intended to replace the queen, but to raise a second queen. This way, there will be a queen for the part that swarms and a queen for the part that stays.

  • Roast Cherry Tomato Pasta Recipe  GF TV Video

    Roast Cherry Tomato Pasta Recipe GF TV Video

    Easy Cherry Tomato Recipe served over pasta, rice, or quinoa. Here’s a recipe for all those ripe cherry tomatoes in your garden. Roast the tomatoes with some garlic and the like, and its amazing.

    My friend Bill gave me this cherry tomato recipe; he’s been making it a few times a week. Its a great midweek dinner, or weekday dinner recipe, super simple.

    I make this with all yellow tomatoes, but you can ‘ use what you got ‘ cause that’s the GardenFork way, after all. The yellow cherry tomatoes have  lower acid content, and are sweeter, I think, than red cherry tomatoes, but that’s just my opinion.

    If you have a recipe for cherry tomatoes, please share it with us below, be great to hear from you.

    Roast Cherry Tomato Pasta Recipe
    Recipe Type: Pasta
    Cuisine: Italian
    Author: Eric Rochow
    Prep time:
    Cook time:
    Total time:
    Serves: 4
    Cherry Tomato Pasta recipe to deal with all the tomatoes you have in the garden.
    Ingredients
    • 2 pints cherry tomatoes
    • 1/4 cup olive oil
    • 4 large cloves, coarsley chopped garlic
    • 1 cup oil cured black olives – optional
    • 1 cup cubed feta cheese
    • 1 lb pasta, preferably whole wheat
    Instructions
    1. pints cherry tomatoes
    2. /4 cup olive oil
    3. large cloves, coarsley chopped garlic
    4. cup oil cured black olives – optional
    5. cup cubed feta cheese
    6. lb pasta, preferably whole wheat
    7. Cooking Directions
    8. Preheat the oven to 375F
    9. Wash and dry the cherry tomatoes. arrange the tomatoes in one layer in a 9 x 13 pan.
    10. Coat with the olive oil and distribute chopped garlic over tomatoes.
    11. Roast in oven for about 30 minutes, or until the cherry tomatoes start to burst and brown slightly.
    12. If using black olives or feta cheese, add these after tomatoes are roasted.
    13. Cook pasta while tomatoes are roasting. Drain cooked pasta and divide between 4 bowls.
    14. Pour roast tomato mixture over the pasta.


  • Easy Native Pollinators

    Easy Native Pollinators

    Just a short “bonus” video from Rick this morning on Easy Native Pollinators. He’s been guarding his dill and fennel patches in the front yard from the Perfectionistas’ in the neighborhood (and inside his own house) all season long. The result is this somewhat seedy but extremely prolific butterfly habitat, a Motel 6 for Monarch Butterflies headed for Mexico in successive waves new hatchlings.

    Rick also covers up his innate laziness in not getting a spring garden planted in a side bed by showing off his stand of Buckwheat. It grew from seed to super pollinator attractor in less than 3
    weeks.

  • DIY Grow Light PDQ

    DIY Grow Light PDQ

    We don’t have a lot of space at Casa Cairn, so we have to make a lot of stuff do double duty. And why not? Most of our stuff is really used very infrequently. I’ll bet it’s pretty much the same at your house.

    Today we’ll take a two bulb florescent light from the garage and press it into it’s twice a year role as a grow light. Note that you don’t have to buy special –and expensive– grow bulbs, but your light should have two florescent bulbs, one in the Daylight or Cool spectrum (toward blue around 6,000 K) and one in the Warm end of the spectrum (toward red, around 2,500 K). Many door growers are using red and blue LED lamps, but those are expensive (although cheaper to run than fluorescents) for a home project.

    Here’s your materials list:

    • 16 ft of 2″ x 2″ lumber. The longest piece needs to be about 4’6″ long (about 3 inches longer than your fluorescent fixture). The uprights need to be equal length, around 3 foot long or so. The feet should be at least 1 foot long. As I note in the video, the controlling issue for the uprights is usually your ceiling fan.
    • 4 – plywood triangles, about 8″ on each side. Cut up some scrap.
    • 2 – screw in hooks to hold the light
    • A fist full of wood screws, about 1″ long.
    • 2 – cleats or some way to secure the light and keep it from crashing down on your seedlings
    • 1 – 24-hr timer. You light should be on for 18 hours off for 6 hours. If plants don’t get rest, they can’t generate the hormones and enzymes they need to grow.
    • a length of line so that you can raise and lower the light. Note: the closer you put your light to the plants, the less “leggy” they will grow.

    This video was edited, including voiceover, on my iPad. Not quite as smooth a job editing as I’d like, but power was out for much of the project.