Category: Video

  • Pressure Cooker Short Ribs Recipe – GF Video

    Pressure Cooker Short Ribs Recipe – GF Video


    This pressure cooker short ribs recipe really shows just how great a pressure cooker is. Pressure cookers are great for easy cooking and last-minute cooking – if you decide you want some short ribs at the last minute you can cook them up fairly quickly with a pressure cooker. If you were to cook short ribs in the oven or on your cook-top it would take quite a while. But with the pressure cooker, you toss your ingredients in the cooker close it up, bring it up to temperature, cook it happen hour and you’re done. And that my friends is amazing!
    For this pressure cooker short ribs recipe, I like bone-in short ribs you can also get boneless short ribs those short ribs will cook much faster in the pressure cooker but I think the bone adds flavor so that’s why I use bone in short ribs.

    pressure cooker short ribs recipe
    sear the short ribs, don’t cook them

    You want to make sure to cut big chunks of carrot. If you make the carrot pieces small I think they’re going to fall apart in the pressure cooker. They’re in there for half an hour if they are too small the pieces breakdown, maybe even like turn to mush. Which would be a bad thing.
    For this pressure cooker short ribs recipe I use half red wine and half water. I think if you use all wine for the braise it’s just too strong I use a medium bodied Malbec box wine. Good box wine is just fine. K?
    When cooking food in the pressure cooker, it’s actually better to under estimate the cooking time than to over estimate. If you overcook the ribs, they’re not as good. If you undercook them you can always close the lid back up and bring them up to pressure and cook them for a few more minutes. When you open the lid, some of the meat will be falling off the bone, some will still be sticking to the bone, but either way your friends are going to love this. My friends did. Let me know what you think in the comments below, do you make short ribs or do you have some good pressure cooker tips and recipes?

    Here is my pressure cooker review and purchase suggestions post.

    Pressure Cooker Short Ribs Recipe

    4 large pieces of bone-in short ribs

    1 medium – large sweet onion chopped coarsely

    1 lb carrots, chopped into 1″+ chunks

    1 cup medium body red wine, like a Malbec or Cote Du Rhone

    Sear the large sides of the meat in a few glugs of vegetable oil in the pressure cooker without the lid on. Just brown the meat, don’t cook it.

    When all the meat is browned and in the pot, add in the carrots and onions, and pour in 1 cup of wine and 1 cup of water.

    Attach the pressure cooker lid and lock it according to the manufacturers instructions.

    Cook on high pressure for 30 minutes.

    Turn off heat and let pressure cooker cool down for 10 minutes. Release any remaining steam per instructions and open the lid away from you.

    Gently pour the meat and vegetables into a colander and collect the braising liquid in a bowl. Use a fat separator or a glass container to pour off most of the fat in the braising liquid.

    Put the meat and veg into a serving bowl and pour the braise liquid over it. You could thicken the liquid if you wish with cornstarch.

  • Best Cast Iron Seasoning Instructions – GF Video

    Best Cast Iron Seasoning Instructions – GF Video

    The best cast iron seasoning instructions, hands down. First watch the video, then read more about our easy step by step process to restore cast iron.

    At the end of this article are links to how to remove rust from cast iron and how to remove the seasoning from cast iron, where to buy cast iron, and cast iron videos.

    So you have a brand-new cast iron pan you just bought or you have an older pan that you just strip the seasoning off of. I ruined the seasoning of one of my pans awhile back, and is one of the reasons I created this cast iron seasoning and care video series. While we show a skillet, this process works for how to season a cast iron dutch oven or griddle as well.

    Our cast iron seasoning instructions are based on a blog post by Sheryl Canter, who did a lot of research into this and saved us all from having to do that same research. The secret to cast iron seasoning is you want use an oil that is called a drying oil. When drying oils are applied to a surface like cast iron and heated, the oil goes through what’s called polymerization. The best edible drying oil is Flax oil. You have to buy this in the health food section of a food store and it has to be kept refrigerated, as it can go rancid fairly quickly. Flax oil is the food grade version of linseed oil,  I would not suggest you use linseed oil to season your cast iron pan.

    But a more affordable and easier to find oil that works well is Sunflower Oil. I have found its great. And if you can’t find any of these oils, regular old vegetable oil or Crisco does just fine.

    Best cast iron seasoning instructions

    For this cast iron seasoning method, the more oil application and heating cycles you do, the better the seasoning. Our cast iron seasoning instructions are based on Sheryl’s, I modified it a bit. This process is for new pans, or pans that have had all the previous seasoning removed, watch our video here for how to remove cast iron seasoning.

    Cast Iron Seasoning Instructions

    1. On the stove top, heat up the cast iron pan. This makes sure the pan is dry and opens up the pores of the metal a bit.
    2. Add in a tablespoon or two of oil into the pan. Use a paper towel to coat the whole pan, inside and out, with the flax oil.
    3. Grab a new paper towel, and wipe out excess oil. You only want a thin film of flax oil in the pan. No drips or globs of oil.
    4. Turn the oven to 500F and place the pan – you can do more than one, stack them if you want- into the oven.
    5. Heat for one hour, turn off the oven, allow the pan to cool.

    Repeat the oil coating and heating 2-3-4-6 times. Whatever works for you.
    The more you do this initial seasoning, the better the pan will be.

    cast-iron-seasoning-instructions-6
    The outdoor gas grill is great for cast iron seasoning.

    The cast iron seasoning process puts out a bit of smoke, so I’d suggest using your outdoor gas grill. Turn the grill burners on high, close the lid to heat it up, put in the pans. My gas grill will not get to 500F, but it got close, and that worked well for me.

    I oiled and heated one of my pans 4 times and it looked great, more and it is even better.

    I think new cast iron is just as good as old cast iron, but there are many arguments about that. You can get good cast iron on amazon here. This post may contain affiliate links which won’t change your price but I earn a commission from. Thx!

    cast-iron-seasoning-instructions-7

    Soap On Cast Iron? Video               Remove Old Seasoning From Cast Iron Video

    cast-iron-seasoning-instructions-9

    Remove Rust From Cast Iron Video       Cast Iron Skillet Cornbread Recipe Video

  • Rugelach Recipe From My Grandmother – GF Video

    Rugelach Recipe From My Grandmother – GF Video

    Our rugelach recipe is based on the on my Grandmother and Mom for the Christmas holiday. We also called Rugelach ‘roll-ups’ not sure why, maybe it was easier to say. But, Rugelachs are easy to make, and with Eric’s recipe for rugelach, you can too. Our family’s version of rugelach used the classic nut – sugar mix, but we also used jam or jelly. Its important not to use too much jam or jelly; when you bake the rugelach, some of the jam may seep out and burn you cookie sheet. Not a good thing.

    rugelach recipeThere are some people that say rugelach and croissants are related but after reading this Wikipedia entry, I don’t think so. Rugelach is a much older treat and croissants only came about in the 19 century. Nonetheless rugelach are found in a lot of different cultures and in a lot of different countries, especially in Eastern Europe. Take some flour, a little sugar, add some nuts and something sweet, roll it up and bake it and you got this excellent dessert.

    Here’s my modern take on rugelach I add cream cheese to the pie dough and it works out really well. The dough might be a little wet, so use a little less water. You can always add a little more as you go along. If you find the dough is too wet after comes out of the fridge, you can add a little bit of flour to soak up the moisture.

    Eric’s Rugelach Recipe

    2 cups all purpose flour

    2 sticks butter – cold – cut into 1/2 cubes

    3 teaspoons sugar

    8 ounces cream cheese – cut into 1 inch blocks

    1 teaspoon salt

    2 cups chopped walnuts

    1/2 cup brown sugar

    1 teaspoon cinnamon

    lemon zest – optional

    Preheat oven to 350F

    In a food processor, pulse the flour and butter together until the flour coats the butter and the mix starts to look like large cornmeal.

    Add in the cream cheese and pulse to mix it all together, it should start to form small marbles, and also just some fine powder as well. ( it never looks like it does on the food TV shows, don’t worry )

    Put the flour mixture into a large bowl, and start to add small amounts of ice water, about 2 tablespoons at a time. Mix the water into the flour until you get a dough that is wet, but dry enough to handle.

    Shape the dough into a big disc, wrap in plastic wrap, and put in the freezer for about 10 minutes, or the fridge for 30 minutes. You can also leave the dough in the fridge until the next day if you want.

    Mix the walnuts with the brown sugar and cinnamon. You can also add lemon zest to the nut mix.

    On a floured counter or plastic wrap, or whatever you like to use for dough, try to shape the dough into a big circle, like a pizza. If it isn’t perfect, don’t worry, use a pastry scraper to cut out a rough circle, save the extra pieces.

    Pour the nut mixture onto the circle of dough

    Cut pizza slices into the dough. the outside of the slice should be 1.5 – 2″ wide.

    Roll up the slices so they look kinda like croissants.

    Place on a greased baking sheet, bake at 350F for about 30 min. The crust should be slightly golden, you can bake them more if you like, just don’t burn them.

  • Soap On Cast Iron and Restoring Cast Iron Videos

    Soap On Cast Iron and Restoring Cast Iron Videos

    I’ll be posting a more thorough how to season cast iron series here soon, with more photos and information, but I wanted to get these up on the site for you all. And the last video in this list here is our excellent cast iron cornbread, check it out.

    remove-cast-iron-rust-pin-play
    Watch our how to remove rust from cast iron video here.

    cast-iron-cornbread-recipe-video-2

    Watch our Cast Iron Cornbread Recipe Video here.

  • Cast Iron Cornbread Recipe Video

    Cast Iron Cornbread Recipe Video

    Here’s my go to cast iron corn bread recipe for most weekends at the house. Cornbread goes with so many of the dishes we make, I have the ingredients in my head.

    Melt fat, mix dry, add wet, pour into pan.
    cast-iron-cornbread-recipe
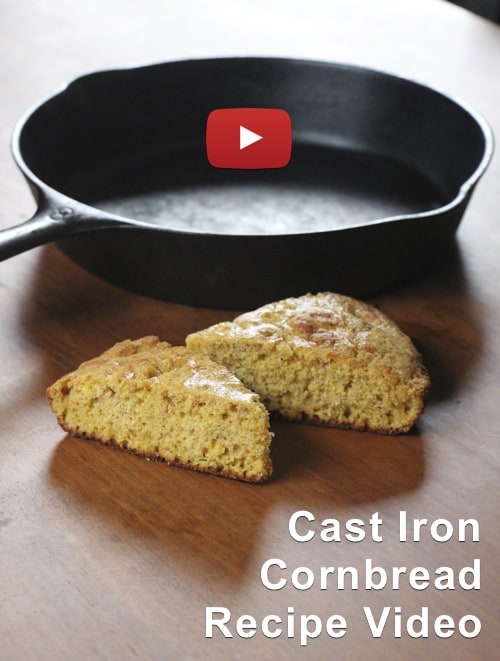
I love cornbread. I’m not sure when the first time I ever had cornbread was, but I’m pretty sure it was probably at the Friday night fish fry when we lived in Wisconsin.

    We would go to Etzel’s Country Inn and sit in what looked like someone’s basement recreation room. There was a bar next-door, and we would have fried perch, french fries, and corn bread. All this and a polka band playing with accordion music.
    And it was that his fish fry that the epiphany that I want to learn how to play the accordion. We see how well that turned out.
    But what I love about this cast iron cornbread recipe is it’s easy super simple. You literally throw the oil in the pan, put the pan in the oven to heat up. You mix the dry ingredients dump, the wet ingredients and mix it all together. Pour in a hot pan, if it sizzles be careful. I’ve never had it spit at me but you got to becareful these days or else someone’s gonna get mad at you you know.
    Drop it in your oven half an hour later, boom: delicious cornbread.
    In this recipe I use a bacon drippings. You don’t have to do that if you don’t want to, it does give it a neat taste, but you could also use butter or you could use a vegetable oil. Really what ever makes you happy go do it. Okay?
    Full disclosure: I am a northerner and I like cornbread that’s a little sweeter maybe than my southern friends. I know I like it sweeter than my southern friends because when I serve them cornbread there’s always a raised eyebrow that I got from them.

    If you want to buy a cast-iron skillet here’s a link.

    See our how to season cast-iron videos as well.

    Here is our Jiffy cornbread recipe hack video.

    Eric’s Cast Iron Cornbread Recipe

    4 tablespoons of bacon drippings, veg oil, or butter
    1 1/2 cup cornmeal, medium or coarse ground
    1/2 cup whole wheat flour
    1/2 cup sugar, less if you like.
    1 1/2 teaspoons baking powder
    1 teaspoon salt
    1 cup milk
    2 eggs

    You can also use a glass or metal pan for this. I would opt for the glass pan if i didn’t have any cast iron.
    Fire up the oven to 375 with the cast iron pan in it.
    After assembling your ingredients, pull out the pan.
    Drop the oil into the cast iron pan, and put back into the oven.
    Mix together the dry ingredients using a fork or similar tool.
    Add the two eggs into the milk and scramble them. Don’t over-scramble, K?
    When the cast iron pan has melted the oil, pull it out, and place on a rack, as it will be hot.
    Pour the batter into the pan. The oil will puddle up, that’s ok.
    Bake for 30 minutes, test with a clean knife for done-ness.

  • Pressure Cooker Braised Pork with White Beans and Peas Video

    Pressure Cooker Braised Pork with White Beans and Peas Video

    I love cooking with my pressure cooker and this braised pork recipe what white beans is to me the quintessential fall and winter recipe.


    Cut up some pork, with some dried beans, add onions, some herbs, in for the pressure cooker 30 minutes later you’re done. Isn’t that amazing?
    I could probably eat white beans every day all winter. They just have this kind of magic quality and you really haven’t done anything. Maybe you added some onions and garlic, some olive oil – just a little bit of something and boom amazing. What I really like to do is save with the cheese rinds from Romano and Parmesan cheese, and when I’m cooking white beans, I throw them in. I chopped up the cheese rinds into 1 inch chunks, and throw them in while I’m cooking the beans. The rinds gives off a magic flavor quality which I love.

    This pressure cooker recipe works really well for this recipe. If you wanted to go a little faster you could add in frozen carrots at the end of the dish  instead of chopping up carrots in the beginning. Just one little cheat that might work and make it a little faster for you. I posted about pressure cooker reviews and a really good pressure cooker cookbook I like here.

    Pressure Cooker Braised Pork with White Beans and Peas Recipe

    This is for your average 6 quart pressure cooker, if you have a larger pressure cooker you can increase the dried white beans to 1 pound.

    2-3 pound boneless pork shoulder or pork butt, or a pork shoulder you have deboned. Cut into 1″ or so cubes. Cut off large pieces of fat.

    8 ounces of dried white beans, Northern, Cannenelli, or whatever you have

    2 Medium Onions, or one large one chopped into 1/2″ pieces

    6-8 cloves of chopped garlic  depending on how big the cloves are

    2 tablespoons Italian Seasoning herb mix, or Herbs de Provence herb mix

    4 bay leaves

    1 cup white wine  dry wine is better, I think

    3 cups chicken broth  you can use beef broth if you want a bigger flavor

    2 lbs of carrots chopped into 1″ lengths

    16 ounce bag of frozen peas.

    Rinse the white beans, put in a bowl and cover with hot water, add in 1 tablespoon of salt and let sit for an hour or longer.

    Heat a glug of oil in a skillet and add in the chopped onions and chopped garlic, you want them to start to brown.

    Heat a glug of oil in the pressure cooker and brown the cubed pork shoulder. You don’t want to cook the meat, just brown it.

    When the onions-garlic is browned, put them in with the meat. Pour some white wine into the onion pan, deglaze the bottom, and pour this into the pressure cooker with the meat and onions. Add in white wine to 1 cup or so.

    Add in the carrots to the pressure cooker.

    Drain the beans in the salt brine – do not rinse them – and add to the pressure cooker.

    Pour in the 3 cups of broth.

    Drop in the herbs. I go kinda heavy on herbs, follow your nose…

    Important: follow your model’s instructions on how full you can fill the pressure cooker, most limit it to 2/3 or 3/4 full. You may have to hold back on some of the beans or carrots.

    Close up the pressure cooker and bring to high pressure, lower the heat and cook at high pressure for 30 minutes. Let it sit for 10-15 minutes and then quick release any residual steam.

    Drop in the bag of frozen peas, stir into the mix.

    If you have any cheese rinds from Romano or Parmesan, you could cut these into big chunks and drop them in. Carve off the hard edge or wax rinds themselves, as they will dissolve.

    If you want make this a bit faster, omit the chopped carrots and when the pork is done, drop in a bag of frozen sliced carrots when you put in the frozen peas.

  • DIY Rolling Garage Shelves – GF Video

    DIY Rolling Garage Shelves – GF Video

    Build these DIY rolling garage shelves and make your basement or garage more organized and save some bucks. Shelving units with wheels are expensive, here’s how I added caster wheels to my existing garage shelving units.


    You can build the DIY rolling garage shelves either as a light-duty or heavy duty version. Light duty would be for a shelving unit that doesn’t have a lot of heavy material on it. Light stuff might be beach towels, blankets, pillows, things like that. A duty shelf would be one that has tools, screws, nails, that sort of thing on the shelves.

    diy-rolling-shelves-pinYou can build this with scrap lumber that you have laying around. One special tool that you will need is called a hole saw. If you don’t have a hole saw kit you might be able to borrow one from a neighbor or you can buy a hole saw kit here online. Don’t buy the cheapest hole saw kit, it will break.

    I used 1 1/4″ and 1 5/8″ drywall screws to pu this together, it depends on if you are using 2x4s or something thinner. Its good to have a box of both on hand anyway. For the lumber, you can use cast off studs from a renovation, spare pieces of plywood, metal studs (for the lightweight version). This is really a use what you got kind of project.

    I got the caster wheels for this project from an IKEA desk that I had taken apart, but you can find these wheels at the hardware store or at tool supply stores. I have also taken wheels off of furniture that has been put out for the trash. You can also buy wheels online here.

    Adding wheels to your shelving units does increase the height of the shelving unit. So if you have low ceilings in your basement, keep that in mind. Your new DIY Rolling Garage Shelves might hit the ceiling now if you have tall stuff on the top shelf.

    Assembly of the DIY rolling garage shelves:

    holes line up with legs of shelf
    holes line up with legs of shelf
    Done
    Shelf sits in holes of the wheel base
    Have an assistant
    Have an assistant
    Assemble upside down
    Assemble upside down
    Heavy Duty Shelves
    Heavy Duty Shelves
    Light Duty Shelves
    Light Duty Shelves
  • Oyster Mushroom Hunting – GF Video

    Oyster Mushroom Hunting – GF Video

    Here’s a mushroom hunting video about some really amazing oyster mushrooms we found growing along the side of the road right near our house

    A few things to keep in mind when you’re going mushroom hunting:

    • bring along several identification books we like a couple that we listed at the end of the video here
    • learn from someone who already knows what they’re doing take a class or ask if you can tagalong with someone who is a mushroom expert
    • Join your local mycological society, in other words your local mushroom group. You can learn a lot from these people and they might even take you long to show you some really cool spots to go mushroom hunting.

    When you find some mushrooms you want to harvest, don’t take all of them. Leave one third of the mushrooms there so the mushrooms can propagate they will release their spores and they will grow more mushrooms that you would go in harvest.
    After a while you’ll be able to recognize some of the common edible mushrooms in your area but bring along several mushroom identification books anyway. I really like the Audubon guide and there are also several regional guides. We  have a few for the Northeast United States or New England listed those below.

    Avoid mushrooms that have slugs or bugs in them, yes they are a protein, but many don’t taste that great. You can wash mushrooms, but they usually only need to  be brushed off. You can use a towel, I’ve seen mushroom brushes that look like a whisk broom/porcupine thing. So again, if you’re not quite sure don’t eat it or check with your friend who is an expert OK?

    Want to grow mushrooms, watch this vid: How To Grow Mushrooms From Plug Spawn – GF Video

    Here are more mushroom hunting and mushroom identification videos for your here on GardenFork:


    Oyster Mushroom Identification

    cook-mushrooms-play
    How To Cook Mushrooms

    oyster-mushroom-hunting-2
    Wild Mushrooom Risotto Recipe

    Click here to see our other mushroom identification posts

    Cross check the mushrooms you find with several sources, books are best, I think. I use several books for identifying mushrooms , below are the mushroom identification books I recommend:


    Click Here To Buy From IndieBound

    Click Here To Buy From Amazon


    Click Here To Buy From IndieBound

    Click Here To Buy From Amazon

  • Winter Beekeeping Preparation Checklist

    Winter Beekeeping Preparation Checklist

    Getting honeybees ready for winter, aka winter beekeeping preparation, is one of those things that can fall off the list for beekeepers, probably not a good thing. I believe if you just leave your hives as is, most will perish.
    Below we have several videos on getting honeybees ready for winter, but first of all, here’s a few things we do to each hive in late fall to prepare for winter.

    winter-beekeeping-preparation-checklist-5-things-1

    Winter Beekeeping Checklist:

    1. Feed 1:2 sugar syrup in the fall
    2. Treat bees for varroa mites
    3. Feed one gallon of syrup with Fumagillin
    4. Add dry sugar to the top of the hive.
    5. Use an insulated inner cover.
    6. Tilt the hives forward.
    7. Close up the screened bottom board.
    8. Insulate the hives with polystyrene.
    9. Install a mouse guard on entrance.
    10. Strap down the hives.

    Varroa Mite Treatment: From what I understand, varroa mite populations in your beehive soar in winter, so knocking down that population before winter makes sense. Watch our oxalic acid varroa mite treatment video, its pretty easy to do and is a huge step toward getting your bees through winter. One should rotate mite treatments, Hop Guard is the other mite treatment I’d suggest.

    Sugar Syrup: Ask your beekeeping neighbor when they start feeding sugar syrup. I add Fumagillin the first gallon of syrup. Let the bees take down all this treated syrup before adding more sugar syrup to the feeder.

    Dry Sugar: This year we used the mountain camp sugar method when providing sugar on the top of the hive. In years past we have made sugar cakes, but this year I wanted something simpler. Reading about this method on the Honey Bee Suite blog, I agree with Rusty’s post, that the mountain camp dry sugar method works pretty good, and because its easy, you will do it. Making fondant or sugar cakes is a pain, and you will likely procrastinate about making the cakes it until its too late. Watch: Mountain Camp Method Video

    winter-beekeeping-preparation-checklist-5-things
    Mountain Camp Winter Sugar Feeding

    Insulated Inner Covers: I am a big convert to using these. Before I put them on the hives in winter, every spring I would find mold in the hives and dead bees. Insulated inner covers reduce or eliminate condensation from collecting on the top of the hive. Imagine its raining inside a hive in winter, that’s condensation. Wet bees are dead bees. Watch and learn how make an them in this video:

    watch beekepeing videos insert copyOr you can use a piece of polystyrene, a wood spacer you can easily make, and your existing inner cover to do the same thing.

    Insulated Inner Cover Beekeeping

    Winter Beekeeping Preparation
    Top View of Insulated Inner Cover – purchase this or make your own

    Tilt the beehive forward: Gravity works. Extra insurance to keep condensation from raining down on the hive cluster. Tipping the hive forward allows any drops of water that have begun to form on the top of the hive (which is the bottom of the inner cover) to slide forward, hit the front wall of the hive, and finally, draining out the front of the hive. Its easy to do, just slide a 2×4 under the back of each hive before you strap it down.

    "<yoastmark

    A few more winter survival tips:

    Close up the screened bottom board: This is one of those opinion based things. I use screened bottom boards that have a plastic board that slides into the bottom. So I close off the screen in winter. Because it is important to have ventilation in the hive, yet reduce condensation, the hive needs at least one top vent hole.

    Insulate the Hive: First of all, the best method we’ve found so far is to surround the hive with with polystyrene, secured with a ratchet strap. We have two videos about this, watch here: Beehive Winter Wrap

    Winter Beekeeping Preparation

    watch beekeeping videos insert

    Mouse Guard: This can be bought from bee suppliers or you can make one out of 1/2″ hardware screening. One year I blanked on mouse guards, as a result, I lost a hive to mice. Its sad and a pain to clean up.

    Close the guard down to about 2" wide with duct tape
    Close the guard down to about 2″ wide with duct tape

    Strap Down The Hives: This may seem overkill, yet it has saved us. We secure the hives against high winds and bears. One strap goes around the hive itself. The second hive secures the hive to the ground with two metal stakes. Furthermore, if you live in an earthquake zone, strapping your hives is a must. Watch our video about how using straps saved a hive here.

    mountain-feeding-sugar-beekeeping-play

    bee-oxalic-acid-mite-treatment-play

    Winter beekeeping is not the easiest part of keeping bees, therefore some preparation in the fall can help bees survive winter. Follow these tips and increase your chances of getting bees through winter.

    Save

  • PVC Cold Frame Hoop House #3 – DIY GF Video

    PVC Cold Frame Hoop House #3 – DIY GF Video

    Easy to build PVC Cold Frame Hoop House is a mini greenhouse that allows you to grow salad greens and cold tolerant vegetables into the winter, and get a head start on early spring planting. This hoop house is more resistant to heavy snow than our previous versions, listed below.

    This is version 3.0 of our cold frame hoop house. What I like about this one is that it’s a taller than our previous cold frames, so you could start to grow tall plants like kale or start sunflowers earlier in the spring.

    hoop house cold frame plans

    PVC cold frame hoop houseA couple things to keep in mind while you’re building this hoop house, especially if you are using this on raised beds. You want this hoop house to fit just inside the walls of your raised bed. I made this mistake when I made my first hoop house, I didn’t measure how wide my raised bed was and the cold frame didn’t fit exactly. Experience has once again taught me something. The frame fits just inside the wooden sides of the raised bed and it doesn’t have to have a super tight seal with the soil, you do want some air exchange in and out. What the hoop house is doing is moderating temperature. When it gets really cold outside, it’s going to be cold in there but it will extend your growing season.

    Consider planting some cold tolerant greens in August, I like a salad green mix that sold by Fedco seeds. They have  a fall and winter lettuce greens mix and that’s worked really well for me.

    One thing I did not mention in the video is that where the plastic meets the plywood ends of your hoop house, the plywood can cause the plastic to tear and so you might want to put something soft around the edge of the plywood. If you have some old garden hose you could split the garden hose open and run that along the edge of the plywood and that would go a long way toward making the plastic such that it wouldn’t rip.

    For  this 8′ x 4′ cold frame I used:

    • Two 2×3 8′ long studs
      Two 2×3 studs cut to 45″ long
      One 1×2 8′ stud, you could also use a 2×2
      4 metal angle iron brackets
      3 pieces of 1/2″ Schedule 40 PVC cut to 6′ long
      1 1/4″ and 1 5/8″ drywall screws
      Two pieces of 4’x4′ thin plywood. You could also cut down a 4’x8′ piece.
      3 or 4 mil plastic, i used a roll of 10′ x 25′, which is enough for two hoop houses.
      Two thermatic vents, available here http://amzn.to/2Cg81fg
      Staple gun

    Using the angle brackets, build a 4′ x 8′ wood frame, make sure the shorter pieces of 2×3 wood (the 45″ pieces) are inside of the larger pieces, so the outside dimensions are 48″ x 96″

    I cut the plywood ends to match the arc of the pvc hoops. Take one of the hoops and curve it into the wood frame at the end of the frame, and use this to sketch the arc on the plywood ends, it does not have to be perfect.

    pvc-cold-frame-hoop-house pvc-cold-frame-hoop-house-3 pvc-cold-frame-hoop-house-2 pvc-cold-frame-hoop-house-5 pvc-cold-frame-hoop-house-6 pvc-cold-frame-hoop-house-7 pvc-cold-frame-hoop-house-8

    My hoop house cold frame gardening has been greatly influenced by Eliot Coleman and Niki Jabour.

    Four-Season Harvest    The Year-Round Vegetable Gardener

    hoop house cold frame
    Watch all of our  hoop house videos here.

  • Best Stove Top Pizza Recipe – GardenFork Video

    Most fry pan pizza ain’t great, but this stove top pizza recipe is truly the best. Why? Its a thin crust pizza with a nice snap, and it can be made in about 5 minutes, and you don’t have to make pizza dough the day before.

    The key ingredient to this pizza is tortillas. Who knew? I’ve seen many recipes that say to use a pita bread as the pizza crust, and its real underwhelming. The torilla is already thin, and it crisps up nicely in some oil in a cast iron pan. You can also use a Calphalon style pan, but it has to be oven proof.


    But where to get tortillas? In your grocery store. From what I can tell, they are now sold all over the country. Yes you can use those tortillas that you have to cook first, just cook the top side bit first, then flip it and add your sauce and toppings.

    The pan does not need a lot of oil, as the excess oil can smoke when you put this in the broiler. Learn from my experience. The ideal tortilla is one that covers the bottom of the fry pan, mine did not, but it wasn’t a big deal, it still tasted great.

    best-stove-top-pizza-recipe

    My tomato sauce is super simple. Quality pureed canned tomatoes are already cooked and only need some salt and I add a few tablespoons of italian seasoning mix. Done.

    For cheese, I used chopped up fresh mozzarella, and quality Pecorino Romano. Do not fill the whole crust with cheese, it will spread out nicely.

    For toppings, its really use what you got. I always keep a can of sundried tomatoes in the fridge, and I had some nice dry sausage that I chopped up.

    Best Stove Top Pizza Recipe

    1 can quality pureed tomatoes

    2 tablespoons italian seasoning mix

    1 bag tortillas that fit your fry pan

    1 chunk of pecorino romano

    1 ball of fresh mozzarella

    Few slices of quality dried sausage

    1 cup sun dried tomatoes

    Preheat the broiler

    Heat the cast iron fry pan on the stove top, add enough vegetable oil to coat the bottom of the pan. When it shimmers, drop on the tortilla.

    Spread the tomato sauce mixture lightly on the tortilla, and drop on chunks of mozzarella.

    Add dried tomatoes and sausage.

    Sprinkle romano cheese.

    By now the fry pan will be hot, so be careful. Take this pan and put it in the broiler, the closer the better to the broil element.

    Keep an eye on it, but in about 2-3 minutes, the top of the pizza will be melted and toasted.

    Pull out, let cool a bit, and cut into slices.

  • Chocolate Halloween Treats Recipe – GF Video

    Chocolate Halloween Treats Recipe – GF Video

    Here’s a Halloween Treats Recipe for those of you who want to go the DIY way and make their own treats for the trick or treaters.

    As you know I love chocolate almost in any form, and I was watching Jacque Pepin’s TV show More Fast Food My Way and he did a quick little recipe for these DIY Halloween treats,  he called them Chocolate Rochers, similar to my last name. Very simply just melted chocolate with a couple different crunchy items dropped onto parchment. They were brilliant, really simple and I thought that’s a GardenFork Halloween treat if I ever saw one. Click Here to buy Jacques Pépin’s Book More Fast Food My Way

    Our Halloween Treats Recipe is based on his, pretty straightforward. Taking crunchy items like Rice Crispies, Cornflakes, toasted almonds, you could also use toasted hazelnuts or toasted walnuts. It’s really what do you like, if it’s crunchy and goes good with chocolate, it probably works. I’m a big fan of peanuts as well, you could have peanuts that you toasted in the fry pan.

    chocolate-halloween-treats-recipe-pin


    As far as what kind of chocolate to use for the chocolate Halloween treats, we were using semi sweet baking chocolate which I preferred or a big bar of Hershey’s dark chocolate, both of which you can buy at almost any grocery store. Experiment and buy a couple different ones and see what you like.

    Be very careful when melting the chocolate! You can melt it in the microwave with short pulses of about 30 seconds and you wait a minute or two and then zap it for another 30 seconds. I found that a simple homemade double boiler works fine for mem. A small saucepan pan with about an inch of water in it,  a metal bowl on top works very well as a double boiler.
    So there you go, our version of a DIY Chocolate Halloween Treat. What is your favorite kind of halloween treat that you can make? I would love to hear in the comments below, it’s great to hear from you all.

    Chocolate Crunchers, a DIY Halloween Treats Recipe

    1 box of semi sweet baking chocolate or whatever chocolate you like.

    2 cups of Rice Crispies, Corn Flakes, roasted nuts such as almonds, walnuts, hazelnuts.

    In a double boiler, break up the chocolate bar into pieces and melt the chocolate. Do not over-melt it, you want it such that it is thick.

    Take the bowl off the boiling water and add in the chosen ingredient(s). Be careful as the bowl is hot.

    If you are working with kids, scrape the melted chocolate into another bowl.

    How much of the crunchy ingredients is up to you. I prefer most of the nuts be covered in chocolate.

    Drop tablespoon sized amounts of the melted chocolate onto parchment paper and let the chocolate cool.

  • Pallet Compost Bin Plans & Photos

    Pallet Compost Bin Plans & Photos

    Here’s a neat pallet compost bin we made in an hour. My pallet projects obsession continues, lately I’ve been looking way too much at pallets sitting on a sidewalk and thinking what can I make out of those?

    Charlie Pup and I went out to dump kitchen compost in our pallet compost bin. She sat for a photo you can see at the end of this post. I wanted to follow up on how our compost bin has been doing.

    So far so good is the verdict. While the wood has weathered well, we haven’t filled it up completely, as this bin is mainly for food compost. I do drop stuff from the vegetable garden as well.

    I have found that I can build one of these pallet compost bins without the metal brackets. With some care and long wood screws, you can align the pallets at the corners. Then you can sink in some screws between them to join it together. But if you have some spare brackets of some sort, by all means use them. Use what you got!

    more compost videosKeep an eye out for old pieces of pipe or metal fencing, because you can use these to drive down in between the pallet sides to keep anchor the bin. Two of these pipes seems to work well for me. I built one of these up at my friend’s cabin to keep the Labradors from feasting on his food scraps. The bear has not torn through his compost bin yet it has kept the dogs out.

    Build The Bin with photos and video

    Here is the original pallet compost bin video  with some other information if you want to check it out, below are photos of how to build the pallet compost bin.

    pallet-compost-bin-plan-gf-video pallet-compost-bin-plan-gf-video-8 pallet-compost-bin-plan-gf-video-7

    Pips add stability
    Pipes add stability

    pallet-compost-bin-plan-gf-video-3 pallet-compost-bin-plan-gf-video-6

    Save

    Save

    Save

    Save

    Save

  • Easy Spaghetti Meatballs Recipe – GF Cooks Video

    Easy Spaghetti Meatballs Recipe – GF Cooks Video

    What’s not to like about this easy spaghetti meatballs recipe? Bake the meatballs, cook the pan sauce, add pasta and eat. Simple and easy to do, and you could use this recipe to make meatballs sandwiches as well. Nice.

    Our simple recipe uses meatloaf mix and a bunch of italian seasonings. We buy about 1.5 pounds of meatloaf mix, which around us is half pork and half ground beef. The beef I bought for this project was 90% lean, and I’d rather have it around 80% lean. You could toss in a few tablespoons of bacon drippings or butter to amp this up a bit. It all works.

    A key thing here is to not over mix the meat mixture, it will make the meatballs tough. You can use your hands or a spoon to mix it all up, use what you got. Be sure to wash your hands after handling meat.

    This is different than in the video, but I have found out that I like the cheese to be coarse grated with the large holes of a box grater instead of the fine grating of the microplane. It just tastes better, and i think the cheese stands out more, you run across pieces of cheese in the meatballs, which I like.

    easy-spaghetti-meatballs-recipe-gf-cooks-video-2

    Easy Spaghetti Meatballs Recipe

    1.5 pounds of meatloaf mix, preferably 80% lean beef and pork

    4 tablespoons Italian seasoning herb mix

    3 ounces of tomato paste, half a small can

    1- 28 oz can of crushed or pureed tomatoes, buy a good quality brand.

    1 large yellow or sweet onion chopped up

    2-3  cloves of garlic

    2 slices of bread toasted and ground up in a mini chopper or similar gizmo

    1/2 cup milk

    2 eggs

    2 cups coarsely grated pecorino romano cheese

    Preheat the oven to 375F

    Boil up a pound of your favorite pasta.

    Put the onion in a large pan or pot with good slick of oil on the bottom of the pan. Its best to slow cook these onions, but do what you can. Golden color on the onions is best for flavor. Chop up the garlic and add in to toast for a few minutes at the end of the cooking.

    Add half the onion to a bowl with the meatloaf mix, 2 tablespoons Italian seasonings, eggs, ground up toast, milk, cheese, some salt and pepper.

    Add the can of tomatoes and paste and seasoning to the pan with the cooking onions and simmer the sauce while we make the meatballs. Halfway through the simmer, at about 15 min, add a half cup of water and some sugar to taste.

    Mix the meatball ingredients together, don’t overmix the meat!

    Roll the meatballs into about  1.5″ diameter balls and put in a baking pan or sheet. Put in the oven for about 20 minutes, check with a thermometer, 145F is done.

    In a perfect world, this all comes together at about the same time, so you an assemble the dish and sit down, but you can cover the meatballs with foil while prepping the other stuff.


  • Pumpkin Cornbread Recipe – GF Video

    Pumpkin Cornbread Recipe – GF Video

    A cornbread recipe that adds in pumpkin to change it up. This will go great with chili, stews, or as a Thanksgiving side dish recipe. I love cornbread already, and when I saw pumpkin puree on sale at the store, I started to think of ways to use it, and there you go: add it to a cornbread recipe!


    A couple of key things here, I use a sectional cast iron pan for this, you can use a cast iron fry pan or an 8×8 or other square baking pan as well. A glass baking dish will make the best crust, I think. If you are using cast iron, put the fry pan in the oven and then preheat the oven and the cast iron. Do not oil the cast iron pan, just let it heat up. We will oil the pan just before we put in the batter, OK? You can buy the cast iron cornbread pan here. This post may contain affiliate links which won’t change your price but I earn a commission from. Thx!

    If you are using a baking pan, put 2 tablespoons of butter in the pan, and put it in the oven to melt just before you are ready to add in the batter. Take care not to burn the butter, this is a bad thing. If the butter burns, get a clean pan out and start over with that process.

    This is basically a quick bread recipe, so take care not to over mix the batter, the milk helps everything come together pretty well, but don’t beat it into a mess. If you want more pumpkin flavor, add in more puree, and dial back on the milk. It will be an experiment, but I think it will come out fine. Let me know how you use pumpkin in the comments below.

    pumpkin-cornbread-recipe-gf-cooks-video2

    Pumpkin Cornbread Recipe
    Recipe Type: Bread
    Cuisine: American
    Author: Eric Rochow
    Prep time:
    Cook time:
    Total time:
    Serves: 8[url:1][img:1]
    Cast Iron Corn Bread Recipe gets a flavor upgrade with Pumpkin for Thanksgiving or any time.
    Ingredients
    • 1 1/2 cups Cornmeal
    • 1/2 cup All Purpose Flour
    • 1 tablespoon Baking Powder
    • 1 teaspoon Salt
    • 1/4 cup Brown Sugar
    • 1/2 teaspoon Nutmeg
    • 2 Eggs
    • 1 cup Pumpkin Puree
    • 1/4 cup Vegetable Oil
    • 1/2 cup Milk
    Instructions
    1. Preheat the oven to 375F and preheat the cast iron pan if you are using one.
    2. Mix all the dry ingredients together in medium sized bowl
    3. Crack the two eggs into a small bowl and scramble them together, then add to the dry batter.
    4. Add in the puree, milk, veg oil.
    5. Mix the ingredients together, but don’t over mix, OK?
    6. If using a baking pan, put 2 tablespoons of butter in it, and place in the oven to melt.
    7. After butter has melted, swirl it around in pan and then add batter.
    8. If using cast iron, take pan out, swab vegetable oil all around and add batter.
    9. Bake for about 30 minutes and test for doneness. Its not the end of the world if cornbread overbakes a bit.
    10. Let cool for 1o minutes then pop out of the pan.
    11. This tastes great with maple syrup.

  • DIY Dog Tug Toy – GF Video

    DIY Dog Tug Toy – GF Video

    Learn how to make a dog tug toy in this DIY GardenFork Video. Our dogs tear through store bought toys, maybe the toys are made for smaller dogs, not sure. So I bought 100′ of rope and now we make our own dog rope toys. This video is one of several we are working on for Dog Toy series. Sign up for our newsletter to find out when we post new vids.

    One precaution here: In this video we are using a polyester rope, and some dog have issues with this kind of rope, it can get stuck in their stomach. Our pups do not have this problem. I suggest you use cotton rope, which you can get at a camping supply store or a good hardware store.

    diy-dog-tug-toy-gf-video2

    This tug toy is not perfect, the dogs manage to tear it apart in a week or two, but then I just make up another one. And they love it when they see me with the large hank of rope making them a new toy. Moose, the black lab, loves to get hold of the whole hunk of rope, which makes a mess of it.

    Charlie Pup and Moose are the main users of the tug toy, Henry will want to play with Moose, and then Charlie Pup jumps in. Not sure if this is a dominance thing or just Charlie Pup being jealous, or maybe its just dogs being dogs. But it is a blast to watch, below is a video of the dogs playing with the tug toy. You can watch more Lab videos on their YouTube Channel here. As you can see, it works very well, and it wears them out, which is a big goal of mine. Sleeping dogs are a good thing at the end of day, and this works well for that.

    I can barely hold onto the rope when I play with them, its amazing how much pull strength they have. Their jaw clamps onto that rope and then they pull back with their hind legs. I let go the rope, lest I wreck my back.

    Do you make your own dog toys? Let us know below:

  • Grilled Tomatoes with Spinach and Cheese, an Easy Tomato Recipe – GF Video

    Grilled Tomatoes with Spinach and Cheese, an Easy Tomato Recipe – GF Video

    An easy tomato recipe to use up some of those giant beefsteak tomatoes that doesn’t involve making a salad or a BLT. Grill big tomato slices, make a cream sauce, add in spinach, top with cheese, and you’ve got a nice appetizer or side dish. This recipe comes from GF viewer Marcus, who sent us a nice note about his friends food blog, Cheater Chef, and this recipe.


    Be sure to oil the grill grates after preheating your grill, take a paper towel with vegetable oil and use tongs to apply the oil from the towel onto the grates. I use a propane grill for this easy tomato recipe, be sure to heat it up, mine takes a while, mbe your grill doesn’t. A charcoal grill will heat these up quickly.

    You can also use the broiler of your oven to make these, ideally one would put a grate into a baking sheet so the tomato slices sit above the pan. I think many people forget about the broiler function of their ovens, restaurants use the broiler all the time, we should use it more too.

    The original recipe calls for using heavy cream, and this appetizer or side dish is quite rich with the sauce, I think you can use half and half or even whole milk and dial down the richness a bit, the tomatoes will do just fine. I like a sharp cheddar for this, but use what you got, Mozzarella would work, but also some drier cheeses too, like Emmenthaler.

    easy tomato recipe

    Easy Tomato Recipe

    Grilled Tomatoes with Spinach & Cheese, based on the recipe by Cheater Chef

    1 large beefsteak tomato, nice and ripe.

    1 bag or large bunch of spinach, about a 1 pound bag would work

    small onion or half of a larger onion, chopped up fine

    1/2 cup half/half or whole milk, your choice

    1 clove garlic minced, depending on how much garlic you want.

    Butter for the pan

    2 cups grated sharp cheddar cheese

    • Preheat your grill

    • Slice the tomato into half inch slices, oil the grill grates carefully, and place slices on grill, close grill cover

    • Chop spinach, discarding large stems, and microwave on high for about 3 minutes, you want it to wilt, but not overcook.

    • Melt butter in fry pan,  and add chopped onions, cook them down until starting to brown.

    • Add garlic, be sure to get the garlic to grown a bit too.

    • Go check on slices grilling, turn them when they are starting to have grill marks

    • Add half/half or whole milk to the pan and let it thicken, don’t burn it like I did.

    • Toss in cooked spinach and bring cream sauce out to grill

    • Turn slices if you haven’t done so already, and place a big spoonful of the cream sauce on each slice

    • Top with cheese, and close grill to allow the cheese to melt. Don’t walk away from the grill right now.

    • When the cheese is melted, the dish is ready.


    Do you grill tomatoes? Let us know below:


  • Cherry Tomato Recipe: Make Pesto! – GF Video

    Cherry Tomato Recipe: Make Pesto! – GF Video

    A cherry tomato recipe that is a new one to me: Cherry Tomato Pesto. I heard about this from Lidia Bastianich, who was interviewed on ATK Radio and mentioned it. I was surprised at how well it turned out, never had I thought of making pesto this way before. What fun to have a new and unique cherry tomato recipe just in time for the tomato overflow from the garden.

    Another interesting ingredient in this pesto recipe is the use of almonds, which i had not thought of before but now seems so obvious. One thing I did learn while working on this recipe was that the almonds need to be ground up in the food processor before adding in the rest of the ingredients. Just dumping them in with the tomatoes doesn’t work, as the almonds are still pretty chunky when the rest of the ingredients have been mixed together.

    Basil does play a role here, but you could also use parsley, both work well when paired with tomato. I imagine you have both growing in your garden somewhere near the cherry tomatoes, do a mix of the two if you like.

    And do not use cheap olive oil for a pesto recipe, use the best you can get, or almost the best. There are a lot of adulterated olive oils out there, you can check out Truth In Olive Oil for a list of good olive oils you can buy in your area.

    cherry-tomato-recipe-make-pesto-1

    Not your usual Cherry Tomato Recipe

    Cherry Tomato Pesto Recipe  based on Lidia Bastianich’s recipe

    • 1 pint cherry tomatoes, not the super sweet kind, a mix is good.
    • 3/4 cup grated Pecorino Romano cheese, buy a wedge and grate it yourself
    • Approx 1 cup Extra Virgin Olive Oil
    • 3/4 cup raw almonds, not salted or roasted, but you could use the salt-roast kind in a pinch
    • 1 medium clove of garlic, smashed or minced
    • 1 small handful of basil leaves and young stems
    1. Mince of smash the garlic and let it sit out while you prepare the rest of the ingredients.
    2. Put the almonds in a dry saute pan on the stove, and toast lightly. Be careful not to burn them. The almonds will click when its time to turn them.
    3. Grate the Pecorino Romano cheese with the large holes of a box grater.
    4. Pull the basil leaves and young stems from the woody older stems.
    5. Put the toasted almonds in the food process and break them down to small chunks and some powder
    6. Add the cherry tomatoes, cheese, garlic, basil.
    7. Turn on the food processor and mix this all together, be careful not to over process, you want this to have some texture.
    8. Slowly drizzle the olive oil into the food processor as it mixed the ingredients together. The pesto will thicken a bit.
    9. Test for salt, it may or may not need some.

    Do you have a favorite cherry tomato recipe? Let us know below!