• Bullfrogs Scare Me : GardenFork Radio

    Leave a comment: 860-740-6938 A more laid back GF Radio, as  Eric is kinda tired, and Mike is, well, Mike. But, we talk about Frog mating calls, using social media in your job search, Eric’s visit to a food swap, BKswappers, at Brooklyn Kitchen, slide rulers, how to keep your dogs out of your raised beds, and birdhouses. Please write a review on our iTunes page!

    photo by Click

  • Twice-cooked Rice Cakes: A Leftover Rice Recipe

    Don’t throw out that rice! Instead make this twice-cooked side dish. It’s easy to make and it only takes about 15 minutes. It’s rich and creamy and similar to risotto but closer to a Japanese onigiri (rice ball). This recipe serves two.

    You’ll need;

    • a small covered sauce pan
    • a wooden spoon
    • a square or round cooking ring
    • 1 1/2 cups cooked, leftover rice
    • 3/4 cup chicken broth
    • 2 tbsp butter
    • 1 tbsp olive oil
    • 1/4 tsp of spices to your taste: powdered onion, garlic, parsley,  pepper, oregano, thyme… etc.
    • 1/4 cup grated Parmesan cheese.
    • 1/2 tsp sea salt, to taste

    Add chicken broth, butter, salt, and spices to a small sauce pan and bring to a boil. Lower heat to medium and add cooked rice. Stir often with a wooden spoon until most of the liquid is absorbed. Remove from heat and add grated Parmesan cheese and olive oil, mix well, cover, and let it set for 5 minutes. Put rice into cooking rings and pack well, then remove the ring. If the rice does not release easily from the ring, run a wet butter knife around the inside edge. Top it with more grated Parmesan or dried bonito flakes. You have to admit this is pretty impressive for leftover rice.

  • Hire Mike, IT Expert : GardenFork Radio

    Mike is seeking new employment opportunities in the computer tech social media IT world. He is smart. So hire Mike.

    The alternative title for this show has to be: Approach the Printer and say “Print”. How to get to the moon using slide rulers; The Apollo project, the joys of Bruce’s steel cut oatmeal recipe, April Fool’s jokes, raised beds and companion plantings, seed starting, Kefir and yogurt.

    10 things about the Apollo Moon Landing link here

    MakerBot , the 3D printer here

  • The Mice in My Greenhouse

    It was pretty toasty in my greenhouse yesterday, and while cleaning up I ran across this mouse nest inside a terra cotta garden pot. The mice had moved out, but this shows how industrious they are when building a nest. All sorts of materials in this nest to make it cozy.

    What's inside?
    cozy mouse nest
  • Still snow in my yard…

    But it’s slowly melting. The black plastic will warm up the raised beds quickly. Yours?

  • How to Grow Heirloom Tomatoes : GardenFork Radio

    Call us: 860-740-6938  Want to know How to Grow Heirloom Tomatoes? or just how to grow tomatoes? Today we talk with my neighbor Priscilla, who is an heirloom tomato expert, and has more energy than I do even after drinking lots of coffee. Priscilla grows tomato seedlings of 30 different heirloom tomato varieties each year and sells the young plants at her farm stand at the end of her driveway.

    Priscilla mentioned several seed companies she is ordering from Baker Creek Heirloom Seeds has a beautiful catalog and is very pro-active about heirloom seeds. Their site is here http://rareseeds.com/

    Totally Tomatoes is a catalog that has more tomato varieties than anyone else, I think. Their site is here http://www.totallytomato.com/

    Shumway Seeds website is here: http://www.rhshumway.com/

    We will also be posting a new GardenFork video this week on how to start vegetable seeds in these neat homemade cardboard containers Priscilla showed us how to make.

    Some of my favorite heirloom tomato varieties are Black Krim, Mortgage Lifter, Prudens Purple, and Juliette.

    What are your favorite tomato varieties? Let us know below:

  • Red Bean Paste: A Sweet Asian Puree Recipe

    Azuki, a small dark red bean, is the second largest Asian crop next to soybean. It’s the main ingredient in sweet Red Bean paste. Red bean paste and candied Red Bean are sold in Asian markets all year round, but usually they’re used in fall harvest desserts as pastry filling (Chinese moon cakes), light snacks (Japanese zenzai and anko), and sweet soups (Korean patjuk). This highly prized confection can be coarse or smooth. It has a taste similar to chestnut puree and pine nuts and is as smooth as pumpkin filling. It’s easy to make… and even easier with a blender. This recipe makes 4 cups.

    You’ll need:

    • a large pot with lid for soaking and boiling
    • a blender
    • a large mixing bowl
    • a large colander
    • 2 cups of dried azuki beans
    • lots of water
    • 3/4 cup sugar
    • 1tbsp salt
    • 1 tsp powdered ginger
    • four drop of vanilla
    • 1/2 cup unsalted butter (optional)

    Soak Your Beans
    As with most beans, azuki must be soaked and rinsed. In a large pot add beans and enough water to cover up to 2″ above the beans. Cover and soak overnight in a cool place (the fridge). Soaking overnight conditions the beans for boiling. Next day, drain and rinse beans until the water runs clear, then soak them again in clean water for another 6 hours at room temperature. Be sure to add enough water as before.

    Boil ‘Em
    Place the covered pot on hight heat until it boils, then lower the heat to medium and cook until the beans are very soft — roughly 2 hours. Add more water to the pot if the needed and stir every 20 minutes. When they are done, the skins should separate from the beans and they should mash easily with a wooden spoon. Check by crushing them on a cutting board. Be sure to rinse the pot clean, you’ll be using it again.

    Puree
    Drain the beans and reserve the hot liquid. In a blender add 1 1/2 cups of beans and enough of the reserved liquid water to cover 1″ above the beans. Set to puree and blend until smooth. Pour half the batch back into the clean pot. Add another cup of beans to the blender and puree, add more of the reserved liquid if needed. Repeat until the entire batch is blended.

    Simmer Down
    Set the heat to medium, add sugar, salt, ginger, and vanilla to the pureed beans and stir constantly to prevent burning. Simmer and stir until it is reduced to the consistency of thick fudge. Pour the finished bean paste into a mixing bowl and allow it to cool. It should have a deep purple-red color. For a velvet smooth texture add unsalted butter and mix well before it cools down completely. Store away into sealed jars and keep refrigerated.

    Foot note: Although butter is not a traditional ingredient, my grandmother would add refined lard to preserved red beans and Red bean Paste. It gave these preserves an incredibly smooth texture and a deep red color. In this age of chocolate covered bacon and rendered duck fat spreads this is not so far-fetched. If can find a quality refined leaf-lard, use this instead.

    You can keep red bean paste refrigerated for up to two months, but it’s best when used fresh. Use it as a sweet spread on pancakes or as a pastry filling. I like it with cream cheese on a toasted bagel at breakfast. If you make your own ice cream try this as a new flavor.

  • Not-so-sloppy Joe: A Ketchup Recipe

    Ever wonder what to do with that drawer full of Ketchup and Plum sauce packets? The answer is  Sloppy Joe! I have such fond memories of the 70’s and Sloppy Joe Night that I barely remember that we were in a recession. Sloppy Joe served on a TV tray while watching gun Smoke! This is one of my favorite cheap eats, and you probably have most of the ingredients already. This recipe feeds four.

    You’ll need:

    • a medium size skillet with lid
    • 3/4 pound ground beef
    • 1/2 pound of diced canned tomatoes (6. oz.)
    • 1/2 cup each, chopped: onion, bell pepper, parsley
    • 12 packets of take-out ketchup (1/2 cup)
    • 6 packets of take-out duck sauce (1/4 cup)
    • 2 tbsp Worcestershire Sauce
    • 1 tbsp hickory BBQ sauce (1 packet)
    • 3 tbsp olive oil
    • 1 tsp salt
    • liquid smoke (optional)

    Use these dried spices or an equal amount of a good dried BBQ seasoning.

    • 1/2 tsp each: cumin, oregano, thyme, black pepper
    • 1 tbsp dried basil
    • 1 tsp powdered garlic

    Step 1: Add 1 tbsp of oil to a hot skillet and brown ground beef, drain and discard excess liquid. Remove from the pan and set aside.

    Step2: Add 2 tbsp of oil to the skillet and add onion, bell pepper, and parsley and cover. Cook until bell peppers are soft. Lower heat to medium and add browned ground beef, dried spices, and salt. Cook for five minutes. Now add all the wet ingredients: ketchup, plum sauce, canned tomatoes, liquid smoke… etc. or a pack or dried BBQ seasonings. Cover and cook for 15 more minutes, stirring once or twice. It’s ready when the liquid has thickened. Serve it up on toasted bread topped with a crumbled layer of crushed potato chips… be sure to have it with a hot bowl of tomato soup.

  • Thundersnow In My Head : GardenFork Radio

    Comments and questions: 860-740-6938 call us! Mike and Eric talk about thundersnow, bicycle seat height adjustment, the vernal equinox, how to make soft cheese, making sweet and sour cabbage, a crashed hive, watching web video on your HDTV, using appleTV on our TV & the art of highway rest areas

    links to things we talk about in the show:

    how to make cheese video
    sweet and sour cabbage recipe video
    www.restareahistory.org

    photo by alvimann

  • Tostones: A Fried Plantain Recipe

    Tostones are fried twice — that's what makes them so good.

    Plantains, a close cousin to bananas, are eaten when they are green, reddish black, or black depenging on the variety. The flesh is very firm, higher in starch and lower in sugar. They are prepared more as a root vegetable would be. A popular South American and Caribbean dish is tostones — twice-fried plantain chips. Tostones are easy to make, but there is a little trick to peeling plantains.

    Start by cutting off the tips and ends from each plantain, then  cut three to four shallow slits from tip to end.

    Loosen one section with your thumb and peel, then remove the rest of the skin. You’ll notice the skin peels off easily. The flesh should be very firm and creamy white or very light pink in color.

    Cut plantains into pieces that are 3/”4 to 1″ thick. If you’re not ready to cook, put them into a bowl of ice water and a little lemon to prevent them from turning brown. Drain and dry them when you’re ready to cook.

    Add vegetable or canola oil to a hot skillet — about 1/2″ deep or so. Check if oil is at frying temperature by placing a wooden spoon or chopstick into the pan. When bubbles form it’s fryin’ time. Place the plantain pieces into hot oil and fry until they are golden. Place them on a paper towel to drain.

    Deep frying soften the plantains, which is important for this next step: pressing. Flatten them gently, but don’t mash the hell out of them. I use a small “tostonera,” a wooden press, but the bottom of a coffee mug works just fine.

    Finally, place the flattened pieces back into the hot oil and fry them again until they are golden brown on both sides.

    Drain them on a paper towel and lightly salt while they’re still hot. I like adding a little powdered garlic and black pepper too. Tostones go well with eggs — they’re good with any dish that you’d serve French fries. If you make a big batch you can re-heat them in a toaster oven.

  • How To Make Maple Syrup at a Sugar Shack: GF Video

    Ever wondered how to make maple syrup? I have a number of friends who have sugar shacks and boil down sugar maple sap to make maple syrup. Last weekend I visited one of my friends and made this video about how to make maple syrup.

    You can also use simpler methods than the one shown here with the 2 stage evaporator, I plan on tapping my sugar maples next year and making maple syrup in with a simple propane burner and stainless steel steam table tray that will be my evaporator.

    Do you make your own maple syrup? How do you make it? and any tips and tricks you can offer us here? Let us know below

  • The Martha Radio Gig, Margaret Roach, & GardenFork.TV

    Eric tells about his Martha Stewart Living Radio experience, and Margaret Roach’s new book, making mid-life changes & going back to college, brand name batteries, Mike’s Jukebox repair, dog beds, and more on GardenFork Radio. call us 860-740-6938

    Link to Martha Stewart Living Radio is here Link to Margaret Roach’s blog and info on her new book is here

  • Frittata Squares: A Cooking Ring Recipe

    I’m really getting into these cooking rings. Here’s another square egg dish: Mushroom Frittata with red pepper, parsley, cheddar cheese, and onion. It’s important not to over-fill the rings, otherwise they’ll flow over the tops of the rings as they cook. You’ll add the eggs into the rings to make layers. Since this dish is finished by steaming in a non-stick, you won’t need much butter, but that’s entirely up to you.

    You’ll need:

    • non-stick pan with glass lid
    • 2 square cooking rings, 2.75″ square X 1.5″ deep
    • a flat spatula
    • 1/3 cup each, minced: onion, parsley, red pepper
    • 2 medium size Crimmini mushrooms, sliced
    • 1/8 cup course breadcrumbs
    • 1/8 cup grated cheddar cheese
    • 4 large eggs
    • 1/8 cup milk
    • 1/2 tsp powdered onion
    • dried chives
    • 1/4 cup water
    • salt and pepper
    • butter

    Cook the mushrooms. In a hot non-stick pan, melt a pat of butter and lay the mushrooms in flat, sprinkle a little salt. Lower heat to medium, and cover. The mushrooms should release liquid in about 5 minutes. Remove from pan when both sides are evenly browned.

    Melt another pat of butter in the pan and add bread crumbs, red pepper, onion, parsley and sprinkle them with a little salt and powdered onion. Cook until the red peppers are soft, then set them aside.

    Make this frittta in layers. With the burner on high, place 2 well-greased cooking rings in the pan and melt 1/2 tsp into each ring. Beat 2 eggs with a little milk and pour about 5 tablespoons into each ring. Lower heat to medium and let the eggs cook form a solid base — it’s OK if some egg spills out, just trim it off later. Now add some of bread crumb mixture, cover the pan and cook until the eggs start turning opaque.

    Remove the glass lid and add more bread crumb mixture and cheese. Pour the rest of the egg halfway up the ring. Cover and let eggs cook as before. Now pour the final layer — arrange mushrooms and pour the rest of the egg with some dried chives. Make sure the eggs sit about 1/4″ away from the top of the cooking ring. Turn heat up to high, add water to the pan and cover. Let the eggs steam until the tops rise slightly over the rings.

    Remove the eggs and rings from the pan — don’t be a hero, use a flat spatula. Let them sit for a minute to cool, the eggs should shrink away from the edges. If they do stick use a sharp knife to free the edges. Plate them and serve with cocktail sauce and aside of buttered toast with strawberry jam. Make this breakfast for two this weekend for someone special, use what you like for filling.

  • I’m just holding Mike’s coat : Gardenfork Radio

    Please like us on facebook.com/GardenFork ! Rick, Mike, & Eric talk how to fix ice dams, how to prevent ice dams, insulating your attic, getting honeybees ready for spring, Sirius Martha Stewart Living Radio, and how to prune a tree the right way. Only the most recent 100 shows are on iTunes. Listen to the full radio archive at www.GardenFork.TV

    The how to repair ice dams video we talk about is here

    photo by ronnieb

  • Bath Vanity Falling Off Wall : Stuff I See While Working

    I’ve been in a lot of houses and apartments that have been renovated or are new construction, and I’m never surprised by what I see. Take this expensive bathroom vanity as an example:

    right side is a bit off here…

    Here the bath vanity is falling off the wall, not a good thing. Especially for a brand new renovation.

    Vanity counter separating from wall

    Crawling underneath the vanity and searching around, I found that the whole vanity, with this heavy counter top, had been installed with 4 drywall screws. And two of screws did not hit a stud.

    On the right side of the vanity the drywall screws had sheared. wow.

    Before starting to fix this, I explained to the homeowner that it was possible the vanity top would crack when we raised it back into place. Always warn people.

    I got the car jack from our car and with some scrap lumber, raised the vanity a bit higher than its original location. I did this because I knew the vanity would probably drop just a bit when screwing it back in to the wall.

    I then got my hammer drill out – the right wall is the common wall between 2 brownstones, hence its a double brick wall- and drilled a 3/8″ hole thru the tile deep into the brick.

    concrete sleeved anchors are bulletproof

    I drove in a sleeved anchor, and tightened the vanity to the wall. If you have to hammer in a sleeved anchor, put the nut on the anchor before hitting it with hammer to save the threads. These anchors hold a lot of weight and are easy to put in, the hardest part is drilling the hole. I use them to hang TVs on brick and cement walls.

    What surprises have you found when doing repairs? Tell us below

  • How to make cheese, ricotta cheese, queso blanco : GardenFork.TV

    I’ve been wanting to show you all how to make cheese for a while now; basic soft cheese like ricotta or queso blanco is easy and gives you the basics to move into more involved cheeses. The homemade cheese recipe and some book recommendations are below the video.


    Click here for an Amazon search for books on how to make cheese. Plus I list the most popular books below.

    The GardenFork.TV Home Made Cheese Recipe

    Get the freshest best quality milk you can find for this. I have seen raw milk for sale now, but use it at your own risk.

    Measure out 2 cups of milk into a microwavable container, a Pyrex pitcher works well for me

    Add 1 teaspoon of Citric Acid, you can also use vinegar, if so, use 2 tablespoons of vinegar.

    Mix the milk and acid together

    Place the container of milk in your microwave and turn on high for 2 minutes

    The power rating of your microwave will determine how long to heat the cheese, you want to get the milk to at least 165F, but you can go up to 185F.

    When the milk has gotten hot enough, take it out and give it a stir, then let it set for a few minutes.

    Pour it thru a fine sieve into a bowl, this will separate the soft cheese from the liquid.

    Labradors love this liquid, called whey, by the way.

    After the cheese has drained, you are ready to eat. Add a bit of salt and honey to make it even better.

    ©2014 all rights reserved.

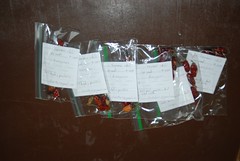
  • Forest Park Community Garden Seed Swap

    Seeds

    On February 27th, Forest Park Community Garden hosted it’s first public seed swap and it was a great success and tons of fun!

    A seed swap is where a group of gardeners get together to trade seeds, information about the seeds, and just have a great time hanging out. I’ve gone to one prior that was held in a friends house and she hosted about 15 to 20 people, but the Community Garden hosted about 75 people. We laid out five tables filled with seeds. Three tables alone to held all the fruit and veggie seeds. People brought in everything from garlic to hyacinth, amaranth to zucchini. Every Vegetable, Herb, Flower that does well in our area was represented.

    There was also demonstrations about seed starting and one of the committee member’s daughters showed how to use seeds in greeting cards. It was very cute.

    All in all, it was a great success. We had a ton of fun and got to spend the afternoon chatting with the neighbors.

    Now, I’m just on edge waiting for the snow to stop and the weather to finally warm up. Have Seeds! Need Planting!

  • Square Poached Eggs: Using Metal Cooking Rings

    This is not a Photoshop trick, these poached eggs ARE square. I stopped into a baking supply store to pick up some Vanilla. As I passed by the kitchen gadgets section, I spotted cooking rings and recalled the podcast that I did with Eric: “How to Poach an Egg…

    After looking over stainless steel diamonds, ovals, and circles, I picked the squares. I’ve found that a thicker bands distributes heat more evenly, a thinner gauge of metal is
    better suited for making stacked presentations. I wouldn’t call this a recipe, this is more of a description of how I used a metal cooking ring.

    You’ll Need:

    • a metal cooking ring, large enough for large 2 eggs
    • a non-stick frying pan with a glass lid
    • flat spatula for flipping
    • 2 large eggs
    • dried chives
    • salt or grated Parmesan cheese
    • 1/2 tsp unsalted butter
    • 1/2 cup water
    • small bowl

    Place cooking ring into the frying pan and bring pan to medium heat. Crack one egg into a bowl and let the egg white settle. Melt 1/2 tsp of butter in the cooking ring and pour some of the egg white into the ring to form a solid bottom, then add the rest of the egg. Add 1/2 cup of water to the pan and cover with glass lid.

    When the egg yolk starts to form a slightly opaque film, remove the glass lid and sprinkle some dried chives and salt or Parmesan cheese. Crack the other egg on top of the first egg, return cover and cook on medium heat for another 5 minutes, or longer if you like your eggs well done. With a flat spatula, transfer the cooking ring and egg to a plate. Let it cool for a minute and carefully remove the ring, and serve.

    When you slice through, you’ll notice that bottom egg will be more well-done, than the top layer of egg. Here’s an idea: beat an egg with ham, smoked salmon, red pepper, or caramelized onion and make the first layer into scrambled egg, then make the top layer a poached egg — two for one!