Tag: cast iron

  • Can you use soap on cast iron? 3 cast iron myths – GF Video

    Can you use soap on cast iron? 3 cast iron myths – GF Video

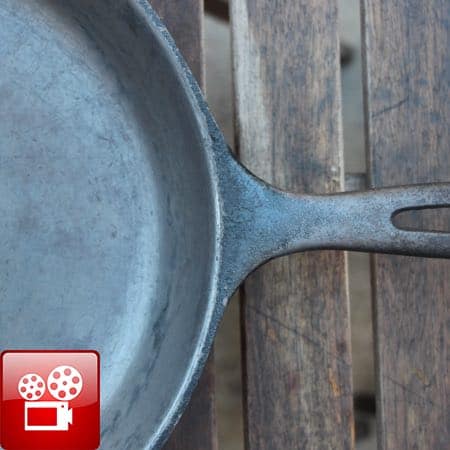
    Can you use soap on cast iron? A HUGE debate in the world of cast iron cooking, watch our video to find out the answer:

    Can You Use Soap On Cast Iron

    Yes. Here’s why:

    When you apply a thin film of vegetable oil, ideally flax oil or sunflower oil, to the pan, and then heat it, the oil polymerizes. Polymerization is a chemical process where oil becomes a plastic like finish. The oil dries out, and is no longer an oil.

    Dishwashing soap breaks down oil. Since the oil you applied, has been heated & dried, it is no longer an oil, the soap doesn’t dissolve it. So the mindset of soap ruining the finish on cast iron doesn’t apply here. The cast iron pan seasoning is now a polymer. Any food or cooking oil will get cleaned out by the soap, but the seasoning stays.

    How To Care For Your Cast Iron

    Use enough oil to cook your food, and when done, wipe out the pan with a towel. If there is food sticking, or you made a curry or some fragrant dish, put a little soap in the pan and clean out the pan. Set the pan back on the burner, heat it up to dry out the water. Apply a very thin layer of vegetable oil, ideally flax or sunflower oil, wipe out the excess, and allow the pan to cool off.

    That’s it! Here’s the best how to season cast iron video:

    how-to-season-cast-iron-play

    A conversation in the YouTube comments of this video says a lot about this question, can you use soap on cast iron:

    The Real Jim Guy: “I season my cast iron the old fashioned way with lard and i tell you from experience that dish soap strips the finish right off it to where everything sticks like glue.”

    John B: “I believe that’s because lard doesn’t polymerize they way that olive oil or flax seed oil does under heat. so it remains soluble to the effects of the soap.”

    Galanie: “True, unhydrogenated animal fats never dry really and won’t polymerize the way that seed oils do.”

    Brrag: “I have washed my cast iron skillets with dish washing detergent for 40 years. my mother and grandmother washed theirs the same way. i once heard you weren’t suppose to use soap on them so just started cleaning with hot water. they got so nasty smelling, i went back to the soap again. Using soap does not change the taste of your food. On the other hand, not using soap will change the taste of your food; it will taste like you cooked it in rancid oil.” (Probably the best argument on can you use soap on cast iron)

    Pappy: “You make so much sense… used to be called common sense but it’s not very common any more. I have a cast skillet that is at least 80-90 yrs old. My grandmother got it at Montgomery Wards (remember them?) Anyway she and my mother after her used this pan daily, washed it in soapy water, dried it, heated it and put some Crisco or bacon fat on it and that was it. It has a glass smooth bottom and cooks like a dream and is pretty much none stick. I admit it had gotten pretty grungy over the years so I cleaned it up, got most of the gunk off it and reasoned it. I don’t regularly wash it in soapy water because it cleans up beautifully with just water and a scrub brush but if it gets particularly dirty or I forget it overnight I don’t worry about soaping it up. The flax seed oil characteristics you mentioned are spot on from what I’ve also read. Once seasoned well with it you don’t need to only use flax seed oil tho, any oil will do to maintain that finish. Good video, thanks…”

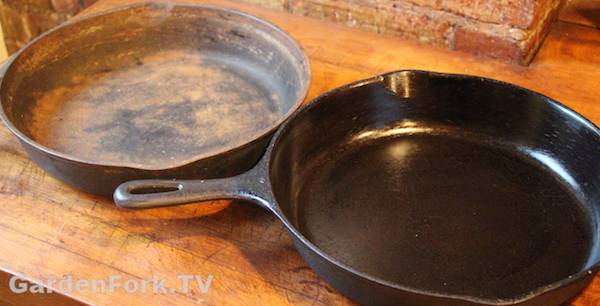
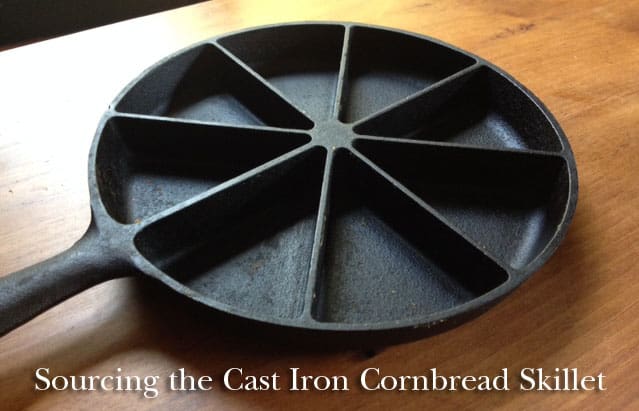
    If you want to buy cast iron pans, I suggest finding them at yard sales and restoring them. You can get good cast iron on amazon here. (This is an affliate link, it helps us make more GardenFork!)

  • Bean Hole Beans Recipe, Dig A Hole, Start A Fire, Cook – GF Video

    Bean Hole Beans Recipe, Dig A Hole, Start A Fire, Cook – GF Video

    A while back I read an article about an artisanal bean hole beans recipe, and then and there decided to make the GardenFork version. In other words, the done is better than perfect Bean Hole recipe. Watch the video:

    Any project that involves open fire and food is a good one. Growing up, we would camp in the backyard, and boil crayfish we caught in the quarry pond over our campfire. Fire, coffee can, crayfish = good. Same thing with beans, bacon, and a hole in the ground. Its wicked simple, and fun to do on the weekend, especially in the fall.

    What is a bean hole beans recipe?

    Cooking food in a hole in the ground, as a cooking method, has been around for a long time. Probably since humans learned how to use fire to cook food, or shortly thereafter. But the Bean Hole Beans we are talking about started with the Penobscot Tribe in Maine. They cooked their beans in a clay pot with bear grease and maple syrup.

    This bean hole baked beans recipe was adopted by the logging crews in Maine. One story I read told of how they used this method while transporting logs down the river to the harbor. The cook would ride down the river one day ahead of the logging crew. He would dig a hole and start a pot of beans, mark the spot, and then ride down the river another day, and do the same thing. The loggers would arrive at the camping spot, and dig up the beans for dinner.

    I’m not sure of the veracity of this story, but its certainly plausible to me. And what’s not to like about pulling into camp to find dinner ready?

    Bean hole cooking is the original Crock Pot cooking method of its day, the pre-electric version of the slow cooker. Plus its one of those low and slow methods, which we now know as a braise or BBQ.

    How To Make Bean Hole Beans

    This cooking method, is more than just cooking, its an experience. And it is great. It embraces the two mantras of GardenFork:

    Done is better than perfect.

    Use what you got.

    Here’s what you need:

    • Cast Iron Dutch Oven with a handle, and ideally a rimmed lid.
    • Wood to burn or chunk charcoal. Not large pieces of wood, btw.
    • Used clay bricks or rocks. Don’t use rocks that break when heated.
    • Sheet metal of some sort.
    • Chain, or heavy wire, or coat hangers.
    • Aluminum foil.

    You will need to dig a hole in your yard. I have found its easiest to do this in a raised vegetable garden bed. Its much easier, but dig where you are allowed. THINK about where you are digging, before you dig, OK?

    Bean Hole Beans Recipe

    Your hole is at least 6″ wider than the dutch oven and at least a 12″ deeper. Line the hole with used clay bricks. I don’t think one needs to use firebrick.

    Start a small fire in the hole with small pieces of wood. This will take longer if you use big pieces. Use small pieces. Add wood to this fire to build a larger fire.

    Let the fire burn down so the wood is starting to turn to coals. This is subjective, but you want a good base of coals to surround your dutch oven. There can be some wood that has not become coals yet. If you wait for everything to be burned down to coals, you’ve probably waited too long.

    Clean the center of the fire pit

    There are many bean hole beans cooks that par boil their beans before putting them in the dutch oven – to me this a waste of time. The beans are going to be cooking a long time. It’s great to brine beans before cooking, i do it all the time, but for this recipe, you don’t need to. OK? Good.

    Bean Hole Beans, the GardenFork recipe

    One 1 lb bag of dried northern beans – not soaked (other white beans work fine too)

    2 TBSP Mustard

    One small can of tomato paste

    1/2 cup maple syrup

    One chopped sweet onion

    4 slices of bacon.

    1 tablespoon kosher salt

    6 cups of water

    – again, use what you got, you can add other stuff to this recipe

    Put all the ingredients in the dutch oven. If your dutch oven lid does not seal well, place one or two layers of aluminum foil between the dutch oven and the lid.

    Cover the outside of the lid with aluminum foil to keep any dirt from getting in to the beans.

    Remove half the coals and move the rest to the sides. Lower the dutch oven into the hole, add back in the hot coals. Cover with the tin and then dirt. Be sure to lay the chain so its outside the fire pit.

    dutch oven banana bread recipe
    Now watch this dutch oven banana bread video

    Eric Bakes Artisan Bread in Five Minutes a Day


  • Cleaning Cast Iron With A Battery Charger – GF Video

    Cleaning Cast Iron With A Battery Charger – GF Video

    Cleaning cast iron with a battery charger, aka cleaning cast iron with electrolysis, makes it super easy to remove rust and crud from rusted cast iron. Watch this video I made, then we’ll step through the process.

    Caution! Use the setup outdoors and away from open flames. Don’t smoke while doing this. Restoring cast iron with electrolysis produces hydrogen and oxygen. Use this info at your own risk, OK?

    Cleaning Cast Iron With A Battery Charger, Step By Step

    Cleaning cast iron with a battery chargerAbove is what my setup looks like for cleaning cast iron with a battery charger. Let me walk you through the process.

    Cleaning cast iron with a battery chargerYou will need a battery charger with a MANUAL mode. This is important. The first one I bought said it was manual, but it wasn’t. It should have a switch on it for manual. Here is a link to the battery charger I bought, it works well.

    Cleaning cast iron with a battery chargerFor the metal plates, I used two old baking pans. I used a wire wheel on my drill to remove the coating on the pans to expose the bare metal. DO NOT use stainless steel, bad chemistry will  happen. I used a self tapping screw on each pan to attach a 12 gauge copper wire to them, as well as the wire that goes from the pans to the battery charger.

    Cleaning cast iron with a battery chargerHere is a top view of how my cast iron cleaning tank looks. It is important that the metal cake pans, or whatever metal you are using, does not touch the cast iron to be cleaned. I have been told that you can also use several pieces of rebar wired together for the metal plates. Or visit a scrap yard. Again, do not use stainless steel.

    Turn On The Charger And See What Happens

    Cleaning cast iron with a battery chargerUse  a wire brush to clean off the handle of the cast iron where the negative (black) clip of the battery charger connects to the pan. I don’t suggest submerging your battery clamps in the solution, therefore, if you want to submerge the whole piece, wrap copper wire around the handle and attach the clip to the copper wire above the water line.

    Important Things To Keep In Mind

    • Use 1 tablespoon of Washing Soda per gallon of water for the cleaning solution.
    • Red clamp from battery charger attaches to metal pans in the tank, Black clamp attaches to item to be cleaned.
    • Wear gloves while doing this, OK?

    Cleaning cast iron with a battery chargerIf you’ve got the rig set up correctly, you will see bubbles start to rise from the solution almost immediately. Let it run for several hours, so all sorts of stuff will have time to bubble off. Most of all, make sure the cast iron pan being cleaned does not touch the metal plates.

    Cleaning cast iron with a battery chargerEvery few hours, pull out the cast iron and clean off the crud with a dish scrubber. Flip the pan 180 degrees in the solution every time you pull it out. Finally, depending on the age and how many layers of seasoning are on the piece, you may need to use steel wool to remove some of the last bits of the material. Learn how to season cast iron here.
    how-to-season-cast-iron-play

  • Best Cast Iron Seasoning Instructions – GF Video

    Best Cast Iron Seasoning Instructions – GF Video

    The best cast iron seasoning instructions, hands down. First watch the video, then read more about our easy step by step process to restore cast iron.

    At the end of this article are links to how to remove rust from cast iron and how to remove the seasoning from cast iron, where to buy cast iron, and cast iron videos.

    So you have a brand-new cast iron pan you just bought or you have an older pan that you just strip the seasoning off of. I ruined the seasoning of one of my pans awhile back, and is one of the reasons I created this cast iron seasoning and care video series. While we show a skillet, this process works for how to season a cast iron dutch oven or griddle as well.

    Our cast iron seasoning instructions are based on a blog post by Sheryl Canter, who did a lot of research into this and saved us all from having to do that same research. The secret to cast iron seasoning is you want use an oil that is called a drying oil. When drying oils are applied to a surface like cast iron and heated, the oil goes through what’s called polymerization. The best edible drying oil is Flax oil. You have to buy this in the health food section of a food store and it has to be kept refrigerated, as it can go rancid fairly quickly. Flax oil is the food grade version of linseed oil,  I would not suggest you use linseed oil to season your cast iron pan.

    But a more affordable and easier to find oil that works well is Sunflower Oil. I have found its great. And if you can’t find any of these oils, regular old vegetable oil or Crisco does just fine.

    Best cast iron seasoning instructions

    For this cast iron seasoning method, the more oil application and heating cycles you do, the better the seasoning. Our cast iron seasoning instructions are based on Sheryl’s, I modified it a bit. This process is for new pans, or pans that have had all the previous seasoning removed, watch our video here for how to remove cast iron seasoning.

    Cast Iron Seasoning Instructions

    1. On the stove top, heat up the cast iron pan. This makes sure the pan is dry and opens up the pores of the metal a bit.
    2. Add in a tablespoon or two of oil into the pan. Use a paper towel to coat the whole pan, inside and out, with the flax oil.
    3. Grab a new paper towel, and wipe out excess oil. You only want a thin film of flax oil in the pan. No drips or globs of oil.
    4. Turn the oven to 500F and place the pan – you can do more than one, stack them if you want- into the oven.
    5. Heat for one hour, turn off the oven, allow the pan to cool.

    Repeat the oil coating and heating 2-3-4-6 times. Whatever works for you.
    The more you do this initial seasoning, the better the pan will be.

    cast-iron-seasoning-instructions-6
    The outdoor gas grill is great for cast iron seasoning.

    The cast iron seasoning process puts out a bit of smoke, so I’d suggest using your outdoor gas grill. Turn the grill burners on high, close the lid to heat it up, put in the pans. My gas grill will not get to 500F, but it got close, and that worked well for me.

    I oiled and heated one of my pans 4 times and it looked great, more and it is even better.

    I think new cast iron is just as good as old cast iron, but there are many arguments about that. You can get good cast iron on amazon here. This post may contain affiliate links which won’t change your price but I earn a commission from. Thx!

    cast-iron-seasoning-instructions-7

    Soap On Cast Iron? Video               Remove Old Seasoning From Cast Iron Video

    cast-iron-seasoning-instructions-9

    Remove Rust From Cast Iron Video       Cast Iron Skillet Cornbread Recipe Video

  • Best Stove Top Pizza Recipe – GardenFork Video

    Most fry pan pizza ain’t great, but this stove top pizza recipe is truly the best. Why? Its a thin crust pizza with a nice snap, and it can be made in about 5 minutes, and you don’t have to make pizza dough the day before.

    The key ingredient to this pizza is tortillas. Who knew? I’ve seen many recipes that say to use a pita bread as the pizza crust, and its real underwhelming. The torilla is already thin, and it crisps up nicely in some oil in a cast iron pan. You can also use a Calphalon style pan, but it has to be oven proof.


    But where to get tortillas? In your grocery store. From what I can tell, they are now sold all over the country. Yes you can use those tortillas that you have to cook first, just cook the top side bit first, then flip it and add your sauce and toppings.

    The pan does not need a lot of oil, as the excess oil can smoke when you put this in the broiler. Learn from my experience. The ideal tortilla is one that covers the bottom of the fry pan, mine did not, but it wasn’t a big deal, it still tasted great.

    best-stove-top-pizza-recipe

    My tomato sauce is super simple. Quality pureed canned tomatoes are already cooked and only need some salt and I add a few tablespoons of italian seasoning mix. Done.

    For cheese, I used chopped up fresh mozzarella, and quality Pecorino Romano. Do not fill the whole crust with cheese, it will spread out nicely.

    For toppings, its really use what you got. I always keep a can of sundried tomatoes in the fridge, and I had some nice dry sausage that I chopped up.

    Best Stove Top Pizza Recipe

    1 can quality pureed tomatoes

    2 tablespoons italian seasoning mix

    1 bag tortillas that fit your fry pan

    1 chunk of pecorino romano

    1 ball of fresh mozzarella

    Few slices of quality dried sausage

    1 cup sun dried tomatoes

    Preheat the broiler

    Heat the cast iron fry pan on the stove top, add enough vegetable oil to coat the bottom of the pan. When it shimmers, drop on the tortilla.

    Spread the tomato sauce mixture lightly on the tortilla, and drop on chunks of mozzarella.

    Add dried tomatoes and sausage.

    Sprinkle romano cheese.

    By now the fry pan will be hot, so be careful. Take this pan and put it in the broiler, the closer the better to the broil element.

    Keep an eye on it, but in about 2-3 minutes, the top of the pizza will be melted and toasted.

    Pull out, let cool a bit, and cut into slices.

  • Where to buy that cast iron skillet with sections?

    Where to buy that cast iron skillet with sections?

    In our recent pumpkin cornbread recipe video, we use a round cast iron skillet with sections, a pan with the pie sections already divided. I love this pan. I can’t remember where I got it, but I figured out where to buy it.

    buy-cast-iron-pan-pie-sections-2

    Why Love a Cast Iron Pan?

    This skillet has edge wedge already sectioned off, and after you preheat this pan in the oven, you oil the sides of each section, and pour in your batter. The cool thing is each slice of the pan is like getting a corner piece. Each section has that crunchy edge thing going for it.

    I learned early on that this pan needed to be well seasoned, and before putting in the batter, use one of those silicon brushes to slather on butter or oil. You don’t want the batter sticking, its a pain to clean.
 Be sure to put the pan on a wire grate when you pull it out of the oven, else that burned circle on your countertop will haunt you for a while.
 And cast iron is HOT when you pull it out of a pre-heated oven, use a good oven mitt or gloves, OK? Burned hands = bad.

    This pan can be kinda difficult to clean, but for this I pull out an old toothbrush that I keep in the kitchen drawer for this special purpose. You can brush off the baked corn bread batter fairly easily. One could also use one of those small wire brushes, but be gentle. The plastic bristles of the toothbrush work better. Go pull a toothbrush from the bathroom.
Some cast iron pans will come already seasoned. Pre-seasoned is what its called.

    Here’s one of our how to season cast iron videos:

  • Pumpkin Cornbread Recipe – GF Video

    Pumpkin Cornbread Recipe – GF Video

    A cornbread recipe that adds in pumpkin to change it up. This will go great with chili, stews, or as a Thanksgiving side dish recipe. I love cornbread already, and when I saw pumpkin puree on sale at the store, I started to think of ways to use it, and there you go: add it to a cornbread recipe!


    A couple of key things here, I use a sectional cast iron pan for this, you can use a cast iron fry pan or an 8×8 or other square baking pan as well. A glass baking dish will make the best crust, I think. If you are using cast iron, put the fry pan in the oven and then preheat the oven and the cast iron. Do not oil the cast iron pan, just let it heat up. We will oil the pan just before we put in the batter, OK? You can buy the cast iron cornbread pan here. This post may contain affiliate links which won’t change your price but I earn a commission from. Thx!

    If you are using a baking pan, put 2 tablespoons of butter in the pan, and put it in the oven to melt just before you are ready to add in the batter. Take care not to burn the butter, this is a bad thing. If the butter burns, get a clean pan out and start over with that process.

    This is basically a quick bread recipe, so take care not to over mix the batter, the milk helps everything come together pretty well, but don’t beat it into a mess. If you want more pumpkin flavor, add in more puree, and dial back on the milk. It will be an experiment, but I think it will come out fine. Let me know how you use pumpkin in the comments below.

    pumpkin-cornbread-recipe-gf-cooks-video2

    Pumpkin Cornbread Recipe
    Recipe Type: Bread
    Cuisine: American
    Author: Eric Rochow
    Prep time:
    Cook time:
    Total time:
    Serves: 8[url:1][img:1]
    Cast Iron Corn Bread Recipe gets a flavor upgrade with Pumpkin for Thanksgiving or any time.
    Ingredients
    • 1 1/2 cups Cornmeal
    • 1/2 cup All Purpose Flour
    • 1 tablespoon Baking Powder
    • 1 teaspoon Salt
    • 1/4 cup Brown Sugar
    • 1/2 teaspoon Nutmeg
    • 2 Eggs
    • 1 cup Pumpkin Puree
    • 1/4 cup Vegetable Oil
    • 1/2 cup Milk
    Instructions
    1. Preheat the oven to 375F and preheat the cast iron pan if you are using one.
    2. Mix all the dry ingredients together in medium sized bowl
    3. Crack the two eggs into a small bowl and scramble them together, then add to the dry batter.
    4. Add in the puree, milk, veg oil.
    5. Mix the ingredients together, but don’t over mix, OK?
    6. If using a baking pan, put 2 tablespoons of butter in it, and place in the oven to melt.
    7. After butter has melted, swirl it around in pan and then add batter.
    8. If using cast iron, take pan out, swab vegetable oil all around and add batter.
    9. Bake for about 30 minutes and test for doneness. Its not the end of the world if cornbread overbakes a bit.
    10. Let cool for 1o minutes then pop out of the pan.
    11. This tastes great with maple syrup.

  • Bake A Cake : Outdoor Cooking with a dutch oven – GF Video

    Bake A Cake : Outdoor Cooking with a dutch oven – GF Video

    Outdoor cooking recipe to bake a cake in a dutch oven. Great camping recipe or to keep you house cool in summer, outdoor baking is the way to go. We use this basic cake recipe and add in whatever fresh fruit we have in the summer months. Its a fun way to bake a cake that doesn’t heat up the house, or when you are camping, this is a super simple cake recipe. Its easy to change up the recipe to suit whatever ingredients you have.

    How To Bake A Cake Outdoors

    You need to have a fireproof safe place to do this. We use our grill, it works well because it is a good height, and is already built for fire. Or you could use some other fireproof material, but be careful, you will be using hot charcoal to do this. In a camping situation, you can use the coals from a campfire, but you will have to pay more attention to the coals, probably adding a few during the baking process.

    If you do not have some oven-proof bowls of some sort – we like to use ramekins – you can use balled up foil to raise the dutch oven above the coals. You do not want the bottom of the dutch oven to touch the coals, this can burn the bottom of the cake. If your dutch oven does not have a flat lid, you can make a ring of foil that will keep the coals from falling off the top of the dutch oven.

    bake-a-cake-outdoor-cooking

    To Bake a cake this way requires some experimentation, its easy to burn the cake if the coals on the bottom are too hot. There is some trial and error here. And wear oven mitts or heat proof gloves, this stuff is hot!

    Easy Cake Recipe:

    1 cup self rising flour
    OR 1 cup all purpose flour + 1 1/2 tsp baking powder and 1/2 tsp salt

    1 stick of butter

    1 cup milk

    1 cup sugar – you can use less sugar, this cake is pretty sweet

    1 can of peaches, drained, light syrup preferred, 20-24 oz

    Preheat the oven to 375F

    Put the stick of butter in a 9×9 baking dish, preferably a glass dish, and place in the oven to melt the butter.

    Mix together the dry ingredients, then add the milk and mix.

    Pour the batter into the heated baking dish with the melted butter, then add the can of peaches.

    Bake at 375 for 30-40 minutes. The cake is done when a knife comes out clean.

  • Cast Iron, Maple Syrup, & Cake! Viewer Mail Video #4

    Here’s Viewer Mail Video #4, where we answer questions about Cast Iron, Maple Syrup, and Chocolate Cake.

  • Cooking Pizza In A Fireplace – GF Video

    Cooking Pizza In A Fireplace – GF Video

    Cooking pizza in a fireplace is not rocket science! No need to build a pizza ove, let me show you how to cook pizza in the fireplace. This is totally a “Use What You Got” GardenFork moment. I wanted to make pizza in our portable backyard pizza oven, but it was freezing outside, and staring at the fireplace, the light bulb went off in my head. I already had a built-in pizza oven in our living room.

    Cooking Pizza In A Fireplace, How To Start

    For this pizza oven method, you’ll need a cast iron dutch oven combo cooker, You can buy a combo cooker dutch oven here
    And a cooking or camping grate. you can buy the camping grate here

    We make our pizza dough – watch our pizza dough recipe video here – the day before and let it do a slow rise in the fridge overnight.

    Be very careful when working with the fire! Fire burns – don’t wear loose clothing, wear gloves and use fireplace tongs or other metal tools.

    After the fire in the fireplace pizza oven dies down bit, put the camping grate over the fire and preheat both parts of the dutch oven. You may need to adjust the height of the camping grate over the fire, I used bricks under the legs of the camping grate. Have all your ingredients prepared ahead of time, as well as the dough rolled out.

    Hardwoods make the best firewood, my wood shed is primarily stacked with oak and maple. The maple takes longer to catch, so I use a mix of what I have.

    Have you used your fireplace as a pizza oven? Let us know in the comments section below.

    Here are the links again to the combo cooker dutch oven and the camping grate:

  • Cook In A Dutch Oven – Temperature Control

    Cook In A Dutch Oven – Temperature Control

    This is another of a series of articles about how to cook in a dutch oven, dutch oven recipes, and how to season cast iron and dutch ovens by Gary House, of Cooking-Outdoors.com. A big thank-you to Gary for contributing this.

    The key to successful outdoor Dutch oven cooking, is knowing how many charcoal briquettes are required to produce a certain temperature inside of your Dutch oven while it is cooking.
    The secret to this knowledge is understanding charcoal briquettes.

    Types of charcoal

    Types of Charcoal

    Charcoal briquettes produce more uniform heat than campfire coals or Lump charcoal, making your Dutch oven temperature easier to control. Brand-name briquettes have more consistent quality than bargain brands. They are consistent in size— about 2 inches square — which is important for predictable heat. Start with charcoal briquettes if you just beginning and experiment with live campfire coals as you progress.

    How many briquettes do you need?

    This is the basic foundation of Dutch oven cooking, once you know this, everything else falls into place. Take your Dutch oven’s diameter in inches and double it.
    •    8 inch Dutch oven = 16 briquettes
    •    10 inch = 20 briquettes
    •    12 inch = 24 briquettes
    •    And so on.

    The total calculation is the number of standard-size charcoal briquettes you will need to heat your Dutch oven to approximately 325 degrees F for one hour.
    It is that simple.

    Controlling temperature
    Most Dutch oven beginners are familiar with cooking on a stove at home, cooking with bottom heat only and that can cause confusion when cooking outdoors with a Dutch oven.
    Because heat rises, briquettes heat the bottom of a Dutch oven more quickly and directly than the top. The top rim of the lid draws the heat downwards, you will need to divide your briquettes between the top and bottom for even heating. Commonly referred to as the three up method and is effective on 8, 10 and 12-inch diameter Dutch ovens; larger size Dutch ovens may require more briquettes.
    As an example:
    •    To heat an 8-inch Dutch oven to 325 degrees, you need 5 coals on the bottom and 11 coals on top. Sixteen coals total.
    •    To heat a 10-inch oven, you need 7 briquettes on the bottom and 13 on top. Twenty coals total.
    •    To heat a 12-incher, you need 9 briquettes on the bottom and 15 on top. Twenty-four coals total.

    These guidelines will get you close enough that, with practice, you can understand exactly what works for your Dutch oven.

    Briquette placement

    Top ring & bottom ring placement


    Using the circle method of coal placement, place your bottom coals in a single circle aligned with the legs of your Dutch oven closer to the outside of the Dutch oven bottom, referencing the lip of the Dutch oven lid place your coals evenly around the perimeter.
    Variables
    If your recipe calls for temperatures higher or lower than 325 degrees, make adjustments by adding or subtracting 2 briquettes. Two briquettes equal approximately 25 degrees. Add these to the top of the Dutch oven, unless you need more heat on the bottom.

    How long do briquettes last?
    Today’s charcoal briquettes last about 45 – 50 minutes. When recipes call for longer cooking times, start fresh replacement briquettes at 40 minutes. They will be ready to add to your Dutch oven when the original coals start losing their heat. Replace approximately 60% of the coals each 45 – 50 minutes of cook time.
    Compensation for weather conditions will be required. On cold days, add a couple of more coals on the top and on a hot day remove a coal or two. Wind will play a significant roll in temperature control, it is best to shelter your Dutch oven from the wind with a windscreen if possible.
    Following these basic concepts will insure your first adventures in Dutch oven cooking are a success. After practicing a few recipes, temperature control will become second nature and you will no longer need to count as you become more proficient.

    Here is one of my favorite beginner recipes, the same one I use in my Dutch oven classes.

    Blackberry cobbler

    Blackberry Cobbler
    Ingredients
    For the cake mix:
    1 stick butter
    2 cups flour
    2 cups sugar
    1 tbs baking powder
    1tsp salt
    1 1/2 cups milk
    For the berries:
    4 cups fresh or frozen blackberries or 2 bags frozen (thawed)
    ½ cup sugar
    1 ½ tsp fresh grated lemon zest
    ¼ cup water
    1 tsp cinnamon
    10 or 12” Dutch oven (20 or 24 briquettes)
    Start your briquettes using the formula above to determine the quantity.

    Rinse your fresh blackberries and drain, place them in a bowl with your sugar, lemon zest, water and cinnamon; mix well and set aside.
    When your briquettes are ready, place the bottom circle of briquettes down and set your Dutch oven with the lid on top of the briquettes, then add the remaining briquettes to the lid to pre-heat your Dutch oven.
    Now you can mix your cobbler batter. In separate bowl combine flour, sugar, baking powder, and salt; stir to mix. Add milk and beat until batter is smooth.
    Remove the Dutch oven lid, take one stick of butter and place in hot Dutch oven, stir until melted. Add your Blackberry mixture to the melted butter and pour your cobbler batter over the top
    (A different variation of this would be to take your batter and pour that in first place your blackberries on top.)

    Replace the lid and bake for 45 minutes.

    Serve with vanilla Ice cream and enjoy!

  • Season Cast Iron How To with Gary House

    Season Cast Iron How To with Gary House

    This is the third of a series of articles about how to cook in a dutch oven, dutch oven recipes, and how to season cast iron and dutch ovens by Gary House, of Cooking-Outdoors.com. A big thank-you to Gary for contributing this.

    The good news is that almost all new Dutch ovens come pre-seasoned direct from the factory. Today’s seasoning process at the factory is so good; you can use your new Dutch oven right out of the box (after washing) without going through the initial seasoning process. New Dutch ovens will still require continuous seasoning to build up the layers of protection.

    Seasoning is the process of applying thin layers of grease or oil and baking until absorbed into the cast iron. This continuous process builds up layers of “carbonized” oils, protecting the surface from rust and giving you that desired non-stick coal black patina coating.

    Vegetable oil, olive oil, bacon grease, Crisco, lard and premade seasonings are commonly used to season cast iron. I cannot tell you what one is best for you and everyone has their special grease or oil that they prefer; I will recommend you try grease instead of oil, as it is easier to see when you apply too much allowing you to remove the excess. Personally, I use Crisco these days and it works very well for me.

    If you do have an un-seasoned Dutch oven or skillet and want to season it here are 8 simple steps to make that process easy:
    •    Wash with soap and water.
    •    Dry completely with heat, a towel will not remove enough moisture. Place cast iron in oven for a few minutes or in the sun if hot out until it is too hot to handle with your bare hands but easy to handle with heat pads. (Cast iron absorbs grease and oils best when warm so apply your seasoning to pre-heated cast iron that is warm to the touch, no need to burn yourself. Pre-heating opens up the cast iron pores to allow the seasoning to be absorbed.)
    •    Before applying seasoning, check for rust. Now is the time to remove it.
    •    Lightly grease inside and out, you do not want the oil to pool or build up anywhere while you are seasoning your oven. Lightly means enough to change the color of the cast iron; do not apply a heavy coating that feels sticky to the touch.
    •    Place your Dutch oven upside down with the lid laying flat on the grate into a BBQ that can maintain 375° F consistently for one hour. If you use your oven in the house you could get a lot of smoke in the kitchen, consider yourself warned.
    •    Bake for 1 hour at 375° F
    •    Turn heat off, open lid and let cool.
    •    Repeat two more times for best results.

    Your Dutch oven is ready to use!

    For bests result, apply a light coat of seasoning to your Dutch oven after every use. This builds up the layers of carbonized grease every time you do this, giving you layers of protection and non-stick surfacing.

    There may come a time when you need to re-season your cast iron; perhaps it is getting a little rust, some bubbles have formed or the finish is chipping off. All caused from improper seasoning or care, but easily fixed.

    •    Place your Dutch oven or cast iron skillet in a self-cleaning oven.
    •    Turn and lock oven in the self-cleaning cycle.
    •    Run until cleaning cycle is complete. Your Dutch oven will be a light grey color when done.
    •    Let cool for a couple of hours
    •    Repeat steps 1 through 8 above.

    I will leave you with my 6 Golden rules for storing your Dutch oven

    Rule #1
    Never put away your Dutch oven dirty.
    Rule #2
    Never put away your Dutch oven wet.
    Rule #3
    Put a light coating of seasoning on your Dutch oven while it is warm from cleaning.
    Rule #4
    Air circulation prevents a rancid Dutch oven; store with the lid off or ajar.
    Rule #5
    Store your Dutch ovens in the house where the humidity is balanced.
    Rule #6
    Rotate your Dutch ovens when selecting one for a meal. The one on the bottom in the corner is all dusty is going bad on you!

    Next time we will discuss temperature control when cooking and I will have an easy bread recipe for you!

    Part Three of our Dutch Oven Cooking Series by Gary House, creator of www.Cooking-Outdoors.com; an excellent source for all things about outdoor cooking, including Grill & Smoker reviews, recipes, and videos.

    Gary is also the host of a new DVD, Taking Your Dutch Oven To The Max, using the dutch oven to smoke, grill, and even make ice cream.

    Listen to Gary on this episode of GardenFork Radio talk about how to season cast iron, how to use a dutch oven, and dutch oven recipes.

  • How To Cook With Cast iIron Dutch Ovens with Gary House

    How To Cook With Cast iIron Dutch Ovens with Gary House

    This is the second of a series of articles about how to cook in a dutch oven, dutch oven recipes, and how to season cast iron and dutch ovens by Gary House, of Cooking-Outdoors.com. A big thank-you to Gary for contributing this.

    Last time we talked about the different types and sizes of Dutch ovens available to cook meals outdoors in. By now, you should have a solid idea of where to start in purchasing a Dutch oven for you and your family or perhaps you have resurrected that dusty black pot that’s been sitting in the corner since you brought it home.
    Dutch oven cooking can become somewhat addictive, so I must warn you early, you can’ just own one! They seem to grow magically as time goes by, first a 12” then a 10”, maybe I need a 12” deep and really, a 14” is not as big as Gary says, etc. I have a collection of 10 active Dutch ovens, those that I keep handy to use on a weekly basis, but hidden away in the garage are another dozen “collectables” that need to be seasoned or I have to remove the rust, etc. This collection just seems to grow and grow and grow, consider yourselves warned.

    For those of you with the will power to minimize and control those urges (un-like myself), there are a few accessories that you will want to add to your Dutch oven cooking arsenal.
    Undoubtedly, the most important item you can start to add to your collection is a cooking platform; you need something to place your hot coals on when you cook with your Dutch oven. The bare ground is not a good option, as it will suck the life out of your coals in record time (a campground fire pit would be an exception as the ground there has baked into a hard heat-reflecting surface and will give you a solid cooking base). Those 45 minutes to an hour cooking time that you planned will reduce to 30 minutes or less if you just place your coals and Dutch oven directly on the dirt.

    I started out with a simple 32-gallon garbage can lid. Just pop the handle off, stomp it flat and it will last for years (I still have my 5 year old model). If you are looking for a Dutch oven dedicated cooking table to use at home and when you go camping you have a few options:
    Table
    Lodge, Camp Chef and several other manufactures offer nice models that will run you $100 or more. Think about these things before you buy yours:
    How many Dutch ovens do you plan to cook with at one time?
    •    2 to 4 pots at one time then stick with a Lodge http://lodgemfg.com or Camp Chef www.CampChef.com Dutch oven cooking table.
    •    Six plus Dutch ovens get yourself a custom table from a reputable source.

    My big Dutch oven cooking table comes from www.chuckwagonsupply.com, it holds 9 Dutch ovens at a time plus room to hang my tools.
    Folding legs or stationary?
    •    Folding legs means you can travel with it.
    Windscreen?
    •    This should come with the table but sometimes it’s extra and it is quite necessary. The wind can cause all kinds of havoc with your cooking times, so a screen is very important.
    Carrying case?
    •    This is usually extra and worth every penny in my opinion
    Height?
    •    Important! The higher the table the higher you have to lift those pots and if you decide to stack your Dutch ovens (cooking one on top of the other), you will want a low platform that reaches to just above your knees.
    Weight?
    •    Bigger = heavier, longer lasting and more difficult to transport but I think the positives far outweigh the weight issue.

    Utensils

    Just the basics to get started, if you’re like me, you will add so much more stuff as time goes by that you shake your head in wonder – why didn’t I buy a bigger truck!

    Gloves – leather welder’s gloves that cover the lower half of your arm
    Lid lifter – indispensable tool that has multiple uses in addition to acting as a solid place to set your lid when you have to stir the pot or add additional food to your recipe
    Charcoal tongs – Goes without saying that charcoal burns, so you will need a tool to move those hot coals around the Dutch oven as you cook
    Charcoal chimney – used to light your charcoal briquettes with a single sheet of newspaper
    Wisk broom – helps to dust the ashes of the Dutch oven lid and table
    Lighter – or matches, your choice. Some people use flame throwers!
    Safety gear
    Never leave home without them!
    Fire extinguisher
    Shovel – a small shovel to move the spent briquettes from the cooking table to the bucket
    Ash bucket – use a galvanized pail with a lid for safe transportation and storage
    First aid/burn kit
    Dutch oven cooking can be as simple as you want or need it to be, do not obsess over all of the accessories available, what you should or should not have, etc. Remember, it only takes one pot and a recipe to produce a fantastic meal. Cooking outdoors in a Dutch oven is a rewarding adventure that can keep your taste buds delighted for many years to come.
    Next time we will discuss how to take care of all that cast iron I have talked you into buying!

    Part Two of our Dutch Oven Cooking Series by Gary House, creator of  www.Cooking-Outdoors.com; an excellent source for all things about outdoor cooking, including Grill & Smoker reviews, recipes, and videos.

    Gary is also the host of a new DVD, Taking Your Dutch Oven To The Max, using the dutch oven to smoke, grill, and even make ice cream.

    Listen to Gary on this episode of GardenFork Radio talk about how to season cast iron, how to use a dutch oven, and dutch oven recipes.

  • Dutch Oven Banana Bread Recipe – Campfire Cooking – GF Video

    Dutch Oven Banana Bread Recipe – Campfire Cooking – GF Video

    Dutch oven banana bread recipe baked in a campfire or using charcoal, nice right?. Either way it tastes like the instant comfort food that it is. Watch the video and then read the recipe below.

    Head up: I now have 4 dutch ovens, and all are well seasoned at this point. You can see our  how to season cast iron video here. But I’ve never used a dutch oven for what they were probably originally designed for, cooking over a campfire. So today we use the cast iron dutch oven for what it is for, cooking outdoors. Watch and learn how to bake with fire.

    How to make the dutch oven banana bread recipe

    Whether for campfire cooking or backyard cooking, the dutch oven comes thru as a great pot for baking. Today we are going to learn how to use the dutch oven you have to bake or cook food outdoors, using charcoal or firewood. There are a couple of tricks here we learned from Gary of Cooking-Outdoors.com, like how to stack coals on the lid of a dutch oven, and how to use a dutch oven to bake breads and cakes.

    Update: Reading some of the great comments, I’ve learned that when fully fired up, each charcoal briquette puts out about 40-50F of heat. I will use this info as I experiment more with dutch oven cooking with charcoal and campfires. What fun.

    If you don’t already have them here are links to buy a cast iron dutch oven, a charcoal chimney, and heat resistant oven mitts.

    Some takeaways from this video and recipe, which was really fun to do.

    • Its not perfect. Is baking outdoors ever perfect
    • Use good pot holders and silicon oven gloves.
    • Charcoal is hot!
    • You will love baking outdoors.

    [tasty-recipe id=”13323″]

    Toad In A Hole Recipe
    Check out our Toad In The Hole Recipe, also made outdoors in a dutch oven.

  • Deep Fried Corn Flake Beer Batter Twinkies – GF Video

    Deep Fried Corn Flake Beer Batter Twinkies – GF Video

    Deep Fried Twinkies, coated in a Beer Batter Recipe, and rolled in Corn Flakes. wow. There is a long history of deep frying candy bars, snacks, cookies, treats, most anything. From what I know, people who work in fish and chip shops have tried to deep fry all sorts of food. Some foods work, some don’t.

    But do Deep Fried Twinkies work when Eric makes them with his Corn Flake Beer Batter recipe? Watch and learn here on Gardenfork.tv

    gardenfork_twinkie

    Eric’s Corn Flake Beer Batter Deep Fried Twinkie Recipe:

    Put your Twinkies in the freezer for at least 4 hours.

    Fill a large pot – a cast iron dutch oven works well – with peanut or vegetable oil to a depth of about 2-3 inches.

    Heat the oil to 350 F and then turn down the heat to hold the oil at 350 F.

    Batter Recipe:

    1 1/2 cups flour – all purpose, bread, organic, all work –

    1 can of inexpensive lager beer – Pabst Blue Ribbon is my favorite

    1 egg

    approx 3 cups of corn flakes, crumbled to about their original size.

    Roll the Twinkie in the beer batter, coat it around all sides.

    Now roll the Twinkie in the crumbled corn flakes.

    Using tongs, place the coated Twinkie in the deep fryer.

    BE CAREFUL! stand back from the oil, as it may spit.

    Turn the Twinkie over after about 2-3 minutes, its cooked when its nicely light gold-brown all over.

    Drain on paper towels, and allow to cool a bit.

    Then eat, and savor.

    Have you tried this? let us know below. And tell us your deep fry stories. thanks, eric.