Tag: cast iron cooking

  • Cooking Pizza In A Fireplace – GF Video

    Cooking Pizza In A Fireplace – GF Video

    Cooking pizza in a fireplace is not rocket science! No need to build a pizza ove, let me show you how to cook pizza in the fireplace. This is totally a “Use What You Got” GardenFork moment. I wanted to make pizza in our portable backyard pizza oven, but it was freezing outside, and staring at the fireplace, the light bulb went off in my head. I already had a built-in pizza oven in our living room.

    Cooking Pizza In A Fireplace, How To Start

    For this pizza oven method, you’ll need a cast iron dutch oven combo cooker, You can buy a combo cooker dutch oven here
    And a cooking or camping grate. you can buy the camping grate here

    We make our pizza dough – watch our pizza dough recipe video here – the day before and let it do a slow rise in the fridge overnight.

    Be very careful when working with the fire! Fire burns – don’t wear loose clothing, wear gloves and use fireplace tongs or other metal tools.

    After the fire in the fireplace pizza oven dies down bit, put the camping grate over the fire and preheat both parts of the dutch oven. You may need to adjust the height of the camping grate over the fire, I used bricks under the legs of the camping grate. Have all your ingredients prepared ahead of time, as well as the dough rolled out.

    Hardwoods make the best firewood, my wood shed is primarily stacked with oak and maple. The maple takes longer to catch, so I use a mix of what I have.

    Have you used your fireplace as a pizza oven? Let us know in the comments section below.

    Here are the links again to the combo cooker dutch oven and the camping grate:

  • How To Cook With Cast iIron Dutch Ovens with Gary House

    How To Cook With Cast iIron Dutch Ovens with Gary House

    This is the second of a series of articles about how to cook in a dutch oven, dutch oven recipes, and how to season cast iron and dutch ovens by Gary House, of Cooking-Outdoors.com. A big thank-you to Gary for contributing this.

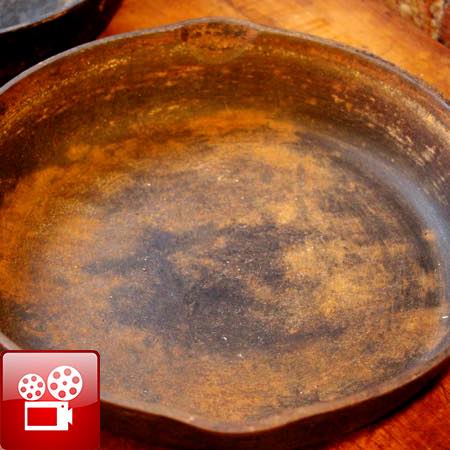
    Last time we talked about the different types and sizes of Dutch ovens available to cook meals outdoors in. By now, you should have a solid idea of where to start in purchasing a Dutch oven for you and your family or perhaps you have resurrected that dusty black pot that’s been sitting in the corner since you brought it home.
    Dutch oven cooking can become somewhat addictive, so I must warn you early, you can’ just own one! They seem to grow magically as time goes by, first a 12” then a 10”, maybe I need a 12” deep and really, a 14” is not as big as Gary says, etc. I have a collection of 10 active Dutch ovens, those that I keep handy to use on a weekly basis, but hidden away in the garage are another dozen “collectables” that need to be seasoned or I have to remove the rust, etc. This collection just seems to grow and grow and grow, consider yourselves warned.

    For those of you with the will power to minimize and control those urges (un-like myself), there are a few accessories that you will want to add to your Dutch oven cooking arsenal.
    Undoubtedly, the most important item you can start to add to your collection is a cooking platform; you need something to place your hot coals on when you cook with your Dutch oven. The bare ground is not a good option, as it will suck the life out of your coals in record time (a campground fire pit would be an exception as the ground there has baked into a hard heat-reflecting surface and will give you a solid cooking base). Those 45 minutes to an hour cooking time that you planned will reduce to 30 minutes or less if you just place your coals and Dutch oven directly on the dirt.

    I started out with a simple 32-gallon garbage can lid. Just pop the handle off, stomp it flat and it will last for years (I still have my 5 year old model). If you are looking for a Dutch oven dedicated cooking table to use at home and when you go camping you have a few options:
    Table
    Lodge, Camp Chef and several other manufactures offer nice models that will run you $100 or more. Think about these things before you buy yours:
    How many Dutch ovens do you plan to cook with at one time?
    •    2 to 4 pots at one time then stick with a Lodge http://lodgemfg.com or Camp Chef www.CampChef.com Dutch oven cooking table.
    •    Six plus Dutch ovens get yourself a custom table from a reputable source.

    My big Dutch oven cooking table comes from www.chuckwagonsupply.com, it holds 9 Dutch ovens at a time plus room to hang my tools.
    Folding legs or stationary?
    •    Folding legs means you can travel with it.
    Windscreen?
    •    This should come with the table but sometimes it’s extra and it is quite necessary. The wind can cause all kinds of havoc with your cooking times, so a screen is very important.
    Carrying case?
    •    This is usually extra and worth every penny in my opinion
    Height?
    •    Important! The higher the table the higher you have to lift those pots and if you decide to stack your Dutch ovens (cooking one on top of the other), you will want a low platform that reaches to just above your knees.
    Weight?
    •    Bigger = heavier, longer lasting and more difficult to transport but I think the positives far outweigh the weight issue.

    Utensils

    Just the basics to get started, if you’re like me, you will add so much more stuff as time goes by that you shake your head in wonder – why didn’t I buy a bigger truck!

    Gloves – leather welder’s gloves that cover the lower half of your arm
    Lid lifter – indispensable tool that has multiple uses in addition to acting as a solid place to set your lid when you have to stir the pot or add additional food to your recipe
    Charcoal tongs – Goes without saying that charcoal burns, so you will need a tool to move those hot coals around the Dutch oven as you cook
    Charcoal chimney – used to light your charcoal briquettes with a single sheet of newspaper
    Wisk broom – helps to dust the ashes of the Dutch oven lid and table
    Lighter – or matches, your choice. Some people use flame throwers!
    Safety gear
    Never leave home without them!
    Fire extinguisher
    Shovel – a small shovel to move the spent briquettes from the cooking table to the bucket
    Ash bucket – use a galvanized pail with a lid for safe transportation and storage
    First aid/burn kit
    Dutch oven cooking can be as simple as you want or need it to be, do not obsess over all of the accessories available, what you should or should not have, etc. Remember, it only takes one pot and a recipe to produce a fantastic meal. Cooking outdoors in a Dutch oven is a rewarding adventure that can keep your taste buds delighted for many years to come.
    Next time we will discuss how to take care of all that cast iron I have talked you into buying!

    Part Two of our Dutch Oven Cooking Series by Gary House, creator of  www.Cooking-Outdoors.com; an excellent source for all things about outdoor cooking, including Grill & Smoker reviews, recipes, and videos.

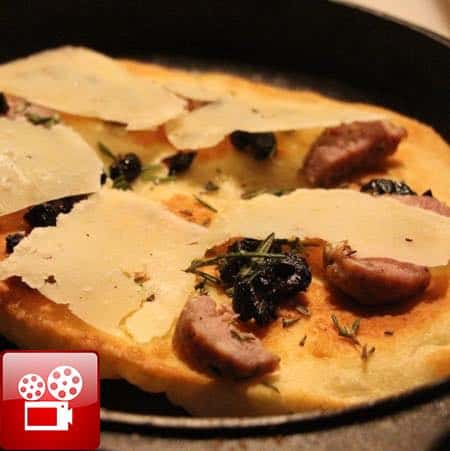
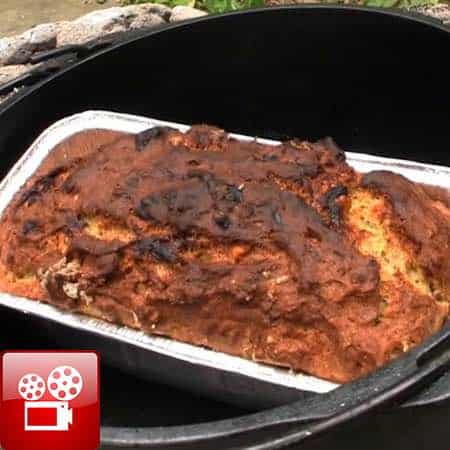
    Gary is also the host of a new DVD, Taking Your Dutch Oven To The Max, using the dutch oven to smoke, grill, and even make ice cream.

    Listen to Gary on this episode of GardenFork Radio talk about how to season cast iron, how to use a dutch oven, and dutch oven recipes.

  • Dutch Oven Banana Bread Recipe – Campfire Cooking – GF Video

    Dutch Oven Banana Bread Recipe – Campfire Cooking – GF Video

    Dutch oven banana bread recipe baked in a campfire or using charcoal, nice right?. Either way it tastes like the instant comfort food that it is. Watch the video and then read the recipe below.

    Head up: I now have 4 dutch ovens, and all are well seasoned at this point. You can see our  how to season cast iron video here. But I’ve never used a dutch oven for what they were probably originally designed for, cooking over a campfire. So today we use the cast iron dutch oven for what it is for, cooking outdoors. Watch and learn how to bake with fire.

    How to make the dutch oven banana bread recipe

    Whether for campfire cooking or backyard cooking, the dutch oven comes thru as a great pot for baking. Today we are going to learn how to use the dutch oven you have to bake or cook food outdoors, using charcoal or firewood. There are a couple of tricks here we learned from Gary of Cooking-Outdoors.com, like how to stack coals on the lid of a dutch oven, and how to use a dutch oven to bake breads and cakes.

    Update: Reading some of the great comments, I’ve learned that when fully fired up, each charcoal briquette puts out about 40-50F of heat. I will use this info as I experiment more with dutch oven cooking with charcoal and campfires. What fun.

    If you don’t already have them here are links to buy a cast iron dutch oven, a charcoal chimney, and heat resistant oven mitts.

    Some takeaways from this video and recipe, which was really fun to do.

    • Its not perfect. Is baking outdoors ever perfect
    • Use good pot holders and silicon oven gloves.
    • Charcoal is hot!
    • You will love baking outdoors.

    [tasty-recipe id=”13323″]

    Toad In A Hole Recipe
    Check out our Toad In The Hole Recipe, also made outdoors in a dutch oven.

  • Remove Rust From Cast Iron Video – GF TV

    Remove Rust From Cast Iron Video – GF TV

    I found a badly rusted cast iron pan, and wanted to show you all how remove rust from cast iron in this video. Rusty cast iron can be brought back from the dead, to clean the rust off the cast iron, it takes some elbow grease, and the pan will never be brand new, but old cast iron is great. [Note, I have posted some updated info below the video, thx!]

    Update: Use vinegar at full strength. If this method does not work, watch our video on how to strip cast iron using oven cleaner, or with a simple battery charger tank method. Plus it will be a great cast iron pot with a good story of where you found it. Let us know your tips for seasoning cast iron below the video.

    You can remove rust from cast iron, but it can take some time. Take it easy and it will work well. Check out our other cast iron videos, how to season and clean cast iron, and learn more about cast iron pots and fry pans, and all the great reasons to use them.

    We are  now using Flax Oil to season our cast iron, the result is a much harder finish than just using vegetable oil or shortening. so save the vegetable oil for the deep fryer. Watch our Best Way To Season Cast Iron video.

    remove rust from cast iron

    You can watch us use a cast iron dutch oven doing some campfire outdoor cooking in these two videos, the first is us making a banana bread recipe in a cast iron dutch oven over charcoal, then we made the classic Toad in a Hole cooked outdoors in a cast iron dutch oven as well.
    cast-iron-seasoning-instructions-7

    Soap On Cast Iron? Video               Remove Old Seasoning From Cast Iron Video

  • Deep Fried Corn Flake Beer Batter Twinkies – GF Video

    Deep Fried Corn Flake Beer Batter Twinkies – GF Video

    Deep Fried Twinkies, coated in a Beer Batter Recipe, and rolled in Corn Flakes. wow. There is a long history of deep frying candy bars, snacks, cookies, treats, most anything. From what I know, people who work in fish and chip shops have tried to deep fry all sorts of food. Some foods work, some don’t.

    But do Deep Fried Twinkies work when Eric makes them with his Corn Flake Beer Batter recipe? Watch and learn here on Gardenfork.tv

    gardenfork_twinkie

    Eric’s Corn Flake Beer Batter Deep Fried Twinkie Recipe:

    Put your Twinkies in the freezer for at least 4 hours.

    Fill a large pot – a cast iron dutch oven works well – with peanut or vegetable oil to a depth of about 2-3 inches.

    Heat the oil to 350 F and then turn down the heat to hold the oil at 350 F.

    Batter Recipe:

    1 1/2 cups flour – all purpose, bread, organic, all work –

    1 can of inexpensive lager beer – Pabst Blue Ribbon is my favorite

    1 egg

    approx 3 cups of corn flakes, crumbled to about their original size.

    Roll the Twinkie in the beer batter, coat it around all sides.

    Now roll the Twinkie in the crumbled corn flakes.

    Using tongs, place the coated Twinkie in the deep fryer.

    BE CAREFUL! stand back from the oil, as it may spit.

    Turn the Twinkie over after about 2-3 minutes, its cooked when its nicely light gold-brown all over.

    Drain on paper towels, and allow to cool a bit.

    Then eat, and savor.

    Have you tried this? let us know below. And tell us your deep fry stories. thanks, eric.