Tag: gardening

  • Cardboard Seed Starting Pots – DIY Video

    Cardboard Seed Starting Pots – DIY Video

    These cardboard seed starting pots are made from paper towel tubes. Biodegradable plant pots made from stuff in your house. Watch this DIY video about how to make the seed starting pots and get more info below, plus links to our other seed starting videos.

    You can buy seed starting pots, but I like to make them with stuff I already have. Our neighbor, Priscilla, who we call ‘The Egg Lady’ because we get our eggs from her, has a huge garden. She grows many heirloom tomatoes, in addition to some stuff I have never heard of. Unique string beans, heirloom flowers, plus she has several apple orchard around the property. Priscilla is like me, always wanting to share cool stuff she has discovered or found or grown.

    Plus she has a menagerie of animals, horses, turkeys, guinea hens, cats, and dogs. You can hear Priscilla on GardenFork Radio here.

    I had been saving cardboard tubes for her and then one day she showed me what she was doing with all the tubes. So I wanted to share this all with you.

    Couple of important things to remember when using starting plants from seed:

    • Cardboard seed starting pots are not for long term use.
    • Take care not to over-water them. Too much water invites mold and fungus, as a result, bad things when you are starting plants.
    • Don’t use potting soil to start seeds. Buy seed starting mix.
    • You can also use coir, which is shredded coconut fiber, mixed with vermiculite and perlite.
    • Do not add fertilizer to seed starting mixes.
    • Use a grow light rig. Learn how to build a DIY Grow Light here.

    The height of the seed starting pot depends on the plants you are growing. Taller plants need more root space, therefore, make those pots larger. Salad greens can be grown in a 2″ high pot.

    Here are some of our hoop house cold frames for when its time to move the seedlings in to the garden:

    hoop house cold frame

    So there you go, let me know any improvements or suggestions and how you start seeds in the comments below.

    cardboard seed starting pots

    Save

    Save

    Save

    Save

    Save

  • Mini Greenhouse Seed Starting Pots

    Mini Greenhouse Seed Starting Pots

    We have all sorts seed starting pots, but how about seed starters that have their own roofs? A neat idea that includes a solution for plastic bottles that function as a mini greenhouse for each seed starting pot. Jeremy sent me this photo and email about making these mini greenhouses with recycled bottles.

    mini-greenhouse-seed-starting-pots

    “I just want to thank you for all you have done for everyone over the years. You have been a huge help to me and an inspiration since last spring when I started gardening again after the loss of my mother.It was the best therapy I could ever hope for and You helped me more than you would ever imagine. Now I want to try and help you out if possible.

    While starting my seeds this last week I had come up with a cheap way to make a little green house by just getting a 2 piece disposable baking pan with large dome lid for a dollar at the dollar store and the smaller peat pots that you could fit 16 of them into each pan. Well I had a little too much moisture in there and had to open it up and kill the fungus on a few of the pots and it got me thinking.

    I drink bottled water a lot and I grabbed an empty bottle cut the top off and it fits perfectly over the peat pot and has a resting ledge on the ribbing of the bottle where it stops making each pot have it’s own personal mini green house.

    You can set them on a window sill if you are low on space and line the whole thing with them. If it works out well I was thinking it would also be a good way to keep infestations contained to one or two seedlings instead of a whole tray. Here are some Pictures in case you wanted to see it and give it a try. It’s a great way to recycle some of the water bottles and keep them out of a landfill. “

    Beautifully simple and something I had never thought of. I am always wanting to over-engineer everything, and make it bigger than it needs to be. A big thank you to Jeremy for taking the time to send that. Do you make seed starting pots? Let me know in the comments below!

    If you live in the northern areas of the world, its time to start seed starting pots with sugar snap peas, and then some tomatoes too. Below are links to check out our how to make seed starting pots and how to start seeds videos.

    seed starting pots

    seed starting pots


  • Cheap Cold Frame How To – DIY GF Video

    Cheap Cold Frame How To – DIY GF Video

    Here’s a cheap cold frame you can make out of scrap lumber and a window. In this video I’ll show you how to build the cold frame in a few hours. With this rig, you can do some winter gardening, and of course we have some videos on that, the links are at the end of this post.

    Some enhancements I’ve done with we made the video:

    • I painted the cold frame with outdoor latex paint, 2-3 coats is good, as plywood does not like to get wet, you know.
    • I split open some old garden house and slipped it on the bottom of the cold frame to keep the wood out of the dirt.
    • I’ve grown vegetables in winter for several years. Neat.

    I’m betting you can find enough scrap lumber to make this a recycle or freecycle project. The wood doesn’t have to be finish grade, and one of my pieces was warped, but it worked anyway. The hinges I had laying around, and the only thing I had to buy was the thermal vent.

    What grows well in a cold frame? I grow cold hard salad greens and kale. Kale will grow in snow. I’ve dug it out of the garden and its still green in February. You can buy winter salad green mixes from the seed companies. Mache is a neat green that not many people grow, the seeds are kinda tiny.

    cheap cold frame

    If you don’t get the auto vent, you will have to open up the frame on warm days. You will be surprised how hot it can get in a our cheap cold frame, even if it didn’t cost us any money to build.

    The biggest problem with this rig is the glass. It can break. That tree limb could have landed anywhere, but it landed on top of your super cheap cold frame instead. I have replaced the glass once. Luckily I had some spare windows that I salvaged a piece of glass out of. You might try putting some screening over the glass to protect it. Just a thought.

    cheap cold frame

    Below are some suggested books for winter gardening, let me know your thoughts.

    hoop house cold frame
    Watch all of our  hoop house videos here.

  • Cold Frame Gardening at BBG – DIY GF Video

    Cold Frame Gardening at BBG – DIY GF Video

    Cold frame gardening can be done in the Northern climes, as we see at the Brooklyn Botanic Garden. We made this winter gardening video at their demonstration garden in December. They were harvesting greens like arugula and mache. Watch the video and see for yourself. Below are some book recommendations for winter gardening.

    The cold frame plans for this set are easy to build. The dimensions depend on the size of the windows. You may already have some windows, or a neighbor may be replacing their windows and you can grab a few of them. Or pick them up from a garage sale or look on the web for free stuff.

    The cold frames in this video were built with 2×8 or 2×10 lumber, but you could use something less thick and it will be ok, i think. I like how they had the cold frames next to each other, so each frame helped insulate the one next to it. You could use scrap hinges off some old doors, its a ‘use what you got’ kind of project.

    cold frame gardening

    cold frame gardening

    For cold frame gardening, its best to orient the cold frame so it faces south, if you are in the northern hemisphere. This cold frame is manually vented, meaning you vent them by opening them up and closing them yourself. You could install the thermatic vent we have used in our hoop house greenhouse plans if you like.

    What to grow when gardening in winter? Cold tolerant plants, mainly salad greens work well. Several seed suppliers sell winter salad mixes, they will do well until it becomes just too cold. But then those plants will revive in early spring. Many times there is enough moisture in the ground to keep the plants watered, but keep an eye on them. If the cold frame gets too warm, the soil can dry out. And you’d be surprised at just how hot a cold frame can get in winter.

  • Hoop House Cold Frame #2 – DIY GF Video

    Hoop House Cold Frame #2 – DIY GF Video

    This is the second DIY Hoop House Cold Frame we have built in our video series. Easy to build, this mini greenhouse allows you to grow plants in winter. Watch the video here, plans and photos are below as well as links to our other DIY Hoop House Cold Frame Videos.

    This cold frame uses a wire mesh that’s usually used for concrete, but it works really well as a cold frame form to hold the plastic up. I like how it works
    You can buy this concrete reinforcing wire at a local lumber supply yard. It comes in two thicknesses, you want the thinner gauge wire, the thick wire is too much, I think. This wire also comes in rolls, but the it is a pain to work with. The mesh I bought was 10’ x 5’.

    hoop house cold frame plansTo cut the wire mesh we use a right angle grinder with a metal cutting disc. Be sure to wear ear and eye protection and wear gloves while you’re handling this material, it can cut your skin.

    hoop house cold frame

    Be sure the cut end of the wire mesh faces the plywood end, else the plastic can get sliced by the sharp ends of the wire. You can put pieces of old garden hose along the end of the wire mesh where the plastic bends over to form the end wall, as well as on the plywood end to protect the plastic from the hard edges of the wire and wood.

    But you can build this! It’s not hard and I really like it. Another great version of the hoop house cold frames that we’ve built, we have a whole series of them – link here – and every time we make one we get better and better. The super cool part is that you can extend your growing season in the fall and you can use one of these cold frames to warm up the soil in your vegetable beds in late winter and plant seeds even earlier than you could normally. Cold frame hoop houses are especially good for salad greens, radishes, sugar snap peas – plants that are cold tolerant.

    cold frame hoop house
    You can use scrap wood to tie the corners together, or use brackets.

    thermatic-vent-hoop-house-cold-frame

    The automatic vent that we use is kind of a specialty item but that they’re not that expensive. Here is the link to buy it.

    You could put one vent in or you could put in two vents. With two vents you would put plywood at both ends of this cold frame. Having a vent on both sides allows more warm air to exit. Cold frames can get quite hot, you don’t realize how much solar energy the sun has even in the winter. You will need to vent the hoop house, you can go out on sunny days and manually vent it if you want by lifting up the cold frames, but I’m not there all the time. So I like the automatic vents.
    Have you made a cold frame? Do you have anymore questions? Pease leave them in the comments below.

    My cold frame experiences have been greatly influenced by these books by Eliot Coleman and Niki Jabbour.

    Four-Season Farm     Year Round Vegetable Gardener (affiliate links)

    Watch more of our hoop house cold frame plans videos here.

    PVC Cold Frame Hoop House #3 – DIY GF Video

  • PVC Cold Frame Hoop House #3 – DIY GF Video

    PVC Cold Frame Hoop House #3 – DIY GF Video

    Easy to build PVC Cold Frame Hoop House is a mini greenhouse that allows you to grow salad greens and cold tolerant vegetables into the winter, and get a head start on early spring planting. This hoop house is more resistant to heavy snow than our previous versions, listed below.

    This is version 3.0 of our cold frame hoop house. What I like about this one is that it’s a taller than our previous cold frames, so you could start to grow tall plants like kale or start sunflowers earlier in the spring.

    hoop house cold frame plans

    PVC cold frame hoop houseA couple things to keep in mind while you’re building this hoop house, especially if you are using this on raised beds. You want this hoop house to fit just inside the walls of your raised bed. I made this mistake when I made my first hoop house, I didn’t measure how wide my raised bed was and the cold frame didn’t fit exactly. Experience has once again taught me something. The frame fits just inside the wooden sides of the raised bed and it doesn’t have to have a super tight seal with the soil, you do want some air exchange in and out. What the hoop house is doing is moderating temperature. When it gets really cold outside, it’s going to be cold in there but it will extend your growing season.

    Consider planting some cold tolerant greens in August, I like a salad green mix that sold by Fedco seeds. They have  a fall and winter lettuce greens mix and that’s worked really well for me.

    One thing I did not mention in the video is that where the plastic meets the plywood ends of your hoop house, the plywood can cause the plastic to tear and so you might want to put something soft around the edge of the plywood. If you have some old garden hose you could split the garden hose open and run that along the edge of the plywood and that would go a long way toward making the plastic such that it wouldn’t rip.

    For  this 8′ x 4′ cold frame I used:

    • Two 2×3 8′ long studs
      Two 2×3 studs cut to 45″ long
      One 1×2 8′ stud, you could also use a 2×2
      4 metal angle iron brackets
      3 pieces of 1/2″ Schedule 40 PVC cut to 6′ long
      1 1/4″ and 1 5/8″ drywall screws
      Two pieces of 4’x4′ thin plywood. You could also cut down a 4’x8′ piece.
      3 or 4 mil plastic, i used a roll of 10′ x 25′, which is enough for two hoop houses.
      Two thermatic vents, available here http://amzn.to/2Cg81fg
      Staple gun

    Using the angle brackets, build a 4′ x 8′ wood frame, make sure the shorter pieces of 2×3 wood (the 45″ pieces) are inside of the larger pieces, so the outside dimensions are 48″ x 96″

    I cut the plywood ends to match the arc of the pvc hoops. Take one of the hoops and curve it into the wood frame at the end of the frame, and use this to sketch the arc on the plywood ends, it does not have to be perfect.

    pvc-cold-frame-hoop-house pvc-cold-frame-hoop-house-3 pvc-cold-frame-hoop-house-2 pvc-cold-frame-hoop-house-5 pvc-cold-frame-hoop-house-6 pvc-cold-frame-hoop-house-7 pvc-cold-frame-hoop-house-8

    My hoop house cold frame gardening has been greatly influenced by Eliot Coleman and Niki Jabour.

    Four-Season Harvest    The Year-Round Vegetable Gardener

    hoop house cold frame
    Watch all of our  hoop house videos here.

  • Planting a tree next to a tree stump is a challenge

    Planting a tree next to a tree stump is a challenge

    planting-a-tree-next-to-a-tree-stump-is-a-challenge1

    We took a Mulberry tree out of our backyard, the neighbors were complaining about the berries, the pups ate the berries, not a good thing. In its place we are planting Leyland Cypress evergreens. These trees grow fast and are good at creating a green fence, which makes good neighbors.

    But we had to deal the Mulberry tree stump, plus two other stumps from previous tree removals. I have been delaying this project for a while, but the cool weather means its time to get this in gear. So out comes the reciprocating saw.

    planting-a-tree-next-to-a-tree-stump-is-a-challenge2

    A large tree root crossed right where we wanted to plant on of the trees, so I bought a pack of wood cutting blades for the saw and started cutting the large root. It wasn’t as hard as I had imagined, but it took a bit of time. The larger roots have lots of smaller roots coming off of it going downward. Lots of lifting up a root to find it still attached underneath.

    planting-a-tree-next-to-a-tree-stump-is-a-challenge3

    I don’t dig a large hole for planting things. The instructions say dig twice as wide and deep, but this doesn’t work for me. I’ve done well planting how I plant so far in life. I have found that as the hole gets deeper, its not easy to use a shovel to get out all the dirt. A scoop of some sort works much better after one had broken up another layer of dirt with the shovel. One more reason to save those yogurt containers!

    planting-a-tree-next-to-a-tree-stump-is-a-challenge4

    I wanted to re-use the plastic pots that the trees came in – not sure for what yet – so I pulled the trees out of the pots by laying them down and having help. One person grabs the pot, one pulls the tree trunk. Out it comes.

    planting-a-tree-next-to-a-tree-stump-is-a-challenge5

    I think the most important thing in planting in general is plenty of water after planting. I plant things a bit lower than the soil layer, and build a moat of dirt around the plant so I can fill it with water. It will slowly drain into the soil and water the plant. It needs to grow roots, so water it a lot the first few weeks. What are your plant planting methods? Let us know below.

  • DIY Rain Barrel System – GF Video

    DIY Rain Barrel System – GF Video

    Easy Rain Barrel System we built with spare lumber and trash cans and some PVC. What I like about this rain barrel system is that you don’t have to go buy or find some rain barrels, you just go to the hardware store and buy some garbage cans. Done.

    How to build a rain barrel system

    Below is a slide show of photos I took while we assembled the rain barrels. The exact dimensions of your project will vary, depending on the size of your trash cans and how high up in the air you want to put your system.

    Important: Be sure to screen the slot where the downspout enters the barrel or use mosquito dunks to control mosquito breeding.

    A list of the items used:

    Gutter Downspout Diverter, available here: http://amzn.to/1mf6ENG

    • 2″ male and female electrical PVC connectors to attach the PVC drain pipe to the trash cans
    • 2″ PVC plumbing pipe to connect the rain barrels to the garden hose spigot. The length of pipe you need depends on your trash cans and the stand you build.
    • Two 2″ PVC 90 degree elbows
    • One 2″ PVC T connector
    • One 2″ PVC 30 degree elbow
    • Assorted PVC adapters to fit the garden hose spigot to the end of the PVC pipe
    • One each 3″ male and female electrical PVC connectors for overflow pipe
    • One 3″ PVC street elbow for overflow
    • Various 3″ PVC elbows to divert overflow to where you want it to drain.
    • Sections of downspout pipe to connect downspout diverter to your rain barrel system
    • Quality silicone bathtub caulk

    We built the stand for the rain barrels out of scrap lumber. Be sure to build the stand to support a heavy load, and do not site the rain barrels where they could fall over, they are heavy! If the stand is sitting on soft earth, put bricks or pavers underneath the legs of the stand.

    The top of the stand has a gap in the middle of it for the pipe that comes out of each rain barrel, plan for this ahead of time.

    Our overflow pipe is 3″, which might be overkill for some designs. This system takes in water from a large flat roof, and in a hard downpour, a smaller overflow pipe would be overwhelmed, we believe. If you are doing rainwater collection from a smaller roof, your overflow pipe could be smaller.


  • A Frame Tiny House Plans & Good Eats Love – GF Radio 340

    A Frame Tiny House Plans & Good Eats Love – GF Radio 340

    Deek’s  simple A Frame Tiny House Plans start the show. Deek is part of the tiny house movement, publishing videos on his YouTube Channel, and his tiny house plans book, and hosting workshops. Eric and Rick like the A frame plan, it is a great starter cabin for that piece of land out in the country.

    Watch the video about Deek’s A Frame tiny house plan here and download the plans here.

    Rick and Eric are both big fans of WFIU Earth Eats, a really well produced radio show, the polar opposite of GardenFork Radio. Annie Corrigan does a great job producing and hosting the show.

    Here is the some photos of Earth Eats on Flickr and on Pinterest.
    Beginner’s Guide To Gardening: Recycling In The Garden | Earth Eats – Indiana Public Media http://ow.ly/vXLKl

    Carrots From Farm To Plate, Magical Cheese Microbes, Urban Vertical Farming, Will Allen | Earth Eats – Indiana Public Media

    We talk about the new GardenFork.TV videos, an ornamental seed starting video, and the famous freecycle propane grill repair video that Eric is still excited about. Free propane grill, what’s not to like?

    Rick is shooting Grafting tomatoes vid today, results in a couple of weeks (tobacco mosaic virus, darkness, to top or not), the tomato blight has been a real problem on the east coast, Rick is grafting blight resistant stock with good fruit plants. Stay tuned for the results.

    Rick made a new video using jigs to assemble wooden ware https://vimeo.com/92171810

    Eric talks about the new video soft lights that he bought on ebay.

    photo video lights

    Click Here To Check Out The Photo Video Soft Lights

  • 5 Great Seed Starting How To Videos

    5 Great Seed Starting How To Videos

    How to start seeds? Watch these seed starting videos from the GardenFork video archive.

    Simple Seed Starting Pots Video

    Cardboard Pots Video

    Origami Newspaper Pots

    Our Super Easy Grow Light How To Video

    Here’s how to build the grow light stand for your cheap grow lights:

    Some Seed Starting Thoughts from Eric

    • Do Not Overwater Seedlings or seed trays.
    • Damp sponge consistency is good. Wet is not good.
    • Keep the grow lights right on top of the seedlings, they tops of the plants should be touching or almost touching the bulbs.
    • Keep the grow lights on 16 hours a day.

    Not enough light and over-watering are the two biggest mistakes people make when seed starting. I don’t believe in using a window to start or grow seedlings, the weak light makes the plants leggy and weak, in my opinion.

    5-great-seed-starting-how-to-videosIf you want to save money and avoid having more plastic pots around, consider using cardboard or newspaper seed starting pots. The videos above show how easy it is to make these.

    I use coir as a seed starting medium, I avoid using peat moss, which isn’t the most renewable resource we have. We seem to have a ton of coconut shells and fiber around. With coconut water being the new cupcake and all…

    I add vermiculite and perlite to the coir fiber to give it some air and drainage. Easy enough to buy this stuff in the local garden shop. The exact amount is not important, use what you got, but you want a majority of the seed starting mix to be coir.

    Break down the coir bricks in warm water. It helps to break them up with a hammer or some sort of smashing type object. I tend to add too much water to the coir bricks, and end up draining off a lot of it.

    What are your seed starting practices? Thoughts? Let us know below:

  • How to buy a farm, Tyler buys a small farm – GF Radio 327

    How to buy a farm, Tyler buys a small farm – GF Radio 327

    Tyler tells his story of how to buy a farm. Tyler recently bought a small farm with a 3 stall barn and house on 2 acres, and he tells us about the house buying process. If you are thinking of buying a small farm or just buying a house with some land, or just want to hear us talk, listen on.

    Tyler walks us through his house purchase, and how important it was to hire a good home inspector, and work with a knowledgeable realtor. Tyler’s new house is called a flip, meaning it was bought by a developer or contractor at a lower price, perhaps at a foreclosure, and has fixed up the house for resale.

    how-to-buy-a-farmA flip sale may not sound like a good idea, but thinking about it in another way, you’ve already got someone to do a bunch of the repairs that need doing.

    Now being a farmer, Tyler went out and bought a chainsaw, and did the right thing and bought chainsaw chaps and safety gear. Good for him.

    The Garden Tractor  Dilemma: what to tractor to buy? and what attachments. Eric weighs in on whether to buy a rototiller that attaches to the back of the tractor or to get a standalone rototiller. Eric votes for a stand alone rototiller, the back of tractor rototiller seems like more work.

    We move on to storm chasing, as Tyler is CEO of Allison House, the severe weather data company. Rick asks Tyler about the radarscope app , and what is the difference between the different radars available on the app. Tyler and Rick go into probably more detail than the average GF listener wants to know about radar tilts. But if you are into storm chasing, this might be interesting. Tyler uses big words like ‘step function improvement’ . Let me know.

  • Composting 101 – Backyard Composting Basics – GF Video

    Composting 101 – Backyard Composting Basics – GF Video

    Composting! Learn how to compost in this video. What food can you compost? What food should not go in the composter? What kind of bin should I buy or build? Watch the show and let us know your thoughts in the comments below.

    To compost in your backyard, you’ll need a bin of some sort. You can buy one – here are a few models – or you can build one – here are some GF videos with compost bin plans.

    Composting Ingredients

    Here is a brief list of things you can compost:

    • Eggshells
    • Coffee Grounds
    • Salad Greens
    • Corn Cobs
    • Vegetables
    • Newspaper, napkins, paper towels
    • Light cardboard

    Stuff  you should not compost:

    • Meat
    • Foods saturated with oil
    • Cat Litter and Dog Waste
    • Cheese & Dairy Products

    more compost videosMost backyard composting takes months to break down, because of the lack of a large biomass, the pile cannot achieve the ideal temps for hot cooking of the material. But  this isn’t a reason not to do it. Taking food scraps in to the backyard instead of the trash can is a super eco green way to live, and its real easy. There’s really no wrong way to do it.

    composting-101-backyard-composting-basics-2

    Backyard Composting can be as simple as a pile of leaves and yard waste in the back of the yard, or in a more structured bin, its up to you. Whatever type you go with, be sure to aerate the pile, turning it over on itself, or lifting it up and poking holes in it. The pile needs air to work.

    I’ve found that most of the compost accelerators don’t do much more than a good shovel full of manure will. What do you think? Let us know below:

  • Squash Vine Borer Treatment #3 : GF Video

    Squash Vine Borer Treatment #3 : GF Video

    A new Squash Vine Borer treatment to control Squash Vine Borers and keep them from eating your squash plants. Squash Borers live inside your squash plant and eat the plant from the inside out until  you have a dead squash plant. Are your Zucchini plants dying? Summer Squash too? The culprit is likely the borer. Here’s a video how to on a new squash vine borer treatment that uses Bt.

    Many times I hear of people who walk into their vegetable garden and find all their squash plants wilting and yellowing. Check the base of the stem, where it enters the soil. If you see this orange frass that looks like wet sawdust like in the photo below, you have squash vine borers in your plants. If left untreated, there’s a good chance you will lose the squash.

    squash-vine-borer-treament
    Orange frass at base of stem, a sure sign of squash vine borer infestation

    How this squash vine borer treatment works

    In this video we are using Bt, Bacillus thuringiensis var kurstaki . This is a naturally occurring organism that, once it enters the gut of the borer, causes it to stop eating. Bt is considered an organic treatment, allowed by the OMRI ( Organic Materials Review Institute )

    The adult moth of the borer lays its eggs in the soil at the base of the squash plant, then the eggs hatch and the borer chews a hole in your squash plant, enters the stem and starts eating. The Bt is injected into the stem of the squash plant at several intervals. The goal here is to get the borer to ingest some of the Bt, so you want to inject the Bt in front of where the borer is currently chewing. Watch the video for how to do this.

    This Bt is not to be confused with GMO BT, which has been genetically spliced into plants. This is a naturally occurring organism that we are harnessing to kill caterpillars. Below are our other videos on how to prevent squash vine borers, let us know any suggestions or comments below:

    squash-vine-borer-treatment-3

    Squash Vine Borer Treatment method #2

    squash-vine-borer-play

    Squash Vine Borer Prevention and Treatment method #1

    squash


    Check out our Squash Recipes Here


  • Raised Bed Garden Plans For A Self Contained Garden : GF Video

    Raised Bed Garden Plans For A Self Contained Garden : GF Video

    This raised bed garden plan video is perfect for a school garden project, or for building raised beds on a concrete or asphalt playground. This kind of raised bed is also good for raised beds on top of contaminated soil. This self contained raised bed is a plywood box supported by concrete blocks, a plastic liner keeps moisture away from the wooden sides of the raised bed.

    I saw this raised bed at a Whole Foods in St Louis, MO. I like the simple design of the raised bed, one can build it with a few tools and a saw. This kind of bed would be great for a school that wants to build a garden in a playground or parking lot. You don’t have to dig up anything, just build these raised beds and drop in the soil. If you have soil contamination in your yard, yet you want a vegetable garden, this design will work for you. ( we have another video coming up about gardening in or on contaminated soil, join our email list to be alerted to that video post )

    raised-bed-garden-plans-for-a-self-contained-garden

    This design uses treated plywood for longevity, and the treated plywood is kept separate from the garden soil by a plastic liner. The raised bed is supported by concrete footers that are usually used to build decks. Holes are drilled through the liner and plywood for drainage.

    raised-bed-garden-plans-for-a-self-contained-garden-2

    This kind of container gardening requires one to pay attention to the moisture level of the garden soil in the raised bed. This soil will dry out faster than the surrounding earth. I think a soaker hose drip irrigation system – drip irrigation video here – would work great for this bed.

    raised-bed-garden-plans-for-a-self-contained-garden-3

    What kind of raised beds do you have? ? Questions, Comments? please let us know below:

  • Seed Starting in a Hoop House Cold Frame : DIY Video

    Seed Starting in a Hoop House Cold Frame : DIY Video

    Starting seeds in a hoop house cold frame is like putting a greenhouse on your vegetable bed. The hoop house warms the soil and then you drop seeds right into the soil. No transplanting or grow lights, no transplant shock. This is our cheap PVC hoop house that can be made with salvaged or recycled materials, and then you can grow vegetables in the hoop house. What I love is how the cold frame warms the soil to 15F above the ambient soil temperature.

    Plants that do well  for seed starting in a hoop house are those that are cold tolerant. What the cold frame offers is a warmer soil and air temperature, which aids in germination. Yes, peas can be planted in snow, but they germinate much better in slightly warmer soil, same for lettuces and cabbages like kale, just a bit warmer and they sprout better. For this video I put sugar snap pea seeds in and radish seeds. Radishes are one of those seeds that are kinda fail-safe, so you feel ok even if some of the other plants didn’t take as well.

    hoop house cold frame plansWe have several videos on how to build a hoop house cold frame and how to use a plastic greenhouse like this, here is the video of us building our first cheap hoop house. I think its key to have the thermally controlled vent, if it gets too hot, you might consider putting a vent on each end of the hoop house. The PVC we use in this cold frame could be salvaged or recycled from another project or job site. The plastic we use is 3 mil plastic from the hardware store. With care this plastic will last several years. In the middle of summer, I hang my hoop house on the back side of the woodshed, and the plastic stays in good shape for a few years.

    seed starting hoop house
    Salad Greens Grow Really Well In A Hoop House

  • Repair Of Our Hoop House Cold Frame : GF Video

    Repair Of Our Hoop House Cold Frame : GF Video

    Setting up our simple cheap hoop house greenhouse for seed starting. This PVC hoop house cold frame works well for us and it was easy to build, here is the video of us building our the hoop house. The hoop house greenhouse allows you to get a head start on planting vegetables and seed starting. We started this in February to start warming the soil. This can be made for free if you find some scrap leftover lumber and PVC pipe. This plan uses short lengths of PVC pipe, which you may find laying around your yard, or your neighbor’s yard.

    My hoop house plans for this mini greenhouse are simple. Some 2x4s, some PVC pipe, and a piece of plywood. The thermal actuated vent keeps the hoop house from overheating. Link to buy the thermal greenhouse vents

    I use 3 mil clear plastic from the hardware store, it lasts a few years with care. I hang our mini greenhouse on the back of a shed when i am not using it. To attach the plastic to it, I fold the plastic over on itself and use lots of staples. You could also use a piece of lath or thin wood to hold the plastic to the wood. For the ends, I staple the plastic to the plywood end with the thermal vent and then cut off the excess plastic. For the other end of the cold frame hoop house, I simply bunch up the plastic and staple it to the 2×4.

    Cheap-Hoop-House-Greenhouse-Setup-2

    After a few days on your vegetable bed, this portable greenhouse will start warming the soil. Its amazing how warm it is inside the hoop house compared to the outside temperature. We have a video showing how a hoop house greenhouse can defrost your garden soil coming soon.

    In the video, the plywood I used for the end of the greenhouse, OSB, is not the best kind of plywood for outdoor uses. Use a better piece of plywood and paint it with a few coats of latex paint, it will last much longer if its painted.

    hoop-house-cold-frame-play

    Click here to watch our How To Build a Hoop House Cold Frame Video

    How-to-build-a-cold-frame-hoop-house-3

    Click here to watch How to build a cold frame video.

    Learn how to grow food year round, read Eliot Coleman’s Four Season Harvest book and Nikki Jabour’s Year Round Vegetable Gardener.

    Do you use a hoop house greenhouse? let us know comments or questions below:

  • Cheap Grow Light Stand : GF Video

    Cheap Grow Light Stand : GF Video

    Easy grow light stand made from scrap lumber! Don’t buy one of those $100 grow lights, build this grow light stand to go with our DIY grow light video. Homemade grow lights have always been funky, but with this grow light stand, and our easy grow lights built from cheap shop lights, you won’t have to have this mess of lights and cords and rope to hang grow lights above your plant seedlings.

    I built this light stand out of scrap lumber I had in the garage, if you don’t have any, ask your neighbors or walk around the neighborhood on trash day, I bet you’ll find free wood to build this. You’ll need some chain as well, which you can get from the local hardware store.

    grow light video insert

    What I like about this grow light rig is that you don’t have to hang lights from the ceiling or some kludged together mess of ropes and wood. The side braces allow the light to be adjusted up as the seedlings start to grow. I’ve also got an idea for a stacked version of the grow light stand, so you can put one on top of the other and save space. neat.

    cheap grow light stand

    What kind of bulbs should you use in grow lights? I use regular old warm white or cool white fluorescent bulbs. Other may disagree with this, but here’s my thinking, we’re not growing plants, we’re starting seedlings, and the light output of these inexpensive lights works fine for me. Its been suggested not to mix the kinds of bulbs you use in a grow light made from shop lights, it can make the ballast wear out faster.

    cheap grow light stand

    cheap grow light stand

    cheap grow light stand

    Check out our special Seed Starting How To page here.

    What are your ideas for grow lights? let us know below:

  • Simple Paper Seed Pots : GF Video

    Simple Paper Seed Pots : GF Video

    Learn how to make simple paper seed pots, the best paper seed pots, I think. These paper pots are for those of us who can’t make origami paper plant pots, OK? Simple method to make paper pots for your seedlings and seed starting trays. If you want to make a pack of paper pots, just glue or tape them together, use what you got.

    Most newspapers print their paper with soy based inks now, so I’m ok with using regular newspaper for vegetable paper pots. And the newspaper will break down in the garden soil; you just open up the bottom of your paper pots just before planting to allow the roots to easily grow out the bottom of the paper pot.

    You can use different size jars to make different size newspaper pots. I used a peanut butter jar to make paper pots for tomato seedlings, and used a small mason jar for lettuce transplant paper pots.

    simple-paper-seed-pots-pin
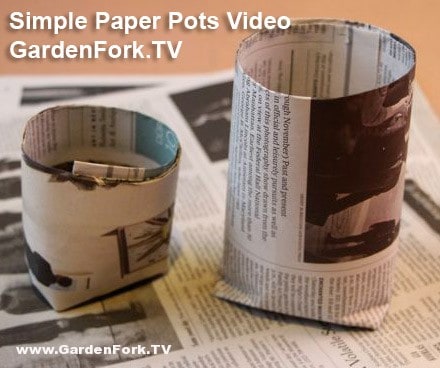
Its best to bunch the paper pots together under grow lights, as the paper can wick away moisture from the seed staring soil, packing the pots close together cuts down on that evaporation. You can watch our how to build a simple grow light video here, and our other seed starting videos here.


    How do you start your seeds in the spring, what kind of pots or trays do you use? Let us know below: