Author: Sarah

  • Spiced Pearsauce Muffins Recipe

    Spiced Pearsauce Muffins | GardenFork.TV

    Sometimes I literally work for food, like last week when Eric brought by a mix of Bosc and Bartlett pears. They were speckled and imperfect but still beautifully fall, boasting shades of yellow and green fit to make the barely-changing leaves here in Brooklyn jealous.

    We ate some with the most minimal of processing – a scrub and some spot- and worm-removal, but I saved just enough to make an adaptation of one of my favorite bundt cakes. The family recipe for pearsauce cake is one I treasure but sometimes hesitate to replicate because it never tastes quite as spectacular as at the farm, where it is executed not only with pears from the property but also estate walnuts and raisins (well, estate-grown grapes, also dried on premises). These muffins didn’t disappoint, though – buttery, sweet, and bursting with warm spices, in particular a hefty dose of ground cloves. I skipped the raisins and swapped walnuts for toasted pecans because they were what we had on-hand, but feel free to use whichever you like best. You can also substitute the pearsauce with 1 1/4 c applesauce, although you’ll miss out on that ever-so-slight and I daresay delightful grittiness from the pears.

    Spiced Pearsauce Muffins
    18 muffins
    Ingredients
    •    4 c peeled, chopped, fresh pear
    •    1 cinnamon stick
    •    pinch freshly grated nutmeg
    •    1 1/2 c all-purpose flour
    •    1/2 tbsp (1 1/2 tsp) baking soda
    •    1/2 tbsp (1 1/2 tsp) ground cinnamon
    •    1/2 tbsp (1 1/2 tsp) ground cloves
    •    3/4 tsp freshly grated nutmeg
    •    1/4 tsp salt
    •    8 tbsp (1 stick) butter, room temperature
    •    3/4 c sugar
    •    1 egg
    •    1/2 c roughly chopped walnuts or toasted pecans
    •    1/2 c raisins (optional)
    Cooking Directions
    1. Make the pearsauce. Add the fresh pear, cinnamon stick, and pinch of nutmeg to a medium pot over medium heat. Cover and cook, stirring occasionally, until the pears are completely soft. Add water if the pears start to stick to the bottom before they are fully cooked. Use a potato masher to mash the pears until only small chunks remain. Cook uncovered until the pearsauce is reduced to 1 1/4 c. Remove the cinnamon stick and cool to room temperature.
    2. Preheat the oven to 300 degrees F. Line a muffin tin with liners. (I have never tried greasing/spraying the pan so I\\\\\\\’m not sure whether that would do that job.) In a medium bowl, whisk together the flour, baking soda, ground cinnamon, ground cloves, nutmeg, and salt.
    3. In the large bowl of a stand mixer, cream together the butter and sugar on medium-high using the paddle attachment until light and fluffy. Reduce speed to low, add the egg, and beat until just incorporated. Add the flour mixture and beat until just combined. Add the cooled pearsauce (1 1/4 c, see step 1) and beat until smooth. Stir in the nuts and raisins.
    4. Fill each muffin cup about 3/4 full and bake until a toothpick inserted comes out clean, about 45 minutes. Serve warm or room temperature. Store in an airtight container.

    Love pears? Try my pear and carrot soup recipe on punctuated. with food.


  • Foraged Oyster Mushroom Risotto

    foraged oyster mushroom | GardenFork

    After getting back from vacation I was pretty lacking in the grocery department, but fortunately Eric graced us with some of these beautiful foraged oyster mushrooms. I made mushroom risotto – a pretty common occurrence in our kitchen but made special by these particular specimens. I typically use creminis from the grocery store because they are affordable and have decent flavor, but these oyster mushrooms are much heartier in texture and woodsier in taste – the perfect addition to creamy, slightly sweet risotto. To make it a meal, we added a fried egg to each serving, the vibrant, runny yolk as a colorful finishing sauce.

    In true GardenFork style this “recipe” won’t include much in the way of precise measurements. Risotto is more art than recipe, and lovers of the dish have a good time debating the precise way to make it perfectly. In our show with Lynne Rossetto Kasper we talked a little about the process of making good risotto. Her tips: stir most of the time and use a wooden spatula with a flat tip so that you move a lot of rice with each stir. My method is below, along with a simple recipe for sautéed oyster mushrooms.

    foraged oyster mushroom risotto | GardenFork

    Oyster Mushroom Risotto
    Serves 4
    Ingredients
    •    1 onion, finely chopped
    •    1 c arborio rice
    •    dry vermouth
    •    Chicken or vegetable stock (I used a homemade chicken stock that included some leftover corn cobs, making it slightly sweet)
    •    1/2 c grated parmesan cheese
    •    2 tbsp butter
    •    4 c cleaned and sliced oyster mushrooms
    •    1/2 tsp dried thyme
    •    balsamic vinegar
    •    4 eggs
    •    chopped chives, to garnish
    •    salt, pepper, olive oil
    Cooking Directions
    1. Heat the stock (I start with a quart) in a medium pot over high heat. Once hot, reduce the heat to low to keep the liquid warm.
    2. Coat the bottom of a medium or large pot over medium-high heat with olive oil. When the oil is hot, add the onions and a big pinch each salt and pepper and sauté until translucent. Add the rice and another pinch of salt and pepper and sauté for a couple minutes. Add a couple big splashed of vermouth and continue to stir and cook until the liquid is absorbed.
    3. Add a ladle full of warm stock and stir the rice until when you run your wooden spoon along the bottom of the pot and the rice does not immediately run back together to cover the line you made. At this point, add another ladle full or two of stock. Continue this process until the rice is creamy and just cooked through, about 30-45 minutes. It may take you a few times to get the consistency just right, but rest assured that all attempts, as long as the rice isn\’t hard, will be delicious, if imperfect.
    4. When the rice is where you want it, turn off the heat, add the cheese and butter, and stir to melt and combine.
    5. Coat the bottom of a large saucepan over medium-high heat with olive oil. When the oil is hot, add the mushrooms and thyme and give them a quick stir to evenly coat with the oil. Let the mushrooms brown deeply, resisting the urge to stir. Once browned on one side, give the mushrooms a stir to brown the other side. Add a splash of balsamic, turn off the heat, and stir to distribute the vinegar evenly. Add a pinch each salt and pepper.
    6. Fry the eggs. Distribute the risotto evenly among four plates, top each with a fourth of the mushrooms and an egg, garnish with fresh chives.

  • Book Review: Long Way On A Little

    Book Review: Long Way On A Little

    I’ve been meaning to do this write-up for months. On the one hand, I feel a little guilty for keeping this gem of a book to myself for so long; on the other hand, there are some benefits to my procrastination. I haven’t just read this book – I’ve really lived with it. More than just an informative read-through, it has become a handy reference and recurring source of inspiration in our kitchen.

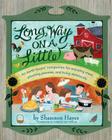
    long way bookThe cookbook is Shannon HayesLong Way On A Little, and the tagline sums it up nicely: “An earth lover’s companion for enjoying meat, pinching pennies, and living deliciously.” It is beautifully written and edited. The content flows logically and is richly educational without overwhelming. As a resource, it’s easy to pick up and quickly find the piece of information or recipe you need. And, no less importantly, the nerd in me found delight in the occasional well-placed pun.

    More than a cookbook, Long Way On A Little begins with an honest discussion on the sustainability of grassfed meat, followed by a thorough (yet concise) explanation of what makes good meat, from farming to processing to cooking. The remaining chapters include recipes and other helpful culinary guidance on: bones, fat, beef, lamb, pork, poultry, eggs, and “other unappreciated treasures.” The pages include descriptions and cooking methods for different cuts of meat, crockpot meals, homemade lip balm, a life-changing technique called super-slow roasting –  they teach more than I could summarize in this review. And the recipes! Braised beef in a cinnamon-orange coffee sauce, pork shoulder roast with caramelized onions and apples, rack of lamb glazed in balsamic butter, and so many other tantalizing dishes to choose from. We made the slow-cooked beef shanks with bacon and tomatoes when my mom was in town, and it was a hit.

    Probably the most convincing reason to own this cookbook, though, is not that it will teach you why and how to purchase quality animal products but that it will motivate you to make the most of what you buy. For example, since reading the cookbook making stock has happily become a weekly ritual in our home. Ms. Hayes has a way of inspiring through Long Way On A Little that I would encourage you not to miss!


    Buy from IndieBound Here


  • Homemade Jello

    Hey everyone! I haven’t posted in a while but wanted to wish you all an early happy Valentine’s Day and share a recipe for a healthy treat. I wanted to make my 11-month-old something special for the holiday that wasn’t loaded with sugar or white flour and decided to try my hand at homemade jello. It’s really simple and fast to make, plus it’s fun to eat.

    Homemade Jello Recipe

    Homemade jello doesn’t take any longer to make than the boxed mix and comes together without any food colorings, artificial flavors, or preservatives. All I used was 100% fruit juice (in this case, tart cherry sweetened with apple) and gelatin. Any gelatin would do but bear in mind there are some high quality products out there, like Great Lakes gelatin, made from grass-fed cows.

    Enjoy and I look forward to catching up with you next week! I have a very cool book review in the works…

    Sarah

    Homemade Jello
    Ingredients
    •    2 c cold fruit juice, divided
    •    1 tbsp unflavored gelatin
    Cooking Directions
    1. Place one cup juice in a bowl and sprinkle the gelatin over it. Allow to soften for 10-15 minutes.
    2. Add the second cup of juice to a small saucepan over high heat and cook until almost boiling. Pour over the juice and gelatin mixture and stir for a minute, until the gelatin has melted.
    3. Pour the mixture into a glass or plastic container or jello mold. Chill for at least 4 hours then turn out. Cut into squares or use cookie cutters to make whatever shape you’d like.

  • Loaded Pumpkin Snack Cake Recipe

    Loaded Pumpkin Snack Cake Recipe

    I have been consumed by (and have been consuming) all things winter squash. I love trying all the varieties the local farmers grow – noting differences in texture to determine how best to use them. This was my first year to try a cheese pumpkin, and it’s now one of my favorites. Its flesh is smooth and so savory it could almost be served as soup without even adding stock.

    Despite the fun I have experimenting with various squash, I always feel comfortable falling back on butternut. Some may argue its popularity arose from its ease of transport and preparation, but there’s no denying it also has good flavor. Did you know there are different varieties of butternut squash? Nutterbutters in particular are very sweet, and conveniently grow to a medium size.

    I use butternut in this snack cake, but feel free to use any pumpkin or winter squash you’re currently enjoying. Just cut the squash in half, scoop out the seeds and pulp, rub with a little oil, and roast “face down” on a baking sheet until the flesh is tender.

    Why a snack cake? I think this is too sweet to be called a pumpkin loaf, but it’s not so decadent as to be restricted to dessert. Heavily spiced and loaded with dried fruit and nuts, I think it’s a great afternoon pick-me-up but you could easily get away with eating a slice with your morning cup of coffee. Anything you top with a dollop of yogurt is breakfast, right?

    Loaded Pumpkin Snack Cake
    Ingredients
    •    1 stick (1/2 c, 8 tbsp) butter
    •    1 c sugar
    •    1 egg
    •    1 1/2 c flour
    •    1/2 tbsp baking soda
    •    3/4 tsp freshly grated nutmeg
    •    1/2 tbsp cinnamon
    •    1/2 tbsp cloves
    •    1/4 tsp salt
    •    1 1/4 c pumpkin/winter squash puree
    •    1 1/2 c lightly toasted nuts (I used a combinatin of pecans and walnuts)
    •    1/2 c dried fruit (I used a combination of tart cherries and raisins)
    •    1/4 c lightly toasted seeds (I used pepitas)
    Cooking Directions
    1. Preheat the oven to 350 degrees. Butter a loaf pan and set aside.
    2. In a large bowl, beat the butter and sugar until light and fluffy. Add the egg and beat until just combined.
    3. In a medium bowl, whisk together the flour, baking soda, spices and salt. Add the dry ingredients to the butter mixture and stir until just combined.
    4. Stir in the pumpkin puree until just combined. Stir in the nuts, fruit, and seeds until about evenly distributed. Pour into the prepared loaf pan and bake 50-60 minutes, or until a toothpick comes out clean.

  • Spicy Indian Poblanos Recipe

    Spicy Indian Poblanos Recipe

    Well, I’m still working my way through that big jar of tamarind paste and really enjoying the journey. A dish that’s a hit in my household is one I’ve been making for a couple years now and was inspired by the overabundance of poblano peppers we had at the farm. We always had a surplus, in part because they are easy to grow organically but also because it seems like people don’t really know what to do with them. If you’ve never had poblano peppers before, I urge you to give them a try. They are considered a hot pepper but have a mild, pleasant heat that pairs beautifully with eggs, and they’re a great fit for stuffing.

    This recipe is one that originally began by following Pham Fatale’s mirchi ka salan recipe but that I’ve adapted and simplified over time, so much that I’m avoiding calling this mirchi ka salan for fear of being called out by an Indian food expert. It may not be authentic, but it’s loaded with the flavors of Indian spices. Speaking of which, don’t let the long ingredient list deter you from giving it a try – I’ll bet you have some jars of spices just waiting to be put to good use.

    We usually eat this Indian poblano dish over plain rice but sometimes switch it up by adding boiled, cubed potatoes to the sauce instead.

    Spicy Indian Poblano Peppers
    Ingredients
    •    1 tbsp tamarind paste
    •    1 tbsp honey
    •    3/4 c water, divided use
    •    coconut oil (or neutral oil)
    •    1 large onion, roughly chopped
    •    3 garlic cloves, finely chopped
    •    large pinch of salt
    •    2-inch piece of ginger, peeled and finely chopped
    •    2 tsp cumin seed
    •    1 tsp turmeric
    •    1 tsp ground coriander
    •    1-2 tsp chili pepper flakes (or omit, depending on your heat preference)
    •    2 tsp garam masala
    •    8 poblano peppers, chopped into bite-size pieces
    •    1/2 c peanuts, finely ground in a food processor or spice grinder
    •    1/2 c shredded coconut
    •    1/2 c plain yogurt
    Cooking Directions
    1. In a small bowl, mix together the tamarind paste, honey, and ¼ c of the water. Set aside.
    2. Place a large pan over medium-high heat and add enough oil to coat the bottom. Add the onion, garlic, salt, and spices and cook, stirring occasionally, until the onion is soft and translucent, about 5 minutes.
    3. Add the peppers and cook another 5 minutes, or until they are just tender. If at any point things are looking too dry, add a tablespoon or two of water or oil.
    4. Add the peanuts, coconut, and remaining ½ c water, reduce heat to medium-low, and let simmer for 5-10 minutes or until the mixture is a thick, cohesive sauce.
    5. Stir in the tamarind-honey mixture and cook another minute.
    6. Remove from heat and stir in the yogurt.

  • Sweet and Salty Roasted Chickpeas

    Sweet and Salty Roasted Chickpeas

    Mike recently tweeted a challenge: Come up with a snack that would fix his crunchy-sweet-salty craving without going overboard on calories. When Monica suggested roasted chickpeas, I also got a hankering in need of quenching. So, I set out to recreate a recipe I used to make often. Why had I stopped? Well, somehow this particular snack slipped out of rotation, I guess. I’m always experimenting and there’s just not enough time (or room in my stomach) for all things tasty. Thanks Mike and Monica for resurrecting this treat back into my life!

    Some tips for roasting chickpeas:

    • Cook your own chickpeas from dried beans. You can use canned but the texture won’t be nearly as satisfying.
    • Cool and dry the chickpeas. You want the beans to be really dry so that they crisp up well. If you cool them in an open container in the fridge they should lose enough moisture to avoid the labor of patting them down with a paper or dish towel.
    • Don’t be afraid to cook them a little longer than you think you should. You’re looking for a deeply golden color to reach optimum crunchiness.
    • Experiment with seasonings. You can add your favorite herbs or spices to the base recipe below. I love garam masala, red pepper flakes, or finely chopped rosemary.

    Sweet and Salty Roasted Chickpeas
    Ingredients
    •    2 c cooked chickpeas
    •    2 tbsp brown sugar
    •    1/2 tbsp olive oil
    •    1/2 tbsp kosher or sea salt
    Cooking Directions
    1. Preheat the oven to 400 degrees. Toss the chickpeas with the brown sugar and olive oil and spread in a single layer on a baking sheet or in a baking dish.
    2. Roast the chickpeas for 30-40 minutes, stirring every 10 minutes or so, until golden brown and caramelized. Don’t be afraid to let them go “just a little longer”! Toss with the salt while hot.

  • Beet Smoothie Recipe

    Beet Smoothie Recipe

    In our honey tasting episode, I described one of my favorite smoothies – one made with beets– that subsequently caught some Twitter flack. I should have noted that the beets should be roasted, and since this is a snack I really do love, I thought I’d elaborate on the recipe and perhaps provide a disclaimer.

    Actually, let’s cover the disclaimer first: This smoothie is for the beet-lover. If you are in the camp that beets taste like dirt or if you are on the fence regarding this vegetable, this will not be the preparation to convert you. Still interested in a taste? Alright then, let’s go…

    The natural sweetness of apples and roasted beets plus a stealthy dose of spinach make this smoothie a great way to start your morning or to sip on as an afternoon pick-me-up. Even its fuchsia hue it uplifting. Bonus: It can also be served as a cold soup.

    Roast the beets ahead of time so they have an opportunity to chill in the fridge. Use whatever apple variety you’d like, but I highly recommend Pink Lady – its tart sweetness makes the smoothie a little special. The recipe is easily doubled, tripled, etc.

    Beet Smoothie
    1 serving
    Ingredients
    •    1 medium beet, roasted, cooled and peeled
    •    1 apple, cored (Pink Lady is best)
    •    handful spinach
    •    kefir, yogurt, milk, or water as need (I use kefir)
    Cooking Directions
    1. Blend the beet, apple, and spinach on high in a blender or powerful food processor until smooth.
    2. Add liquid as needed to bring to desired consistency.

  • Rice Noodles & Green Beans with Tamarind-Almond Butter Sauce Recipe

    Rice Noodles & Green Beans with Tamarind-Almond Butter Sauce Recipe

    To curb a budding takeout addiction, I learned how to make Pad Thai at home. Although some recipes call for a substitute of lime juice, the dish traditionally relies on tamarind for its acidity, so I purchased a jar of tamarind paste. I have since become smitten with its sour-sweet bite and am experimenting with other ways to use this new-to-me ingredient. Otherwise, that jar would wind up forgotten in condiment purgatory, better known as the door of the fridge.

    So far I’ve been sticking with riffs of Pad Thai: rice noodles, vegetables, and roughly Asian ingredients. I’m sure it’s all far from authentic, but what’s more traditional than taking what you have on hand to put together a meal? The recipe below is a recent dinner using tamarind that comes together quickly and with relatively few ingredients but is still flavorful and satisfying. If you try it out, let me know what you think. And please pass along any of your tamarind-inspired recipes – It’s no small jar!

    Rice Noodles and Green Beans with Tamarind-Almond Butter Sauce
    Ingredients
    •    1/2 lb green beans (or three large handfuls), cut into bite-sized pieces
    •    6 oz linguine-style rice noodles
    •    1/4 cup creamy almond butter
    •    2 tbsp tamarind paste
    •    2 tbsp soy sauce or tamari
    •    1 tbsp rice vinegar
    •    1 tbsp honey
    •    1/2 tsp chili pepper flakes
    Cooking Directions
    1. 1. Bring a medium pot of water to a boil. While waiting on the water, in a small bowl mix together the almond butter, tamarind, soy sauce, and rice vinegar, honey and chili flakes. You may need to add upward of a ¼ c of water to bring the sauce to the consistency of salad dressing.
    2. 2. Add the green beans to the boiling water. After a minute or two, turn off the burner and add the rice noodles. The rice noodles should be softened and the green beans fork tender in about five minutes. Strain the water and return the beans and noodles to the pot. Toss with the tamarind-almond butter sauce and serve immediately.
    3. Serves 2 generously


  • The Year-Round Vegetable Gardener Book Review

    The Year-Round Vegetable Gardener Book Review

    I was looking forward to reading Nikki Jabbour’s The Year-Round Vegetable Gardener because my farming apprenticeship had a significant focus on season extension, as the farm is currently going into its twelfth month of continuous harvest. But we were growing in Virginia, whereas Ms. Jabbour has succeeded in maintaining a year-round garden in the more challenging Nova Scotian climate. Because of this, her book achieves its subtitle: How to Grow Your Own Food 365 Days a Year, No Matter Where You Live.

    Listen to Nikki talk with Eric on GardenFork Radio here.

    The Year Round Vegetable Gardener Book Review

    The book is chock full of information, from the basics (timing the seasons and intensive planting) to the complex (building structures to capture and maintain heat). It is comprehensive enough that a relative novice could start with The Year-Round Vegetable Gardener as a valuable resource. A more seasoned grower might be tempted to skip over some familiar-sounding sections, but I would urge you to read cover-to-cover as unique and useful tips are sprinkled throughout the entire text.

    The chapter on winter gardening progresses from light protection (like row covers) to using an unheated greenhouse or building your own polytunnel, so a grower in any hardiness zone or variously sized growing space can find techniques to meet his or her needs. The plans to build your own cold frame or polytunnel are easy to follow and call for inexpensive materials. Plus, the chapter motived me with photos of lusciously green vegetables thriving alongside snow and ice.

    Like many other gardening books, this one concludes with a crop index. Ms. Jabbour recommends specific cultivars based on cold or heat tolerance or days to maturity and includes an emphasis on vegetable varieties less talked about in other books; for example, Tatsoi has its own entry.

    watch more mini greenhouse vids
    In short: I love this book. It’s a wonderful resource for year-round vegetable growing knowledge and inspiration. Now, if only I didn’t live in a studio apartment!


    Order from Indie Bookstores here

    Order from Amazon here. (affiliate links)

    Grocery Gardening a new cooking gardening book that works