Category: DIY

  • Sheetrock Plaster Walls Pros & Cons

    Sheetrock Plaster Walls Pros & Cons

    I’m betting if you are reading this post, you may be searching for information on how to sheetrock or drywall plaster walls. So, I thought I’d post some pictures to give you all a visual how-to on sheetrocking walls and talk about the pros and cons of this kind of wall repair. Here are some photos of a drywall – sheetrock job we recently did on plaster walls that were in really bad shape.

    I get hired to sheetrock plaster walls when the client doesn’t want to repair and skim coat the existing plaster walls. To skim coat plaster walls is labor intensive, and to install drywall is faster and cleaner.

    sheetrock plaster walls
    Plaster walls in bad shape, the client had removed the trim.

    As you can see, the plaster walls were in poor shape, and some of the moldings were missing. We were fortunate in that the room was just slightly higher than 8 feet, so we could blend the edge of the drywall into the crown moulding. One of the issues with applying drywall over a plaster wall is how the drywall butts up to the existing mouldings, it doesn’t always work out very well.

    sheetrock plaster walls-3
    We build out with scrap wood and drywall any holes in the walls

    The drawback to sheetrocking plaster walls is that when the job is done, the walls look very rectilinear, they are very square and straight. To me, this doesn’t look right in a 100+ year old brooklyn brownstone or row house. But we do what the client wants, they are writing the check.

    sheetrock plaster walls
    The sheetrock – drywall attached to the plaster wall

    Plaster walls have an organic feel to them, they have imperfections, they are not straight and square, they undulate. When you skim coat a wall, you preserve that organic feel. When we’re done skim coating, it looks like a plaster wall in an old house; when you sheetrock a wall, it looks like a new condo.

    plaster wall repair
    Lucky for us, the walls of this room were a bit more than 8'

    NOTE: the client had removed the wood trim and loose plaster, thinking they would do this job themselves. Its very likely they encountered lead paint when doing this. Check with your local codes on dealing with lead paint. Lead Paint is very unhealthy to breathe or eat.

    repair plaster walls
    Drywall affixed to the plaster wall, joint compound being applied to seams
    sheetrock over damaged plaster walls
    sheetrock over damaged plaster walls

    What do you all think? Do you have plaster walls in your home? have you ever repaired plaster walls? Let us know below.

  • Adirondack Guide Boat handmade from wooden boat plans

    Adirondack Guide Boat handmade from wooden boat plans

    Last winter one of my friends showed me an Adirondack Guide Boat he was building in his basement. I just nodded, having seen many half finished ‘basement projects’ in friend’s basements, wooden boat plans being one of them.
    Well this spring he finished his boat and it is looks just amazing.

    adirondack guide boat
    homemade adirondack guide boat made from wooden boat plans

    According to Wikipedia, the Adirondack guide boat is just that , it’s a boat that was used in the Adirondacks by professional guides who had paying passengers, usually from New York City, who wanted to go hunting or fishing and they traveled up to the Adirondack region of upstate New York to do so.

    The Adirondack Guide Boat looks a bit like a canoe but they’re have oars  and what’s really cool is that if  you are rowing the boat, and then let the oars rest in the water the boat won’t change direction.

    underside and keel of homemade wooden boat

    My friend built a classic Adirondack guide boat, these days according to Wikipedia, today they are made of Kevlar and fiberglass, but he was a purist and used all wood.

    (more…)

  • Sneak Preview of this week’s DIY show :

    Sneak Preview of this week’s DIY show :

    Does it float? You’ll have to watch this week’s show…

  • How to repair a leaking drain trap

    How to repair a leaking drain trap

    A friend of mine called me and asked if I would help him with a plumbing problem. His utility sink in his laundry room was leaking whenever you would turn on the water. The washing machine also drains into this sink and whatever was always leaking. Not a good thing. I crawled underneath and I took a look; sure enough there was what we would call some ‘unprofessional plumbing’ under the sink.

    Arrow shows the leak site, notice how crooked the drain trap is.

    As you can see from this first picture here there’s a 2″ plumbing drain coming out of the wall and then a rubber coupler connected to a huge brass trap that connects to an 1.5″ brass drainpipe. The rubber coupling does not have enough strength to hold that brass trap in place without any support . Rubber couplings are really good for plumbing but they’re not built to hold up that much brass. Looking at the picture here you can see that the heavy brass trap would put stress on the pipe that’s going up to the sink itself and the pipe started the corrode at the point where the brass drainpipe meets the trap. And before you know it just falls apart

    So I took apart the trap and the brass drainpipe and the rubber coupling to find that there was a stub of metal pipe attached to the 45° angle pipe that’s coming of the wall.

    2" metal stub with no threads. fun.

    My plan, and of course all great plans never come out how we want them to, but I wanted to remove the 2″ stub pipe and put in a PVC adapter. The PVC pipe adapter I would use has a 2 inch pipe thread on one end to thread into the existing metal pipe, and and then you can glue PVC pipe to the other end of the PVC adapter. I would then connect a PVC trap to the adapter and then connect the PVC trap to the drainpipe coming down from the sink.

    Two pipe wrenches in a very tight spot against the wall

    Because the existing metal pipe stub was not threaded, I had to remove it. I put a pipe wrench on this stub of metal pipe and it would not move. I got two pipe wrenches on there and I could not get the thing to move. Part of the problem being that the drain pipe is coming out of the corner of a very small utility room wall so it was really hard to get any leverage on the wrenches. I even tried what I call a large chain pipe wrench – its a plumbers wrench that uses a chain rather than a regular jaw grip – I couldn’t get the thing the budge.

    Chain Pipe Wrench can't budge the pipe

    Another way to get this to ancient metal stub out of the 45 degree angle piece it was connected to would be to use a reciprocating saw a.k.a. a sawzall. You could take the sawzall and make two cuts or perhaps three cuts from the inside of the pipe out, cutting the stub in the three pieces and it would fall out.

    But then I thought of a Plan B that would be much cleaner and simpler than having to use the sawzall to cut out the metal stub.

    My plan B was to go to the plumbing supply store and get a rubber coupling that accepts 2 inch diameter pipe on one side and accepts 1.5″ diameter pipe on the other side. my thinking here is that the rubber coupling will attach to the to 2 in metal stub that’s coming out of the wall and then have a short piece of 1 1/2 inch PVC pipe sticking into the other side of the rubber coupling.

    rubber coupling allows PVC to connect to metal stub

    From that 1 1/2 inch PVC pipe I can attach a PVC trap and reattach the sink to the trap with a brass drain pipe i already had.

    The trap i used is called PVC solvent weld trap. This kind of trap allows you to connect it to a PVC drain pipe on the drain end, and on the inlet side you can connect it to a PVC or brass 1 1/2 inch drain pipe from the sink with a slip joint. I glued the trap to the stub of PVC pipe that was coming out of rubber coupling and then connected the trap to the 1.5″ brass drain pipe that was sticking down from the bottom utility sink.

    its a beautiful thing, this plumbing stuff.

    I’ve found that sometimes slip joints aren’t always completely waterproof, so I always use some TFE plumbing paste with Teflon. It goes under different brand names but it’s basically it comes in a tube or a jar with a brush and it’s a white plumbing paste that has Teflon in it. I dab this around the circumference of the slip joints and it works really well plus it keeps you from having to take the plumbing apart again to figure out why it’s leaking

    So after using the Teflon paste on all the joints I put it all together turned on the hot water and it was a beautiful thing. It did not leak.

    So there you go, one of those things where your friend asks you to do something and you actually know what you’re doing, and didn’t blow up on you. Do you have stories about helping your friends and whether went really well or went really wrong/ I can tell you more stories about how someone went really wrong but tell us below about the good and bad one.

  • Bath Vanity Falling Off Wall : Stuff I See While Working

    Bath Vanity Falling Off Wall : Stuff I See While Working

    I’ve been in a lot of houses and apartments that have been renovated or are new construction, and I’m never surprised by what I see. Take this expensive bathroom vanity as an example:

    right side is a bit off here…

    Here the bath vanity is falling off the wall, not a good thing. Especially for a brand new renovation.

    Vanity counter separating from wall

    Crawling underneath the vanity and searching around, I found that the whole vanity, with this heavy counter top, had been installed with 4 drywall screws. And two of screws did not hit a stud.

    On the right side of the vanity the drywall screws had sheared. wow.

    Before starting to fix this, I explained to the homeowner that it was possible the vanity top would crack when we raised it back into place. Always warn people.

    I got the car jack from our car and with some scrap lumber, raised the vanity a bit higher than its original location. I did this because I knew the vanity would probably drop just a bit when screwing it back in to the wall.

    I then got my hammer drill out – the right wall is the common wall between 2 brownstones, hence its a double brick wall- and drilled a 3/8″ hole thru the tile deep into the brick.

    concrete sleeved anchors are bulletproof

    I drove in a sleeved anchor, and tightened the vanity to the wall. If you have to hammer in a sleeved anchor, put the nut on the anchor before hitting it with hammer to save the threads. These anchors hold a lot of weight and are easy to put in, the hardest part is drilling the hole. I use them to hang TVs on brick and cement walls.

    What surprises have you found when doing repairs? Tell us below

  • Tools fall off truck, into dirt. This is GardenFork!

    Tools fall off truck, into dirt. This is GardenFork!

    Just to let you all know it doesn’t happen just to you. I had my socket set opened up while working on my Ford F150, and somehow knocked the case of sockets off the fender, and into the dirt. Note the help I am getting from the Labradors.

  • Simple Way to Test Your Car Alternator

    Simple Way to Test Your Car Alternator

    Is your battery or alternator light on? Here’s the first step to determine if your alternator is not working.

    You will need a voltmeter – I prefer a digital one – they are all less than $20.

    Open the hood of your car/truck, set the voltmeter for 20 volts DC or whatever DC voltage setting it has between 15-25 volts DC.

    12.67 volts DC means the alternator is not charging

    Place the Black lead from the voltmeter on the negative post of the car battery – the black cable from the engine is attached to the negative side of the battery.

    Place the Red lead from the voltmeter on the positive post of the car battery – a red cable from the engine is attached to the positive side of the battery.

    Read the voltage: if it is around 12.5 volts, the alternator is not charging the battery. This may be caused by several things, it may be a loose or disconnected wire, a loose belt, the voltage regulator may be bad, or the alternator is bad. In many cars, the voltage regulator is attached to the back of, or incorporated into the alternator.

    When my Ford F150 truck battery went dead, I pulled out my voltmeter and tested the battery. I was able to tell the problem was not a loose wire or connection because soon after I started testing at the battery, the alternator started to smoke, which is a pretty good indication that it needs to be replaced.

    On many cars and trucks, if you have some mechanical ability, you can replace the alternator yourself. Look online for a discussion forum about your vehicle and search the posts for alternator replacement tips and tricks. When you go to your local parts store to pick up a new alternator, its ideal to bring in the broken one, most parts like this require a trade-in of the old part ( so they can rebuild it ) AND it is good to confirm that the new alternator is the right one. Save yourself a trip.

    Tell us your alternator stories below, be good to learn other tips and tricks from you all.

  • Homemade Spacecraft : perfect father-kid project

    Homemade Spacecraft : perfect father-kid project

    Hey! I have an idea, let’s send a camera into space!

    So a dad, Director of Photography Luke Geissbuhler, and his son, build a small spacecraft with a video camera, an iPhone and batteries, and send it up with a weather balloon.

    How cool is that?

    I’ve seen a few of this kind of project, using a weather balloon to send objects up into space or near-space. The other near space weather balloon camera rig that comes to mind we posted videos about here, done by 1337 Arts.

    Luke takes the near space weather balloon plans further by using an iPhone, which has built in GPS, making this a do-able  project for many of us.

    The weather balloon space rig is made of off-the-shelf stuff for the most part. You can do this. Watch the video Luke made below:

    Thanks to WREXLABS and TreeHugger.com for telling us about this.

  • Repairing a hole or damage in drywall or sheetrock

    Repairing a hole or damage in drywall or sheetrock

    I helped a friend of mine close up an  inlet in his chimney, and we then needed to patch the dyrwall hole that the metal chimney stack originally went thru.

    This is the how to repair holes in drywall method that I used, there are others. If you have a good drywall how to, please tell us below.

    drywall repair
    This method works well for damage drywall also

    To repair a hole in drywall, you cut a replacement piece of drywall that fits inside the hole. I prefer to use drywall that is slightly thinner than the drywall we are repairing. So if we are repairing 5/8″ sheetrock, I like to use 1/2″ sheetrock.

    The reason for the slightly narrower sheetrock is I find it allows you do a better repair that is less noticeable. If you use a piece of same width sheetrock, the joint compound you apply over the repair is more obvious.

    drywall and sheetrock repair
    screw in a piece of scrap wood as a support

    Find a piece of scrap wood that is about 4″ wider than the hole you need to repair in the sheetrock. Slip this wood in behind the existing sheetrock, and using drywall screws, screw the wood support in.

    sheetrock repair replacement
    cut a piece of sheetrock to fit the repair

    cut a piece of sheetrock that fits just inside the hole you are repairing. Home improvement stores sell 2’x2′ repair pieces, or you can find a piece of scrap at a construction site.

    drywall repair patch
    screw the patch into the support

    After the the drywall is screwed in, use well stirred drywall compound with a little plaster added , and using the most flexible wide blade you can find, lay an initial layer of joint compound over the patch. let this dry completely, and go over it with 2 more layers. The smoother the layers, the better it will look.

    When its all dry give it a light sand to even out any ridges or marks. Prime the repair then paint with the wall paint.

    How do you repair sheetrock or drywall? Let us know below.

  • Build an Outdoor Shower

    Build an Outdoor Shower

    As the temperature drops here and we move into fall, what do I start thinking about? Outdoor shower plans, of course. Here are some photos of an outdoor shower a friend of mine built at his house.
    (also see the neat  DIY wood stove tile floor protector they built, link at end of this post)

    a simple stone floor works. note the low tech valves.

    The walls are slatted cedar I believe, which you can buy, or perhaps salvage from someone residing their old house. The floor is a few flat stones found in the woods. The shower valves are simple to assemble. you may be able to find a utility sink valve setup that may work, or just solder two valves with a T for the shower head. I would not use PVC or PEX for this.

    it doesn’t have to be fancy

    Most important is that the outdoor shower has cut off valves inside the house where you can turn off the flow of water to the outside shower and drain the water that is in the shower pipes. If you don’t drain the pipes, the water will freeze and burst the pipes. Not a good thing.

    door handle of found wood

    homemade-wood-stove-floor-protector-5

    See the neat DIY wood stove floor protector here.

  • Repair the power cord on your power tool : GardenFork.TV : power tool repair video

    Repair the power cord on your power tool : GardenFork.TV : power tool repair video

    Here we make a video on how to repair the power cord of your power tool. Don’t just wrap it in tape; here Eric shows you how he repairs the power cord on his circular saw. You can do this, watch the video and then repair your tools .

    DIY power tool repair is within the grasp of your average person, if i can repair my drill, circular saw, or other electric tools so can you. This DIY video shows you how to fix a circular saw, but this can be applied to other tools as well. Basically anything with  power cord can be fixed , just watch here and learn.

    Its important to match the wires correctly when re-attaching them, you want the polarized plug to work properly and safely. And be careful when soldering wires, the soldering iron is hot, learn from my experiences…

    And pay attention to where the power cord is when you are using a power tool, after we shot this how-to video, I proceeded to cut the cord of this saw yet again, and i repaired it yet again. Not unusual in my world.

    Do you have a good way to repair the power cord on a power tool? let us know below!

  • Rain Gutter Repair

    Rain Gutter Repair

    As part of my family visit, I am always repairing my sister’s house. First was the motion sensor light repair, and now on to the rain gutter repair.

    The hanger bracket and nail. Screws work better.
    The hanger bracket and nail. Screws work better.

    Her rain gutters were starting to pull away from the house, so I climbed up to find the gutter hangers had been nailed in instead of screwed in, and the nails were now pulling out of the wood behind the gutters.

    Be careful on the ladder, don't over-reach.
    Be careful on the ladder, don't over-reach.

    I picked up some rain gutter screws ( more like lag bolts, actually ) that I used on my  own house. Once you put these in, the gutter doesn’t come off, unless the wood behind it does. The plastic sleeve keeps the screw from compressing the rain gutter.

    These screws work well
    These screws work well

    With these gutter screws, I’ve found it best to drill a pilot hole in the front lip of the rain gutter. Then I use a powerful cordless drill or a corded drill to sink in the screws. You have to put some weight behind this, so make sure the ladder is secure, and don’t over-reach, you’ll fall off the ladder – a bad thing.

    Be sure to position the spacer in the gutter before screwing in the screws.
    Be sure to position the spacer in the gutter before screwing in the screws.
    You have to put some weight into driving these puppies in.

    The gutter screws reconnect the gutter to the house.
    The gutter screws reconnect the gutter to the house.

    Have you done gutter repairs? Tell us your solutions in the comments section below:

  • Switching out a Motion sensor light with a dusk to dawn light

    Switching out a Motion sensor light with a dusk to dawn light

    Whenever I go to my sister’s house, there is a quid pro quo. She makes choc chip cookies, I fix her house. This trip we removed a TV antenna, fixed the rain gutter, and swapped out a broken motion sensor light.

    Eric, electricity, power tools, what will happen next...
    Eric, electricity, power tools, what will happen next…
    The original motion sensor light
    The original motion sensor light
    The existing lights had broken in only a short time
    The existing lights had broken in only a short time

    I like motion sensor lights. I’ve installed many. But I’ve found that the ones I buy at the large home improvement stores tend to stop working after a few months to a year.

    My sister had a motion sensor light at her back door, and she was using its dusk to dawn setting. The sensor had broken, and one of the lamp assemblies just fell apart.

    I suggested a simpler light assembly with just a dusk to dawn sensor. I made sure the one we bought allowed us to replace just the sensor if need be.

    Here's the dusk to dawn lights we installed
    Here's the dusk to dawn lights we installed
    Removing the old motion sensor light
    Removing the old motion sensor light

    I switched out the lights. To test the light sensor, you need to turn on the power to the light and wait a few minutes for the sensor to adjust to the sun. Then put some electrical tape over the sensor and wait a few minutes. If the lamp does not go on, something is not working correctly. First to to check is your wiring, many times the wire nuts supplied are not great, I always use better ones from the hardware store.

    The black object is the dusk to dawn sensor, easy to replace
    The black object is the dusk to dawn sensor, easy to replace
    Put electrical tape over the sensor to simulate night time
    Put electrical tape over the sensor to simulate night time

    We wanted to use compact fluorescent bulbs in the outdoor light, but all the outdoor rated lights, most of them flood lights, were too bright for just lighting up the back door. We didn’t want to light up the whole back yard.

    Proof that the light is wired correctly, unusual on a first try for me
    Proof that the light is wired correctly, unusual on a first try for me

    We bought some lower wattage CFLs that were similar to the floods, but not rated for outdoor. We’re using those for now, and we’ll have to figure out if they can stay outside. The lamp housings protect the bulbs from the elements, but I’m thinking the ballasts may not be rated for cold temperatures.

    What has your experience been with motion sensor lights? Do yours break? Let us know in the comments below:

  • The Allison House Weather Station Update

    The Allison House Weather Station Update

    A while back on GardenFork Radio I was saying how much I’d like one of those weather stations that sit on your roof and you can hook up to the internet.

    Then Allison House, a weather data company, sent us one. ( I like how this works )

    The Allison House Weather Station
    The Allison House Weather Station

    We assembled the weather station, which is an Oregon Scientific WMR968. It has an anenometer, wind direction, rainfall, temperature, humidity and barometric pressure sensors, which are all solar powered and connected via wireless to the central display in our house.

    here is the inside of the rain guage. always wondered how that worked
    here is the inside of the rain guage. always wondered how that worked

    This display is then connected via USB to our internet router, and bang – our super microclimate weather data in our yard is on the web and on my iPhone. We use WeatherUnderground to post the weather data, this site aggregates weather info from a ton of personal weather stations. You can search by zip code to see if there is a weather station near your. You can use the smartphone version of their site for remote check-ins.

    I installed this in 16F weather. fun.
    I installed this in 16F weather. fun.

    AND the best part is the graphs and historical data is collects. I can go to the site, and see graphs for the past 24 hours, past week, past month, etc. This has been good to have with our bees, as I can tell when the bees have probably been leaving the hive during the late winter, early spring. Its also great for gardening, when we have a few years of data, we can see the average frost date for our yard. One of our neighbors down the hill has a weather station as well, and I can check his now for frost dates , though his date will be earlier than mine, as he is lower in a valley.

    This daily graph tells me the Honey Bees were out in the afternoon. And its interesting to watch the barometric pressure drop.
    This daily graph tells me the Honey Bees were out in the afternoon. And its interesting to watch the barometric pressure drop.
    Temps above 50F means the honey bees are out working
    Temps above 50F means the honey bees are out working

    Hooking up the weather station to the net took a bit of work, it was not plug and play, but not too hard either. The enclosed instructions are good, and there is an active community of users online.

    A big thank you again to Allison House for providing the weather station. You can follow them on Twitter at http://twitter.com/allisonhouse

    Do you have a weather station? Let us know, be cool to compare equipment and uses.

  • The latest GardenFork.TV @Ford : an @FordTrucks F150

    The latest GardenFork.TV @Ford : an @FordTrucks F150

    Not sure if I told you this, but I tore the rear end of my 82 Ford F150 off towing Bill’s car out of a ditch, and after that my favorite truck was no longer the same. The shackle brackets were broken, the rear half of the exhaust system was gone… you get the picture.

    So I picked up a 93 Ford F150, in black of course. I drove it to work in the city, and already got a parking ticket. Thank You New York City.

    eric 93 F150

  • “Well You Should Be Watching the GardenFork Podcast”

    “Well You Should Be Watching the GardenFork Podcast”

    yes, you should. Some kind words from Life Adorned a yarn – crafter who watches GardenFork, AND also spins her own yarn, makes yarn based things, and sells them on Etsy. In other words, someone who would of course watch GardenFork.

    my 2 favorite things about this podcast:

    (1) eric is a trial-and-error kind of guy. many of the episodes start out with “i’ve never done this before, so let’s give it a try and see how it goes.” and, he’s not afraid to admit to imperfection. he includes all of his mistakes so that we can learn from them too.

    (2) the gardenfork labradors! these cute, friendly, playful pups are featured here and there throughout the videos, and are a viewer favorite. look, they’ve got their own book!

    Life Adorned hand crafted knit hat
    Life Adorned hand crafted knit hat

    Check out her fun blog of the craft items she makes , her flickr page, and her etsy page. Its great to see people making and doing things.

  • No Cable Tv

    No Cable Tv

    I love tv and hate commercials. Two years ago we got  Apple Tv so I could connect to Boxee and watch Internet Tv. Jim and I brought home our first tv and canceled Comcast(1) Cable. For about six months, we were able to watch almost all programs, online with limited or no commercials. All we had to do was down load Boxee and install it in the Apple Tv and have the patience to watch our program after they aired. It was good, but Apple didn’t like it, and configured software download thingy to block Boxee.

    photo by Alvimann
    photo by Alvimann

    However, with an HD antenna and Apple Tv, Jim and I didn’t miss cable. Most of the programs we watched were on network tv and now there are more network channels to watch. In Chicago we have WCIU. They show all the old Twilight Zone episodes and the like. Plus Kora and Max did a commercial for WCIU. (as much as I hate commercials) We were never at a loss for programing.

    Our No Cable lasted about a year. We have At&t cable since it’s packaged with our internet and phone deals. I’m still not happy with it, but that could also be because I’m not thrilled with television. This is where I get into the whole how much I hate commercials. Why are we paying for cable tv and watching commercials? The commercials are so close together and so frequent that I can not “get into” the program that I’m watching. I’ll get up during the commercials and go do something else. Which, you know, isn’t always bad. There are just times when I want to relax and be entertained by tv.

    When Jim and I got our kitchen done, we designed a space for a second tv. This tv is also my computer monitor. I got a Mini Mac and wireless keyboard and mouse, plugged everything in, and I can watch GardenForkTV and cook. Follow recipes online and watch some of my programs. Networks pull their programs off of sites like Hulu.com and Slashcontrol.com all the time. I rather not “steal” programing.

    Eric mentioned on Gardenfork Radio going cableless. I totally support this since I am not happy with the service from either of the two cable providers. Boxee is coming out with it’s own “box” that hooks up to the internet. So do some of the video game machines. We’re living in an interesting time when it comes to how we watch tv.

    All information for how to go cableless I found on sites like lifehacker.com and tuaw.com
    (1) I don’t like either available cable company and hate having to pick the lesser of two evils.
  • Install A Generator Transfer Switch, How to and How Not To

    Install A Generator Transfer Switch, How to and How Not To

    install a generator transfer switch

    To safely use a generator to power your home, you can install a generator transfer switch. This can be done by a licensed professional or someone who has experience with breaker panels. We also have a generator transfer panel video and a post on how to pick a generator for home use.

    NOTE: Be sure so follow local codes. We strongly suggest to hire an electrician. Use this information at your own risk.

    Why You Should Install A Generator Transfer Switch

    A manual generator transfer switch allows you to safely connect a generator to your circuit breaker panel. A transfer switch allow you to flip a few switches and manually disconnect your home breaker panel from the utility line power (the power coming into your house) and connect it to your generator. Hence the name, manual transfer switch.

    watch-hook-up-generatorIf you don’t use a transfer switch, the power from the generator can feed back into the power line that serves your house. This is called Back-feed, and is incredibly dangerous for many reasons. The biggest being you can electrocute a line worker who may be working to restore your electric power.

    Here is how the Columbia River Utility explains it:

    Standby generators make life easier during power outages, but if used improperly, they can be deadly. During an outage, electricity from your generator can backfeed the power lines, killing or seriously injuring our line crews who are working to repair the lines.

    A transfer switch stops backfeeding, and also makes using your generator much more convenient, allowing appliances to be operated much like when the power is turned on.

    A transfer switch also protects your generator when your local utility restores power, it keeps that local power from feeding back into your generator and damaging it.

    Do not fashion an extension cord to plug the generator into one of your electrical outlets. A neighbor had a friend do this for him, only problem was the guy hooked up the generator side of the cord to the 220 volt output of the generator. They plugged in this very un-smart idea into one of their 120 volt outlets and burned out all the TVs, microwave, etc in the house.

    a-generator-transfer-panel-installation-how-to-and-how-not-to-3

    We installed a manual switch similar to these. Here is one of the better transfer switches you may want to purchase.

    To Install A Generator Transfer Switch, Things to think about:

    The first thing one must do is figure out how many watts and/or amps your home will require when running on generator power. Read our post on how to pick a generator here. When calculating this, figure out what essentials you need: furnace, well pump, lights, fridge, freezer. Your power needs determine how large a generator you need, and what size transfer panel you’ll need. Also pay attention to how many 220 volt and 110 volt items you have, because some transfer panels only have one 220 volt circuit breaker.

    A transfer switch swaps out line power for generator power on the circuit breaker level. When selecting what circuits to be connected to the transfer panel, you need to balance the generator load. There are two meters on the transfer panel, and you want the load on each side of the transfer panel to be relatively equal. An example is you should put the furnace on one side of the panel, and the fridge on the other side. The instructions that come with the panel will go into detail about this.

    Why do you need to balance the power load? The fields in the generator – those coils of wire that generate the electricity – work best when the north and south coils have equal loads.

    Think about where you plan to locate the generator outdoors. Your weather proof generator plug has to be nearby. This may mean running electric cable through the basement or garage. NEVER run a generator inside a garage or basement, you will die.

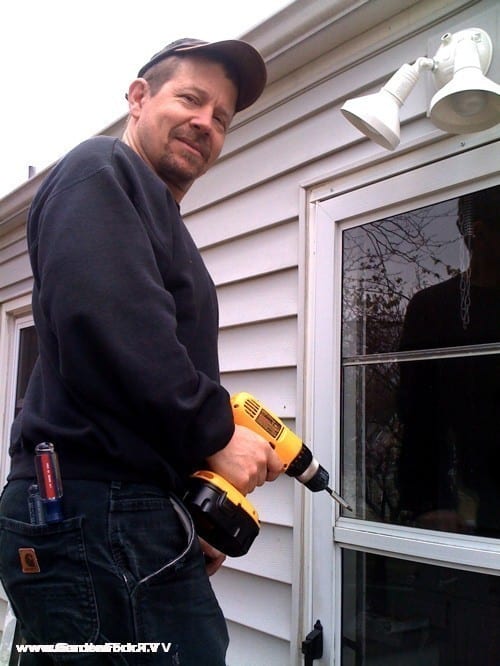
    To install a generator transfer switch involves working inside your circuit breaker panel. If you don’t feel comfortable doing this, don’t.

    Be sure to turn off the main circuit breaker before opening up the panel.  Pay close attention to the directions that come with the transfer panel, many come with a video. Watch it, you’ll learn. Again, if you don’t know your way around a circuit breaker box, don’t do this. Hire an electrician.

    I think the hardest part of all this is getting the bx cable from the transfer panel to connect with the breaker box. This silver armored flex cable that contains all the transfer panel wires has to go through a hole in the breaker box. Most boxes have a number of holes pre-punched, but they can still be hard to punch out. I use a cold chisel, but there are real electrician tools to open up these holes.

    This whole process requires some thought and planning. Before you go out and buy a generator, calculate how much power – amps – you need. Here is a post about how to calculate the power load and buy a generator for home use.

    Again, I’m not the expert here, but wanted to share some of my experiences with generators and transfer panels. Please be careful, and hire a professional if the job requires it.

    Here is a video we did talking about our generator transfer panel installation

    Hook Up A Generator To Your House – GF Video