Category: Cooking TV

  • Can I Eat This Mushroom? GF Video

    Can I Eat This Mushroom? GF Video

    You are wondering, can I eat this mushroom? Is this mushroom edible? Watch this video to find out.

    First, be very careful with mushrooms. That said, there are a bunch of mushroom that are safe to eat and easy to identify. Today we will learn how to identify the oyster mushroom.

    So, Can I Eat This Mushroom?

    There are several ways to learn about identifying mushrooms.

    The best way is to learn from someone who already knows. Find a mentor or take a class. Search for your local mycological society or mushroom foraging group.

    Oyster Mushroom
    Pay attention to how they mushrooms attach to the tree

    Another good way is to use several mushroom guidebooks. Look up the mushroom you are researching in each of the books, see what they all say about the one in your hand. I have several mushroom books, here is a post I wrote about the ones I use.

    • When identifying mushrooms pay attention to the following:
    • What kind of tree or soil it is growing in.
    • Where on the tree it is growing. Roots, trunk, etc.
    • Weather conditions
    • Color and size of mushroom
    • What kind of gills and stem it has, or no gills at all
    oyster mushroom
    Note how these gills look and there is no stem.

    The guidebooks I use have great detailed information on each mushroom, and by combining the info from several books, you can start to learn to identify edible mushrooms. If you are not sure, ask a friend who knows, or find a mushroom group online and post a photo with information there.

    If you are not absolutely sure, do not eat it.

    But I think, after some study and learning you will be able to answer the question: Can I eat this mushroom?

    Graphical user interface

    If you want to learn about other wild foods in the woods, check out my post on good guidebooks for foraging:

    books on foraging

    Video transcription:

    Are you wondering like I’m wondering, what are these, and can we eat ’em? Ready? Let’s go. I’m gonna be back in a minute, okay? Did you see, what I see? I gotta go get a bag, hold on. The girls are in here. Hello my knuckleheads. She has pneumonia. Anyway, you stay here. It is almost Thanksgiving. I know, yuppie bag.
    It’s frosted here several times, the ground is frozen about three inches. Actually, I just shot a video about digging up potatoes out of my frozen potato bed and I just drove by that. I think these are Oyster Mushrooms. The question is, can we eat them? First let’s make sure they’re mushroom, but also since it’s frosted last night, the bottom part of this is cold. And, we’ll let’s take some off and see.
    See there, well you can’t really see but they are in there. It is, it like crunches when you’re taking it off. And that is cold and hard. But look at that. They feel a little leathery, rubbery. Some of these are past their prime. That’s just, that’s gone. That’s gone, but man, that smells, that’s an amazing smell. I just love that smell of woodsy mushrooms.
    Oh wow. These look like they fruited a little later than the ones over there. This is a Maple, probably a Sugar Maple, because I’m in the land of Sugar Maples, but see the snow? Here? So there’s definitely been some frost. Can you eat a frozen mushroom? We’re gonna find out. This is just, I’m very excited as you can tell. That’s definitely frozen. I’m wondering whether this will turn to mush or not. I mean, . I’m all about, hey let’s try this, and see what happens.
    So that’s what we’re gonna do. All right, finish some harvesting here. So, I’ve left a bunch here. I don’t know if the spore will travel with this kind of weather conditions, it’s supposed to rain later, it’s like 32 and a half degrees out, just above freezing. So I have some, and I always leave some, I think that karma is boomerang that way, but still, a nice harvest. We’re gonna identify these and then if they’re an edible one we’re going to cook them. Here’s the rub though. I have to go back to New York City today. We love in Brooklyn during the week, so we’re gonna take these and we’re gonna mushroom road trip to Brooklyn, identify ’em and cook ’em. Ready? Here we go.
    Look where we are? The Brooklyn Museum, no, the Brooklyn Library. Says right there. So, before you eat mushrooms, you need to identify them, and this is me trying to get you to go to your library and also learn about identifying mushrooms and also seeing if Eric can eat these mushrooms. So, in here is some knowledge. Here we go. Phone booth. We got our books. There’s Grand Army Plaza. I used to live right near here and then I moved. So, it’s kinda fun to be back. But the library, just go to your library. It is amazing. I kinda got lost in the stacks there and I was like gonna check out too many books and I forgot my knapsack and that’s more information than you need to know, so let’s go, let’s go see if we can eat these mushrooms. And then cook them. So stay for that bonus round of cooking.
    So some of these are looking a little aged, they’re looking a little old but you can still eat ’em, they’re just not gonna be like wow, but still it’s wow that you got these from the woods and wow that we’re gonna identify ’em. I just said you could eat them, and we don’t know that yet. Strike that, okay? What are you thinking about mushrooms, yeah? Is that exciting? Not too excited huh? Yeah.
    So how did I learn about mushroom foraging? It’s, I think the way a lot of people do, I actually went with a conservation group in the next town and they had these two mycology experts in the woods and we walked around and we discovered different kinds of mushrooms that were edible and the other ones to watch out for, which I think is great. So learning from another person, learning from an expert, is really the best way. Like a mentoring.
    You want to read the book with me? You can’t eat the book, okay? Another way is through guidebooks. I will link to all the guidebooks that I use, again you don’t have to buy them, you could just get them from the library, like this really good one with a chapter on Oyster Mushroom. So with all the information we’ve garnered from our guidebooks, looking, smelling, observing where it was growing, how we harvested it, what did it look like, stacked kinda like this, my vote is that these are edible. So let’s try this, see what happens.
    Is that really a good phrase for mushrooming? I don’t know about that.
    I don’t like to slice mushrooms, I just like to tear them into pieces, well, maybe bigger pieces than that but I kinda like, I just like tearing them rather than cutting them. Cutting is too uniform and that’s not Garden Fork. All right, these. Smells pretty good, let’s see if it’s edible. All right, the great moment. Will I live or will I die? Let’s see here. Tastes like a mushroom. Tastes like a winner to me. Let’s you and I continue our mushroom journey here, I have some more mushroom videos should be floating right here, so I will see you in the next video. I’m gonna eat these mushrooms.


  • Beer Cooler Sous Vide, The Cheapest Way To Cook Sous Vide!

    Beer Cooler Sous Vide, The Cheapest Way To Cook Sous Vide!

    What is Beer Cooler Sous Vide? It’s a super simple way to cook sous vide without buying an expensive immersion stick gizmo. You probably have all the parts you need in your garage. Let’s watch the video:

    This is a great hack I learned about from Kenji Lopez-Alt of SeriousEats. You can cook meat sous vide with just a beer cooler, some zipper bags, and a thermometer. No need for expensive immersion circulators, just some simple tools and this all tastes amazing.

    Sous Vide is a cooking method that brings the meat up to a set temperature (like medium rare) and holds it there. The beauty of this is you don’t overcook the meat, and you get to precisely pick the done-ness. Nice.

    How to build your beer cooler sous vide rig

    Pretty simple. Get a cooler.

    I’m am all about use what you got, so go in the garage and see what’s there. Or maybe your neighbor has a cooler they want to get rid of.

    Then do this neat hack I learned from Kenji. Insulate the lid.

    beer cooler

    Its something I never thought of, and now I wonder why cooler companies haven’t done it before. Get your cordless drill, and drill two 3/8″ holes in the front edge of the lid. Lift the lid such the edge with the holes is pointing up. Fill with regular spray foam. Let dry.

    beer cooler with spray foam

    Be sure to wear gloves and clothes you don’t care about when you do this spray thing, the foam will get on your clothes and it does not come off. Learn from me.

    That’s is for the build, pretty simple, right. Now that everyone has Yeti coolers, I imagine you can find someone who will give you a cooler for free. Just find the friend who is doing the decluttering thing.

    So why a beer cooler? Coolers keep things cool, but they can also keep things hot for quite a while. To cook a steak, fish, and other thin proteins with the sous vide method, you only need to keep them in hot water for about an hour. The cooler will keep the water right at 135ºF (medium rare) for quite a while.

    A plate of food on a table, with Steak

    IMPORTANT! Season your meat. Its best if you can salt and pepper boths sides of the meat a day before and leave it in the fridge, but even adding it just before sealing in a bag is ok.

    Cooler and Sous vide

    The hardest part of this whole beer cooler sous vide method is getting the air out of the zipper bag. When I first made this video, my air evacuation technique was not great, but now I put the meat in the bag, and lower it in to the cooler (or a bowl of water) and slowly lower the bag until the zipper part is at the water line. Almost all of the air will have been evacuated at this point. Zip up the bag and you are good to go.

    I use water that is a few degrees warmer than the end temperature I am aiming for, this works for me. Test for yourself, and get a digital thermometer, it is a big time saver.

    A plate with a fork and knife and steak

    When your meat has been in the cooler for an hour, it is time to sear it. Heat up a cast iron pan, pat dry the meat, add oil to the pan, and sear for a minute on each side. Drop in some butter if you want a quick sauce. Let the meat sit for a few minutes and you are good to go!

    steak in a fry pan
    Watch another beer cooler sous vide video here.


  • Super Cheap Sous Vide Machine –  DIY Video

    Super Cheap Sous Vide Machine – DIY Video

    Here is a cheap sous vide machine that works almost as well as an expensive sous vide machine. My beer cooler sous vide setup works just as well as those immersion sticks. Watch the video and read on!

    The beauty of this cheap sous vide machine is, you probably already have all the parts to make it happen. Its not even a ‘machine’, I think, it’s a big insulator sitting on the shelf in the garage. So go get it, clean it out, and let’s go.

    One key thing: the lid of most coolers is hollow. Get a can of regular spray foam (not the kind for big gaps) and drill two 3/8″ holes in the lid, along the front edge near the corners. Fill the lid with spray foam. Its ok if it spills out the holes, it will dry and you can snap it off. Its best if you prop the lid up so the front edge of the lid is pointing up, that way the foam will flow down into the lid. Let this dry overnight.

    How to use the Cheap Sous Vide Machine, aka Beer Cooler Sous Vide

    Go buy good steaks. They don’t have to be expensive, but I’ve found steaks at least 1″ thick work best. I have also used blade steaks and they work quite well. What kind of steak is up to you.

    A slice of cake on a plate, with Steak

    Put the steaks on a tray or plate, and season with salt and pepper on both sides. Put them in the fridge overnight. This allows the salt to permeate the meat and the fridge dries out the steak a bit. Kind of like dry aged steaks only not as dry. It does help.

    But if you are like me and don’t plan, just salt and pepper the steaks and put each in a zipper bag. Drop the bags into a bowl of water to push out as much of the air as possible. See the video for how to do this. You can drop in some herbs if you want, and add some butter. Nice.

    steak in plastic bag

    I like my steaks medium rare, so I aim for an internal temperature of about 132º F. This tells me to fill the beer cooler, aka cheap sous vide machine, with water that is 135º F. There will be a bit of a temp drop in the cooler, so bump the water temp a bit higher than your ideal internal meat temperature. Keep in mind you are going to sear the steak after the beer cooler, so it will raise the temp a bit of the meat.

    Once you are happy with the temp of the water in the cooler, drop in your meat in the zipper bag. If the bag wants to float, you need to remove more air. If you’ve gotten as much air as possible out, use a rubber band some silverware to the bag to keep it submerged. Close the lid.

    beer cooler

    A few times while the water heats the meat, I will pop the lid and stir the water real quick. After an hour, I take out the bags and fire up the grill or the cast iron pan.

    steak in fry pan

    IMO, the best way to sear a steak is a cast iron pan, but you can use the grill if you want. OK with me…

    Dry the meat after pulling it out of the bag, preheat and oil your pan, and drop in the steaks. Sear each side quick, you can add butter if you want to make a quick sauce – like we do in this steak cooking video – and place on a plate. Let the steak rest at least 5 minutes, OK?

    Steak on cutting board

    Then pour a nice glass of red wine, sit down with those mashed potatoes you made, and enjoy. You’ve cooked an amazing steak with gear from your garage.

    Sous vide beer cooler video linkA while back I made my first video about the beer cooler sous vide rig.

    steak on plateSteak on charcoalFrom the video:

    You want to cook a steak, right, and you want to try that sous vide method. I mean, what’s that all about? But the problem is is those sous vide machines are, like, wicked expensive, right, and I’m not gonna go out and buy one of those things and you’re maybe thinking but you want to try something, right? Let me take you on my journey of the cheapest, if not free, DIY sous vide machine. You probably already have one in your basement. Hello? Beer cooler sous vide. Ready? Here we go.

    I made a video about this cheap sous vide machine quite a while ago and the other day, the light bulb went off. I had some steaks. I had more than this and I was like, Let’s sous vide these puppies again and I brought out my DIY sous vide beer cooler machine. Total credit, I did not invite this. Invite? Invent this. Kenji Lopez Alt from Serious Eats and also the fantastic book, The Food Lab, he came up with this.

    I’m just showing you his, I’m spreading his word, okay? This thing is brilliant. It’s a cooler but it’s also a heater. I mean, it keeps things warm and it keeps things cool. Let me show you.

    So coolers are insulated waterproof plastic boxes, right? The trick here is that the top is usually hollow so what Kenji suggests, and I did, was I got some spray foam and I drilled two holes here and then you spray foam the whole lid and that helps insulate. Basically, a giant insulated thing and you usually coop but keep. I can’t talk. You usually use it to keep things cold, right? But it equally keeps things hot and sous vide is all about maintaining a constant temperature to cook something to X degrees, right? Enter the beer cooler and hot water and this.

    I salted this steak last night and then I put it in the fridge. I didn’t cover it. I kind of like that it dries out a little bit but I’m gonna add some pepper. Salt and pepper, yellow Labrador, beer cooler. You don’t need to use this big of a cooler. GardenFork is all about, Hey, let’s try this and see what happens and use what you got. And this is what we got. So that’s what we’re using.

    And I got a thermometer thing. So I want to see how hot the water comes out of the tap at. Medium rare is what, 130 degrees. This is 128. Maybe it’ll kick up a little bit. 127, 126. I’m gonna heat this water up to get that a little above our ideal temperature.

    Salt and pepper, zipper bag. Um, this goes in here at the bottom, whoa, there we go. Yeah, like that. And then the goal is to get all or as much of the air out of here as possible. We’re gonna do this by submerging it in the water, bringing it all the way up to the zipper part and then sealing this. ‘Cause my cooler’s so deep, it’s kind of hard to show that so I’m gonna show you in a pan of water here. So this is submerged and the water pushes all the air out of the bag there. I don’t know if you can see that. So we’re just gonna push the bag all the way down. Just fold it on top of itself. That’s totally fine. A little bit of air is totally fine and then see how I got this, it’s hitting the zipper? The level of the water is hitting the zipper like that? So just push this all down. I run the zipper across while holding this down. It’s not rocket science, doesn’t have to be perfect. Because on GardenFork, done is better than perfect and this is almost done.

    Now, into the cooler. More hot water needed. More hot water. I guess it would help to turn this on, right? Okay, so this is at about 132. That’s pretty good. That’s like medium, medium rare. This goes in here and it sits like that. And that’s it. That’s, I mean, you don’t have to use this giant cooler. Just a six-pack cooler makes a fine inexpensive sous vide rig. Kenji, in his video on Serious Eats site, has just a six-pack cooler. This just happens to be what I got so that’s what we use, right? But it’s brilliant and you don’t need to be buying one of those fancy machines, right? That in there, one hour. Let’s watch Labradors. Ready? Go.

    All right, steak time. Wow, it’s, wow, you can really feel the warmth in here and that is at, this thermometer runs really slow, so. Shaking it helps, you know. Whoa, it fogs the lens. Sorry. 129. Pretty good. Pull this out. How cool is that? So it looks brown. It doesn’t look super tasty but just hold on, okay? Wait ’til we taste this at the end of the video. So this doesn’t look great. That’s okay. It’s going to be fantastic. Stick around for the tasting at the end of the video. Keep that up really hot. So you want this to be what I call wompin’ hot. That’s hot. We’re gonna throw some vegetable oil in here and then we want to get it to the smoke point of the oil and then lay the steak in.

    All right, vegetable oil. I want to get it to its heat smoke point, which it’s pretty much close to right now. Heat, fan on, sorry. This is hot. This . All right, every 30 seconds now, according to Kenji, I’m gonna turn this. I’m being splattered right now. 30 seconds, turn. 30 seconds, turn, and a wadge of butter. Maybe there’s too much vegetable oil in there. Let’s see what happens. Okay, after about two minutes of searing, I want to cook the fat along the edge there. Now comes the hardest part. Let your steak rest a couple minutes. This smells great.

    Let’s just go right for the center and see what happens. Wow, look how nicely that cuts. Oh, look at that. That, all the way through and then the sear. Pink all the way through and the sear. That is amazing. That is amazing. It’s tender. It’s got flavor from salt and pepper. It’s not that overcooked edges. I’m talking really well with food in my mouth, aren’t I? Phenomenal.

  • Simple Maple Syrup Evaporator : GF Video

    Simple Maple Syrup Evaporator : GF Video

    Learn how to make maple syrup with this simple maple syrup evaporator. I’ll show you how to tap and collect sap from your sugar maples and then boil down the sap. This setup uses propane and 2 outdoor propane stoves.

    We have used several methods to make maple syrup, watch all our maple syrup videos here and we have built a DIY maple syrup evaporator out of a file cabinet.

    What’s great about this simple maple syrup evaporator rig is you can walk away from it. You don’t have to watch it constantly. I have mine outside the kitchen, and every 15 min or so I go out and check it.

    maple-syrup-updateI found a used large stainless steel pot that was probably used to boil clams, and I found a large shallow stainless steel bowl at the dollar store. The idea behind this DIY maple syrup evaporator is the cold sugar maple sap is brought up to a boil in the first large pot, and then it is ladled into the shallow finishing pan to be boiled down into maple syrup.
    Sugar Maple Sap becomes maple syrup when the sap reaches 7.5 degrees F above the local boiling point. Boil a small pan of water on  your stove and when it boils, measure the temperature with your digital thermometer. Add 7.5 degrees to that temp – at our house the boil happens at 210F – and when the sap reaches that temperature, it is now syrup. Quickly turn off the heat on the finishing pan burner, and strain the syrup in to jars. If you are up to it, you can let the sap boil to a slightly higher temperature for a slightly darker syrup – be careful not to burn the finishing pan.

    Parts You Need For The Simple Maple Syrup Evaporator

    digital_thermometerI strongly suggest buying a digital kitchen thermometer, old style candy thermometers are hard to use with this setup.

    If you see your finishing pan foaming big time, you probably have syrup, and probably the temperature is above the ideal, turn off the propane and pour off the syrup.

    The drawback of this system is that it uses quite a bit of propane, not the best use of what you’ve got. The plan is to build a wood fired evaporator next year. I have a ton of white pine from the trees we dropped that would fire a sugar shack nicely.


    make maple syrup
    Watch all our Maple Syrup How To Videos here.

    Here is a great PDF from the Univ of Maine on how to tap trees and boil sap

    Questions? Comments? let us know below:

  • Propane Maple Syrup Boil : GF Video

    Propane Maple Syrup Boil : GF Video

    Our first year of making maple syrup! Learn how to make maple syrup with this cheap evaporator, using a propane turkey deep fryer rig.

    We have used several methods to make maple syrup, watch all our maple syrup videos here and we have built a DIY maple syrup evaporator out of a file cabinet.

    A turkey deep fryer is a good way to start making maple syrup. It will take quite a while to boil down the sap. Here is what we used:

    Maple sap becomes Maple Syrup at 7.5 degrees F above the local boiling point. Go boil a pan of water on your stove, use your digital thermometer to measure the temp at boiling. I bet it wont be 212F, but probably lower. Add 7.5 to that boiling point for the temperature you want to attain.

    Wide Pots work best for boiling sap
    Wide Pots work best for boiling sap

    When its Syrup, the sap starts to foam up, so you have to keep an eye on the process.

    Be very careful. Hot sap burns bad, plus there is open flame. Use common sense, keep kids and dogs out of the way.

    The wider the pot you use, the more sap you can boil off faster. Its all about surface area. This is why evaporators are wide and shallow.

    Take the pot off the propane burner as soon as you reach temp. Its OK if the temp goes a bit higher, but not much higher. I find it best to finish the boil on the stove in the kitchen. Take it inside when you are within a few degrees of syrup at your elevation.

    Strain through cloth, cheesecloth, whatever you like. You will have some cloudiness in the syrup if you use cheesecloth.

    make maple syrupThis video shows how we improved version of making maple syrup with a propane burner

    Let us know any questions or comments below! Go out and do stuff!

  • Dandelion Greens & Bacon Salad Recipe : GF Video

    Dandelion Greens & Bacon Salad Recipe : GF Video

    What do you with dandelion greens? You make a salad of course. Watch our video to find out how to identify and forage for dandelion in your yard, and make a great salad. If you are looking for edible plants in your yard, make sure the yard hasn’t been treated with herbicides or other things that are bad for you to ingest. Check out our other foraging videos here.

    How To Find and Prepare Dandelion Greens

    Wild Greens are abundant if you live in an area with grassy weedy places. They grow, we eat them. Things like mustard grow wild, wild onions, dandelion, purslane, burdock, all sorts. What I like about dandelion is it is ubiquitous and abundant, and it grows all summer. It is said that the dandelion greens are more bitter after the dandelion flower have bloomed, but my personal experience has been mixed. It is true the older the leaf, the more bitter it will be.

    I do suggest buying at least one foraging plant identification book, I’m a big fan of Leda Meredith’s Foraging Books, she also has regional foraging books out as well. A second book you might consider is Joy Of Foraging.

    Dandelion Greens

    Follow this simple dandelion greens recipe, and all will be great. It uses items you probably have in your fridge.

    Dandelion Salad Recipe  makes 2 salads

    1 bunch of dandelion, about a large handful, tap root and flower stems removed, washed and dried.

    2 strips of thick cut bacon

    balsamic vinegar

    2 eggs, poached for 3 minutes

    1 avocado

    Cook the bacon to crisp

    While the bacon is cooking arrange the dandelion in two salad bowls or plates.

    Cut the avocado in half, core and add to the bowls

    Add the poached egg on top of the greens,

    Cut the bacon into small pieces, spread over the salad

    Pour about a half teaspoon of the bacon grease from the pan over each bowl.

    Serve as soon as possible.

    Now on to foraging for Lambsquarters!

    Wild and Urban Foraging for Lambsquarters : GF Video


  • Does The Instant Pot Yogurt Recipe Work? GF Video

    Does The Instant Pot Yogurt Recipe Work? GF Video

    I was skeptical about the Instant Pot yogurt recipe that is in the instapot manual, so I set out to test it and refine it. I am a big fan of the this multicooker. Watch my video below and read through the instructions below to learn how it all came out.

    Read on to learn how to make yogurt in the instant pot.

    How to make the Instant Pot yogurt recipe, step by step:

    There are 3 steps in the instant pot yogurt recipe process. Heating the milk, cooling the milk, fermenting the milk.

    A couple of decisions you have to make from the get go. What kind of milk should you use? Full fat or 2% works for me, the Fat Free milk isn’t great, in my opinion, but use what you got. You can use raw milk also, but I have not tried this yet. I am told not to use organic milk from the store, as it is ultra pasturized and the proteins wont line up properly to make the milk into yogurt.

    I use glass canning jars to make yogurt, this works for me. If you want to make a lot of yogurt, you can make a big batch right in the pot. Clean the jars with hot soapy water, running through a dishwasher works well also.

    Instant Pot Yogurt Recipe

    Pour a cup of water in the bottom of the cooker. Place in the bottom the wired stand thing that came with your multicooker. This will keep the glass jars above the water. Pour milk into the glass jars. Close the lid and make sure the vent is set to ‘sealing’.

    Press the ‘Steam’ button and using the plus and minus buttons on the control panel, set it to 1 minute. In a few seconds the Instant Pot will start the steaming process. It will take longer than one minute, so don’t stand there and watch it. Once the steam process is done, (about 15 min) the cooker goes into a keep warm mode. Turn off the cooker, but DO NOT open the lid. Don’t vent the steam either, allow for natural release. To do this, let the cooker sit for about 20 minutes, turn the vent to release any pressure, and open the lid. Remove the jars, place on grate to cool.

    Instant Pot Yogurt Recipe

    Cooling and Adding the Yogurt Starter To The Instant Pot

    The heated milk now has to cool to 115F or lower. When you hit that temperature, you can add your yogurt starter. I like this Yogourmet brand starter. You can also get some really cool heirloom yogurt starters here.

    Instant Pot Yogurt Recipe

    Remove the wire grate and water from the pot. Place the jars back in the cooker, close the lid, and press the ‘Yogurt’ button. Using the + and – buttons, set the Instant Pot to ferment the yogurt for 6 hours. I have found that the longer you heat the yogurt mix, the thicker the finished product is. 6 hours works for me, see the instructions that come with your starter. Let me know what works for you in the comments below.

    Instant Pot Yogurt Recipe

    You can also make yogurt in a styrofoam container or a cardboard box, learn here.


    How to make yogurt in a cardboard box – GF Video

  • Balsamic Vinegar Dressing Recipe GF TV

    Balsamic Vinegar Dressing Recipe GF TV

    Here’s a simple balsamic vinegar dressing recipe that you can make in 10 seconds. And here’s a video to show you how to make salad dressing. This salad dressing recipe follows most others, except for a secret flavor boosting ingredient! Watch the salad dressing video to see what the ingredient is.

    Store bought salad dressings are usually too sweet, and are full of calories and cheap vegetable oil. We call it ‘glop’, because that’s what it looks like. Using simple ingredients, Eric’s oil and vinegar dressing blows away this store bought stuff.

    This salad dressing is a vinaigrette, an emulsion of oil and vinegar bound together with mustard. You can use deli, brown, or dijon mustard. You can also use ground mustard, but use less than you would of the wet mustard.

    I’m thinking we should do a series of videos about salad dressings. This balsamic vinaigrette is our mainstay, but I’d like to experiment with miso based dressings, and make one of those carrot ginger dressings, like the one at DoJo in New York City. I’ve bought jarred carrot ginger dressing, but it doesn’t taste the same as the stuff we get in the restaurant.

    Eric’s Version of the Balsamic Vinegar Dressing Recipe

    Ingredients
    •    1 tablespoon Brown or Dijon Mustard
    •    4 tablespoons Extra Virgin Olive Oil
    •    1 tablespoon Balsamic Vinegar
    •    1 dash Worcestershire Sauce
    •    pinch salt & pepper
    Cooking Directions
    1. put the mustard in a large salad bowl, add the olive oil, vinegar, Worcestershire Sauce, salt and pepper.
    2. whisk the ingredients together with a fork or whisk.
    3. add salad greens to bowl and toss, then add additional salad items and toss again.
    4. serve in individual bowls.

    Mayonnaise Recipe Yum! How to make Mayonnaise

  • Oven Baked Sweet Potato Dog Treats Recipe – GF Video

    Oven Baked Sweet Potato Dog Treats Recipe – GF Video

    This Oven Baked Sweet Potato Dog Treats Recipe is wicked simple. And probably the easiest dog biscuit recipe you are going to find. Here’s my video on how to make them:

    How to make this sweet potato dog treats recipe:

    Making these treats is the polar opposite of complicated rocket science. But it took a while to figure out how to do this right.

    The sweet potato dog treats you buy in the store are, besides being expensive, not falling apart and crumbling in your hands. I tried to make these several times and mine never would stay intact.

    But I persevered as I didn’t want to pay the high prices these dog treats get in the stores. I don’t blame the makers of these treats for making money, its how we all pay the bills. I imagine the packaging also makes these treats expensive, I have seen them in stores in hard plastic containers or those foil-plastic bags. Not cheap.

    Easy enough to start out here. Hopefully you have or can borrow a mandolin. You can pick on up here: http://amzn.to/2hDGt85 (affiliate link)  If not, cut the sweet potatoes into 1/4″ slices, as uniform as possible with a sharp knife.

    Sweet potato dog treats recipe

    BE VERY CAREFUL when using a mandolin. They can cut your fingers. Most have a vegetable holder-guard,  or you can get one of those chain-mail gloves. And put a towel under the mandolin when cutting the sweet potatoes.

    The secret I found in a another version of this recipe that uses a food dehydrator is this.

    Spray the sweet potato slices with a very light coating of vegetable oil.

    Sweet potato dog treats recipe

    This allow the dog treats to stay slightly pliable, and they wont crack when being stored.

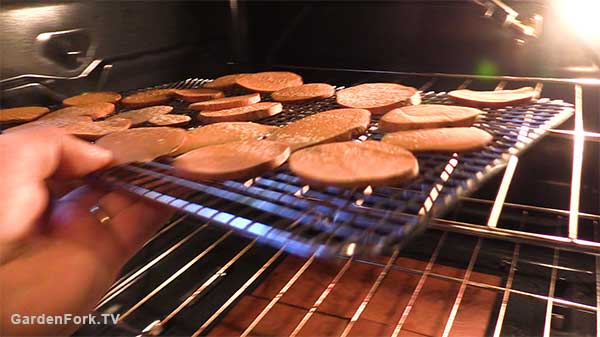
    In our previous sweet potato dog treat recipe video, we used an electric dehydrator to dry the snacks, but this time I wanted to see how the oven would work. The lowest oven temp on my oven is 170F, so I set it to that and turned it on. The dog treats dried in about 3  hours.

    Sweet potato dog treats recipe

    And how cool is that?

    Sweet potato dog treats recipe

    Sweet Potato Dog Treats Recipe : GF Video

  • Can you use soap on cast iron? 3 cast iron myths – GF Video

    Can you use soap on cast iron? 3 cast iron myths – GF Video

    Can you use soap on cast iron? A HUGE debate in the world of cast iron cooking, watch our video to find out the answer:

    Can You Use Soap On Cast Iron

    Yes. Here’s why:

    When you apply a thin film of vegetable oil, ideally flax oil or sunflower oil, to the pan, and then heat it, the oil polymerizes. Polymerization is a chemical process where oil becomes a plastic like finish. The oil dries out, and is no longer an oil.

    Dishwashing soap breaks down oil. Since the oil you applied, has been heated & dried, it is no longer an oil, the soap doesn’t dissolve it. So the mindset of soap ruining the finish on cast iron doesn’t apply here. The cast iron pan seasoning is now a polymer. Any food or cooking oil will get cleaned out by the soap, but the seasoning stays.

    How To Care For Your Cast Iron

    Use enough oil to cook your food, and when done, wipe out the pan with a towel. If there is food sticking, or you made a curry or some fragrant dish, put a little soap in the pan and clean out the pan. Set the pan back on the burner, heat it up to dry out the water. Apply a very thin layer of vegetable oil, ideally flax or sunflower oil, wipe out the excess, and allow the pan to cool off.

    That’s it! Here’s the best how to season cast iron video:

    how-to-season-cast-iron-play

    A conversation in the YouTube comments of this video says a lot about this question, can you use soap on cast iron:

    The Real Jim Guy: “I season my cast iron the old fashioned way with lard and i tell you from experience that dish soap strips the finish right off it to where everything sticks like glue.”

    John B: “I believe that’s because lard doesn’t polymerize they way that olive oil or flax seed oil does under heat. so it remains soluble to the effects of the soap.”

    Galanie: “True, unhydrogenated animal fats never dry really and won’t polymerize the way that seed oils do.”

    Brrag: “I have washed my cast iron skillets with dish washing detergent for 40 years. my mother and grandmother washed theirs the same way. i once heard you weren’t suppose to use soap on them so just started cleaning with hot water. they got so nasty smelling, i went back to the soap again. Using soap does not change the taste of your food. On the other hand, not using soap will change the taste of your food; it will taste like you cooked it in rancid oil.” (Probably the best argument on can you use soap on cast iron)

    Pappy: “You make so much sense… used to be called common sense but it’s not very common any more. I have a cast skillet that is at least 80-90 yrs old. My grandmother got it at Montgomery Wards (remember them?) Anyway she and my mother after her used this pan daily, washed it in soapy water, dried it, heated it and put some Crisco or bacon fat on it and that was it. It has a glass smooth bottom and cooks like a dream and is pretty much none stick. I admit it had gotten pretty grungy over the years so I cleaned it up, got most of the gunk off it and reasoned it. I don’t regularly wash it in soapy water because it cleans up beautifully with just water and a scrub brush but if it gets particularly dirty or I forget it overnight I don’t worry about soaping it up. The flax seed oil characteristics you mentioned are spot on from what I’ve also read. Once seasoned well with it you don’t need to only use flax seed oil tho, any oil will do to maintain that finish. Good video, thanks…”

    If you want to buy cast iron pans, I suggest finding them at yard sales and restoring them. You can get good cast iron on amazon here. (This is an affliate link, it helps us make more GardenFork!)

  • Bean Hole Beans Recipe, Dig A Hole, Start A Fire, Cook – GF Video

    Bean Hole Beans Recipe, Dig A Hole, Start A Fire, Cook – GF Video

    A while back I read an article about an artisanal bean hole beans recipe, and then and there decided to make the GardenFork version. In other words, the done is better than perfect Bean Hole recipe. Watch the video:

    Any project that involves open fire and food is a good one. Growing up, we would camp in the backyard, and boil crayfish we caught in the quarry pond over our campfire. Fire, coffee can, crayfish = good. Same thing with beans, bacon, and a hole in the ground. Its wicked simple, and fun to do on the weekend, especially in the fall.

    What is a bean hole beans recipe?

    Cooking food in a hole in the ground, as a cooking method, has been around for a long time. Probably since humans learned how to use fire to cook food, or shortly thereafter. But the Bean Hole Beans we are talking about started with the Penobscot Tribe in Maine. They cooked their beans in a clay pot with bear grease and maple syrup.

    This bean hole baked beans recipe was adopted by the logging crews in Maine. One story I read told of how they used this method while transporting logs down the river to the harbor. The cook would ride down the river one day ahead of the logging crew. He would dig a hole and start a pot of beans, mark the spot, and then ride down the river another day, and do the same thing. The loggers would arrive at the camping spot, and dig up the beans for dinner.

    I’m not sure of the veracity of this story, but its certainly plausible to me. And what’s not to like about pulling into camp to find dinner ready?

    Bean hole cooking is the original Crock Pot cooking method of its day, the pre-electric version of the slow cooker. Plus its one of those low and slow methods, which we now know as a braise or BBQ.

    How To Make Bean Hole Beans

    This cooking method, is more than just cooking, its an experience. And it is great. It embraces the two mantras of GardenFork:

    Done is better than perfect.

    Use what you got.

    Here’s what you need:

    • Cast Iron Dutch Oven with a handle, and ideally a rimmed lid.
    • Wood to burn or chunk charcoal. Not large pieces of wood, btw.
    • Used clay bricks or rocks. Don’t use rocks that break when heated.
    • Sheet metal of some sort.
    • Chain, or heavy wire, or coat hangers.
    • Aluminum foil.

    You will need to dig a hole in your yard. I have found its easiest to do this in a raised vegetable garden bed. Its much easier, but dig where you are allowed. THINK about where you are digging, before you dig, OK?

    Bean Hole Beans Recipe

    Your hole is at least 6″ wider than the dutch oven and at least a 12″ deeper. Line the hole with used clay bricks. I don’t think one needs to use firebrick.

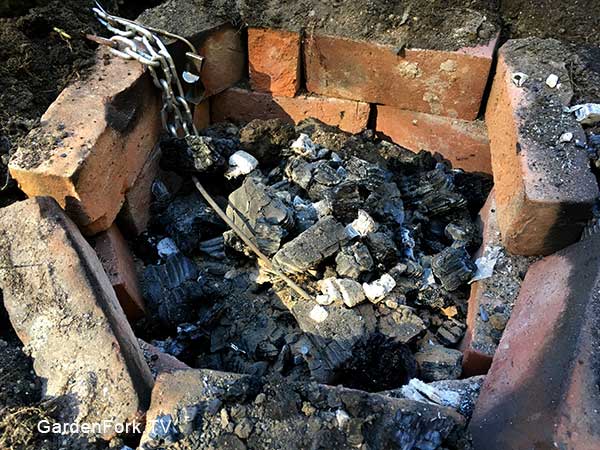
    Start a small fire in the hole with small pieces of wood. This will take longer if you use big pieces. Use small pieces. Add wood to this fire to build a larger fire.

    Let the fire burn down so the wood is starting to turn to coals. This is subjective, but you want a good base of coals to surround your dutch oven. There can be some wood that has not become coals yet. If you wait for everything to be burned down to coals, you’ve probably waited too long.

    Clean the center of the fire pit

    There are many bean hole beans cooks that par boil their beans before putting them in the dutch oven – to me this a waste of time. The beans are going to be cooking a long time. It’s great to brine beans before cooking, i do it all the time, but for this recipe, you don’t need to. OK? Good.

    Bean Hole Beans, the GardenFork recipe

    One 1 lb bag of dried northern beans – not soaked (other white beans work fine too)

    2 TBSP Mustard

    One small can of tomato paste

    1/2 cup maple syrup

    One chopped sweet onion

    4 slices of bacon.

    1 tablespoon kosher salt

    6 cups of water

    – again, use what you got, you can add other stuff to this recipe

    Put all the ingredients in the dutch oven. If your dutch oven lid does not seal well, place one or two layers of aluminum foil between the dutch oven and the lid.

    Cover the outside of the lid with aluminum foil to keep any dirt from getting in to the beans.

    Remove half the coals and move the rest to the sides. Lower the dutch oven into the hole, add back in the hot coals. Cover with the tin and then dirt. Be sure to lay the chain so its outside the fire pit.

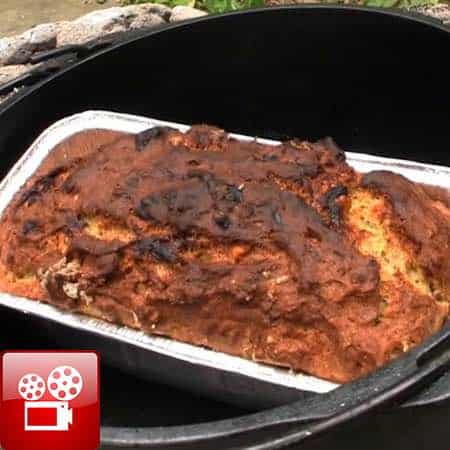
    dutch oven banana bread recipe
    Now watch this dutch oven banana bread video

    Eric Bakes Artisan Bread in Five Minutes a Day


  • Make Iced Coffee At Home – GF Video

    Make Iced Coffee At Home – GF Video

    Its easy to make iced coffee at home, you probably have all the ingredients, water and ground coffee. Here we go!

    OK, so now you know how to make iced coffee. Let’s to a deep dive in to the process.

    This is what we call cold brew coffee, we don’t actually put ice in the coffee until the end. The fact that the coffee is already cold, hence the name ‘cold brewed coffee’ , means you can skip the ice if you want. Coffee that is soaked in ground coffee overnight has a smoother taste, I think, than hot brewed does.

    Make Iced Coffee

    The ideal container to make iced coffee is a french press. (Buy a French Press here) You may be able to find one at a yard sale or perhaps your neighbor has one in their basement, the one they got as a wedding present maybe. Don’t tell them what a great tool they have, just ask if you can have it…

    The biggest issue with a french press is the glass can break. I don’t have any suggestions on avoiding that, other than the obvious. I have found they break most frequently when you are washing them in the sink. Take glass, add soapy water, and gravity, and you see what can happen, right?

    Make iced coffee

    If you don’t have a french press, you can still make cold brew coffee. A pitcher of water and some ground coffee works well, and you can strain the coffee through a paper towel to remove the grounds. Not as easy as the press, but I’m all about ‘use what you got’.

    Easy Iced Coffee Recipe
    Recipe Type: Drinks
    Prep time:
    Cook time:
    Total time:
    Serves: 3 cups
    Easy way to make cold brewed coffee at home
    Ingredients
    • 1 cup quality ground coffee
    • 4 cups water
    Instructions
    1. Put ground coffee into the bottom of a french press.
    2. Add water into french press.
    3. Cover and place in the refrigerator overnight.
    4. Remove from fridge, press down plunger to strain iced coffee from grounds.
    5. Pour into a glass, add milk or sugar or whatever you like.

    Want more? Watch all our cooking videos here.


  • Love The Instant Pot! – Instant Pot Pressure Cooker Review – GF Video

    Love The Instant Pot! – Instant Pot Pressure Cooker Review – GF Video

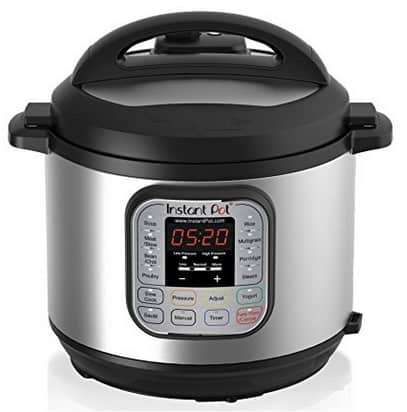
    I have used a stovetop pressure cooker for years. Then a friend of mine showed me his Instant Pot Pressure Cooker. Then I bought one. Buy Yours Here: Instant Pressure Cooker 6 Quart    Watch our review video and read on for more info below the video.

    [Being up front here, the above link is to Amazon and we get a finder’s fee for referring you to Amazon, its part of how we pay the bills to make more videos and posts for you all to watch.]

    OK back to the story:

    pressure cooker review

    Its literally “set it and forget it”. Put in ingredients, turn it on, and go do something else in the yard or house. Don’t leave the property, OK?

    I make beans and chickpeas ever week, we cook pork shoulders and short ribs in it, and I want to try a carrot soup recipe I saw in the Modernist Cooks At Home cookbook next.

    The advantage of electric over stovetop pressure cookers:

    • You don’t have to adjust the stove burner
    • It stops cooking at a pre-set time and goes into keep warm mode
    • Its incredibly quiet
    • It makes cooking super easy

    Read more on the Pressure Cooker review page here.

    America’s Test Kitchen has a great pressure cooker cookbook, Pressure Cooker Perfection and a new book, Multicooker Perfection.

    I’ll go more into this with more posts as I cook more with it. Let me know what you think in the comments. thx!

    Pressure Cooker Short Ribs Recipe – GF Video

    Save

  • Deep Fried Turkey Hacks – GF Video

    Deep Fried Turkey Hacks – GF Video

    My best deep fried turkey hacks all in one video. What not to do when deep frying a turkey, OK?

    Deep Fried Turkey Hacks, My List

    Practice to make sure you know what you are doing. Plan on buying turkeys 2 weeks ahead, defrost them in the fridge for 3-4 days, then do a practice run at making the best turkey you’ve ever tasted.

    Test your deep fryer gear ahead of time, make sure it fires up. If something is broken you don’t want to be dealing with that on Thanksgiving Day, the hardware store will be closed. AND have a back up tank of propane. I can never tell exactly how much propane I have left, so I have two tanks.

    Deep Fried Turkey Hacks

    Wash out the cooker every time. New deep fryer pots may have a coating on them, and pots that have been stored may have something else on them, you never know.

    Calibrate the thermometer. Boil a small pot of water, then place the tip of the thermometer in boiling water. It should read about 212F at sea level, at 1,500′ where I am, it will read 210F.

    Measure how much oil your fry pot needs to cover the turkey. I put the turkey in the clean pot, pour in enough oil so just the ends of the legs are sticking above the oil. I then remove the turkey and let it drain on a tray, and fire up the oil to heat it to 350F. Coating the bird with oil will not ruin it prior to cooking, OK?

    Deep Fried Turkey Hacks

    Wear oven mitts and long sleeve shirt. We’ve talked about this one before, but its the easiest safety measure you can take.

    Clean out burner with compressor or canned air. The propane burner can get debris stuck in it, and it wont burn nearly as well. As you can see in the video, cleaning the burner made a huge difference.

    watch more how deep fry

    Deep Fried Turkey Hacks

  • Easy Leftover Turkey Soup Recipe – GF Video

    Easy Leftover Turkey Soup Recipe – GF Video

    After making a deep fried turkey, make this easy leftover turkey soup recipe the next day. Watch our video to learn how.

    My turkey soup recipe, A few thoughts:

    • Use what you got, in other words, if you don’t have carrots, use potatoes.
    • Celery and Onion are key, and you should keep celery in the fridge anyway.
    • This cooks down in about an hour.

    Easy Turkey Soup Recipe

    I can’t say I invented this Thanksgiving leftovers recipe, but it seemed like an obvious thing to do the day after the big holiday meal. But you can do this anytime you deep fry a turkey, and I think we all should cook turkey a lot more. Its a huge amount of food for the price of a turkey. BTW, you can also roast a turkey in the oven, if that’s your thing. We did a video about that here.

    Easy Turkey Soup Recipe

    One GF fan suggested cooking down the soup in one of those pasta pots that have a strainer insert. You could cook the vegetables in the pot, then put in the strainer and add in the turkey parts. That way you could pull out all the bones at once, then separate the meat, and boom you are done.

    It helps to use an oversized pasta pot for this turkey soup recipe. The pot I used had turkey and stock up to the rim and it made it easy to spill. I have about 3 pasta pots in the basement, but I blanked on that when cooking this. Note to self.

    Keep in mind that if you put in a lot of celery, that flavor will be more pronounced after a night in the fridge. The second time we heated up the soup for dinner, you could really taste the celery above the carrots. But I love celery so that was ok with me.

    The videos I talked about this video:  How To Deep Fry A Turkey     Build a DIY Mini Greenhouse

    Easy Turkey Soup Recipe


  • Healthy One Pot Pasta Recipe – GF Video

    Healthy One Pot Pasta Recipe – GF Video

    A healthy one pot pasta recipe video inspired by Anna Cole. Take your typical one pot recipe, add kale, and turn it from a carb meal into a green meal, at least thats how I look at it. Check out my video, then read through the recipe.

    I read about this version of a healthy one pot pasta recipe in the the NY Times Food section, where they reviewed some cookbooks, one of which was Anna Cole’s A Modern Way To Cook.

    Cherry Tomatoes Are A Secret Ingredient

    Cherry tomatoes are key here, I think. They seem like these pedestrian items, but when you cook them down, they morph in to something more than a store bought tomato. Of course, garden fresh cherry tomatoes are even better, but use what you got.

    Healthy one pot pasta recipe
    Don’t forget to add the kale!

    The pasta and most of the ingredients go in the pot at once, consequently, its super easy to make this. Even I can do it. Of course, I forgot to add the kale, but it worked out OK. As the spaghetti cooks, it releases starch into the cooking water. This starch mixes with the tomato juices to make a nice sauce.

    Be sure to mix the pasta as soon as you add it in, and as it cooks. I didn’t stir it right away so the spaghetti stuck together a bit. Keep the lid off while it simmers, I forgot that one.

    Chop the kale into smaller pieces than I did in the video. The smaller pieces mix together better when the dish is finished.

    Easy to follow directions for you:

    [tasty-recipe id=”13308″]


  • No Knead Bread Recipe with Olives – GF Video

    No Knead Bread Recipe with Olives – GF Video

    Easy to make no knead bread recipe, this time we add black olives for extra flavor. Oil cured black olives are what a friend of mine calls ‘little salt bombs’ they are that and more. Watch the video and check out the recipe.

    Lately I’ve been doing a whole wheat – white flour mix for my no knead bread recipe. I’m adding more whole grains into my diet, and the whole wheat adds that nice nuttiness to the bread. Making 100% whole wheat breads can be tough, especially no kneads.

    No Knead Bread Recipe

    But the main ingredient here are black olives! Don’t buy the watery black olives in a can, get oil cured olives. These are usually available in a deli or gourmet shop. I have seen oil cured in a jar, but not often. Buy pitted olives, but when chopping them, keep an eye out for pits, you may run across one or two.

    For some time  now I have been using parchment paper to move the dough from the the bowl it rises in into the dutch oven. This eliminates the risks of flopping the formed dough into the dutch oven. Its ok if the parchment paper sticks out of the lid of the dutch oven, it will help with removing the baked loaf when its done.

    No Knead Bread Recipe
    This is what shaggy can look like.

    For my basic no knead bread recipe, the bread is done with the internal temperature reaches 200F. I usually bake the bread for 35 minutes covered and then 15 minutes uncovered. With your oven these baking times may change. Its better to over-bake bread than to under-bake it. Wet dough bread is no fun.

    watch more bread videosEven if you are a big fan of black olives, using less is more here. Olives pack a lot of flavor in a little portion, OK?

    No Knead Bread Recipe with Olives
    Recipe Type: Bread
    Cuisine: American
    Author: Eric Rochow
    Prep time:
    Cook time:
    Total time:
    Serves: 1 loaf
    An easy bread recipe that adds more flavor with black olives. Serve this at dinner, your friends will like it.
    Ingredients
    • 2 cups all purpose flour
    • 1 cup whole wheat flour
    • 1/4 teaspoon active dry yeast
    • 1 1/2 teaspoons salt
    • 1 cup chopped & pitted oil cured black olives
    • 1 1/2 cups warm water
    Instructions
    1. Mix together the two flours, the salt, and the yeast. I like to use a whisk for this.
    2. Add in the pitted and chopped olives, be sure they don’t have any pits in them. Bad things can happen.
    3. Add in the warm water and mix together.
    4. The dough will be stiff and will not come together. Don’t worry, it won’t. You want the dough to be ‘shaggy’ like shag carpet, not wet.
    5. Add water by the teaspoon if needed, but a bit too much water will make the dough wet.
    6. Cover the bowl with plastic wrap and place is a warm place to rise. I use my oven with the light on.
    7. Let the dough rise 12-18 hours. The dough should have strands pulling away from the bowl when its ready.
    8. Flour a board lightly. Scrape the dough out of the bowl onto the board. Dust the dough with a bit of flour and turn the dough into itself to form a ball.
    9. Place the ball of dough onto a sheet of parchment about 18” long. The parchment should be wide enough to sit in the dutch oven and stick out the top a bit, as shown in the video.
    10. Gather the corners of the parchment/dough and put into a bowl with high sides. One similar to the one I use in the video is good.
    11. Cover with a towel and let the dough rise for two hours in a warm place. I use the oven with the light on again.
    12. After 1 1/2 hours of rise, put the dutch oven and lid in the oven and set the oven to 450F.
    13. After 30 minutes, remove the dutch oven from the preheating oven, lower the parchment with the dough into the dutch oven, cover and bake for about 30-40 minutes. It all depends on your oven.
    14. After 30 minutes, remove the lid of the dutch oven, the bread should be starting to brown. Bake another 15 minutes with the cover off.
    15. Check the temperature of the bread, its done with the bread reaches 200F


  • How To Cut Up Chicken – GF Video

    How To Cut Up Chicken – GF Video

    Wondering how to cut up chicken? The chef term for this is to joint a chicken, but cutting up a chicken is a pretty good term for me.

    When you cut up a chicken instead of buying, lets say, chicken thighs, you save a ton of money. The cost of a whole chicken is not that much more than buying already cut up thighs, for example, and you get a whole chicken to use for other meals.

    How To Cut Up Chicken, Some Tips:

    • Buy poultry shears
    • Wash the cutting board really well
    • Pull out the neck before you start

    I like the poultry shears that come apart for easy cleaning. Super simple way to clean up your tools after breaking down a chicken, and makes it easier to sanitize everything. Mine have good handles so I don’t slip while working.

    Its important to clean your cutting board well after working with meat. I use comet cleanser, because is has some chlorine in it and is scrubs out stains as well. Its easy to cross contaminate, so pay attention to where you are putting your hands after handling chicken and tools.

    Cut Up Chicken

    Pull out the parts! Sometimes I forget to remove the neck and giblets, then I wonder what is going on with this chicken. Even me, the alleged expert has moments like this.

    Consider cooking more than just the breasts or thighs next time, could you use the wings for something? You can make a nice stock with the back of the chicken and some vegetables, for basicaly free.

    That being said, my favorite part of the chicken are the thighs, as they are the easiest to cook. You can overcook the dark meat and it will still taste good. Not true with breasts, you know.

    Do you have any tricks or tips for cutting up a chicken, how about the best way to freeze a chicken after you have cut it up? Please let us know below.