Category: Gardening TV

  • How To Build A DIY Pallet Compost Bin Video

    How To Build A DIY Pallet Compost Bin Video

    Build your own pallet compost bin! Its easy. I’ll show you how with these photos and video. You’ll be composting in a few hours. Recycled pallets are perfect to make this bin, they are strong, have built in vents, and are free. This bin is also dog proof, our Labradors can’t get in it and cause trouble. Learn how to compost with our composting basics video. Want more DIY pallet ideas? See this page for more of my pallet projects.

    How To Build A Compost Bin

    If you have several pallets to choose from, pick those that are made of hardwoods. I am still amazed to find pallets made from oak, but yeah, they are out there. Hardwood pallets will last longer.

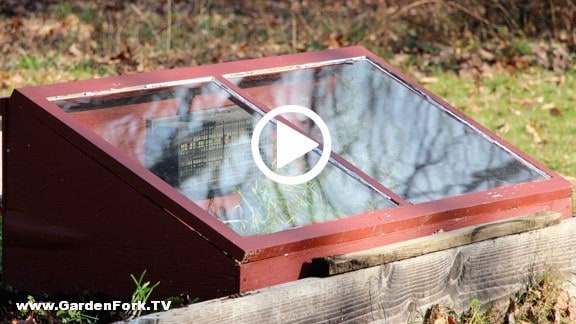
    Basically, we are building a box, with an open top and bottom. Its best to not site your bin where the ground is wet or muddy. You want your compost to drain, not hold water.

    We used some shelf brackets we found in the trash to hold the the walls of the compost bin together. Or you can get some online. Wire, angle brackets, and wood all work. I have used recycled shelf brackets to build my raised vegetable garden beds, and they will hold up longer than the wood they are screwed into.

    bracket holding pallets together

    Once the sides and back of the pallet compost bin are screwed together, I drive old pieced of metal pipe down in between the slats of the two side walls. Wood stakes will work as well here, or even rebar (metal rods).

    close up of compost pallet wall

    The door of the compost bin is hinged, and again, use Use What You Got™, used door hinges work fine. I hung the door about 1.5″ higher than the bin walls, using small pieces of wood to hold it up. This is based on experience; if you don’t do this, the door can drag on the ground, I’ve found. To add strength to the bin, I hammered some metal pipes in the two side pallets. Metal fence stakes or other long strong things will work as well.

    The hinge side of the door needs the most stability here, as it holds the most weight. I used a piece of chain i had laying around to secure the door closed. The door will have to hold up quite a bit of weight when the bin is full, so think about that when crafting some sort of latch.

    The floor of the compost bin is dirt. I don’t put a base in the bin. I like the idea of worms moving from the soil up into the compost and the dirt provides some natural drainage. You could also put into the compost pile some red wiggler vermicompost worms to help break down the pile.

    compost bin

    more compost videos

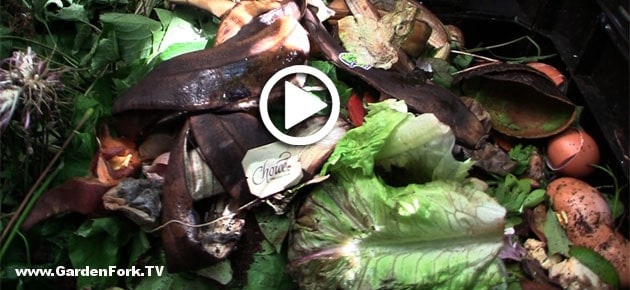
    What to add to your compost bin?

    We have our Composting Basics video that explains a lot about how to compost in your yard, but a few key things are to not add meat or greasy stuff to the pile, and to make sure it is not packed down, air needs to circulate in the compost pile. You can also read more in Wikipedia. Let us know your questions, suggestions, and how you compost below:

    Save

  • How To Harvest Garlic – Grow Garlic Video Series – GF Video

    How To Harvest Garlic – Grow Garlic Video Series – GF Video

    Learn you how to harvest garlic properly, and how to store your garlic. We showed you how to grow garlic in the first of our grow garlic videos – link below – and now its the middle of summer and time to harvest and store the garlic.

    The question I get most often is when to plant your garlic, the second is when to harvest it. Garlic is usually harvested in middle to late summer, when the plants start to turn brown, but not completely brown. If you let the plant go completely brown, the bulbs will be falling apart and starting to rot. Pay attention to the scapes to see if they are pointing straight up, and then the plant will start to go brown. Pull a bulb or two and check the condition of the bulb.

    Grow Garlic, Then Harvest It

    how-to-harvest-garlic-grow-garlic-v
    The bulb will still have a lot of moisture in it, and most people will air dry the bulbs before using them or selling them. I’ve even seen farmers who put the bulbs in large plastic trays, stack the trays, and then put a fan underneath the trays to push air through the stack and dry the garlic. Personally, I tie the garlic into bunches and hang it in the shed for a few weeks. Avoid putting the garlic in damp areas, which will invite mold to start, which is not a good thing.

    If some of your garlic has brown spots on it, it is still ok to eat, most people just cut around the spotty areas and you are good to go. If you want to save garlic seed, set aside the largest cloves for the fall planting. The idea here is that the largest cloves will yield large bulbs. Check out Filaree Farm to order garlic.

    How To Plant GarlicLet us know your thoughts on garlic growing.

  • How to save tomato seeds – GF Video

    How to save tomato seeds – GF Video

    Learn how to save tomato seeds from tomatoes in your garden. Watch our video, its super easy to do. Tomato seed saving works best with heirloom and non-hyrid tomatoes. Seeds saved from hyrbrid tomatoes will not yield the same tomato variety.

    Save Tomato Seeds For Next Season

    Simple right? Its not hard to save tomato seeds . The key thing to remember is to not use any of the seeds that are still floating in the tomato water after 3-4 days. These saved seeds will not germinate, as they still have that gelatinous membrane around them. There will be plenty of seeds at the bottom of your tomato seed container to dry for next year’s crop.

    Remember to dry the seeds on plain copy paper,  not  paper towels. The saved seeds will stick to the paper towels, they stick less to the regular paper. It helps greatly to write on the paper what kid of tomato the seeds are saved from. Learn from my experience…

    I keep all my seeds in the fridge or in a cool dry dark place in the basement. Save those silica gel packs from electronics packages, and put them in with the seeds, they absorb moisture from the stored seeds. You can also buy silica gel at a crafts store. Are there other methods for absorbing moisture in the seed packets? Let us know below.

    Here’s how one GF viewer saves tomato seeds:

    I save those but I keep them in a different fashion. If I find a tomato I like (heirloom, hopefully) I take a color photo of it before I cut the tomato. I then proceed to save the seed. I dry them on a plate myself. Once dried for a few days I make a small wax paper envelope, put the seed in and then staple it to the photo. If there’s some quality about the tomato I write that and the name, if I know the name, onto the photo. That’s my system for saving.

    how-to-save-tomato-seeds-2

    You might also consider doing a seed exchange with your friends, its a neat way to discover local specialty seeds. Or this could be the start of a new hobby of cross breeding tomatoes to create new varieties that work best in your micro climate. Neat stuff all round. Fedco Seeds has some great heirloom tomato seeds. Let us know your seed saving ideas below:

    how-to-save-tomato-seeds

    Click Here To Watch More GF Tomato Videos


  • Composting 101 – Backyard Composting Basics – GF Video

    Composting 101 – Backyard Composting Basics – GF Video

    Composting! Learn how to compost in this video. What food can you compost? What food should not go in the composter? What kind of bin should I buy or build? Watch the show and let us know your thoughts in the comments below.

    To compost in your backyard, you’ll need a bin of some sort. You can buy one – here are a few models – or you can build one – here are some GF videos with compost bin plans.

    Composting Ingredients

    Here is a brief list of things you can compost:

    • Eggshells
    • Coffee Grounds
    • Salad Greens
    • Corn Cobs
    • Vegetables
    • Newspaper, napkins, paper towels
    • Light cardboard

    Stuff  you should not compost:

    • Meat
    • Foods saturated with oil
    • Cat Litter and Dog Waste
    • Cheese & Dairy Products

    more compost videosMost backyard composting takes months to break down, because of the lack of a large biomass, the pile cannot achieve the ideal temps for hot cooking of the material. But  this isn’t a reason not to do it. Taking food scraps in to the backyard instead of the trash can is a super eco green way to live, and its real easy. There’s really no wrong way to do it.

    composting-101-backyard-composting-basics-2

    Backyard Composting can be as simple as a pile of leaves and yard waste in the back of the yard, or in a more structured bin, its up to you. Whatever type you go with, be sure to aerate the pile, turning it over on itself, or lifting it up and poking holes in it. The pile needs air to work.

    I’ve found that most of the compost accelerators don’t do much more than a good shovel full of manure will. What do you think? Let us know below:

  • Squash Vine Borer Treatment #3 : GF Video

    Squash Vine Borer Treatment #3 : GF Video

    A new Squash Vine Borer treatment to control Squash Vine Borers and keep them from eating your squash plants. Squash Borers live inside your squash plant and eat the plant from the inside out until  you have a dead squash plant. Are your Zucchini plants dying? Summer Squash too? The culprit is likely the borer. Here’s a video how to on a new squash vine borer treatment that uses Bt.

    Many times I hear of people who walk into their vegetable garden and find all their squash plants wilting and yellowing. Check the base of the stem, where it enters the soil. If you see this orange frass that looks like wet sawdust like in the photo below, you have squash vine borers in your plants. If left untreated, there’s a good chance you will lose the squash.

    squash-vine-borer-treament
    Orange frass at base of stem, a sure sign of squash vine borer infestation

    How this squash vine borer treatment works

    In this video we are using Bt, Bacillus thuringiensis var kurstaki . This is a naturally occurring organism that, once it enters the gut of the borer, causes it to stop eating. Bt is considered an organic treatment, allowed by the OMRI ( Organic Materials Review Institute )

    The adult moth of the borer lays its eggs in the soil at the base of the squash plant, then the eggs hatch and the borer chews a hole in your squash plant, enters the stem and starts eating. The Bt is injected into the stem of the squash plant at several intervals. The goal here is to get the borer to ingest some of the Bt, so you want to inject the Bt in front of where the borer is currently chewing. Watch the video for how to do this.

    This Bt is not to be confused with GMO BT, which has been genetically spliced into plants. This is a naturally occurring organism that we are harnessing to kill caterpillars. Below are our other videos on how to prevent squash vine borers, let us know any suggestions or comments below:

    squash-vine-borer-treatment-3

    Squash Vine Borer Treatment method #2

    squash-vine-borer-play

    Squash Vine Borer Prevention and Treatment method #1

    squash


    Check out our Squash Recipes Here


  • Broken Lawnmower Wheel Repair : GF Video

    Broken Lawnmower Wheel Repair : GF Video

    Fix a broken lawnmower wheel: watch our lawn mower repair how to video and get back to mowing you grass. The tire on our mower broke, here’s how to fix it.

    When the lawnmower broke, the camera operator, who happens to love mowing the lawn, thought we needed to buy a new mower! No, for about $10, we fixed our grass cutting machine, and the camera operator is now out cutting the grass before dinner. Not a bad deal for me…

    The lawnmower wheel repair was not difficult. All you need is a metric or standard wrench, depending on the make of the machine. An adjustable wrench will work as well, but the correct size wrench is better. Pay attention to how the tire is attached to the mower, remove the nut holding it to the threaded axle, along with any washers that may be with it. Take a picture with your cell phone as you disassemble the nut and tire unit, it will help with putting the whole thing back together.

    Take the tire to your local hardware store to match it to a replacement. Our wheel was an 8″ diameter, which seems pretty standard for push mowers.

    Lawnmower wheel

    Bring back the new one and slide it on. There may be a metal or plastic bushing inside the wheel so the tire can fit on different diameter axles. Secret tip: use some anti-seize paste on the axle threads before attaching the wheel. If you ever have to remove the wheel again, this will make the job much easier.

    Get a neat set of wrenches here.  (Affiliate link)

    And there you go. Job done, now how to convince your significant other that mowing the lawn is exercise?

    We have a how-to video on how to tune up a lawmower here,  and And a how-to video on how to sharpen the blades of a lawn mower .

  • Vegetable Garden Tour : GF Video

    Vegetable Garden Tour : GF Video

    A quick tour of the garden and what is going on in the yard here for you all. Let us know what you are doing in your garden in the comments below!

  • Foraging For Wild Garlic : GF Video

    Foraging For Wild Garlic : GF Video

    Foraging for edible plants in the spring includes looking for edible wild greens like wild garlic, also called spring garlic. This edible wild food is one of the first plants to start growing after the long winter, and is ready for your dinner plate. Wild Garlic looks like a young scallion plant or chives, and is edible. The taste has a slight garlic aroma, but its definitely in the onion taste family. You can find this edible plant growing in lawns and forest edges. Many consider it a weed, however we think it a great addition to salads or meals.

    Be Safe In Your Foraging!

    Double check with a good plant identification book! At the end of the post are some books we suggest. Always be sure with your plant identification before adding this to your soup.

    According to Wikipedia, when cattle eat wild garlic, it can give a garlic-like taste to the milk and beef, interesting. It is native to Europe and considered an invasive here in North America.

    foraging-for-wild-garlic-2

    I see this edible plant growing in yards a lot. I’m sure the homeowners don’t realize they have food growing in their yard! To harvest the wild garlic, its best to use one of those 3 pronged garden fork hand tools. You have to dig down a bit to get out the bulbs, or you can snip off the green stems and they will grow back. As the plant matures, unfortunately the stems get woody and aren’t good eating. If you pull this plant out of a park or someone’s yard, make sure it hasn’t been sprayed with an herbicide. Not a good thing to be eating that stuff.

    Foraging Videos

    Let us know what you know about this plant or any questions below:

  • Raised Bed Garden Plans For A Self Contained Garden : GF Video

    Raised Bed Garden Plans For A Self Contained Garden : GF Video

    This raised bed garden plan video is perfect for a school garden project, or for building raised beds on a concrete or asphalt playground. This kind of raised bed is also good for raised beds on top of contaminated soil. This self contained raised bed is a plywood box supported by concrete blocks, a plastic liner keeps moisture away from the wooden sides of the raised bed.

    I saw this raised bed at a Whole Foods in St Louis, MO. I like the simple design of the raised bed, one can build it with a few tools and a saw. This kind of bed would be great for a school that wants to build a garden in a playground or parking lot. You don’t have to dig up anything, just build these raised beds and drop in the soil. If you have soil contamination in your yard, yet you want a vegetable garden, this design will work for you. ( we have another video coming up about gardening in or on contaminated soil, join our email list to be alerted to that video post )

    raised-bed-garden-plans-for-a-self-contained-garden

    This design uses treated plywood for longevity, and the treated plywood is kept separate from the garden soil by a plastic liner. The raised bed is supported by concrete footers that are usually used to build decks. Holes are drilled through the liner and plywood for drainage.

    raised-bed-garden-plans-for-a-self-contained-garden-2

    This kind of container gardening requires one to pay attention to the moisture level of the garden soil in the raised bed. This soil will dry out faster than the surrounding earth. I think a soaker hose drip irrigation system – drip irrigation video here – would work great for this bed.

    raised-bed-garden-plans-for-a-self-contained-garden-3

    What kind of raised beds do you have? ? Questions, Comments? please let us know below:

  • Filling an Unwanted Swimming Pool

    Filling an Unwanted Swimming Pool

    Here is Rick’s pool being filled in:

  • Seed Starting in a Hoop House Cold Frame : DIY Video

    Seed Starting in a Hoop House Cold Frame : DIY Video

    Starting seeds in a hoop house cold frame is like putting a greenhouse on your vegetable bed. The hoop house warms the soil and then you drop seeds right into the soil. No transplanting or grow lights, no transplant shock. This is our cheap PVC hoop house that can be made with salvaged or recycled materials, and then you can grow vegetables in the hoop house. What I love is how the cold frame warms the soil to 15F above the ambient soil temperature.

    Plants that do well  for seed starting in a hoop house are those that are cold tolerant. What the cold frame offers is a warmer soil and air temperature, which aids in germination. Yes, peas can be planted in snow, but they germinate much better in slightly warmer soil, same for lettuces and cabbages like kale, just a bit warmer and they sprout better. For this video I put sugar snap pea seeds in and radish seeds. Radishes are one of those seeds that are kinda fail-safe, so you feel ok even if some of the other plants didn’t take as well.

    hoop house cold frame plansWe have several videos on how to build a hoop house cold frame and how to use a plastic greenhouse like this, here is the video of us building our first cheap hoop house. I think its key to have the thermally controlled vent, if it gets too hot, you might consider putting a vent on each end of the hoop house. The PVC we use in this cold frame could be salvaged or recycled from another project or job site. The plastic we use is 3 mil plastic from the hardware store. With care this plastic will last several years. In the middle of summer, I hang my hoop house on the back side of the woodshed, and the plastic stays in good shape for a few years.

    seed starting hoop house
    Salad Greens Grow Really Well In A Hoop House

  • Repair Of Our Hoop House Cold Frame : GF Video

    Repair Of Our Hoop House Cold Frame : GF Video

    Setting up our simple cheap hoop house greenhouse for seed starting. This PVC hoop house cold frame works well for us and it was easy to build, here is the video of us building our the hoop house. The hoop house greenhouse allows you to get a head start on planting vegetables and seed starting. We started this in February to start warming the soil. This can be made for free if you find some scrap leftover lumber and PVC pipe. This plan uses short lengths of PVC pipe, which you may find laying around your yard, or your neighbor’s yard.

    My hoop house plans for this mini greenhouse are simple. Some 2x4s, some PVC pipe, and a piece of plywood. The thermal actuated vent keeps the hoop house from overheating. Link to buy the thermal greenhouse vents

    I use 3 mil clear plastic from the hardware store, it lasts a few years with care. I hang our mini greenhouse on the back of a shed when i am not using it. To attach the plastic to it, I fold the plastic over on itself and use lots of staples. You could also use a piece of lath or thin wood to hold the plastic to the wood. For the ends, I staple the plastic to the plywood end with the thermal vent and then cut off the excess plastic. For the other end of the cold frame hoop house, I simply bunch up the plastic and staple it to the 2×4.

    Cheap-Hoop-House-Greenhouse-Setup-2

    After a few days on your vegetable bed, this portable greenhouse will start warming the soil. Its amazing how warm it is inside the hoop house compared to the outside temperature. We have a video showing how a hoop house greenhouse can defrost your garden soil coming soon.

    In the video, the plywood I used for the end of the greenhouse, OSB, is not the best kind of plywood for outdoor uses. Use a better piece of plywood and paint it with a few coats of latex paint, it will last much longer if its painted.

    hoop-house-cold-frame-play

    Click here to watch our How To Build a Hoop House Cold Frame Video

    How-to-build-a-cold-frame-hoop-house-3

    Click here to watch How to build a cold frame video.

    Learn how to grow food year round, read Eliot Coleman’s Four Season Harvest book and Nikki Jabour’s Year Round Vegetable Gardener.

    Do you use a hoop house greenhouse? let us know comments or questions below:

  • DIY tapping maple trees for maple syrup – GF Video

    DIY tapping maple trees for maple syrup – GF Video

    Tapping sugar maple trees to make maple syrup is a big tradition in my part of Connecticut, so I wanted to show you how to tap maple trees to get maple sap to make maple syrup. We use plastic taps and tubing that are connected to buckets at the base of each tree. The advantage of using individual buckets is that some of the water in the sap will freeze in the collection bucket. The whole goal of boiling sap in an evaporator is to remove the water from the maple sap, so removing some of the water as ice is a super simple way to reduce your boiling time.

    Tubing Connector for tapping sugar maples
    Tubing Connector for tapping sugar maples

    We buy our taps and tubing from Leader Evaporator. The smallest length the tubing comes in is 500′, but don’t fret, its quite inexpensive, about $60 for that much tubing. To buy a lesser amount of tubing locally would cost just as much. We use Tree Saver taps. Buy a bunch of their tubing connectors too, you will need them to tie several taps into one bucket.

    In a future sugar maple tree tap video, we’ll connect several trees into one large collection barrel.

    Check your buckets every morning, scoop out the ice with a sieve, and then store the sap in a large barrel that is in a cold place packed with snow. The sap has to stay cold or it will spoil. You can tell if you sap has gone bad if it has a milky color to it.

    We have a bunch of maple syrup making videos, including how to boil down your sap into maple syrup, click here to watch our maple syrup videos

    Here is a great PDF from the Univ of Maine on how to tap trees and boil sap

    Have any questions or comments? Please post them below:

  • Cheap Grow Light Stand : GF Video

    Cheap Grow Light Stand : GF Video

    Easy grow light stand made from scrap lumber! Don’t buy one of those $100 grow lights, build this grow light stand to go with our DIY grow light video. Homemade grow lights have always been funky, but with this grow light stand, and our easy grow lights built from cheap shop lights, you won’t have to have this mess of lights and cords and rope to hang grow lights above your plant seedlings.

    I built this light stand out of scrap lumber I had in the garage, if you don’t have any, ask your neighbors or walk around the neighborhood on trash day, I bet you’ll find free wood to build this. You’ll need some chain as well, which you can get from the local hardware store.

    grow light video insert

    What I like about this grow light rig is that you don’t have to hang lights from the ceiling or some kludged together mess of ropes and wood. The side braces allow the light to be adjusted up as the seedlings start to grow. I’ve also got an idea for a stacked version of the grow light stand, so you can put one on top of the other and save space. neat.

    cheap grow light stand

    What kind of bulbs should you use in grow lights? I use regular old warm white or cool white fluorescent bulbs. Other may disagree with this, but here’s my thinking, we’re not growing plants, we’re starting seedlings, and the light output of these inexpensive lights works fine for me. Its been suggested not to mix the kinds of bulbs you use in a grow light made from shop lights, it can make the ballast wear out faster.

    cheap grow light stand

    cheap grow light stand

    cheap grow light stand

    Check out our special Seed Starting How To page here.

    What are your ideas for grow lights? let us know below:

  • Simple Paper Seed Pots : GF Video

    Simple Paper Seed Pots : GF Video

    Learn how to make simple paper seed pots, the best paper seed pots, I think. These paper pots are for those of us who can’t make origami paper plant pots, OK? Simple method to make paper pots for your seedlings and seed starting trays. If you want to make a pack of paper pots, just glue or tape them together, use what you got.

    Most newspapers print their paper with soy based inks now, so I’m ok with using regular newspaper for vegetable paper pots. And the newspaper will break down in the garden soil; you just open up the bottom of your paper pots just before planting to allow the roots to easily grow out the bottom of the paper pot.

    You can use different size jars to make different size newspaper pots. I used a peanut butter jar to make paper pots for tomato seedlings, and used a small mason jar for lettuce transplant paper pots.

    simple-paper-seed-pots-pin
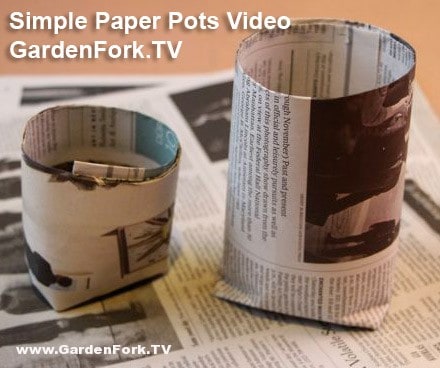
Its best to bunch the paper pots together under grow lights, as the paper can wick away moisture from the seed staring soil, packing the pots close together cuts down on that evaporation. You can watch our how to build a simple grow light video here, and our other seed starting videos here.


    How do you start your seeds in the spring, what kind of pots or trays do you use? Let us know below:

  • Oyster Mushroom Identification, Foraging, Hunting – GF Video

    Oyster Mushroom Identification, Foraging, Hunting – GF Video

    Foraging for Mushrooms this fall, I found a bunch of Oyster Mushrooms, and made this Mushroom Identification Video. Oyster Mushrooms are edible and delicious. They grow on dead or dying trees. The trees can be standing or on their side. I’ve found oyster mushrooms growing out of the ends of cut logs, and the stumps of dead trees.

    Oyster mushrooms grow in clusters, and are usually stacked on top of each other, the individual mushrooms are kidney shape. It has gills and doesn’t have much of a stem. Oyster mushrooms are white to tan colored, they are usually darker in color later in the season. The mushrooms in this video were harvested in late November.

    When harvesting, I always leave some mushrooms on the tree to allow the mother plant to spread spores to create more mushrooms. So don’t strip a tree of all its mushrooms, you may get a second growth of mushrooms on the same tree, so check back a week later, or after a rain.

    Be sure to be very sure what you are doing when foraging for mushrooms! Learn from someone who is a practiced mushroom hunter, or consider taking a class. Do a web search for your state or county or city and “mycological society” and you may find a group offering classes. Also check nearby nature centers.

    Click here to see our other mushroom identification posts

    Cross check the mushrooms you find with several sources, books are best, I think. I use several books for identifying mushrooms , below are the mushroom identification books I recommend:


    Click Here To Buy From IndieBound

    Click Here To Buy From Amazon


    Click Here To Buy From IndieBound

    Click Here To Buy From Amazon

  • Fall Garden Tour 2012  GF Video

    Fall Garden Tour 2012 GF Video

    GardenFork viewers have asked for a tour of the yard, so we walked around a bit to show you what is going on in the garden and yard and the kitchen, plus of course, the Labradors.

    What are you doing in your garden and home? What are you plans for the winter? Lets us know below:

  • Grow Vegetables in Winter with a Cold Frame : GF video

    Grow Vegetables in Winter with a Cold Frame : GF video

    Cold frames have been used to grow vegetables in winter since glass was invented. Winter gardening is made possible with cold frames and hoop houses. Using a recycled window, we built a cold frame last year – see our how to build a cold frame video here – and had good success growing vegetables in the winter and starting plants early in the spring using the cold frame.

    This year I took volunteer plants that had sprung up around the garden: Mustard Greens, Swiss Chard, Garlic, Chives, and parsley and transplanted these plants into the cold frame. These plants all do well in colder weather, so we’ll have some nice greens for salads in the middle of winter. How cool is that?

    The key to using a cold frame to grow vegetables is controlling the temperature inside the cold frame. We use an automatic vent that has louvers that open at about 45F, letting hot air out of the cold frame. It is called a crawlspace vent at the hardware store. You can buy the automatic vent online here.

    The recycled window we used is a single glaze, meaning it has only one sheet of glass, you can also use double glazed windows. As we say at GardenFork: Use what you got.

    You can make a larger cold frame, aka a plastic hoop house greenhouse, by watching our hoop house video here.

    Let us know your cold frame and hoop house tips and suggestions below, thx, eric.