Category: Video

  • Jiffy Mix Cornbread Recipe Hack – GF Video

    Jiffy Mix Cornbread Recipe Hack – GF Video

    Super easy cornbread recipe that’s kinda cheating, hence the name, Jiffy Mix Cornbread Recipe Hack. Lets take a box of Jiffy Corn Muffin mix and throw in a can of creamed corn to create a not-original recipe for pretty a darn good Creamed Corn Corn Bread Recipe. I’ve heard about different Jiffy Corn Mix hacks, and I wanted to try out one I had heard of from many people. The Creamed Corn Recipe Hack.

    Full Recipe at the end of this post. Here are some of our other cornbread recipe videos:

    I have a few corn bread recipes, but this one works for me and many people have commented that it works for them as well. There’s something in that comfort food vein that is evoked with Jiffy Corn Bread Mix. Hope they never change the box, who knows what the uproar would be? The idea for this recipe hack comes from my friend Charlie Shaw, and it sat in the back of my head for several years until I had the lightbulb moment to put a can of creamed corn into a box of Jiffy Cornbread mix. And you see what happened here. Cornbread Splendor.

    Do you use Jiffy Corn Muffin Mix in your cornbread recipe? What do you add to mix it up? Let us know in the comments below:

    Jiffy Mix Cornbread Recipe Hack – GF Video
    Cuisine: American
    Author: Eric Rochow
    Prep time:
    Cook time:
    Total time:
    Ingredients
    • 2 boxes of Jiffy Corn Muffin Mix
    • 2 eggs
    • 2/3 cup milk
    • 14oz can of creamed corn
    • 2 tablespoons butter
    Instructions
    1. Put a #8 – or 12″ cast iron pan in the oven at 375F for about 15 minutes
    2. Mix together the 2 boxes of Jiffy Corn Muffin Mix with the eggs, milk, creamed corn.
    3. Pull the cast iron pan out of the oven, drop in the butter and swirl it around, make sure it gets up on the walls of the cast iron pan.
    4. Pour the batter into the cast iron pan, and bake for 30 minutes.
    5. Check for doneness, the edges of the crust should be starting to brown.
    6. Let cool for a few minutes, run a spatula up under the pan to loosen the corn bread. Flip onto a plate


    Thanks for watching, eric.

  • How to Make Applesauce Recipe : GardenFork.TV

    How to Make Applesauce Recipe : GardenFork.TV

    Learn How to Make Applesauce as fall starts and apples ripen. We get apples from our local pick your own orchard or from our neighbors who have a very nice apple orchard. After you’ve made applesauce, you can can it, watch our hot water bath canning video.

    How to make applesauce the GardenFork way

    Making applesauce is not rocket science. It does take some attention, making sure you don’t burn the bottom of the pan, but is easy to do. This is something you can do with your children, get them involved in cooking.

    How to make applesauce

    Your first choice is are you a skin on or off kind of person. I leave the skins on when cooking down apples to make applesauce. The skins add the red-pink color to the sauce and also thickens it a bit more. I think there’s also a nutritional benefit to the fruit skins.

    Next up is do you want to remove the seeds and core before or after cooking down the apples. You can core the apples before adding them into the pot, or just put whole apples in to the pot and deal with the cores later. You can also just quarter the apples and remove the seeds later.

    If you are leaving the skins on, you’ll need a food mill. These are great tools to have around anyway for other projects. You can use it to make tomato sauce and de-seed other fruit pulp.

    Also important when making applesauce is a pot with a thick bottom so the sauce does not scorch, or you can use a heat diffuser. The key here is to cook down the apples, but not burn them, low and slow works well.

    So there you go, some pointers on how to make applesauce, below is the recipe.


    How to Make Applesauce Recipe : GardenFork.TV
    Recipe Type: Dessert
    Cuisine: American
    Author: Eric Rochow
    Prep time:
    Cook time:
    Total time:
    Serves: 32 ounces
    This recipe makes it easy to make your own applesauce.
    Ingredients
    • 3 lbs ripe apples
    • 1/2 cup water
    • 1 tablespon Cinnamon
    Instructions
    1. Core and cut the apples into quarters.
    2. Add cored – cut apples and water to the pot, put pot on high heat.
    3. When the water and apples start to sizzle, turn down the heat to low, cover, and let the apples cook down.
    4. Add the cinnamon.
    5. Mash the apples down occasionally, until the apples become sauce.
    6. If you like a smoother sauce, cook the apples down longer, taking care not to burn the apples.
  • Poached Egg, Bacon & Escarole Salad Recipe : GardenFork.TV

    Poached Egg, Bacon & Escarole Salad Recipe : GardenFork.TV

    Its been on my mind for awhile to make this Salad Lyonnaise recipe, the Eric way. We had this dish at Franny’s a while back, then out of no where, Mark Bittman puts it in the Food Section of the NY Times. So it was time for us to show you all the GardenFork Salad Lyonnaise Recipe. watch out!

    Do you have a version of this you do? Or another salad that uses egg as a dressing? Tell us below, thx!

  • Sardines, perfect portable food.

    Sardines, perfect portable food.

    Take the Labradors, a canoe,  some sardines, and you have the perfect afternoon. Today we talk about sardines and have a sardine sandwich while watching the Labradors enjoy the water.

    How do you use sardines? please tell us  below:

  • Wild and Urban Foraging for Lambsquarters : GF Video

    Wild and Urban Foraging for Lambsquarters : GF Video

    Today we forage for wild edible food in our own yard, forgaing for Lambsquarters, also called Pitseed Goosefit or Pigweed by some. Lambsquarters is all over our cities and yards, so whether you are doing urban foraging or wild foraging, you can learn in this GardenFork.TV show about Lambsquarters.


    Do you forage for wild plants? What edible plants have you eaten or found? Let us know below:

  • How to make a Window Flower Box : GardenFork.TV

    How to make a Window Flower Box : GardenFork.TV

    Here’s plans and video to make a window box for your flowers. Easy to build in a weekend. Many window boxes fall apart because they are made of wood, I solved that. And here is Eric’s solution: the GardenFork Window Box Plans. Watch the show and then check out our video on window box planting. Below is a window box plan and photos to accompany the window flower box video.

    How to make a window flower box

    The wood box is made out of pine. It’s sized to be just slightly larger than the plastic pot that holds the plants. You can use common pine, be sure to prime it first with a stain blocking primer, else the knots in the wood will bleed through the paint. You can buy a can of stain blocking primer in a spray can, hit all the knots with a second coat, it dries pretty fast.watch more plant a window box video

    Give the window box planter several coats of paint, it will last longer that way.

    window flower box

    I had to offset the hanger brackets because the side of the house has board and batten style wood siding. If you are attaching this do a house with vinyl siding or clapboard, you might want to slip behind the brackets some shims so the bracket screws don’t crush the siding.

    window flower box

    When cutting the front and back wood pieces, be sure to cut them 1-1/2″ longer than the width of the inner planter. If you have coated screws, or deck screws, use those, as they are less likely to rust and bleed out of the paint.

    plastic-window-box

    This is how I make a window flower box, please tell us about your window box experience below.

    window flower box

  • How to Requeen a beehive : GardenFork.TV : Beginning Beekeeping

    How to Requeen a beehive : GardenFork.TV : Beginning Beekeeping

    Learn how to requeen a beehive in this beginning beekeeping video. Requeening the hive is not rocket science, but you do need to know how a few things when you do this. This Beekeeping video will show you how to replace the queen in your beehive, or at least how we do it. As with many things in life, this is how we do it, others may do it differently.

    You replace the queen in a beehive when you want to improve the hive’s characteristics or when the original queen of the beehive has died for some reason. You also requeen a beehive to keep it from swarming.

    We are going to try requeening our hives in late August to prevent swarming the following spring. I’m told that queens replaced in the fall will not swarm in springtime, so we’ll see. Of course we’ll make a video about that.

  • How to hang or install a clothesline : GardenFork.TV

    How to hang or install a clothesline : GardenFork.TV

    Watch all our shows on GardenFork.TV : The Solar Powered Clothes Dryer , aka the clothesline is green and saves money. Installing a clothesline is super easy, if Eric can do it, you can do it. So go out and put up your clothesline and be green and save money.

  • Repair the power cord on your power tool : GardenFork.TV : power tool repair video

    Repair the power cord on your power tool : GardenFork.TV : power tool repair video

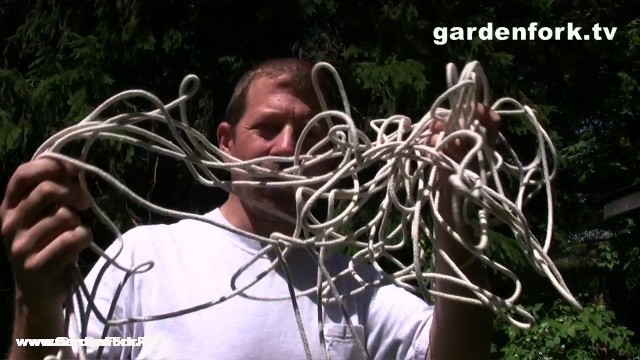
    Here we make a video on how to repair the power cord of your power tool. Don’t just wrap it in tape; here Eric shows you how he repairs the power cord on his circular saw. You can do this, watch the video and then repair your tools .

    DIY power tool repair is within the grasp of your average person, if i can repair my drill, circular saw, or other electric tools so can you. This DIY video shows you how to fix a circular saw, but this can be applied to other tools as well. Basically anything with  power cord can be fixed , just watch here and learn.

    Its important to match the wires correctly when re-attaching them, you want the polarized plug to work properly and safely. And be careful when soldering wires, the soldering iron is hot, learn from my experiences…

    And pay attention to where the power cord is when you are using a power tool, after we shot this how-to video, I proceeded to cut the cord of this saw yet again, and i repaired it yet again. Not unusual in my world.

    Do you have a good way to repair the power cord on a power tool? let us know below!

  • How to move a Beehive : GardenFork.TV Beginning Beekeeping

    How to move a Beehive : GardenFork.TV Beginning Beekeeping

    We decided to move a beehive, so I learned how to move a beehive, and now we’ll show you how we moved the it. Moving a beehive is not hard,  watch this Beginning Beekeping Series video and learn how.

    Have you moved a beehive? Please tell us below:

  • Salted Caramel Strawberry Recipe GF Video

    Salted Caramel Strawberry Recipe GF Video

    Home Made Halloween Treat or decadent dessert, this salted caramel strawberry recipe is good. And you don’t have to make the caramel from scratch.

    I asked Jaden Hair, author of the cookbook Steamy Kitchen and the website SteamyKitchen.com, on Twitter which of her recipes I should make on GardenFork.TV and her answer was immediate: a salted caramel strawberry recipe.
    Caramel Strawberry Recipe

    I asked that the recipe be simple, ( this is Eric cooking after all ) and this is super simple and super good. wow. yum

    I used popsicle sticks for this recipe, but you could also use bamboo skewers, ideally cut in half. Or use what you got, if you have something that will work for you. You could also dip the strawberries using a skewer and then lay each berry on wax paper to cool, and be finger food.

    At times, I’ve found supermarket strawberries to be under-ripe on the inside. There’s really no way to see if the strawberries are ripe inside even though they look red. If you can press on a berry, if they are hard, you know they are not ripe inside.

    caramel strawberry recipe-2

    Be very careful with the caramel. Its hot and its sugar, and it can burn you. Slow and steady wins the race here. Start out with a small batch of the caramel to get the hang of melting the caramel if there is some trepidation.

    this recipe is based on the Southern Living Farmer Market Cookbook

    Salted Caramel Strawberry Recipe GF Video
    Recipe Type: Dessert
    Author: Based On Jaden Hair
    Prep time:
    Cook time:
    Total time:
    Serves: 10 Treats
    An easy dessert or Halloween treat recipe
    Ingredients
    • 10 large fresh strawberries
    • 20 caramels
    • 1 1/2 tablespoons whipping cream
    • 1/4 teaspoon sea salt
    • 
1 cup coarsely chopped mixed nuts (peanuts and almond slivers)
    • 
Wax paper
    Instructions
    1. Soak strawberries in a ice bath for 5 minutes to restore their perky leaves
    2. Pat strawberries completely dry with paper towels
    3. Microwave caramels, whipping cream, and salt in a microwave-safe bowl at MEDIUM(50% power) 2 minutes or until smooth, stirring at 1-minute intervals.
    4. Dip each strawberry halfway into caramel mixture.
    5. Roll in nuts, and place on lightly greased wax paper.
    6. Let stand 15 minutes.
    7. Serve immediately, or cover and chill up to 8 hours.
  • Easy Cake Recipe Peach Dump Cake – GF Video

    Easy Cake Recipe Peach Dump Cake – GF Video

    I’m not a great baker, so this easy cake recipe appeals to me. This is called a Dump Cake Recipe.

    Watch here as we make this peach dump cake that tastes good and is quick to make.

    This all came about as I had a can of peaches and wanted to make a dessert with them. So I asked on Twitter for a peach dessert recipe, and @writersinthesky answered with this peach cake recipe.

    What I like about this cake recipe and dump cakes in general is that they’re a great emergency dessert. If you forgot to plan a dessert or you just decide that you want to add a simple dessert to your dinner, you can make it happen. Because you, like me, always plan ahead, you can keep a can of peaches or a can of pears or other fruit (ideally in a light syrup not the heavy syrup) in the kitchen. Pull it out, add flour, and boom you’ve got a cake.

    This easy cake recipe comes together in minutes. All you really have do is remember to preheat the oven. I like to use a glass cake pan, I think the crust is more crunchy, but you can use a metal pan as well. Use what you got is what I say. You can do this, it’s easy, it’s quite good and it’s wicked simple. So go ahead make this and tell me your thoughts.

    Peach Cake Recipe

    1 cup self rising flour
    OR 1 cup all purpose flour + 1 1/2 tsp baking powder and 1/2 tsp salt

    1 stick of butter

    1 cup milk

    1 cup sugar – you can use less sugar, this cake is pretty sweet

    1 can of peaches, drained, light syrup preferred, 20-24 oz

    Preheat the oven to 375F

    Put the stick of butter in a 9×9 baking dish, preferably a glass dish, and place in the oven to melt the butter.

    Mix together the dry ingredients, then add the milk and mix.

    Pour the batter into the heated baking dish with the melted butter, then add the can of peaches.

    Bake at 375 for 30-40 minutes. The cake is done when a knife comes out clean.

    recipe ©2014 Eric Rochow all rights reserved

  • Winter Fondant Feeding – Beekeeping 101 Video

    Winter Fondant Feeding – Beekeeping 101 Video

    In late winter, when you have a warm day, say 44-50 F, its a great opportunity to quickly check your honeybees and beehive. In this beekeeping 101 video, we show how we open the hive and place some fondant and a grease patty in the hive to get the bees through the last bit of winter. Links to more of our beekeeping videos at end of this post.

    Note: Since making this video, we have changed our methods and are no longer using the styrofoam outer covers or fondant, but its still a good video on caring for your bees in winter. Watch our dry sugar feeding videos here.


    Your honeybees may or may not have enough food stores to make it thru this last part of winter, but I am of the mind that it pays to put in some fondant. Other beekeepers will have differing opinions on this and many other practices related to beekeeping. It is too cold to feed your honeybees sugar syrup in late winter, feed them fondant.

    winter beek check list watchWe have produced this series of Beginning Beekeeping Videos to document our first years of beekeeping to show people how fun it really is and to demystify it, and to spread the word on raising honey bees. We are not beekeeping experts, we are still learning. Tell us your experiences below and we can all learn more.

    Bee fondant and Grease Patty recipes are based on information from Cass of WVBeekeeper’s Blog and the BeeSource forums . A big thank you to Cass for his writings.

    Fondant from WVBeekeeper:

    Fondant Bee Candy

    Fondant bee candy can be fed directly to the bees once cooled. Fondant is a good food source for mini-mating nucs because there is no drowning involved when you have a small amount of bees. It is also common to use this recipe in small quantities to plug the hole on a Queen Cage.

    > 4 parts (by volume) white sugar
    > 4 parts (by volume) 2:1 Syrup or HFCS
    > 3 parts (by volume) water

    Boil water and slowly add the syrup and sugar until dissolved. Continue heating until the mixture reaches 238°F (114°C). Without mixing allow the solution to cool until it is slightly warm to the touch. Then begin to mix and aerate the solution. As you do this the color should lighten. Pour into shallow dishes or mold and save for later use. I prefer to make the fondant thin enough to where I can work it into an empty frame of drawn comb.

    Grease Patties:

    I made my own based on reading thru the Bee Source forums and WVBeekeepers blog.

    2 cups vegetable shortening  – NOT butter or other flavored shortening

    4 cups white sugar

    10 drops of food grade pepperment oil or wintergreen oil

    1/4 cup mineral block – this is a mineralize salt lick you can get at a farm – ag supply store. break off a chunk with a hammer.

    mix this together and form into 4″ wide patties, they have to be thin enough to be placed between hive supers.

    you can wrap these patties in wax paper , put in a freezer back and freeze for future use.


    Read more of our beekeeping posts here and watch beekeeping videos here. Thx!

    beekeeping-sugarcake-vid-thumb

  • Fireplace Grilled Salmon : Eric’s Recipe

    Fireplace Grilled Salmon : Eric’s Recipe

    Grilled Salmon done with Fireplace Cooking, neat. Fireplace cooking means you don’t have to fire up the stove and your house doesn’t smell like fish or steak the next day. Watch as we grill salmon steaks with this simple recipe .

    Do you cook in your fireplace? Please come tell us about it below!


    Fireplace Grilled Salmon Steak Recipe:

    4 Salmon Steaks, as fresh as possible

    Olive Oil, Salt, Pepper

    Start a fire in the fireplace a few hours before cooking, allow the wood to break down into coals, kinda like charcoal.

    Place your cooking grill over the coals in the fireplace – be careful doing this.

    Allow the grill to heat up and clean the grill with half an onion rubbed over the grill.

    Drizzle olive oil and then salt and pepper to each side of the steaks.

    Place the steaks on the hot grill, and let each side cook about 5 minutes. This time may vary depending on how hot the coals are.

    Flip the fish, and check in a few minutes for done-ness. The flesh will flake easily when its done. Ideally you will take the fish off the grill just before the desired done-ness.

    Please let us know your fireplace cooking recipes here:

  • Beans and Toast Recipe : GardenFork.TV

    Beans and Toast Recipe : GardenFork.TV

    I had Beans on Toast for the first time last month, at Fort Defiance in Red Hook, Brooklyn. After the first bite I knew I had to make the Beans on Toast recipe for GardenFork.TV .

    Super simple, yet tastes great and is healthy as well. Lots of protein here, and it tastes even better with toasted multigrain bread. The recipe is below

    Eric’s Beans On Toast Recipe

    1 can of UK Heinz Vegetarian Beans

    or

    1 can of American Baked Beans

    or

    a pot of freshly cooked red kidney beans – i cook them with sauteed onions and cumin

    Bread for toasting – multigrain is best i think

    Eggs

    Grated Cheddar cheese, or the cheese of your choice.

    Toast your bread, and warm up the beans.

    Fry the eggs, how many depends on how many people you are feeding. Sunnyside up or just slightly cooked over easy are best, as the yolks run over the beans that way.

    Place the 2 pieces of toast on a plate, cover with 1 cup of beans, top with the fried eggs, top off with some grated cheese. The heat of the egg should melt the cheese a bit.

    Then eat. and tell us here how it is. ©2010 Eric Rochow all rights reserved

  • How to make Biscuits and Gravy, the Eric Recipe

    How to make Biscuits and Gravy, the Eric Recipe

    I love biscuits and gravy, and this recipe is super simple. First you make biscuits with this recipe, then you make the gravy with some of the leftover fat from cooking the sausages. Then you eat.

    Biscuits and Gravy Recipe:

    2 cups of all purpose flour

    1 tablespoon baking powder

    1/4 teaspoon baking soda

    1/2 stick of *cold* butter – 4 tablespoons

    1 teaspoon salt

    3/4 cup buttermilk, or put 1 tablespoon white vinegar into 3/4 cup milk and let sit for 5 minutes for a quickie buttermilk substitute. you can also use yogurt, but you may need to add a bit of water when mixing the dough in the processor.

    * to make your own baking powder, combine Cream of Tartar to Baking Soda in a 2:1 ratio. mix well and only mix what you’ll use in a few weeks.

    Preheat oven to 450

    Add all the dry ingredients to the food processor, pulse to mix.

    Cut  the cold butter into small pieces and drop in.

    Pulse food processor until the flour looks grainy like cornmeal. do not over-pulse this mixture.

    Slowly pour the buttermilk into the food processor while the unit is turned on.

    Mix until the dough balls up.

    Turn dough out onto a floured board, and press out to 1/2″ thickness

    Use a muffin cutter to cut out round biscuits, and place them on a cookie sheet lined with parchment paper.

    Bake about 11 minutes, until the biscuits rise and brown a bit. Cool on a wire rack.

    Gravy Recipe

    After cooking the sausage, leave about 2 teaspoon of the fat in the pan. Dust in the 1/2 the flour, and mix it around until the flour starts to brown. Slowly add 1 cup of the milk. The gravy should thicken nicely slowly stir in the remaining 1 cup of milk and stir to thicken.

    To plate the biscuits and gravy recipe:

    split open 2 biscuits and place the sausage gravy over them. Season with plenty of pepper and enjoy.

    ©2010 Eric Rochow

  • Practical Green Building and Renovation : GardenFork.tv

    Practical Green Building and Renovation : GardenFork.tv

    Doing a green renovation or building a green building? Watch as I talk with Gennaro Brooks Church of EcoBrooklyn and tour a Brooklyn brownstone he is renovating using practical and pragmatic green building techniques.

    Do you use these techniques? Tell us below in the comments

  • How to make a bread peel or pizza peel : Gardenfork.tv

    How to make a bread peel or pizza peel : Gardenfork.tv

    I needed a pizza and bread peel for our video shows on How to make pizza dough and bake a pizza, and our show on the Artisan Bread in 5 minutes a day method. Instead of buying a pizza peel, I decided to make my own. I went into my basement shop, look around for some scrap plywood, and make a pretty good pizza – bread peel.

    You can make this peel from a piece of 2’x2′ 1/4″ plywood from a home improvement store, and a 1″x2″ stick. You’ll need two 3/4″ wood screws, some 60 grit sandpaper, and white or wood glue.

    What do you think? Watch the show and let me know, have any suggestions? write them below. thx, eric.