Category: Video

  • Flux Core Welding Success! – GF Video

    Flux Core Welding Success! – GF Video

    My first successful flux core welding project, not without an ‘oops’ moment, but watch and read along here. You may learn something, or teach me something. Let’s see.

    I first heard of flux core welding from Jimmy Diresta, when he suggested to a viewer that it was a good beginning welder to buy. Officially called Flux-cored arc welding, aka FCAW or FCA, it is used widely in construction.

    flux core welding

    I have seen a lot of maker people on YouTube using MIG welders for their projects, but MIG welders can be expensive, and you have to use a tank of gas (usually argon) with MIG welding.

    A while back I had taken a 4 hour intro to welding class at a Brooklyn metal arts collective, but I wasn’t sold on getting a MIG welder.

    So I was at Harbor Freight Tools and saw they had a flux core welder on sale for $100. I know Harbor Freight is famous for cheap tools, and it could be a gamble to buy a flux core welder from them. But that’s what I did.

    flux core welding

    Back to YouTube I went and watched many flux core videos. Some were awful, some were great. But I learned enough to start welding. An even greater source of help was my first flux core welding video, where I asked people to post constructive comments on how I could be a better welder. It worked, lots of great comments.

    flux core welding

    A year later that vid still gets nice people writing out what I should be doing better. It was these comments that were in my head when I was repairing the tree guard with the flux core welder. And my welding has improved from the first welding video, I hope you can tell!

    flux core welding

    You can also buy an cheap flux core welder online:

    flux core welding

    A cheap flux core welder will work fine for welding thin metal and repair stuff around the house. If you want to build furniture, you should upgrade to a MIG welder. The cheap flux welders are AC welders, the better units are DC, and more expensive. I have seen some hacks online to convert a cheap AC welder to DC, but have yet to attempt that.

    flux core welding

    This type of wire fed welder is called flux core because the flux is built into the center of the welding wire. This wire is fed from a spool inside the welding unit, through a hose to the tip of the wand. When the wire is energized (by pressing the red trigger on the welding wand) the wire at the welding tip is heated, flux is released, and it allows the wire to melt, create heat, and weld the pieces of metal together.

    This core inside the welding wire also has ingredients that create a shielding gas around the weld point. MIG welding uses an intert gas, usually argon, as a shielding gas. The advantage of FCAW is that you can use it outside in windy conditions. With a MIG welder, the argon gas may get blown away by the wind. As you see in the video I made, the flux core unit is super portable. All you need is a heavy duty extension cord.

    flux core welding

    The down side of flux core welding is it shouldn’t be used indoors unless its really well vented. It puts out some noxious smoke. MIG welders can be used inside. The other downside is it can be harder to see the weld puddle, the melted metal you are working into a joint, with flux core. The process creates slag that can get in the way.

    Maple Syrup Evaporator Build
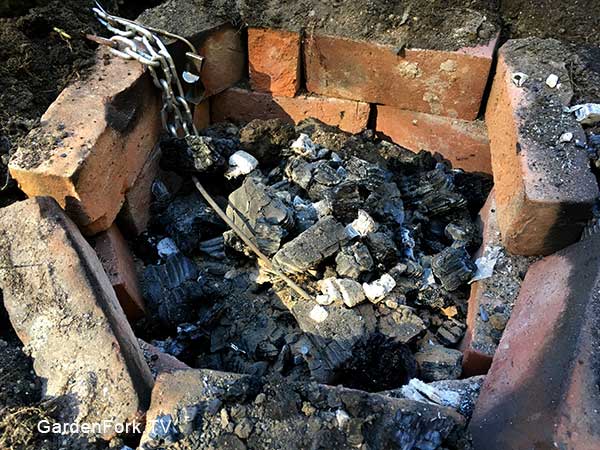
I did some welding on the homemade maple syrup evaporator project

    But I do think a cheap unit is a fine way to get into flux core welding. If you find you really like it, you can sell your cheap welder and upgrade to a nicer unit. If you find you don’t like it, you can still sell the unit.

    Let me know your experience with welding, I am always learning from you. Thx!

  • Troy Bilt Snow Blower Review & Video – Storm 2690 XP Snow Thrower

    Troy Bilt Snow Blower Review & Video – Storm 2690 XP Snow Thrower

    Here’s my Troy Bilt snow blower review and video of the Storm 2690 XP Snow Thrower. If you want to move snow, this snow blower does that nicely, even that wet heavy snow, as you’ll see in the video. We have also done some other Troy Bilt reviews here.

    At the end of my reivew on this machine, I’ve posted a video of this same rig by my friend Erin of The Impatient Gardener.

    My Troy Bilt Snow Thrower Review of the Storm 2690 XP Snow Thrower

    First, Troy-Bilt has been a regular sponsor of GardenFork, and this video is sponsored by them, but as always I will be straight with you about my thoughts.

    This is a two stage snowblower, which means it has a large spinning auger that brings the snow you are clearing into the machine, and then a second rotating scooper in the back of the unit pushes it up through the adjustable chute and out of your driveway. Two stage snowblowers are much better than single stage blowers, especially for wet snow and storms with more than 4-5″ of snow. For more specs and info here is the 2690 page on TroyBilt.com

    Troy Bilt Snow Blower Review
    Two stage system

    This two stage system worked quite well for us this winter. It has been a wet one. Not a lot of big dumper snow storms, but weekly snow that has been wet. Often we would get a mix of rain and snow. The Storm 2690 XP did not fail to toss this mess 20′ away. Nice.

    Safe to say it will also take on much deeper snow. It has the power and the auger size to toss the deep stuff as well.

    Since we all know I am not great at complete paragraphs, I’ll list out the features here and some quick thoughts on them.

    Snow being tossed nicely

    The best feature that is worth the extra dollars here is the joystick controlled snow chute. You don’t have to crank a rod or lean over the machine to turn the chute left or right every time you turn to make another pass on your driveway. Your right thumb moves the red knob and the chute turns side to side and points the snow chute up or down.

    Chute Control Joystick

    The electric start fired up the engine right away – you use a extension cord to start it – no battery. It also has a pull cord, which I used as well.

    The heated handles were a bonus, I have never used a blower with those before and forgot this had them until I grabbed the handles to start working the snow.

    troy bilt snow blower review
    Hand controls and heated handles.

    Muscling a snow blower at the end of a pass is never fun, so Troy Bilt added two triggers underneath the handles to steer to make it much easier to control. Pull the handle and the blower turns. Nice.

    Troy Bilt Snow Blower Review
    Air filled tires

    One way to make equipment less expensive is to use solid or plastic tires, and when you are moving snow, you want real tires, IMHO. I was wondering if this snowblower would do better with chains, but for my needs that answer was no. The air filled snow tires worked well. There’s a few times where you will have to tip the snowblower back on its  wheels to get more weight over the axle for traction, but I think that is a given with any machine.

    Troy Bilt Snow Blower Review
    Oil Drain Tube!

    Attention to detail is something that I think Troy-Bilt does well. A good example is the oil drain pipe on the bottom of the engine. It can be a pain to drain oil from a small engine. The drain plug is usually in an awkward spot, and you will spill oil all over when draining the crankcase. But Troy-Bilt makes it a much nicer experience just by adding in this extension pipe so you can drain the oil easier. Simple = Good.

    Also up by the handles, there is storage for two shear pins. If you hit a big rock, these pins break, saving the auger. Having two on hand is a brilliantly simple addition. Yes, you probably have some spare shear pins in the garage, but where?

    I did not find any red flags with this blower. I’m not sure why snow blowers have to have 6 forward speeds, but that’s not unique to TB.

    Like most everyone, I like to think I can get good stuff at the inexpensive tool store with a nautical sounding name, and sometimes you might find a deal. But with snow blowers you get what you pay for, and I think this one is worth the price.

    Here is Erin’s video of the Troy Bilt Snow Blower:

    The NY Times product review site, The Wirecutter, reviewed the 30″ version of this snowblower favorably.

    Some of the other Troy-Bilt equipment we’ve reviewed:

    Troy Bilt Flex Review, One Engine Goes A Long Way

    Troy Bilt FLEX Log Splitter, How Does It Stack Up? – GF Video

  • Hook Up A Generator To Your House With This Generator Interlock Kit – GF Video

    A generator interlock kit is a simple and safe way to hook up a generator to your house. I just learned about this kit, and wish I had installed it in my house. I installed a generator transfer switch in my house, now I wished I did this instead. Watch the video I made below and read through for more information.

    Steps To Install A Generator Interlock Kit

    Generator Interlock Kit
    Circuit breaker with metal shield provides power to the panel from the generator.

    First of all, I strongly suggest you hire an electrician for this project. I am showing you the steps because I myself was curious how the generator interlock worked. Sticking your hands into an electric service panel is not for the non-professional, OK?

    Generator Interlock Kit
    Interlock in generator ON position. Not how it blocks the line power from being turned on.

    Basically, an interlock provides a way to feed power from your generator into your electric service panel without backfeeding generator power back down the utility line. Backfeeding is bad, it means sending electricity from your generator into the electric grid, aka, the utility wires that connect to your house to the local power company. Backfeeding can kill a lineworker.

    The interlock provides power to your home in a simple way. A 220 volt circuit breaker, matched to the amperage of your generator, is installed at the top of the stack of breakers that feed power to the various rooms and appliances in your house. This 220 breaker is connected, with the proper gauge wire, to a weatherproof outlet outside your home. (NOT in your basement)

    Generator Interlock Kit

    The interlock kit is a metal slide, that is fabricated for the model of circuit panel you own. Interlocks are not avail for all electric panels, you will need a generator transfer panel if one is not made for your panel.

    This mechanical slide does one simple thing. It keeps anyone from turning on the main power breaker (power from the utility lines) when the generator circuit breaker is turned on, and vice versa. Utility power is feeding the circuit panel, the slide is pushed down, generator feeding the panel, the slide is up. The interlock prevents both the utility power and the generator power breakers from being ‘ON’ at the same time.

    Couple of Things I Learned About Generator Interlock Installation

    • Site your weatherproof outlet where you can easily get to it, and have the generator near by.
    • Make sure the outdoor outlet is mounted into studs or brick, you will be yanking on it to plug and unplug the power cord
    • Interlocks are not available for all circuit panels.
    Generator Interlock Kit
    The 10-3 wire can be run through a hole in the mortar, but the bolts holding the outdoor outlet must be set into the brick or a wood stud.
    Generator Interlock Kit
    20 amp L14-20 generator cord, and the corresponding outlet on the generator.

    Here is a list of items you will need for the installation, your electrician may need additional materials, talk to them before purchasing anything. This is sized for a 20 amp 220 volt generator plug & outlet, the L14-20.

    Generator Interlock Kit (this is the one for our panel, yours may be different)

    20 amp Two Pole Circuit Breaker (for our brand of circuit panel)

    Generator Power Cord (20 amp with L14-20 plugs)

    Outdoor Outlet For Generator (20 amp)

    Let me know thoughts and questions, I’ll do my best to answer, thx!

    Hook Up A Generator To Your House – GF Video

  • Dandelion Greens & Bacon Salad Recipe : GF Video

    Dandelion Greens & Bacon Salad Recipe : GF Video

    What do you with dandelion greens? You make a salad of course. Watch our video to find out how to identify and forage for dandelion in your yard, and make a great salad. If you are looking for edible plants in your yard, make sure the yard hasn’t been treated with herbicides or other things that are bad for you to ingest. Check out our other foraging videos here.

    How To Find and Prepare Dandelion Greens

    Wild Greens are abundant if you live in an area with grassy weedy places. They grow, we eat them. Things like mustard grow wild, wild onions, dandelion, purslane, burdock, all sorts. What I like about dandelion is it is ubiquitous and abundant, and it grows all summer. It is said that the dandelion greens are more bitter after the dandelion flower have bloomed, but my personal experience has been mixed. It is true the older the leaf, the more bitter it will be.

    I do suggest buying at least one foraging plant identification book, I’m a big fan of Leda Meredith’s Foraging Books, she also has regional foraging books out as well. A second book you might consider is Joy Of Foraging.

    Dandelion Greens

    Follow this simple dandelion greens recipe, and all will be great. It uses items you probably have in your fridge.

    Dandelion Salad Recipe  makes 2 salads

    1 bunch of dandelion, about a large handful, tap root and flower stems removed, washed and dried.

    2 strips of thick cut bacon

    balsamic vinegar

    2 eggs, poached for 3 minutes

    1 avocado

    Cook the bacon to crisp

    While the bacon is cooking arrange the dandelion in two salad bowls or plates.

    Cut the avocado in half, core and add to the bowls

    Add the poached egg on top of the greens,

    Cut the bacon into small pieces, spread over the salad

    Pour about a half teaspoon of the bacon grease from the pan over each bowl.

    Serve as soon as possible.

    Now on to foraging for Lambsquarters!

    Wild and Urban Foraging for Lambsquarters : GF Video


  • Does The Instant Pot Yogurt Recipe Work? GF Video

    Does The Instant Pot Yogurt Recipe Work? GF Video

    I was skeptical about the Instant Pot yogurt recipe that is in the instapot manual, so I set out to test it and refine it. I am a big fan of the this multicooker. Watch my video below and read through the instructions below to learn how it all came out.

    Read on to learn how to make yogurt in the instant pot.

    How to make the Instant Pot yogurt recipe, step by step:

    There are 3 steps in the instant pot yogurt recipe process. Heating the milk, cooling the milk, fermenting the milk.

    A couple of decisions you have to make from the get go. What kind of milk should you use? Full fat or 2% works for me, the Fat Free milk isn’t great, in my opinion, but use what you got. You can use raw milk also, but I have not tried this yet. I am told not to use organic milk from the store, as it is ultra pasturized and the proteins wont line up properly to make the milk into yogurt.

    I use glass canning jars to make yogurt, this works for me. If you want to make a lot of yogurt, you can make a big batch right in the pot. Clean the jars with hot soapy water, running through a dishwasher works well also.

    Instant Pot Yogurt Recipe

    Pour a cup of water in the bottom of the cooker. Place in the bottom the wired stand thing that came with your multicooker. This will keep the glass jars above the water. Pour milk into the glass jars. Close the lid and make sure the vent is set to ‘sealing’.

    Press the ‘Steam’ button and using the plus and minus buttons on the control panel, set it to 1 minute. In a few seconds the Instant Pot will start the steaming process. It will take longer than one minute, so don’t stand there and watch it. Once the steam process is done, (about 15 min) the cooker goes into a keep warm mode. Turn off the cooker, but DO NOT open the lid. Don’t vent the steam either, allow for natural release. To do this, let the cooker sit for about 20 minutes, turn the vent to release any pressure, and open the lid. Remove the jars, place on grate to cool.

    Instant Pot Yogurt Recipe

    Cooling and Adding the Yogurt Starter To The Instant Pot

    The heated milk now has to cool to 115F or lower. When you hit that temperature, you can add your yogurt starter. I like this Yogourmet brand starter. You can also get some really cool heirloom yogurt starters here.

    Instant Pot Yogurt Recipe

    Remove the wire grate and water from the pot. Place the jars back in the cooker, close the lid, and press the ‘Yogurt’ button. Using the + and – buttons, set the Instant Pot to ferment the yogurt for 6 hours. I have found that the longer you heat the yogurt mix, the thicker the finished product is. 6 hours works for me, see the instructions that come with your starter. Let me know what works for you in the comments below.

    Instant Pot Yogurt Recipe

    You can also make yogurt in a styrofoam container or a cardboard box, learn here.


    How to make yogurt in a cardboard box – GF Video

  • Balsamic Vinegar Dressing Recipe GF TV

    Balsamic Vinegar Dressing Recipe GF TV

    Here’s a simple balsamic vinegar dressing recipe that you can make in 10 seconds. And here’s a video to show you how to make salad dressing. This salad dressing recipe follows most others, except for a secret flavor boosting ingredient! Watch the salad dressing video to see what the ingredient is.

    Store bought salad dressings are usually too sweet, and are full of calories and cheap vegetable oil. We call it ‘glop’, because that’s what it looks like. Using simple ingredients, Eric’s oil and vinegar dressing blows away this store bought stuff.

    This salad dressing is a vinaigrette, an emulsion of oil and vinegar bound together with mustard. You can use deli, brown, or dijon mustard. You can also use ground mustard, but use less than you would of the wet mustard.

    I’m thinking we should do a series of videos about salad dressings. This balsamic vinaigrette is our mainstay, but I’d like to experiment with miso based dressings, and make one of those carrot ginger dressings, like the one at DoJo in New York City. I’ve bought jarred carrot ginger dressing, but it doesn’t taste the same as the stuff we get in the restaurant.

    Eric’s Version of the Balsamic Vinegar Dressing Recipe

    Ingredients
    •    1 tablespoon Brown or Dijon Mustard
    •    4 tablespoons Extra Virgin Olive Oil
    •    1 tablespoon Balsamic Vinegar
    •    1 dash Worcestershire Sauce
    •    pinch salt & pepper
    Cooking Directions
    1. put the mustard in a large salad bowl, add the olive oil, vinegar, Worcestershire Sauce, salt and pepper.
    2. whisk the ingredients together with a fork or whisk.
    3. add salad greens to bowl and toss, then add additional salad items and toss again.
    4. serve in individual bowls.

    Mayonnaise Recipe Yum! How to make Mayonnaise

  • Oven Baked Sweet Potato Dog Treats Recipe – GF Video

    Oven Baked Sweet Potato Dog Treats Recipe – GF Video

    This Oven Baked Sweet Potato Dog Treats Recipe is wicked simple. And probably the easiest dog biscuit recipe you are going to find. Here’s my video on how to make them:

    How to make this sweet potato dog treats recipe:

    Making these treats is the polar opposite of complicated rocket science. But it took a while to figure out how to do this right.

    The sweet potato dog treats you buy in the store are, besides being expensive, not falling apart and crumbling in your hands. I tried to make these several times and mine never would stay intact.

    But I persevered as I didn’t want to pay the high prices these dog treats get in the stores. I don’t blame the makers of these treats for making money, its how we all pay the bills. I imagine the packaging also makes these treats expensive, I have seen them in stores in hard plastic containers or those foil-plastic bags. Not cheap.

    Easy enough to start out here. Hopefully you have or can borrow a mandolin. You can pick on up here: http://amzn.to/2hDGt85 (affiliate link)  If not, cut the sweet potatoes into 1/4″ slices, as uniform as possible with a sharp knife.

    Sweet potato dog treats recipe

    BE VERY CAREFUL when using a mandolin. They can cut your fingers. Most have a vegetable holder-guard,  or you can get one of those chain-mail gloves. And put a towel under the mandolin when cutting the sweet potatoes.

    The secret I found in a another version of this recipe that uses a food dehydrator is this.

    Spray the sweet potato slices with a very light coating of vegetable oil.

    Sweet potato dog treats recipe

    This allow the dog treats to stay slightly pliable, and they wont crack when being stored.

    In our previous sweet potato dog treat recipe video, we used an electric dehydrator to dry the snacks, but this time I wanted to see how the oven would work. The lowest oven temp on my oven is 170F, so I set it to that and turned it on. The dog treats dried in about 3  hours.

    Sweet potato dog treats recipe

    And how cool is that?

    Sweet potato dog treats recipe

    Sweet Potato Dog Treats Recipe : GF Video

  • Simple DIY Chalkboard With A Pallet Wood Frame – GF Video

    Simple DIY Chalkboard With A Pallet Wood Frame – GF Video

    Really nice DIY Chalkboard you can make in less than an hour. We use chalkboard film and pallet wood to simplify the project. Watch the video below, then read through the instructions and photos:

    DIY Chalkboard Parts List

    Chalkboard Film, aka contact paper 24″ wide

    Flat Black Spray Paint

    1″ drywall screws

    Picture Hanging Wire

    24″ x 24″ MDF or smooth plywood (avail at local home center)

    Flip Bit Drill & Screw Driver

    Cordless Drill

    DIY Chalkboard Pallet Project

    Cut your pallet wood to size, the top piece of wood will be 24″ wide. Depending on the width of the pallet wood you are using, the sides and bottom lengths will have to be measured. Note how there are no angle cuts in this frame layour. This is the same layout used for all of the windows in our house, which I love because its simple and it works.

    Spray paint the edges of the MDF or plwyood, and the front and sides of the pallet wood frame pieces. They will dry quickly if you use flat paint. You can also stain this wood, or use a poly-stain. Poly stains are a tinted polyurethane. Saves some time in the process with that product.

    DIY Chalkboard Pallet Frame

    The film I used is 24″ wide, so its a perfect fit for the MDF. Pull back about an inch of the backing paper of the chalkboard film, and align it with one edge of the MDF/plywood. Smooth down that edge from the center to the outside corners. Then pull the backing paper off slowly, laying down the chalkboard film as you pull. Keep the film aligned with the edges of the MDF, and do your best to pull out the wrinkles in the film.

    After you lay down the film, put the backing paper over the front of the film, and smooth out the wrinkles from the center outward with a flat edged tool. A dough scraper from your kitchen works well.

    DIY Chalkboard

    Dry fit the pallet wood frame over the top of the chalkboard film. Use a flip bit to drill pilot holes through the pallet wood that frames your DIY chalkboard. This keeps the wood from splitting when you screw into it.

    DIY Chalkboard

    We added picture frame wire on the back of the DIY chalkboard to make it easy to hang.

    DIY Chalkboard Pallet Project

    Picture hanging wire has this neat trick when you wrap it back on itself. The wire grabs onto itself, no knots needed.

    DIY Chalkboard Pallet Project

    How cool is that! What fun. Let me know suggestions below, thanks!

    Easy Flower Box You Can Make

  • Can you use soap on cast iron? 3 cast iron myths – GF Video

    Can you use soap on cast iron? 3 cast iron myths – GF Video

    Can you use soap on cast iron? A HUGE debate in the world of cast iron cooking, watch our video to find out the answer:

    Can You Use Soap On Cast Iron

    Yes. Here’s why:

    When you apply a thin film of vegetable oil, ideally flax oil or sunflower oil, to the pan, and then heat it, the oil polymerizes. Polymerization is a chemical process where oil becomes a plastic like finish. The oil dries out, and is no longer an oil.

    Dishwashing soap breaks down oil. Since the oil you applied, has been heated & dried, it is no longer an oil, the soap doesn’t dissolve it. So the mindset of soap ruining the finish on cast iron doesn’t apply here. The cast iron pan seasoning is now a polymer. Any food or cooking oil will get cleaned out by the soap, but the seasoning stays.

    How To Care For Your Cast Iron

    Use enough oil to cook your food, and when done, wipe out the pan with a towel. If there is food sticking, or you made a curry or some fragrant dish, put a little soap in the pan and clean out the pan. Set the pan back on the burner, heat it up to dry out the water. Apply a very thin layer of vegetable oil, ideally flax or sunflower oil, wipe out the excess, and allow the pan to cool off.

    That’s it! Here’s the best how to season cast iron video:

    how-to-season-cast-iron-play

    A conversation in the YouTube comments of this video says a lot about this question, can you use soap on cast iron:

    The Real Jim Guy: “I season my cast iron the old fashioned way with lard and i tell you from experience that dish soap strips the finish right off it to where everything sticks like glue.”

    John B: “I believe that’s because lard doesn’t polymerize they way that olive oil or flax seed oil does under heat. so it remains soluble to the effects of the soap.”

    Galanie: “True, unhydrogenated animal fats never dry really and won’t polymerize the way that seed oils do.”

    Brrag: “I have washed my cast iron skillets with dish washing detergent for 40 years. my mother and grandmother washed theirs the same way. i once heard you weren’t suppose to use soap on them so just started cleaning with hot water. they got so nasty smelling, i went back to the soap again. Using soap does not change the taste of your food. On the other hand, not using soap will change the taste of your food; it will taste like you cooked it in rancid oil.” (Probably the best argument on can you use soap on cast iron)

    Pappy: “You make so much sense… used to be called common sense but it’s not very common any more. I have a cast skillet that is at least 80-90 yrs old. My grandmother got it at Montgomery Wards (remember them?) Anyway she and my mother after her used this pan daily, washed it in soapy water, dried it, heated it and put some Crisco or bacon fat on it and that was it. It has a glass smooth bottom and cooks like a dream and is pretty much none stick. I admit it had gotten pretty grungy over the years so I cleaned it up, got most of the gunk off it and reasoned it. I don’t regularly wash it in soapy water because it cleans up beautifully with just water and a scrub brush but if it gets particularly dirty or I forget it overnight I don’t worry about soaping it up. The flax seed oil characteristics you mentioned are spot on from what I’ve also read. Once seasoned well with it you don’t need to only use flax seed oil tho, any oil will do to maintain that finish. Good video, thanks…”

    If you want to buy cast iron pans, I suggest finding them at yard sales and restoring them. You can get good cast iron on amazon here. (This is an affliate link, it helps us make more GardenFork!)

  • Troy Bilt FLEX Log Splitter, How Does It Stack Up? – GF Video

    Troy Bilt FLEX Log Splitter, How Does It Stack Up? – GF Video

    My video review of the Troy Bilt FLEX Log Splitter attachment. This log splitter attaches to the FLEX power base that also runs the other attachments in this line of outdoor power gear. Watch the video and read through my thoughts below.

    Heads Up: Troy-Bilt is a sponsor of GardenFork, I think they are a good company, all opinions are mine. If I don’t like something, I’ll be straight with you.

    Troy Bilt Flex Log Splitter: Easy To Store

    I talk about this in the video, but the standout feature for me, besides that fact that its a good splitter, is how easy it is to store the splitter attachment. Most wood splitters are large, and you have to store them outside under a tarp. Not great for longevity, and an invitation to mice. With the Troy Bilt FLEX log splitter, you wheel it into the garage, tuck it under a shelf, disconnect the power unit, and you are done. The splitter unit is heavy, about 185 pounds, so you will be using a hand truck or the FLEX base to move it around.

    Troy Bilt Flex log splitter

    We’ve reviewed some of the other FLEX attachments, and I like how one power unit, (read: one engine) runs all sorts of different outdoor power equipment. That’s one engine you need to maintain, not 4 or 5 of them. Think of the time savings. Only one oil change a few times a year.

    I cut some red oak up in the neighbor’s woods, and brought back a trailer load and ran it through the FLEX wood splitter. The machine did well. The engine did not bog down at any time. I ran a few 12″ wide pieces through with no issues. The specs on the Troy-Bilt website state this will take up to an 18″ long log, I put in a few 19.5″ ones, which fit tight, but it worked.

    Troy Bilt Flex log splitter

    In the near future I think I’ll pick up 4 way splitting wedge for this. Troy-Bilt doesn’t sell one, but is sure makes splitting go faster.

    My favorite feature is the auto reverse, which retracts the hydraulic piston back to its home point automatically. Tap the handle to the reverse position, and back the piston goes, stopping on it own. Nice.

    Troy Bilt Flex log splitter

    The one issue I had was attaching a clip under the direction handle. This is the only assembly you have to do, and getting that clip over what it basically a chain master link was tricky.

    One comment I’ve seen a few times is that the wood splitter sits a bit low to the ground. Looking around, most all wood splitters in this power range (8 ton) sit low to the ground.

    So there you go, I’m happy to have this in my garage, and not taking up a huge amount of space. Learn more about the FLEX base unit and its attachments on the Troy-Bilt website.

    Troy Bilt Flex Review, One Engine Goes A Long Way

  • Bean Hole Beans Recipe, Dig A Hole, Start A Fire, Cook – GF Video

    Bean Hole Beans Recipe, Dig A Hole, Start A Fire, Cook – GF Video

    A while back I read an article about an artisanal bean hole beans recipe, and then and there decided to make the GardenFork version. In other words, the done is better than perfect Bean Hole recipe. Watch the video:

    Any project that involves open fire and food is a good one. Growing up, we would camp in the backyard, and boil crayfish we caught in the quarry pond over our campfire. Fire, coffee can, crayfish = good. Same thing with beans, bacon, and a hole in the ground. Its wicked simple, and fun to do on the weekend, especially in the fall.

    What is a bean hole beans recipe?

    Cooking food in a hole in the ground, as a cooking method, has been around for a long time. Probably since humans learned how to use fire to cook food, or shortly thereafter. But the Bean Hole Beans we are talking about started with the Penobscot Tribe in Maine. They cooked their beans in a clay pot with bear grease and maple syrup.

    This bean hole baked beans recipe was adopted by the logging crews in Maine. One story I read told of how they used this method while transporting logs down the river to the harbor. The cook would ride down the river one day ahead of the logging crew. He would dig a hole and start a pot of beans, mark the spot, and then ride down the river another day, and do the same thing. The loggers would arrive at the camping spot, and dig up the beans for dinner.

    I’m not sure of the veracity of this story, but its certainly plausible to me. And what’s not to like about pulling into camp to find dinner ready?

    Bean hole cooking is the original Crock Pot cooking method of its day, the pre-electric version of the slow cooker. Plus its one of those low and slow methods, which we now know as a braise or BBQ.

    How To Make Bean Hole Beans

    This cooking method, is more than just cooking, its an experience. And it is great. It embraces the two mantras of GardenFork:

    Done is better than perfect.

    Use what you got.

    Here’s what you need:

    • Cast Iron Dutch Oven with a handle, and ideally a rimmed lid.
    • Wood to burn or chunk charcoal. Not large pieces of wood, btw.
    • Used clay bricks or rocks. Don’t use rocks that break when heated.
    • Sheet metal of some sort.
    • Chain, or heavy wire, or coat hangers.
    • Aluminum foil.

    You will need to dig a hole in your yard. I have found its easiest to do this in a raised vegetable garden bed. Its much easier, but dig where you are allowed. THINK about where you are digging, before you dig, OK?

    Bean Hole Beans Recipe

    Your hole is at least 6″ wider than the dutch oven and at least a 12″ deeper. Line the hole with used clay bricks. I don’t think one needs to use firebrick.

    Start a small fire in the hole with small pieces of wood. This will take longer if you use big pieces. Use small pieces. Add wood to this fire to build a larger fire.

    Let the fire burn down so the wood is starting to turn to coals. This is subjective, but you want a good base of coals to surround your dutch oven. There can be some wood that has not become coals yet. If you wait for everything to be burned down to coals, you’ve probably waited too long.

    Clean the center of the fire pit

    There are many bean hole beans cooks that par boil their beans before putting them in the dutch oven – to me this a waste of time. The beans are going to be cooking a long time. It’s great to brine beans before cooking, i do it all the time, but for this recipe, you don’t need to. OK? Good.

    Bean Hole Beans, the GardenFork recipe

    One 1 lb bag of dried northern beans – not soaked (other white beans work fine too)

    2 TBSP Mustard

    One small can of tomato paste

    1/2 cup maple syrup

    One chopped sweet onion

    4 slices of bacon.

    1 tablespoon kosher salt

    6 cups of water

    – again, use what you got, you can add other stuff to this recipe

    Put all the ingredients in the dutch oven. If your dutch oven lid does not seal well, place one or two layers of aluminum foil between the dutch oven and the lid.

    Cover the outside of the lid with aluminum foil to keep any dirt from getting in to the beans.

    Remove half the coals and move the rest to the sides. Lower the dutch oven into the hole, add back in the hot coals. Cover with the tin and then dirt. Be sure to lay the chain so its outside the fire pit.

    dutch oven banana bread recipe
    Now watch this dutch oven banana bread video

    Eric Bakes Artisan Bread in Five Minutes a Day


  • Eric & Troy-Bilt Volunteer In Savannah – GF Video

    Eric & Troy-Bilt Volunteer In Savannah – GF Video

    This year Troy-Bilt flew me to Savannah, Georgia to meet the other Troy-Bilt brand ambassadors and to do some volunteer work at a local botanic garden. Watch the video:

    Working with Planet In Action, we upgraded a children’s garden at the SACGC Botanic Garden. This was quite the project. As usual I was the least qualified gardener on the team, but I did run the rototiller and watered plants.

    Here is an area that will be a outdoor classroom for the kids, surrounded by some edible and fragrant plants.

    More good things happening here with a bridge over a wet spot in the garden.

    Here I am with Kenny Point, vegetable garden expert. Check out his website, Veggie Gardening Tips.

    A 4WD Self Propelled Mower Review, The Troy-Bilt 4×4 XP – GF Video

  • A 4WD Self Propelled Mower Review, The Troy-Bilt 4×4 XP – GF Video

    A 4WD Self Propelled Mower Review, The Troy-Bilt 4×4 XP – GF Video

    Go up hills easy! My self propelled mower review of the Troy-Bilt 4×4 XP. Watch the video and then read through my comments below.

    Why I Like This Self Propelled Mower:

    • Great Power
    • Ease of Steering
    • Troy-Bilt Quality

    Full disclosure here, Troy-Bilt has been a sponsor of GardenFork for a while now. I wouldn’t work with them if I didn’t believe in their products or their company. I’ve met about 20 people who work at Troy-Bilt and have been using their products for years. They are good people and they make good stuff. Here’s a vid about a volunteer project we did recently with Troy-Bilt

    OK, back to the 4 WD self propelled mower. It will pull you up hills.

    self propelled mower

    Yes, its that simple. I took this lawn mower over to my neighbor’s hilly cow pasture and went through 12″ high grass mix up a hill with no problems. And that’s with the mower set the mulching mode.

    On the mower handle you can choose front wheel drive, rear wheel drive, or four wheel drive, pretty easy. I used it in all modes but found 4WD worked best for me.

    self propelled mower

    Talking about Troy-Bilt quality, it the small things that matter, like how they attach the gas cap to the fuel tank. Ever lost your gas cap? I have.

    self propelled mower

    I suggest buying this mower with the large rear wheels and the Honda engine. If you change the oil in your lawn mower, it can last forever.

    self propelled mower

    Its easy to adjust the height of the wheels for grass cutting height. Note the larger real wheels, makes it much easier to drive around and steer. Its all about ease of use, why make it hard to cut the grass?

    Like most, this self propelled mower comes with a bagger and a side discharge and a mulching mode. I like to mulch the grass, so I did not use the bag feature, but its in the box with the mower if you want to make compost from your grass clippings.

    I give this mower a thumbs up, its a quality machine, and the 4WD is brilliant. You will like this rig.

    Learn more about this mower on Troy-Bilt site here.

    Lawn Mower Oil Change, How To Do It Easy – GF Video

    How To Sharpen Lawn Mower Blades – GF Video


  • The Best Mouse Trap, Period –  GF Video

    The Best Mouse Trap, Period – GF Video

    Here is what I think is the best mouse trap. I use these because they kill the mice instantly and are a pet safe mouse trap. Watch this video to see how it works:

    Why is this best mouse trap?

    1. It works every time.
    2. Its real easy to set, just add peanut butter and turn it on.
    3. Its easy to remove the dead mouse, just empty into the trash.
    4. Its a pet safe mouse trap, your dog or cat can’t be injured by it.

    Buy the Victor Electronic Mouse Trap here.

    Best Mouse Trap

    A pet safe mouse trap is important to me, as we have two Labradors. They leave this trap alone. I put these along the baseboards and kick panels of the kitchen cabinets and the dogs leave them alone. If you have a very curious pet, or one who loves peanut butter, this might be an issue, but its easy enough to put the trap in an out of the way place then.

    Once you turn on the trap, it will stay on for usually a week. It holds a static charge to zap the mouse, and you need to reset the trap every 5-7 days by turning it off then on again. Easy enough.

    If the trap has a dead mouse in it, the trap light will blink green. Simply open the trap cover over the trash can, turn it over and the mouse drops into the trash. You don’t have to touch the mouse.

    Best Mouse Trap

    The peanut butter bait will last for a long time, as the mouse doesn’t really get to eat much of it before its life is over. Peanut butter mouse bait will dry out after a while, so you can clean it out and add a new dab. I suggest creamy peanut butter. The brand doesn’t seem to matter, but the natural peanut butters usually have too much oil and the oil can get onto the metal plates of the trap. Something to avoid.

    If you have a rat infestation, use the Victor Electronic Rat Trap here. The operating premise is the same, just a larger version for getting rid of rats. I have a friend who is a building superintendent, and he swears by these rat traps.


    Save

    Save

  • Lawn Mower Oil Change, How To Do It Easy – GF Video

    Lawn Mower Oil Change, How To Do It Easy – GF Video

    Here’s my how to video on doing a lawn mower oil change. Its not rocket science, its actually pretty easy, AND it will extend the life of your mower. Ready? Watch the video and scroll through the instructions below:

    Lawn Mower Oil Change, Step By Step

    Check the manual to see what kind of oil your engine uses. Most use 30W, but just check, OK? By changing the oil, you are already helping the engine last much longer. Do a lawn mower oil change a few times a year and your mower could last forever, mbe!

    Run the mower to warm up the engine. This gets the oil hot and the debris that settles up and moving. Turn off the mower.

    Place plastic food wrap over the gas tank fill and screw the cap down. Not so tight that you can’t get it off again, but snug. Now we are going to gently turn the mower on its side. Position a plastic tub such that when you tilt the mower on its side, the oil fill tube will pour into the tub.

    If your mower has an oil drain plug instead of a fill tube, you will have to tilt the mower on its side, remove that plug, then place the mower over the bucket. This may take some finesse and a friend to help.

    lawn mower tune up
    See how the gas cap is on the high side of the tilt?

    Be sure to tilt the mower so that the gas cap is on the higher side of the mower, so no gas could leak out if the cap leaked. Tilt the mower into the bucket and let it sit while the oil drains out. You can prop up the mower and let it sit for a while.

    Get your fresh oil ready and a funnel. You can make funnel out of a piece of paper if need be. Tilt the mower back onto its wheels, and slowly add the new oil into the oil fill tube. Use the dipstick to make sure there is just enough oil.

    Do Not Over Fill The Oil. Bad things can happen.

    AND recycle the used oil. Take it to a quick lube shop or a car repair shop, they will recycle the oil. Don’t dump it in the woods or a stream, OK?

    See More Lawnmower Tune Up and Oil Change Tips Here

    This same process can be used for your generator oil change or your riding mower.

    lawn mower

  • How To Grow Mushrooms From Plug Spawn – GF Video

    How To Grow Mushrooms From Plug Spawn – GF Video

    If you want to learn how to grow mushrooms from plug spawn, I just did it, and made a how to video about it. Watch the video then step through the photos below:

    What we are doing here is imitating nature. The mushroom plug spawn I bought is for oyster mushrooms, which grow in dying trees.

    Research what mushrooms grow well in your area, then Order your mushroom plugs here.

    How to grow mushrooms
    Wild Oyster Mushrooms

    With the mushroom spawn or plug spores, we are inoculating recently felled logs with the spore of a particular kind of mushroom, and providing ideal conditions for those spores to flourish and produce edible mushrooms for us.

    How to grow mushrooms
    Plug Spawn

    First thing to figure out is what kind of logs you have available, and then determine what kinds of mushrooms will grow on those logs. The ideal logs are taken from trees that have just been cut or pruned. I was lucky that my neighbor was dropping some oak and birch trees, so I rode over and picked up some 4″ diameter logs.

    How to grow mushrooms

    Its OK if lichen is growing on the logs, but not mushrooms. You want fresh logs, not some that have been sitting on the ground for months or years. Those logs have already been taken over by other mushrooms and other organisms.

    Follow the directions that come with the plug spawn. I drilled holes spaced 4″ apart on the logs and hammered in the spawn  using a rubber mallet.

    How to grow mushrooms

    Coat the ends of the logs with beeswax or food grade soy wax. I found the soy wax to be much easier to use. An old rice cooker works well to melt the wax and keep it warm. Put a weight on the pot and hit the on button to get it to heat up to melt the wax. After the wax has melted, you can remove the weight and the cooker goes into a keep warm mode.

    How to grow mushrooms

    After pounding in all the plugs, you have to seal them in. Plus seal any wounds or gashes in the bark. You are sealing up the log to keep other fungi and organisms from competing with the mushroom spawn.

    How to grow mushrooms

    How to grow mushrooms

    Place the inoculated logs on a pallet in the shade. You will need to water the logs every week. If it rains, that is better, less work for you. Be sure to follow the directions for how to grow mushrooms that comes with the plug spawn. This is one project where details are important.

    If you’d like to learn about mushroom foraging and how to identify mushrooms, here are some videos.

  • Make Iced Coffee At Home – GF Video

    Make Iced Coffee At Home – GF Video

    Its easy to make iced coffee at home, you probably have all the ingredients, water and ground coffee. Here we go!

    OK, so now you know how to make iced coffee. Let’s to a deep dive in to the process.

    This is what we call cold brew coffee, we don’t actually put ice in the coffee until the end. The fact that the coffee is already cold, hence the name ‘cold brewed coffee’ , means you can skip the ice if you want. Coffee that is soaked in ground coffee overnight has a smoother taste, I think, than hot brewed does.

    Make Iced Coffee

    The ideal container to make iced coffee is a french press. (Buy a French Press here) You may be able to find one at a yard sale or perhaps your neighbor has one in their basement, the one they got as a wedding present maybe. Don’t tell them what a great tool they have, just ask if you can have it…

    The biggest issue with a french press is the glass can break. I don’t have any suggestions on avoiding that, other than the obvious. I have found they break most frequently when you are washing them in the sink. Take glass, add soapy water, and gravity, and you see what can happen, right?

    Make iced coffee

    If you don’t have a french press, you can still make cold brew coffee. A pitcher of water and some ground coffee works well, and you can strain the coffee through a paper towel to remove the grounds. Not as easy as the press, but I’m all about ‘use what you got’.

    Easy Iced Coffee Recipe
    Recipe Type: Drinks
    Prep time:
    Cook time:
    Total time:
    Serves: 3 cups
    Easy way to make cold brewed coffee at home
    Ingredients
    • 1 cup quality ground coffee
    • 4 cups water
    Instructions
    1. Put ground coffee into the bottom of a french press.
    2. Add water into french press.
    3. Cover and place in the refrigerator overnight.
    4. Remove from fridge, press down plunger to strain iced coffee from grounds.
    5. Pour into a glass, add milk or sugar or whatever you like.

    Want more? Watch all our cooking videos here.


  • Generator Wont Start? Time To Replace The Carburetor – GF Video

    Generator Wont Start? Time To Replace The Carburetor – GF Video

    If your generator wont start, I bet the carburetor is toast, here’s how to replace it. First, watch our how-to video.

    When Your Generator Wont Start:

    I bet the last time you ran your generator was over a year ago. In that case, the carburetor is full of old gas that has broken down into gunk, and clogged the carb. Now, you can take apart the carburetor and clean it, even buy a rebuild kit. But for most of us, this is a higher level of skill than we posses. We can, however, buy a replacement carburetor and install it. You have the skills to do this, as  long as you watch GardenFork, I bet.

    First step is to order a new carburetor (here is one example, find one that matches your engine). Find the engine model number stamped on the engine somewhere. This may be several lines of numbers, and they are all relevant. If you can, photograph the numbers with your smart device. On Briggs & Stratton engines, the numbers are often on the valve cover. The numbers on the generator chassis are probably not the ones you need, find the engine numbers. Search online for “engine serial number location (name of your generator)”. I have found that there is sometimes one replacement carb that is used on many small engines for a certain brand. I had to search a bit to make sure I was getting the right carb, but the comments made by other purchasers really helped.

    Your replacement carburetor may come with several choke handles, as the new carb fits several models of engine. I had to cut a small piece of metal off the back of the air filter mount to allow the new carb choke handle to fit properly. Not a big deal.

    Check out the instructions that come with the carb. You may need special torx bits. I did, and only learned this after I started the job. Fun.

    To remove the old carburetor, start by draining the old gas out of the fuel tank. Turn off the fuel line that runs to the carburetor, pull the hose off the carb, and put it into a gas can. Turn on the valve, open the fuel tank cap, and drain. Don’t dump this gas in the woods or a creek, OK?

    Generator wont start Generator wont start

    Big thing to remember: take photos throughout this process, so you can refer to how it all came apart, OK? Remove the spark plug wire from the spark plug. This may seem unnecessary, but its a good practice to get into, especially if you have a electric start generator… Now remove the fuel line from the carb and remove the air filter and the frame that holds it to the carburetor.

    Generator wont start

    The carb may have what look bolts or nuts that are star shaped, these are usually called Torx nuts. You may already have a set of tools to remove these, or you can borrow them or you can buy them.

    Generator wont start

    Generator wont start

    Remove the governor control rod and spring assembly. A new rod and spring may come with your carb, use the new one, but hold onto the old one in case there is an issue. The rod may be concealed under a plastic or metal shroud, it may take some time to remove it.

    Remove the carb from the engine carefully. There is at least one gasket that may tear, and you may not have a new one to replace it. Some gas may drip out of the carb, that’s ok.

    The new carburetor will go back in about the same way the old one came out. The hardest part is getting the governor control rod and spring reconnected. There should be a diagram that comes with the new carb showing how it connects.

    Also the choke handle may be different or require a little cutting to get it fit. The carb I bought came with several choke handles, and you may have to remove and replace the one that is installed on the new carb.

    While you are doing the generator repair, you might as well put in new spark plug and change the oil. Spark plugs die out suddenly, and you’re already deep into small engine repair mode, this will take 2 minutes.

    Generator wont start

    If your generator wont start and has been sitting, I bet the oil is the color of mud. This is a bad thing. Muddy oil can mean there is water in the oil, and will ruin the engine. Take the waste oil to a oil change or car repair shop, they will recycle it for you. Don’t dump it in your yard. Generator wont start

    Going forward, always use gas stabilizer in your small engines. Then you don’t have to wonder what to do when your generator wont start. Whenever I fill up my gas cans, I immediately add in the gas stabilizer. My engines start on the first pull, even after a winter in the garage.


    Generator wont start

    A good follow up to this is our small engine tune up and oil change video: