Here is the DIY insulated inner cover I built to prevent condensation in our beehives using easily purchased materials. All the hives we have lost have been in the late winter – early spring due to, I believe, condensation and varroa mite load. This year I am determined to eliminate condensation from our hives. Here is a how to on building a DIY insulated inner cover and why you should consider using this cover for your beehives. We put dry sugar inside the inner cover. (Winter feeding beekeeping videos links are at the end of this post.)
The basics of this design are based on those at the informative beekeeping blog Mudsongs.org . I like to read how Phillip is keeping bees in Newfoundland, Canada.
NOTE: Since building these DIY covers, I have also started using just a piece of 2″ insulation wedged between the covers, watch the video:
The inner cover I built has a space below the plywood for feeding the bees sugar , sugar cakes, fondant, pollen, or pollen patties. My thinking was why have a wood shim below the cover to place sugar in, why not make a one piece inner cover/shim. That way there would be on less piece of woodenware to deal with.
I used pine 1×5 lumber, the outer dimensions are 20″ x 16 1/4″.

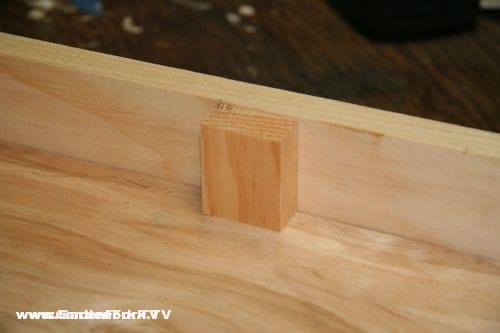
Here is the bottom of the inner cover, you can hold the plywood in place with scrap molding or pieces of wood. Its important that any space between the plywood and side walls is covered, either with scrap trim or other wood, to keep the bees from moving up into the polystyrene. You don’t want the bees trying to chew the insulation. If you have the power tools and woodworking skill, you could dado the insides of the frame and slide the plywood into the dado slot.

I glued these pieces of wood to the sidewall and the plywood, held with a clamp. This held the plywood at the correct depth to allow the insulation to drop into the upper section of the inner cover perfectly. Only use a waterproof wood glue, our beekeeping teacher said never to use Gorilla Glue, as it can foam, and the bees will try to eat the foam that comes out of the wood joint.

Here is the 2″ polystyrene placed in the upper section of the insulated inner cover. Use small scraps to fill in any large spaces near the side walls of the cover.

Be sure to drill vent – exit holes in your inner cover. These are 3/8″ but i’m thinking they should be 1/2″ to allow more airflow. Going forward, I may chisel out a 3/8′ x 1″ notch at the bottom of the cover to allow more bees to use the entrance. The holes seem to jam up traffic.
How to cut polystyrene: get one of those utility knives with the blades that are real long, the kind that you can snap off when the tip is dull. use a straight edge to score the polystyrene. Don’t use too much pressure, make several passes to allow the knife to cut deeper. Be careful not to cut yourself.

After scoring the foam about halfway though, you can snap the foam apart.

Place the cut over the sturdy edge of a work table and make the break.


Read more of our beekeeping posts here and watch beekeeping videos here. Thx!


