Tag: beginning beekeeping

  • Beekeeping 101, a look back on the first year GF Radio

    Beekeeping 101, a look back on the first year GF Radio

    GF Contributor Matt joins Eric to talk about his first year of beekeeping. Matt reflects on what real world beginning beekeeping is like after watching the Beekeeping 101 – How to keep bees videos on Gardenfork. Losing a hive, getting stung, how to find the queen in a hive, how not to kill the queen are all touched on.

    Matt wrote a series of articles on beginning beekeeping for our site, as he chronicled his first year of beginning beekeeping.

    Matt tells us about how to work a hive and yes, you should wear gloves and beehives are heavy. We agree with Rick’s use of metal handles, as beehives get heavy. bees

    Beehives die, and why do they die? As Rick says, bees are bugs in a box, and bees don’t read books. Eric offers a few reasons why the beehive died: a stressed queen, the queen was crushed when working the bees or putting the hive back together.

    Eric gives reasons for not buying bee packages, and especially not having bee packages sent in the mail. Buying local nucs is much better. Matt’s experience with beginning beekeeping bears this out. His package of bees died, his nuc is going strong.

    Matt talked about a program in Virginia that funds beekeepers,

    Matt also talked about homemade  or DIY honey extractors, like this one on Mudsongs.org .

    We also talk about raised beds, and how to build raised beds using bricks or plastic lumber and the pros and cons of using different materials for building raised beds.


    photo by micky07

  • Inside the Hive: Views from a First Year Beekeeper (Scene 21)

    Inside the Hive: Views from a First Year Beekeeper (Scene 21)

    Propolis – that sticky, gooey substance that honeybees make from plant resins – is strong stuff. Anyone who has tried to separate one super from the one below it can testify to the holding power of propolis. As I’ve written before, bees use this to fill in small cracks and seal up anything needing to be sealed up.

    Apparently, they needed to seal this frame in its box very well. Between a bunch of burr comb and an abundance of propolis, this frame simply would not come out. As you can see, the nails and glue failed before the propolis did. I honestly didn’t expect that to be the case. I was very careful when building these frames and if you look closely, you can see that some wood tore away on this frame… maybe it was just weak wood.

    I two-tooled the frame out after pushing my hive tools down between the frames a couple of times. I’ll probably swap that out in the spring and I tapped it back together and noted which one it is.

    Happy beekeeping,

    Matt

    Read all of Matt’s Inside the Hive Posts here

    Matt (twitter @MattInTheGarden) doesn’t like those cutesy flower-topped pens that businesses use to discourage folks from taking them. He doesn’t understand why people like eating liver at all. There are much better things to eat in life. His favorite stooge is Moe because he is grumpy and has a smart looking haircut. Just kidding… he’s not that grumpy. Matt is one of the nine people in North America that listened to AM radio last week. If you haven’t listened to AM in awhile… it hasn’t improved.

  • Requeening A Hive In Fall, a visual beekeeping how to

    Requeening A Hive In Fall, a visual beekeeping how to

    This year has been the year I’ve had to requeen 4 hives. Not sure why, but wanted to show one way how to requeen a beehive. This beehive was doing fine, I pulled some honey off the hive, and then checking it 3 weeks later there is barely any covered brood and no freshly laid eggs anywhere in the hive. You can see here in the first picture of the beehive, this frame is from the lower super, where there is usually brood, there aren’t any eggs on this frame. Luckily, I have a few other robust hives, and was able to get a queen from a nearby beekeeper.

    Queens will slow down their egg laying in the fall, so you have to make sure the hive really is queenless, check most or all of the frames for brood.

    Empty brood frames, not a good sign

    Requeening this hive, I had to keep in mind its getting late in the year, and these bees will need a good population to get through the winter. I pulled two frames full of brood from a nearby healthy hive, knocked off most of the bees from those frames back into their hive, and got ready to open the queenless hive.

    more beekeeping videos insert

    From the queenless hive, I took off the upper supers and then pulled two empty brood frames from the bottom super. I then put in the queenless hive the two frames of capped brood from the healthy donor hive, and then wedged in between those two frames the new queen in a queen cage.

    Gently tap this frame over the donor hive to knock most of the bees off and back into their hive. Make sure the queen is not on these donor frames.
    Capped brood from the donor colony

    The capped brood will hatch soon, and will help boost the population of the hive while the queen gets acclimated and starts laying. I think this hive will make it through the winter, we still have a few months to get it  back in shape.

    I feed all our hives a 2:1 sugar syrup solution with an essential oil mix added in ( get the honeybee essential oil recipe here ), with this hive i may start early on the feeding.

    queenless hive ready to accept brood frames and queen cage
    Capped Brood Frames and Queen Cage inserted into queenless beehive.

    Here are some beekeeping books I recommend:

    What has your experience been with requeening? Let us know below:

  • Inside the Hive: Views from a First Year Beekeeper (Scene 14)

    Inside the Hive: Views from a First Year Beekeeper (Scene 14)

    It was a Father’s Day hive inspection. Dad (that’s me) and son checking out our two hives. Beautiful day. 78 degrees Fahrenheit and just a light breeze. Quite a few things to say and show about this inspection so expect more posts from me in the coming days.

    There are a LOT of bees in these hives. I think non-beekeepers (as well as this first year beekeeper) just don’t get how many bees can live in a hive. It’s incredible quite honestly when you pop open the hive and there is just frame after frame of bees – often so many of them that you can hardly see the comb underneath. The frames with brood on them are just teeming with bees.

    I’ve written before about pheromones and how the hive uses these to communicate. One pheromone they use quite effectively is the alarm pheromone. I understand folks say it smells like bananas. I’ve got a particularly poor sense of smell and am not sure I personally could smell it. At least I haven’t noticed it yet.

    Here is a closeup of my glove. Yes, there’s some goo on it – white shows every stain – but right in the center of the shot is the topic of this post.

    The stinger.

    Today we were on the business end of the stinger. Not the place you want to be, quite frankly.

    My son was taking the lead on the inspection and the bees weren’t all that happy that we were bothering them today. We used the smoker a couple of times and it helped a bit but they were head  butting us from the beginning. They were crawling all over my son’s gloves and that, pardon the pun, bugged him out a  bit. I think he was worried about squashing them as he lifted up frames.

    He got stung on the index finger through his glove while trying to take out the sixth frame and let the frame drop, maybe only an inch, back into the hive body. That didn’t, as you might guess, improve the hive’s disposition. The stinger stuck in the glove and a bit of the venom went into his finger. He wasn’t happy. They weren’t happy. We stepped away, I took the hive tool in my hand and scraped the stinger off the glove. That step is important. The sooner the stinger is removed, the less venom ends up in the body and the less it will hurt. Scrape it, don’t grab and squeeze.

    I sent him in to put some ice on it.

    I decided then that it was time to button things up and try again another day. Their mood wasn’t going to improve.

    That’s the issue though with beekeeping. Unlike woodcarving or painting or playing the french horn, if  you need or want to stop, you can’t just walk away from the hive. If you’ve opened it up, you’ve got to close it back up. Even if the conditions stink. Even if they aren’t happy. Even if you’ve been stung. Some beekeeping friends of mine (Eric and Rick, to name two) have been stung way more than this and surely wanted to just walk away for the day. But you have to finish what you started because that hive won’t put itself back together.

    There were a dozen or so bees banging into me and buzzing that distinctive “I’m pissed at you” buzz. It took me about five minutes to get everything back together because A) the smoker had gone out and B) I needed to step away a few times because they were getting a bit overwhelming, quite honestly. Crawling over my hands, walking all over my veil, flying about, bouncing into me.

    Then they stung me in the hand. Just two or three times. I only felt one of them, looked down and instinctively wiped my one glove with the other. I scraped one more off that I saw before the camera guy in me said “you dummy, take a picture” and then I looked over the glove and found another. That’s the one you see here. This one, however, didn’t penetrate the skin.

    Fortunately my gloves are thick and it just felt like a pin prick as no venom reached my skin. I took a walk away from the hive for a minute or two to see if things calmed down. It did – at least enough to finish closing up the hive. And I got that picture, which was cool. We took one of my son’s finger post-sting but it didn’t turn out well and he wasn’t all that keen to have dad keep messing with it so I gave up on that shot.

    For the keeper, the poke of the stinger and the pain of the venom is a temporary thing. My son’s already over the sting and off to camp to enjoy a week of fun. For the bee, well… it means death… at least for the workers. The barbed stinger of the worker ends up sticking into the skin (or the glove in our case) and causes the back end of the bee to open up. The bee soon dies. Unlike the worker, the queen has no barb on her stinger so she could, in theory, sting you multiple times. In practice the queen isn’t likely to sting you. The male drones have no stinger, so one can pick those up barehanded without incident. The workers… yeah, they sting. A little smoke applied to the sting area helps to mask that alarm pheromone.

    Box checked. First stings have happened. There will be more. No worries.

    I plan to get back into the hive again later this week to finish what I started. I talked with my son and he was OK and said he’d definitely be back in his beesuit again. I’m glad for that.

    Enjoy,

    Matt

    Read all of Matt’s Inside the Hive Posts here

    Matt (twitter @MattInTheGarden) once went to timber framing school with his brother. He prefers homemade jam to store-bought. He loves the puzzles of Martin Gardner. He wonders why all milk products aren’t packaged in the same plastic as milk jugs.

  • Inside the Hive: Views from a First Year Beekeeper (Scene 13)

    Inside the Hive: Views from a First Year Beekeeper (Scene 13)

    Bees, particularly those in new hives, require a lot of energy to draw out comb. To help jump-start the hive, a 1:1 sugar syrup can be used to help feed them during this time. I’m pretty certain they could make it without this feeding in the spring assuming there were sources of nectar around. But, since my hives are new and I’m not expecting or planning to take any honey this year, I’m OK about feeding them sugar syrup to provide them with the food they need to draw out comb on the frames this year.

    I started with baggy feeders but they are a bit messy and quite honestly I don’t like them because they are really a one-use feeder. I’ve got a bunch of canning jars and those can be reused so I’m trying some 1-quart jars in my hives as feeders. All one has to do is punch some small holes in the lid (I tapped a nail into the lid just a bit so that the smallest of holes was made.)  and fill the jar with sugar syrup. With the lid screwed on tight and inverted over the hole in the inner cover a vacuum is formed and the syrup will not run out. The bees can then slowly eat the syrup. When it’s emptied, I can just swap it out for a new one without disturbing the hive much at all.

    Enjoy,

    Matt

    Read all of Matt’s Inside the Hive Posts here

    Matt (twitter @MattInTheGarden) is a big fan of Punch Brothers and the music of Chris Thile in general. If putt putt doesn’t count, he has never played golf. This time next year he’ll be one year older.

  • Inside the Hive:  Views from a First Year Beekeeper (Scene 4)

    Inside the Hive: Views from a First Year Beekeeper (Scene 4)

    This picture is from the installation of hive #2, which is from a nucleus hive, commonly called a “nuc”, from my beekeeping mentor’s bee yard. My mentor has eleven hives and this year had a half dozen nucs as well. Our beekeepers association encourages new beekeepers to buy nucs from local folks. This is a good idea for a number of reasons, not the least of which is that each nucleus hive inspected and sold locally is one less package from out of state that is shipped here. Why is that good? Because the nucleus hive is 4 or 5 frames of fully drawn comb with bees, a queen, brood (eggs, larva, capped brood) and some stores (honey, pollen, etc.) and the bees are already well establish with the queen and don’t have to spend a lot of time and energy drawing out comb before things get moving in the hive. The queen is already mated and laying. These are good things.

    My son and I enjoy working the bees together. He’s a fine teenager and a very calm and methodical person around the hives. He exhibits some of the characteristics of a good beekeeper, particularly knowing not to rush. Here he is setting up the hive  himself. I mostly just took pictures during this install.

    Our hive sits on a hive stand. Mine is painted brown (because I had brown paint) and it gets the hive off the ground and up where it is easier to work. Raising it up provides more ventilation and keeps me from having to bend over so much. Some folks use pallets, cinder blocks, bricks and other things in lieu of a stand like I have. Whatever works. I had the wood, the paint and the time so I built one. I bought some concrete piers to set it on to get the wood off the ground and to raise it up a few more inches. Again, whatever works. The bees won’t care at all.

    The first piece of the hive is a “landing board” which provides a place, as the name suggests, for the bees to land when returning to the hive. I built mine but you could purchase one from a number of sources too. Landing boards aren’t absolutely necessary and I would guess that most hives don’t have them, but I liked the idea and had the wood, so I made a pair of them for my hives. The landing board is the slanted piece here directly on the hive stand at the bottom of this picture.

    Atop the landing board is the “bottom board” and this one is a screened bottom board, sometimes called an “IPM” or “Integrated Pest Management” board, but I call it a screened bottom board personally. It has a place to slide in a white plastic board for doing mite counts or for covering the screen if you want to make the hive less drafty (e.g., during the blustery wintertime). They also make solid bottom boards which are, as you might guess, solid on the bottom rather than screened. Don’t buy these. The screened bottom board is far superior for a number of reasons, not the least of which is ventilation. The “screen” is actually 1/8″ hardware cloth that is tacked in place and is both more durable than actual screen and also of a size that allows pests like the Varoa mite to fall through and onto the ground. Varoa mites literally suck the life out of your honeybees. You’ll probably have them in your hive – most hives have them – but an infestation of them can kill the hive . We’ll talk more in the future about things you can do to combat Varoa.

    If you look closely at the picture, about two inches back from the front of the bottom board is a small board that sits across the front of the hive. This is an “entrance reducer” and it gives the bees a little help defending the hive. We’ve got it positioned with the smaller hole  in use while if I flipped it around we could use the larger entrance hole. As the hive gets stronger, the larger hole is preferable to the smaller one since it allows less queuing up of bees going in and out of the hive. The entrance reducer could be removed completely too for a strong hive.

    My son is about to place a medium hive body onto the bottom board. It is called a medium based on its height. The length and width of the box is pretty standard but there are a couple of common heights (medium and deep) and a few less common ones. It is called a hive body because it will hold frames where the queen will lay her eggs and where the hive will raise its young. Typically the frames will have some honey and pollen on them but will be mostly filled with brood in some stage of development. You can see in this picture that the frames in the center are covered with bees while the outer ones are not. The outer ones are new frames that were added to the nucleus hive’s five frames to make up the ten frames held in this medium box. Boxes are sized to hold either 8 or 10 frames. The narrower 8-frame boxes are lighter and may be a good choice for those not wishing to pick up so much weight – and the boxes do get heavy. Something to keep in mind.

    Next up, to the left are the pieces which will be added, in order, to the hive. There is another medium filled with new frames, which they will use for brood. We put this on right away though we could have waited a week or so for them to draw out comb on the new frames in the bottom box. I may need to make some frame adjustments during my next hive inspection to encourage them to draw out come on the outer frames. Bees tend to move upward. Life was going to be busy for a couple of weeks after this hive install so I opted to put the second box on right away. We will see how things look when we open up the hive for our next inspection.

    Then, under the medium is an empty deep. I used this out of convenience as a “shim” piece to make space for the baggy feeders. It is really overkill for a baggy feeder (since the baggies aren’t that tall) but it was handy. Later on, it was pulled out and replaced with a medium so I could put it to use in hive #1, which uses deeps rather than mediums for the brood boxes. I’m currently using baggy feeders in one of the hives (baggy feeders are just zip-top bags filled with a 1:1 sugar syrup that have a slit in the side where the bees can access the syrup) and trying an inverted mason jar with some small holes punched in the lid on the other. I’ll probably move away from the baggies as they are a bit messy and are a “one time use” feeder.

    Below the deep is the “inner cover”, which has a large hole in the center of it (not visible in the picture) and a notched opening. Inner covers are used for a number of reasons, but in this hive it is place atop that shim piece and provides an exit point at the top of the hive. I added a second hole in the inner cover and covered the hole with screen to improve ventilation. Ventilation is really important in the hive as it helps the bees regulate the temperature and humidity properly.

    The “telescoping outer cover” is next and it’s job is to top off the hive and keep the weather out. It is “telescoping” because it is a bit bigger than the inner cover and boxes so it can slide forward a bit and expose that opening in the inner cover. It is covered with metal (which I’ve painted to hopefully keep it a little cooler) and as you can see on the upper left part of the picture, I use a  brick on top of it to help keep it in place. If it is really hot (such as it gets here in Virginia in August) I might prop open the top of the hive during the day to help with the heat. More on that in a future post.

    That’s probably enough for this image.

    Enjoy,

    Matt

    Read all of Matt’s Inside the Hive Posts here

    Matt (twitter @MattInTheGarden) thinks, clicks and types for a living. He has an unending backlog of farm chores. He recycles everything he can and has three full compost bins made from free pallets whose contents are in various stages of decomposition. Matt likes strawberry jam and the puzzles of Professor Dennis Shasha.


  • Tornado Safe Rooms, Tornadoes, & Storm Chasers GF Radio

    Tornado Safe Rooms, Tornadoes, & Storm Chasers GF Radio

    Tyler joins us to talk about building tornado safe room or tornado shelter, his sister built a tornado safe room in the floor of her garage, and safe rooms were discussed at ChaserCon. Safe rooms can be pre-fab or built on site out of concrete or steel or a combination of rebar, cement, and cinderblocks. Storm Chasing comes next, is storm chasing really like how it looks on the cable shows? Tyler talks about what its like to chase storms and the science behind what causes tornadoes, how to tornadoes form?

    Car repair comes next, Tyler is having some car repair issues with his Jeep, we talk about what a crankshaft is, a harmonic balancer, and flywheel do.

    We talk about beekeeping and Tyler’s beginning beekeeping experiences, Eric and Tyler agree that using medium supers, not the large deeps, are the best way to keep bees. Siting your bees is an issue, as you have to keep in mind how you are going to get to your honeybees in winter and summer, you can’t always just drive your truck right up to them, think about where they are going to live.

    If you want to listen to our Beekeeping for Beginners Questions & Answers shows, click here.

    Car and Truck safety on the highway rounds out the show, a viewer mail asks out loud what will driving be like in 20 years?

    photo by cohdra

  • Winter Bee Check & Sugar Feeding – Beekeeping 101 Video

    Winter Bee Check & Sugar Feeding – Beekeeping 101 Video

    Getting your honeybees through winter is a challenge. We feed our bees sugar in the form of a sugar cake, (sugar cake recipe below video) and show you in this video how to feed your bees sugar in the winter.

    Note: I know use the Mountain Camp method of winter sugar feeding, but the video below is a good visual on checking your bees in winter.


    Another benefit of sugar cakes on top of the hive is that they sugar absorbs moisture, reducing the chance of condensation forming on top of the hive and raining down on your bees, killing them.

    winter beek check list watchWe use these insulated inner covers in the winter, which help greatly in reducing condensation. So the combination of a winter cover and sugar cakes, I believe, really helps with moisture buildup in the hive.

    Many books talk bout using fondant in winter, but I’ve found it is hard to make, and I’m not sure what the exact benefits it has over just plain sugar cakes, which are super simple to make with re-useable foil pans you buy at the store. We add a homemade essential oil mix to the cakes.

    Read more of our beekeeping posts here and watch beekeeping videos here. Thx!

    beekeeping-sugarcake-vid-thumb

    Do you use sugar in your hives in winter? let us know below:

  • Sugar Cake Recipe Winter Beekeeping 101 Video

    Sugar Cake Recipe Winter Beekeeping 101 Video

    Here’s a video on how to make sugar cakes to feed your bees in winter. Overwintering your honeybees is  challenge, here is one way I help the bees overwinter, feeding them sugar cakes with this recipe. You can make these at home. I use foil pans you can buy at the grocery store.

    Note: I know use the dry sugar aka Mountain Camp method of providing sugar to honeybees in the winter. Watch our dry sugar Mountain Camp video here.

    winter beek check list watch

    The sugar cake recipe:

    • put 5 pounds of sugar in a large mixing bowl
    • add 7.5 ounces of water
    • add a teaspoon or two of essential oil mix if you choose
    • mix together and then spread out in a 9×13 or similar foil pan
    • allow to dry overnight
    • take off the inner cover of the hive
    • carefully turn the cake upside down onto a thin plastic or wood board
    • slide the sugarcake onto the top of the hive, and either put on either a shim or an insulated inner cover, and then the outer cover.

    Here are some photos of how to make sugar cakes for bees.

    You can add a homemade honeybee essential oil mix to the sugar cake recipe, you can see the essential oil recipe here. Update: I know buy the pre-mixed essential oil mix, its not that expensive and saves time.

    To put these cakes on top of your hive, you must use a spacer – shim, or an insulated inner cover.

    There are many opinions on how to get your bees through the winter, this is one way we make sure our honeybees have enough food to get through the winter. What I like about sugarcakes is that the cakes absorb moisture in the hive, which reduces or prevents condensation in the hive.

    Many beekeeping books say you should open the hives only when it is 45-50F, but I’ve found if you act quickly, you can pop the top of the hive to slide in sugarcakes when the temperature is in the 30s. Obviously you aren’t going to do a hive inspection at 30F, but you have a few seconds to open the inner cover an add sugar above the supers.

    Again, I think the dry sugar method is much better now, check it out here.

    mountain-feeding-sugar-beekeeping-playDo you use sugar in your hives in winter? let us know below:

    Save

  • Beekeeping for Beginners FAQ Part 2 : GF Radio

    Beekeeping for Beginners FAQ Part 2 : GF Radio

    Matt joins Eric to answer Beekeeping for Beginners questions on this show. What equipment to buy, how to buy honeybees, where to put beehives in your yard, what kind of beekeeping suit to buy all answered here.

    what kind of beekeeping suit and beekeeping veil is good?

    what kind of frames should i use in the beehive, are plastic frames better than wood frames?

    wax foundation versus plastic foundation should i use plastic or wax foundation on the frames of the beehive? eric talks about the benefits of wax foundation and plastic foundation and frames

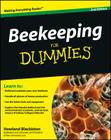
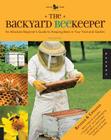
    Eric suggests 2  beekeeping for beginners books,


    Buy On IndieBound Here

    Click Here to buy on Amazon


    Click Here to Buy On Indiebound

    Click Here To Buy On Amazon

    Beekeeping for Dummies and the Backyard Beekeeper

    do you paint the outside of the beehive? yes, we use latex paint.

    should i buy 8 frame supers or 10 frame supers? matt and eric talk about the benefits of 8 frame boxes and 10 frame boxes

    what kind of beekeeping tools should i buy? eric suggests bringing duct tape, scissors, entrance reducer, smoker, woodchips, matches, 2 or 3 hive tools, a frame grabbing tool, needle nose pliers and more.

    what kind of hive stand should my beehive rest on? cinder block, wood, metal stands are talked about, eric suggests having a work table next to your hives.

    we talk about benefits of top bar hives vs. langstroth hives, and the drawbacks of top bar hives and langstroth beehives.

    should you buy a bee package or a honeybee nuc? eric talks about the advantages of honeybee packages , the pros and cons of bee packages, and the benefits of being a nuc or nucleus hive to start a beehive.

    eric advocates buying local honeybees and queens, either packages or nucs, the closer you can buy your bees the better.

    www.whiteoakapiary.com in Brewster, NY and www.warmcolorsapiary.com in Greenfield, MA is where eric buys queens and honeybees.

    should you feed honeybees in winter and how do i feed my bees over the winter? eric talks about how to feed bees in winter. you can watch our Beekeeping for Beginners video series here, and several videos are about feeding bees in winter.

    Eric uses a hand immersion blender to mix this sugar feed solution, and adds this homemade essential oil recipe for bees to the sugar

    The essential oil mixture is great for spraying the bees to combat nosema and bee diarrhea.

    winterizing beehives is discussed, here is eric’s beehive insulated inner cover video, Eric feeds sugar cakes to the bees in winter, not fondant or sugar syrup. Should you close or open a screened bottom board? Matt and Eric discuss

    Mudsongs.org is a favorite beekeeping blog of eric’s. Phillip documents his beekeeping in Newfoundland Canada.

    where to site your hives in your yard, where should you put the hives, what is the best location for beehives? eric has learned that full sun is best, he talks more about it during this radio episode.

    should I take a beekeeping class? eric says yes.

    and join your local beekeeping group. search on the web for your state’s beekeeping association, and that site should list local beekeeping groups.

    Megan of BrooklynHomesteader.com offers online beekeeping classes, and in-person classes as well.

  • How to Requeen a beehive : GardenFork.TV : Beginning Beekeeping

    How to Requeen a beehive : GardenFork.TV : Beginning Beekeeping

    Learn how to requeen a beehive in this beginning beekeeping video. Requeening the hive is not rocket science, but you do need to know how a few things when you do this. This Beekeeping video will show you how to replace the queen in your beehive, or at least how we do it. As with many things in life, this is how we do it, others may do it differently.

    You replace the queen in a beehive when you want to improve the hive’s characteristics or when the original queen of the beehive has died for some reason. You also requeen a beehive to keep it from swarming.

    We are going to try requeening our hives in late August to prevent swarming the following spring. I’m told that queens replaced in the fall will not swarm in springtime, so we’ll see. Of course we’ll make a video about that.