Tag: homesteading

  • Winter Bee Check & Sugar Feeding – Beekeeping 101 Video

    Winter Bee Check & Sugar Feeding – Beekeeping 101 Video

    Getting your honeybees through winter is a challenge. We feed our bees sugar in the form of a sugar cake, (sugar cake recipe below video) and show you in this video how to feed your bees sugar in the winter.

    Note: I know use the Mountain Camp method of winter sugar feeding, but the video below is a good visual on checking your bees in winter.


    Another benefit of sugar cakes on top of the hive is that they sugar absorbs moisture, reducing the chance of condensation forming on top of the hive and raining down on your bees, killing them.

    winter beek check list watchWe use these insulated inner covers in the winter, which help greatly in reducing condensation. So the combination of a winter cover and sugar cakes, I believe, really helps with moisture buildup in the hive.

    Many books talk bout using fondant in winter, but I’ve found it is hard to make, and I’m not sure what the exact benefits it has over just plain sugar cakes, which are super simple to make with re-useable foil pans you buy at the store. We add a homemade essential oil mix to the cakes.

    Read more of our beekeeping posts here and watch beekeeping videos here. Thx!

    beekeeping-sugarcake-vid-thumb

    Do you use sugar in your hives in winter? let us know below:

  • Sugar Cake Recipe Winter Beekeeping 101 Video

    Sugar Cake Recipe Winter Beekeeping 101 Video

    Here’s a video on how to make sugar cakes to feed your bees in winter. Overwintering your honeybees is  challenge, here is one way I help the bees overwinter, feeding them sugar cakes with this recipe. You can make these at home. I use foil pans you can buy at the grocery store.

    Note: I know use the dry sugar aka Mountain Camp method of providing sugar to honeybees in the winter. Watch our dry sugar Mountain Camp video here.

    winter beek check list watch

    The sugar cake recipe:

    • put 5 pounds of sugar in a large mixing bowl
    • add 7.5 ounces of water
    • add a teaspoon or two of essential oil mix if you choose
    • mix together and then spread out in a 9×13 or similar foil pan
    • allow to dry overnight
    • take off the inner cover of the hive
    • carefully turn the cake upside down onto a thin plastic or wood board
    • slide the sugarcake onto the top of the hive, and either put on either a shim or an insulated inner cover, and then the outer cover.

    Here are some photos of how to make sugar cakes for bees.

    You can add a homemade honeybee essential oil mix to the sugar cake recipe, you can see the essential oil recipe here. Update: I know buy the pre-mixed essential oil mix, its not that expensive and saves time.

    To put these cakes on top of your hive, you must use a spacer – shim, or an insulated inner cover.

    There are many opinions on how to get your bees through the winter, this is one way we make sure our honeybees have enough food to get through the winter. What I like about sugarcakes is that the cakes absorb moisture in the hive, which reduces or prevents condensation in the hive.

    Many beekeeping books say you should open the hives only when it is 45-50F, but I’ve found if you act quickly, you can pop the top of the hive to slide in sugarcakes when the temperature is in the 30s. Obviously you aren’t going to do a hive inspection at 30F, but you have a few seconds to open the inner cover an add sugar above the supers.

    Again, I think the dry sugar method is much better now, check it out here.

    mountain-feeding-sugar-beekeeping-playDo you use sugar in your hives in winter? let us know below:

    Save

  • How to make homemade pasta GF TV Video

    How to make homemade pasta GF TV Video

    Home made pasta, aka fresh pasta, we show you how to make a home made pasta recipe in the GF cooking video. Pasta from scratch is not hard, there’s just a few steps to get it right. Homemade pasta tastes different from store bought pasta, and when you make it yourself, there are infinite variations possible. neat.

    There’s a good chance you have a pasta machine in the basement, an xmas gift from a while back that you never got to, so you’ve got the equipment. If you don’t have a pasta machine, check out these pasta machines
    or the links at the bottom of this article.

    My technique for making home made pasta is based on a method Jamie Oliver shows us in his book, Cook with Jamie: My Guide to Making You a Better Cook
    – a book I really like, BTW.

    Home Made Pasta Recipe  ©2012 Eric Rochow

    100 Grams all purpose or Italian “OO” flour

    1 egg

    For homemade pasta, you can use either all purpose flour or an italian flour labeled “OO”, i believe its a finer grind flour, but if you can’t find it, all purpose flour works fine.

    The ratio that I’ve found works best is 100 grams of flour to 1 egg. If you are making fresh pasta for 4 people, I’ve found 300 grams of flour and 3 eggs works well.

    Put the flour and eggs in a food processor, and pulse until the flour comes together and looks like small pebbles.

    Dump the pasta dough mixture onto a floured board, and collect the flour into a ball.

    Now knead the dough by stretching the dough out and folding it over on itself. Its best to watch our how to video to see this. Knead for 5-8 minutes

    The dough is kneaded when you press your finger lightly into the dough and the dough fills out the dimple you’ve made again, the dough bounces back.

    Shape the dough into a rectangle, wrap in plastic wrap, and put in the fridge for at least 30 minutes, longer is better.

    Take the dough out of the fridge and cut into square pieces about 3″ x 3″,  3/4″ thick. how many pieces you will have depends on how much flour and eggs you mixed together.

    Take one of the dough squares and run it through your pasta machine at its widest width. Fold the dough back over on itself in thirds, like folding a letter into an envelope.

    You will now run the dough through each width setting on the machine, holding the dough so the folds are on the sides. You may need to flour the dough when rolling it through the machine to keep it from sticking.

    After you have run the dough through the machine at its smallest width, take the dough and fold it back on itself until it is about 4″ wide or so, you want a width that is small enough so you can run the dough through the machine again.

    Run the dough the machine again, starting at the widest width and progressing through to the narrowest setting. Note: some machines  have a real narrow final width, you may not want to get the dough that thin, it depends on what kind of pasta you want to make, and how thick you want it to be.

    You can cut the dough in half if it gets too difficult to work with. And you can flour the dough as needed.


    You are now ready to run the pasta dough through the die cutters to make various kinds of pasta, or you can hand cut it on a board, or you can make ravioli with the dough. I’ve found it works best to let the pasta dough rest under a towel for 10 minutes or longer before running it through the pasta cutters, you may need to flour the dough again, you want it quite dry.

    The flour you use for dusting can be whole wheat or semolina or just regular flour. I’ve used whole wheat thinking it gives a bit of a nutty taste to the pasta, but maybe i’m just fooling myself.

    Once you cut your pasta, you can drop it into boiling water or let it dry on a dowel or broomstick set between two chairs. Fresh pasta can take 3 minutes to cook, or 8 minutes, it all depends, you’ll have to keep an eye on it.

  • How to make Sauerkraut Kinda Sorta – GF TV

    How to make Sauerkraut Kinda Sorta – GF TV

    We made a sauerkraut how-to video today. Fermenting green or red cabbage into sauerkraut is an easy recipe to make, and the possibilities are endless. Fermentation and fermented foods are on the rise, with their probiotic organisms and all around healthy food reputation. Making sauerkraut should be on the to do list of all urban homesteaders, and i imagine most homesteaders already make sauerkraut.

    Inspired by Daniel Gastieger, author of Yes You Can! And Freeze and Dry It, Too, we make a simple sauerkraut recipe that is the basis for all sorts of combinations. Daniel was on GardenFork Radio, you can hear his interview here.

    If your idea of sauerkraut is that greyish stuff you see in the store, try making sauerkraut yourself. Take red or green cabbage, or a mix, add salt and go from there.

    Basic Sauerkraut Recipe

    this is based on Daniel’s Yes You Can! And Freeze and Dry It, Too book.

    1 head of green or red cabbage

    pickling or kosher salt

    Glass, plastic, or ceramic fermentation container

    Remove the outer leaves from your cabbage, just the dinged up ones.

    Chop up your cabbage, you can do this by hand or use the food processor to coarsely grate the cabbage.

    Put the cabbage into a clean large bowl. Add a teaspoon of salt for each pound of cabbage.

    Use your hands to mix the salt into the cabbage, you want to crush and crinkle the cabbage.

    Put the cabbage into a fermentation container, mash the cabbage down and put a clean plate or something similar on top of the cabbage to keep the cabbage down in the container.

    Cover the top of the container with a plastic grocery bag and put the container in a dark cool area.

    Check the sauerkraut after 24 hours, there should be enough brine to cover the top of the cabbage. If there is not, boil a quart of water, add to it 1.5 tablespoons of salt. let the salt water cool, the  top off the sauerkraut so the cabbage is covered.

    Ferment the sauerkraut for at least 5 days, you can go a month if you want to. any mold that forms should be skimmed off.

    When you are happy with the fermentation, put the sauerkraut in a clean closed container in the fridge. ©2011 all rights reserved


  • Tiny House Directory free from Tiny House Blog

    Tiny House Directory free from Tiny House Blog

    GardenFork became a fan of the Tiny House Blog on Facebook today, and at the same time signed up for their email newsletter.

    get this free directory

    As a bonus, when you sign up for their email newsletter, you get a neat downloadable PDF, the Tiny House Directory, an indexed list of websites, blogs, architects, builders, and kits of all sorts of tiny houses. Tiny houses include boats, yurts, wagons, trailers, tipis, straw bale houses, log cabins, prefabs. Neat.
    I like that a bunch of links have been indexed and are all there on a few pages, so you don’t have to use a search engine to find stuff; Tiny House Blog has done all the work for you.

    Andrew Odom, author of the Tiny rEvolution blog and a contributor to Tiny House Blog, got me interested in the Tiny House movement. He has a new post on hanging windows in your tiny house.

    Not all of us will be living in tiny houses, but even if you are not downsizing, you can get great ideas of how to live with less stuff, and lessen your impact on the earth with the info on the Tiny House Blog and Tiny rEvolution.

    You can sign up for our email newsletter right here:


    How are you downsizing? Are you moving to a tiny house? Let us know below:

  • Hurricane Irene & Plywood Boats : GardenFork Radio

    Hurricane Irene & Plywood Boats : GardenFork Radio

    Mike and Eric talk about hurricane Irene, being a weather geek, the Allison House Weather Station that GardenFork uses, and Eric’s new plywood boat video

    hurricane irene talk


    WMR968 Weather Station is available from AmbientWeather.com

  • Puffballs & Mushroom Identification

    Puffballs & Mushroom Identification

    How to identify mushrooms. I get a lot of requests for more information mushroom identification, so i’ve started with this post to show GardenFork readers different mushrooms I run across in the woods and in the city.
    The Giant Puffball can be a common site in urban areas. You might see these large white balls that look like they are from another planet appearing on your lawn, or in a park or meadow. Puffballs like this are common on the East Coast, I’ve also seen them in the Midwest.
    The Puffball Mushroom in the photo here is one I found in Prospect Park, Brooklyn, New York. It was growing on the edge of a meadow near some trees.

    Puffballs such as this are generally edible, though double check with several references and experts before getting out your knife and fork. I have found them to taste underwhelming, kinda like tofu. So maybe you can use them in a stir fry or saute with other vegetables, or in a soup.

    Homesteaders, Urban Homesteaders, Foragers: Let me know how you cook puffballs.

    how to identify mushrooms
    Giant Puffball Mushroom part of the GardenFork Mushroom Identification series
  • Dutch Oven Banana Bread Recipe – Campfire Cooking – GF Video

    Dutch Oven Banana Bread Recipe – Campfire Cooking – GF Video

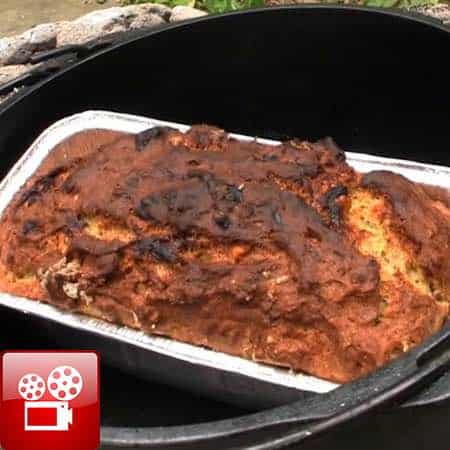
    Dutch oven banana bread recipe baked in a campfire or using charcoal, nice right?. Either way it tastes like the instant comfort food that it is. Watch the video and then read the recipe below.

    Head up: I now have 4 dutch ovens, and all are well seasoned at this point. You can see our  how to season cast iron video here. But I’ve never used a dutch oven for what they were probably originally designed for, cooking over a campfire. So today we use the cast iron dutch oven for what it is for, cooking outdoors. Watch and learn how to bake with fire.

    How to make the dutch oven banana bread recipe

    Whether for campfire cooking or backyard cooking, the dutch oven comes thru as a great pot for baking. Today we are going to learn how to use the dutch oven you have to bake or cook food outdoors, using charcoal or firewood. There are a couple of tricks here we learned from Gary of Cooking-Outdoors.com, like how to stack coals on the lid of a dutch oven, and how to use a dutch oven to bake breads and cakes.

    Update: Reading some of the great comments, I’ve learned that when fully fired up, each charcoal briquette puts out about 40-50F of heat. I will use this info as I experiment more with dutch oven cooking with charcoal and campfires. What fun.

    If you don’t already have them here are links to buy a cast iron dutch oven, a charcoal chimney, and heat resistant oven mitts.

    Some takeaways from this video and recipe, which was really fun to do.

    • Its not perfect. Is baking outdoors ever perfect
    • Use good pot holders and silicon oven gloves.
    • Charcoal is hot!
    • You will love baking outdoors.

    [tasty-recipe id=”13323″]

    Toad In A Hole Recipe
    Check out our Toad In The Hole Recipe, also made outdoors in a dutch oven.

  • How to Chainsaw Tree Logs

    How to Chainsaw Tree Logs

    Here Eric shows you how to use a chainsaw to cut up tree logs into firewood. Keep in mind Eric is not a professional lumberjack, just your average DIY guy who likes to use his chainsaw to cut down trees, and cut the logs to fireplace length. Use this information at your own risk. Always follow all the safety instructions that came with your chainsaw.


    Proper placement of the chainsaw relative to your body, especially your legs and feet is real important here. Think about how the chainsaw may slip down, or up and what part of your body it may hit, which would be a bad thing. What may seem like a comfortable position to hold the saw, especially while you are kneeling to cut up trees, may not be the best way to do something. Steel toed boots are a must have when cutting firewood.

    A sharp chainsaw chain is mandatory, if your chainsaw is spitting out fine sawdust while cutting, its time to switch out the chain with a sharp one. A sharp chain makes large wood shavings when its cutting, not fine wood dust.

    You can watch all our how to cut down a tree chainsaw videos here
    Do you have some chainsaw adventures to share? or some more safety tips on the proper use of a chainsaw? please let us know below

  • How to start a homestead : GardenFork Radio

    How to start a homestead : GardenFork Radio

    Steve and Scott join us today to talk about how the are starting a homestead, what they are planning to do, and where they are getting good information on homesteading. Their homestead will be in Northern California. Scott has a fun blog called Holy Crap I’m A Hippie, and Steve produces several podcasts at the Farm Cast Network site. The books we talked about on our how to homestead show include Build It Better Yourself, which is out of print, but you can find them for sale used.

  • How To Make Maple Syrup at a Sugar Shack: GF Video

    How To Make Maple Syrup at a Sugar Shack: GF Video

    Ever wondered how to make maple syrup? I have a number of friends who have sugar shacks and boil down sugar maple sap to make maple syrup. Last weekend I visited one of my friends and made this video about how to make maple syrup.

    You can also use simpler methods than the one shown here with the 2 stage evaporator, I plan on tapping my sugar maples next year and making maple syrup in with a simple propane burner and stainless steel steam table tray that will be my evaporator.

    Do you make your own maple syrup? How do you make it? and any tips and tricks you can offer us here? Let us know below

  • Urban Homesteading (revised), Megan Paska, The Brooklyn Homesteader

    Urban Homesteading (revised), Megan Paska, The Brooklyn Homesteader

    I met Megan at a beekeeping meetup, and knew we had to have her on GardenFork Radio, so here we are at her place in GreenPoint Brooklyn to talk about urban homesteading. Megan’s sites are www.brooklynhomesteader.com and www.brooklynhoney.com

    Megan Paska
  • Drip Irrigation System with Soaker Hose – GF Video

    Drip Irrigation System with Soaker Hose – GF Video

    I use this homemade DIY drip irrigation system with soaker hose for my raised vegetable beds. Its easy to build and works great. Watch the video to see our first take on a soaker hose system. If you want to build a simpler version see my video for PVC connected soaker hose system.

    The drip irrigation system I built uses copper pipe, which can be expensive, you can also use PVC pipe to build the manifolds that feed the soaker hoses.

    Soaker Hose

    watch more drip irrigationjpg

    I dug a slot into the ground and pushed the garden hose into it to hide the hose feeding each raised bed. This makes lawnmower much easier too, no chance of running over a garden hose that way.

    Soaker Hose Drip Irrigation

    Key to watering your garden with drip irrigation is to not water it too much, i know its fun to watch the water ooze out of the soaker hoses, but you want the beds to dry out a bit between waterings. I water my vegetable beds every 4-5 days. Tomatoes, especially, grow best when the soil dries out between waterings. Too much water is just as bad as not enough water, it makes it easy for fungus and disease to grow.

    Soaker Hose Drip Irrigation

    How long do soaker hoses last? I’ve had these in the ground year round for about 10 years. Some hoses have leaked, but not a lot. And its obvious when they are leaking, and easy to fix. All you do is cut out the leak, and connect the two pieces back together with a piece of pipe.

    If the water pressure going into the hoses is fairly low, or if you use an inline pressure reducer attached to the garden hose, you can use cable ties instead of clamps to put the lines together. Soaker Hose Drip Irrigation

    Water timers for garden hoses have improved a bit lately, below is one i recommend. Some of these timers are awful to try to program.

  • How to build a raised bed for vegetables or flowers GF TV Video

    How to build a raised bed for vegetables or flowers GF TV Video

    Build a simple raised bed with this DIY video. With this raised bed plan we show you how to make raised vegetable or flower beds without using pressure treated lumber  The current raised beds in the garden have been there about 8 years now. So we must have done something right. how unusual… If you want to build raised beds, the ones we have are good for vegetables and flowers, check it out, let us know your thoughts.

    Our raised beds are 4 feet wide and 12 feet long, make sure the raised beds are 4 feet ( 48″ ) wide on the outside dimension. This will make it easy to use floating row fabrics or plastic sheeting that comes in 48″ wide rolls. I learned this the hard way.

    DIY raised bed plan complete

    You may want to consider putting 1/2″ galvanized wire screening across the bottom of the raised bed frame before siting it and loading in all the dirt, this will keep out moles and voles. We haven’t had a huge problem with that, but I see how it could for some people.

    For our garden soil, we had a delivery from a local nursery that sells a garden soil mix. It can be hard to find a company nearby that sells what you want, you may end up mixing it all up yourself. Let me know how you have built your raised beds below:

  • How to start seeds at the Brooklyn Botanic Garden

    How to start seeds at the Brooklyn Botanic Garden

    Learn here how to start seeds in pots or trays with the experts. In the city we live near the Brooklyn Botanic Garden, and they showed us some great seed starting tips. By starting your own seeds, you can get a lot more plants for less money, and you get to grow plants that are not available at your local nursery. neat.

    The Brooklyn Botanic Garden uses bark as a seed starting medium. I can’t seem to find that stuff, so i use coir, which is compressed coconut fiber, and mix in vermiculite or perlite to add some air to the mix.

    One of the keys i think, is to not have the seeds too wet, over-watering your seed starting trays can cause a bunch of problems and kill the seedlings. Its also important to have the seed trays in direct sun, I use a grow light, you can watch our how to build a grow light video here. Having the seeds in a window will cause the seedlings to get leggy – spindly.

    Other GardenFork DIY seed starting videos you may enjoy:

    How to Start Seeds and Make Seed Starting Pots

    How to Start Seeds the GardenFork Way

    How to Build a Grow Light

    Here is a book on seed starting basics you might like to check out:


    Buy From An Independent Bookstore

    Buy From Amazon