Tag: winter beekeeping

  • Will My Bees Survive Winter?

    Will My Bees Survive Winter?

    Helping your bees survive winter is one of the hardest parts of beekeeping. I have several videos about winter bee survival and feeding.  A reader asked:

    It’s been in the 20’s and 30’s for the last two weeks or so with another week of the same temps. If my bees are clustered will they be able to feed and keep clustered enough to survive until the weather breaks?

    Will My Bees Survive Winter
    Beehive insulated, with insulated inner cover, and strapped to survive winter

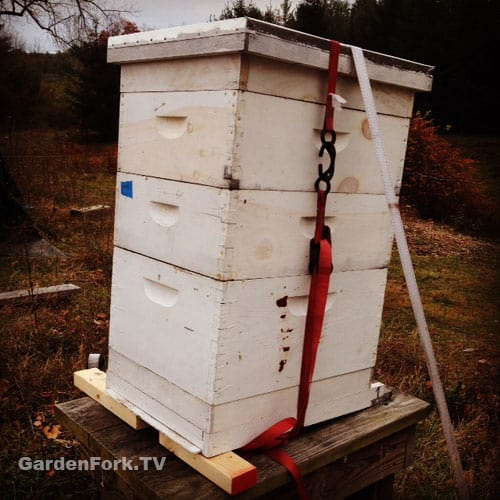
    Will The Bees Survive Winter?

    Honeybees don’t hibernate, they cluster. Their metabolism does slow down, but the don’t ‘go to sleep’. The bees move around the hive, in a balled mass, with the queen in the middle. They move through the hive eating the honey stores. The bees on the outside of the cluster move their wings to generate heat, to keep the cluster warm. And the bees rotate, kinda like a volleyball team, so the bees on the outside of the cluster slowly move to the center to warm up, and the inner bees move outward to be the cluster-warmers.

    In a perfect world, this works fine, then spring comes, and the queen lays eggs, and off we go on another season. But in the northern states, this is not the case. Whatever issues a hive had over the season has a big impact on whether the bees survive winter.

    Best Beekeeping Books
    Best Beekeeping Books That I Still Use

    I’ve got a bunch of vids and how to posts on the topic of winter beekeeping, but I’ll answer the question above right quick.

    Temps in the 20 and 30s are pretty good for winter, I think. The problems get really bad when its near zero. But you can still lose your bees in a 30 degree winter.

    Mite Load. If there are mites in the hive in the fall, that number will explode in winter. As the mite load rises, the bee population declines due to winter die off. The mites will eventually kill off the rest of the hive. Currently I think the best mite treatment is with oxalic acid, here’s the video.

    BTW, just because you don’t see mites doesn’t meant you don’t have any. You more than likely do.

    Will My Bees Survive Winter

    Condensation. The outside of the hive is cold, the inside is warm. Condensation collects on the top of the hive, and drips back down onto the bees. Cold bees are OK in winter, cold wet bees are dead bees in winter. The combined use of dry sugar feeding and a insulated inner cover eliminates condensation.

    Starvation. Either leave a lot of honey on the hive or feed your bees starting in late summer. Sugar syrup is cheap winter bee survival insurance.

    Will My Bees Survive Winter
    Bees eating dry sugar in late winter.

    Emergency Winter Feeding. I think the dry sugar feed is great, but you can also put fondant, sugar cakes, or candy boards on top of your hive. The dry sugar method, aka moutain top feeding, is literally a piece of newspaper on top of the hive with 4 pounds of dry sugar poured on it.

    Northern Queen. Southern queen that come in bee packages have a lower survival rate than Northern Queens. If you have bought a package, you can replace the queen in summer (requeening video here), and increase your chances of winter survival.

    OK, that is my 500 word thought on the subject, what are your thoughts? I always learn from you all in the comments. Thx!

    Prepare your bees for the cold with this winter beekeeping checklist

  • Winter Beehive Inspection – GF Video

    Winter Beehive Inspection – GF Video

    A winter beehive inspection can be either a good thing or a bad thing, here’s a video I made about how I check a beehive in winter.

    Winter Beehive Inspection Rules

    1. Only do this if its warm enough. If its above 40F, its ok, but warmer is better.
    2. Open and close the hive real fast. You don’t want to chill the hive.
    3. Don’t pull any frames, peer down into the hive as best you can.

    In winter, you can’t do much for your bees. What you can do is make sure they have enough food. Of course, you have prepared the hive in the fall, by going through this Winter Beekeeping Prep list. Now about all you can do is open it up quick, and add some sugar if they need it.

    Winter Beehive Inspection Video

    I use the dry sugar winter feed method, and it has worked well for me. So in the winter, I can just pop the cover and top off the layer of dry sugar if need be. If the bees are not looking good or if there are very few bees in the hive, there isn’t much you can do in winter. The hive will probably die, as a result, be more prepared going into fall next year.

    A winter beehive inspection can tell you if you need to order a package or nuc of bees. If the bees are alive, it can also give you a sense of accomplishment. Getting honeybees to survive winter is no small challenge, especially in norther climates.

    Winter Beehive Inspection VideoYou can see in these photos how the bees have chewed through the newspaper and are now eating the dry sugar. Through the winter, the sugar has hardened as it absorbed moisture from the hive, this is a good thing.

    So again, work fast, keep the hive open only as long as needed. Its not summer, its cold out, and the hive has to be kept warm.

    winter-beekeeping-watch-more

    mountain-feeding-sugar-beekeeping-play

  • Varroa Mite Treatment For Bees – Beekeeping 101 – GF Video

    Varroa Mite Treatment For Bees – Beekeeping 101 – GF Video

    Here is the oxalic acid varroa mite treatment I use on our honeybees. I’ve used a few mite treatments in the past, tried the varroa resistant queens, one year I did the hands off method, and the oxalic acid mite treatment is the best thing I’ve used so far. This is based on my use, and other beekeepers I know. Some mite treatments are pretty awful in the hive, oxalic acid strikes a good balance.

    Oxalic acid occurs naturally. It is present in spinach and rhubarb, and is found in small amounts in honey. My treatment method is based on a post by Rusty on my fav beekeeping blog, Honey Bee Suite.

    One of the great things about this method is that it is super easy. Some people will vaporize oxalic acid in their hives, but this requires some gear, and I don’t recommend it for the hobbyist beekeeper. Our treatment process uses a 60 ml syringe. You can buy these at agricultural supply stores, or online here.

    Varro Mite Treatment

    This sugar – acid mix is also great for spraying bee packages before putting then in a hive. It knocks down the mite load quite a bit. All the packages I hive are sprayed with it before dropping into a hive. When treating a regular hive, it is best to apply the mite treatment in late fall, when there is little brood in the hive. The acid will not kill any mites that are in capped cells.

    winter-beekeeping-watch-more

    Varro Mite Treatment
    Oxalic Acid is easiest to buy as wood bleach

    The oxalic acid varroa mite treatment recipe:

    Oxalic acid is also known as wood bleach. It is used by wood finishers. You may be able to find it in a hardware store. I couldn’t find it, so I bought it online, order oxalic acid here. You can buy the syringe here.

    Put 600 ml of hot water in a quart Pyrex container, or similar glass jar.

    Add 35 grams of the oxalic acid crystals and stir to dissolve in the hot water

    Add 600 grams of granulated sugar.

    Store in a glass jar – I use a canning jar.

    Take the cover off the hive, do not break apart the hive. You apply the acid through the top super.

    Measure 50 ml into the syringe, and dribble 5 ml into the spaces between each frame of a 10 frame hive. Some people will use more of the acid in the frame space areas that have more bees in them.

    Rusty suggest practicing the dribble with water before doing this, and I agree. It takes a little work to get it right. Rusty references the Scientific Beekeeping site in her post for the exact oxalic acid varroa mite treatment recipe.

    watch beekeeping videos insert

  • Beehive Winter Wrap – Beekeeping 101 – GF Video

    Beehive Winter Wrap – Beekeeping 101 – GF Video

    After trying several kinds, this beehive winter wrap works best for me. Its easy to put on, and I can re-use it every year. It makes winterizing beehives easier, and the honeybees make it through winter.

    Beehive Winter Wrap How To:

    Insulating the beehive is the first part of winter prep. The second and third parts of winterizing the beehive is to use an insulated inner cover and add a backup source of food, we use the dry sugar method. Before any winterizing, treat the bees for varroa mites.

    watch beekepeing videos insert copyI use the 2″ thick polystyrene you can buy at the lumber store. Its usually used for insulating walls and basements. Its not the cheapest stuff, but it will last a long time, just don’t beat it up. One 24″ x 96″ piece will wrap a hive with some leftover.

    Beehive Winter Wrap

    I cut it with a retractable box knife with the blade pushed all the way out. Be very careful when cutting. Use a piece of metal or wood as a straight edge, and make series of cuts down through the polystyrene. You can also use a hand saw with a straight edge. Best to cut this on a work table or somewhere you don’t mind getting knife marks. Once you make several cuts down through the material, you can snap it off, kinda like cutting drywall.

    Keep in mind the pieces do not have to be perfect.

    Beehive Winter Wrap
    Do Not Block The Lower Entrance
    Beehive Winter Wrap
    Upper Entrance Kept Clear!

    The front piece of insulation will be shorter than the back piece. You have to make sure not to cover the lower or upper entrances with the insulation. These both need to stay open through winter. I use a ratchet strap to hold the hive wrap against the beehive, you could also use 2 bungee cords, one near the top, one near the bottom.

    winter-beekeeping-watch-more

    mountain-feeding-sugar-beekeeping-play

    bee-oxalic-acid-mite-treatment-play

  • Easy Insulated Inner Cover – Beekeeping 101 – GF Video

    Easy Insulated Inner Cover – Beekeeping 101 – GF Video

    Here’s how to put together an insulated inner cover for your beehive without having to buy a new cover or build one. I learned this method from Phillipe at MudSongs.org , he  has some great info on his beekeeping site, very down to earth.

    An insulated inner cover reduces or prevents condensation in the beehive in winter.

    Why does this matter? Condensation is water that collects on the top of the hive. It forms on the side of the inner cover that faces the bees. When enough water collects, it will drip back down onto the bees. Not a good thing.

    Wet bees are dead bees.

    Especially in winter.

    How does this cover help? Condensation happens when warm air meets a cold object. In the beehive in winter, the bee cluster is warm, and there is some humidity in the air. When the warm air from the cluster rises and hits the cold inner cover, the water vapor condenses and drops back onto the bees. Not good.

    Insulated Inner Cover Beekeeping

    The insulation that sits on top of the inner cover here keeps the cover from getting real cold, thus reducing or eliminating condensation. Since I have been using the insulated inner cover, I have not seen signs of condensation in the hive. If you find mold in your hives, you have condensation, FYI.

    My variation on the insulated cover is to put a shim between the upper super and the inner cover. I then put sugar on top of the frames, using the dry sugar, aka mountain camp, method. This sugar provides a backup food source, and absorbs moisture in the hive.

    Be sure the slot of the inner cover is not covered, one should always provide an upper entrance to the hive, plus it allows for air flow. Yes even in cold weather, I believe a hive needs some air flow, so provide an upper entrance. Remember to invert the inner cover.

    You should also insulate the sides of the hive.

    watch beekeeping videos insertHere is how to stack the parts of the top of the beehive, top to bottom:

    • Outer cover sits on top of insulation, and usually covers it.
    • Insulation – I use 2″ thick polystyrene.
    • Inner cover, turned upside down, flat side faces upward.
    • Spacer shim, with dry sugar on top of newspaper.
    • Top brood super

    I built some DIY insulated inner covers that are more involved than this stack method, and they work well for me. If you are handy, have at them.Insulated Inner Cover Beekeeping

    mountain-feeding-sugar-beekeeping-play

    winter-beekeeping-watch-more

  • Mountain Camp Method for Winter Feeding – Beekeeping 101 Video

    Mountain Camp Method for Winter Feeding – Beekeeping 101 Video

    The mountain camp method of feeding your bees sugar during winter is the best way I’ve found so far to provide bees with an emergency food source. For whatever reason, honeybees may run through their winter food stores, and need additional food to get through the tough winter months. The mountain camp method provides this back up food source in a brilliantly simple way. Watch our intro video and follow up video, then read through the rest of this beekeeping 101 post.

    Mountain Camp Method How To

    Mountain Camp Method Beekeeping 101

    Before I started to use this technique, every fall I would make sugar patties for the top of the hives as an emergency feed. They work fine, but making sugar cakes is a pain. This does the same thing.

    The mountain camp method of feeding honeybees emergency sugar is pretty simple. And that’s why I love it. Here’s how to do it:

    • Lay a sheet of newspaper over the top of the hive, cutting it down so there is space around the inside perimeter of the hive box.
    • Pour granulated sugar on top of the newspaper.
    • Spray the pile of sugar with water so it crusts over.
    • Place a spacer shim and/or an insulated inner cover over the pile of sugar.
    • Tilt and strap your hives down for winter.

    watch beekepeing videos insert copyWe built these DIY insulated inner covers that have a spacer built in to allow for sugar feeding, be it sugar syrup in zipper bags or pollen patties. If you don’t use a cover with that allows for this, you can build a simple spacer out of 1″x3″ common pine. I haven’t seen a spacer that’s deep enough for sale anywhere. They are easy to make.

    Insulated Inner Cover with built-in spacer for sugar feeding
    Insulated Inner Cover with built-in spacer for sugar feeding
    Mountain Camp Method Beekeeping 101
    Simple spacer allows for dry and wet sugar feeding. Easy to build.

    This pile of sugar on top of the hive provides a second benefit, it absorbs moisture in the hive during winter, and prevents condensation from dripping back down on to the bees. Wet bees in winter is a very bad thing.

    Questions I have gotten about this method:

    Can I feed them this dry sugar instead of sugar syrup in the fall? No. You still need to feed the bees sugar syrup in the fall. Watch our Sugar Syrup Feed videos.

    My bees have plenty of honey and I fed them sugar syrup during the fall, why do I need to do this? I do the same thing in the fall, but the dry sugar is an emergency winter feed. Sometimes bees run out of their own stores, or sometimes they can’t get to them. Below is a photo of bees taking up sugar I provided them. If I hadn’t provided the bees with this emergency sugar, they would be dead now.

    Mountain Camp Method Beekeeping 101

    Why is it called mountain camp? From what I understand, a person who goes by that name posted this method online a while back and the name stuck.

    winter beek check list watchCheck out more of our beekeeping 101 and winter prep videos and posts:

    Winter Bee Inspection Video

    Build an Insulated Inner Cover

    Let us know your comments below, thanks!

  • Winter Beekeeping Preparation Checklist

    Winter Beekeeping Preparation Checklist

    Getting honeybees ready for winter, aka winter beekeeping preparation, is one of those things that can fall off the list for beekeepers, probably not a good thing. I believe if you just leave your hives as is, most will perish.
    Below we have several videos on getting honeybees ready for winter, but first of all, here’s a few things we do to each hive in late fall to prepare for winter.

    winter-beekeeping-preparation-checklist-5-things-1

    Winter Beekeeping Checklist:

    1. Feed 1:2 sugar syrup in the fall
    2. Treat bees for varroa mites
    3. Feed one gallon of syrup with Fumagillin
    4. Add dry sugar to the top of the hive.
    5. Use an insulated inner cover.
    6. Tilt the hives forward.
    7. Close up the screened bottom board.
    8. Insulate the hives with polystyrene.
    9. Install a mouse guard on entrance.
    10. Strap down the hives.

    Varroa Mite Treatment: From what I understand, varroa mite populations in your beehive soar in winter, so knocking down that population before winter makes sense. Watch our oxalic acid varroa mite treatment video, its pretty easy to do and is a huge step toward getting your bees through winter. One should rotate mite treatments, Hop Guard is the other mite treatment I’d suggest.

    Sugar Syrup: Ask your beekeeping neighbor when they start feeding sugar syrup. I add Fumagillin the first gallon of syrup. Let the bees take down all this treated syrup before adding more sugar syrup to the feeder.

    Dry Sugar: This year we used the mountain camp sugar method when providing sugar on the top of the hive. In years past we have made sugar cakes, but this year I wanted something simpler. Reading about this method on the Honey Bee Suite blog, I agree with Rusty’s post, that the mountain camp dry sugar method works pretty good, and because its easy, you will do it. Making fondant or sugar cakes is a pain, and you will likely procrastinate about making the cakes it until its too late. Watch: Mountain Camp Method Video

    winter-beekeeping-preparation-checklist-5-things
    Mountain Camp Winter Sugar Feeding

    Insulated Inner Covers: I am a big convert to using these. Before I put them on the hives in winter, every spring I would find mold in the hives and dead bees. Insulated inner covers reduce or eliminate condensation from collecting on the top of the hive. Imagine its raining inside a hive in winter, that’s condensation. Wet bees are dead bees. Watch and learn how make an them in this video:

    watch beekepeing videos insert copyOr you can use a piece of polystyrene, a wood spacer you can easily make, and your existing inner cover to do the same thing.

    Insulated Inner Cover Beekeeping

    Winter Beekeeping Preparation
    Top View of Insulated Inner Cover – purchase this or make your own

    Tilt the beehive forward: Gravity works. Extra insurance to keep condensation from raining down on the hive cluster. Tipping the hive forward allows any drops of water that have begun to form on the top of the hive (which is the bottom of the inner cover) to slide forward, hit the front wall of the hive, and finally, draining out the front of the hive. Its easy to do, just slide a 2×4 under the back of each hive before you strap it down.

    "<yoastmark

    A few more winter survival tips:

    Close up the screened bottom board: This is one of those opinion based things. I use screened bottom boards that have a plastic board that slides into the bottom. So I close off the screen in winter. Because it is important to have ventilation in the hive, yet reduce condensation, the hive needs at least one top vent hole.

    Insulate the Hive: First of all, the best method we’ve found so far is to surround the hive with with polystyrene, secured with a ratchet strap. We have two videos about this, watch here: Beehive Winter Wrap

    Winter Beekeeping Preparation

    watch beekeeping videos insert

    Mouse Guard: This can be bought from bee suppliers or you can make one out of 1/2″ hardware screening. One year I blanked on mouse guards, as a result, I lost a hive to mice. Its sad and a pain to clean up.

    Close the guard down to about 2" wide with duct tape
    Close the guard down to about 2″ wide with duct tape

    Strap Down The Hives: This may seem overkill, yet it has saved us. We secure the hives against high winds and bears. One strap goes around the hive itself. The second hive secures the hive to the ground with two metal stakes. Furthermore, if you live in an earthquake zone, strapping your hives is a must. Watch our video about how using straps saved a hive here.

    mountain-feeding-sugar-beekeeping-play

    bee-oxalic-acid-mite-treatment-play

    Winter beekeeping is not the easiest part of keeping bees, therefore some preparation in the fall can help bees survive winter. Follow these tips and increase your chances of getting bees through winter.

    Save

  • Winter Bee Inspection & Dead Bees – Beekeeping 101 Video

    Winter Bee Inspection & Dead Bees – Beekeeping 101 Video

    Another of our Beekeeping 101 videos on how to do a winter bee inspection. Links to more beekeeping videos at end of the post. This time we open up the beehives in late March to show us feeding bees in winter. Keeping bees in areas with snow and winter, you will want to add sugar cakes, aka fondant, in the winter, and then add protein patties in late winter – early spring to get the honeybees going early.

    You can open a beehive if its above 40F to do a quick winter bee inspection, if its in the 30sF, you can open it real quick to put some sugar on the top of the hive. Do not take the hive apart for a full inspection. We are just taking off the outer and inner cover, and looking in from the top of the hive real quick. The faster you do this the better, I think.

    winter beek check list watchHoneybees may not always crawl up to the top and show themselves, they may still be clustered in a lower super, so just leave them that way. If you come across a dead hive, as we did, my suggestion is to leave the hive be, tape up the entrances, and clean out the hive when it warms up. You tape the entrances closed to keep the wax moths from moving in as spring approaches.

    Dead Bees near sugar cake
    Dead Bees near sugar cake

    Why did my bees die? Its not always obvious. Condensation is a big winter killer, but since we switched to the insulated inner covers we built, click for the insulated inner cover post, we have not had a condensation problem in the beehives in winter. Every year we have had a beehive die in winter, it is hard to get them all through winter. So when a hive dies, don’t blame yourself if you have done the following:

    • Followed a plan for varroa mite control
    • Fed bees in fall with sugar syrup
    • Left enough honey in the hive for winter
    • Added sugar cakes or fondant
    • Used an insulated inner cover
    • Tilted the hives forward in fall

    Read more of our beekeeping posts here and watch beekeeping videos here. Thx!

    beekeeping-sugarcake-vid-thumb

    Questions, comments? please let us know below:

  • Winter Bee Check & Sugar Feeding – Beekeeping 101 Video

    Winter Bee Check & Sugar Feeding – Beekeeping 101 Video

    Getting your honeybees through winter is a challenge. We feed our bees sugar in the form of a sugar cake, (sugar cake recipe below video) and show you in this video how to feed your bees sugar in the winter.

    Note: I know use the Mountain Camp method of winter sugar feeding, but the video below is a good visual on checking your bees in winter.


    Another benefit of sugar cakes on top of the hive is that they sugar absorbs moisture, reducing the chance of condensation forming on top of the hive and raining down on your bees, killing them.

    winter beek check list watchWe use these insulated inner covers in the winter, which help greatly in reducing condensation. So the combination of a winter cover and sugar cakes, I believe, really helps with moisture buildup in the hive.

    Many books talk bout using fondant in winter, but I’ve found it is hard to make, and I’m not sure what the exact benefits it has over just plain sugar cakes, which are super simple to make with re-useable foil pans you buy at the store. We add a homemade essential oil mix to the cakes.

    Read more of our beekeeping posts here and watch beekeeping videos here. Thx!

    beekeeping-sugarcake-vid-thumb

    Do you use sugar in your hives in winter? let us know below:

  • DIY Insulated Inner Cover – Beekeeping 101

    DIY Insulated Inner Cover – Beekeeping 101

    Here is the DIY insulated inner cover I built to prevent condensation in our beehives using easily purchased materials. All the hives we have lost have been in the late winter – early spring due to, I believe, condensation and varroa mite load. This year I am determined to eliminate condensation from our hives. Here is a how to on building a DIY insulated inner cover and why you should consider using this cover for your beehives. We put dry sugar inside the inner cover. (Winter feeding beekeeping videos links are at the end of this post.)

    The basics of this design are based on those at the informative beekeeping blog Mudsongs.org . I like to read how Phillip is keeping bees in Newfoundland, Canada.

    NOTE: Since building these DIY covers, I have also started using just a piece of 2″ insulation wedged between the covers, watch the video:

    watch beekepeing videos insert copy

    The inner cover I built has a space below the plywood for feeding the bees sugar , sugar cakes, fondant, pollen, or pollen patties. My thinking was why have a wood shim below the cover to place sugar in, why not make a one piece inner cover/shim. That way there would be on less piece of woodenware to deal with.

    I used pine 1×5 lumber, the outer dimensions are 20″ x 16 1/4″.

    Here is the bottom of the inner cover, you can hold the plywood in place with scrap molding or pieces of wood. Its important that any space between the plywood and side walls is covered, either with scrap trim or other wood, to keep the bees from moving up into the polystyrene. You don’t want the bees trying to chew the insulation. If you have the power tools and woodworking skill, you could dado the insides of the frame and slide the plywood into the dado slot.

    I glued these pieces of wood to the sidewall and the plywood, held with a clamp. This held the plywood at the correct depth to allow the insulation to drop into the upper section of the inner cover perfectly. Only use a waterproof wood glue, our beekeeping teacher said never to use Gorilla Glue, as it can foam, and the bees will try to eat the foam that comes out of the wood joint.

    Here is the 2″ polystyrene placed in the upper section of the insulated inner cover. Use small scraps to fill in any large spaces near the side walls of the cover.

    Be sure to drill vent – exit holes in your inner cover. These are 3/8″ but i’m thinking they should be 1/2″ to allow more airflow. Going forward, I may chisel out a 3/8′ x 1″ notch at the bottom of the cover to allow more bees to use the entrance. The holes seem to jam up traffic.

    How to cut polystyrene: get one of those utility knives with the blades that are real long, the kind that you can snap off when the tip is dull. use a straight edge to score the polystyrene. Don’t use too much pressure, make several passes to allow the knife to cut deeper. Be careful not to cut yourself.

    After scoring the foam about halfway though, you can snap the foam apart.

    Place the cut over the sturdy edge of a work table and make the break.

    top of insulated inner cover with 2″ polystyrene
    The large space built into the inner cover allows for sugar cakes to be easily put in hive
    Honeybees are eating through sugar cakes already

    Read more of our beekeeping posts here and watch beekeeping videos here. Thx!

    beekeeping-sugarcake-vid-thumb

  • Preparing Beehives for Winter

    Preparing Beehives for Winter

    Here’s how to overwinter your beehives & have the bees survive winter. We will do into the following steps that I take to get my beehives to survive winter:

    Note: I have an updated post on winter prep here, but below is a good read as well.

    • Feed bees 2:1 sugar syrup with essential oil mix throughout the fall
    • Insulated Inner Covers
    • Wrap Hives In Polystyrene
    • Sugar Cake  Dry Sugar Winter Feed see this post & videos for the how to
    • Hives tilted forward
    • Metal mouse guards
    • Hives strapped to ground.

    I feed the honeybees sugar syrup all fall, i start just after we harvest honey. I have become a big fan of using zipper type food bags, learn more and see 2 videos here.

    Winter is coming. Just before the October storm that dumped 20″ of snow here, I went out to our two beeyards and got the beehives ready for winter.

    The biggest danger to beehives in winter , i think, is condensation. Humidity builds up inside a warm hive, hits the top of the hive, which is cold, and the water condenses into droplets that rain back down onto the bees. Many times this kills the hive.

    There are a number of things you can do to reduce condensation in a beehive. Most important is to keep air circulating in the hive, don’t seal up the hive tight. You need air moving through the hive to remove the moisture. I believe everyone should use an inner cover with a notch, aka upper entrance, in the warm months. This allows air to flow through the hive .

    In winter, I’ve been using insulated inner covers and sugarcakes with great success.

     The insulated inner covers help reduce condensation, and provide space for the sugarcakes,  watch the video and see insulated inner cover plans here. Since using the insulated inner covers, I have not had condensation problems.

    winter beek check list watchI used to use sugarcakes to provide emergency food and a great way to absorb excess moisture in the hive. But I now use the Mountain Camp Dry Sugar Feed method, and it works well. Video here.

    sliding in sticky boards in the screened bottom board

    There is an ongoing disagreement on whether one should keep the sticky board inserted into the screened bottom board or not in winter. I think it depends on how cold it gets in your area. Around us, it gets below zero a few times each winter, and stays in the single digits at times, so I close the screened bottom board.

    Tilted Hive
    2×4 scraps tilt the hive forward

    The second thing, and just as important, i think, is to tilt the hives. Pretty simple, but tilting the hive will allow any water that has condensed on the inside of the inner top cover of the hive to, by gravity, move toward the front of the hive, and hit the front wall. The water drops then drain out the front of the hive, away from the bees.

    Tilt your hives forward by placing a piece of 2×4 scrap lumber under the back of the hive as shown in the picture.

    I use metal mouse guards on our hives, the holes in the guard allow enough air to move through the hive when used with the insulated inner covers, I think.

    mountain-camp-feed

    beekeeping-sugarcake-vid-thumb

    preparing beehives for winter

    New: I have tried various methods to insulate the hives, and this year I have used 2″ polystyrene. This isn’t the most elegant solution, but it seems to work. I tried various methods of cutting and affixing the insulation, but for this winter, just cutting them to the fit each side of the hive and strapping them together worked well. Its best if you have two people doing this.

    Another important thing to do in areas with high winds in winter, is to strap your hives down to the ground to keep them from blowing over. We double strap our hives because of bears, one strap around the hive itself, another strap goes around the beehive and attaches to stakes hammered into the ground.

    Hives strapped down against winter winds

    We used wooden stakes hammered into the ground for the straps, but they work loose with frost heaves and all. Here is a photo of  GF viewer Doug’s  hives, and he used a spiral metal stake, used for dog runs and camping, that wont pull out of the ground. great idea. i’ve seen these spiral stakes at the home improvement stores.

    spiral stakes work better than my wooden stakes ©2011 Doug Anderson


    Read more of our beekeeping posts here and watch beekeeping videos here. Thx!

  • Preparing for Winter – Beekeeping 101 Video

    Preparing for Winter – Beekeeping 101 Video

    In this Beginning Beekeeping show, we get the hive ready for winter. Raising bees is a great hobby, and here we show how we prepare the beehive for the coming winter. Below the recipe are links to our other beekeeping vids and sources.

    winter beek check list watchGrease Patties:

    I made my own based on reading thru the various online forums and blogs.

    2 cups vegetable shortening  – NOT butter or other flavored shortening

    4 cups white sugar

    10 drops of food grade pepperment oil or wintergreen oil

    1/4 cup mineral block – this is a mineralize salt lick you can get at a farm – ag supply store. break off a chunk with a hammer.

    mix this together and form into 4″ wide patties, they have to be thin enough to be placed between hive supers.

    you can wrap these patties in wax paper , put in a freezer back and freeze for future use.

    Read more of our beekeeping posts here and watch beekeeping videos here. Thx!

    beekeeping-sugarcake-vid-thumb