Tag: cooking video

  • Oven Baked Sweet Potato Dog Treats Recipe – GF Video

    Oven Baked Sweet Potato Dog Treats Recipe – GF Video

    This Oven Baked Sweet Potato Dog Treats Recipe is wicked simple. And probably the easiest dog biscuit recipe you are going to find. Here’s my video on how to make them:

    How to make this sweet potato dog treats recipe:

    Making these treats is the polar opposite of complicated rocket science. But it took a while to figure out how to do this right.

    The sweet potato dog treats you buy in the store are, besides being expensive, not falling apart and crumbling in your hands. I tried to make these several times and mine never would stay intact.

    But I persevered as I didn’t want to pay the high prices these dog treats get in the stores. I don’t blame the makers of these treats for making money, its how we all pay the bills. I imagine the packaging also makes these treats expensive, I have seen them in stores in hard plastic containers or those foil-plastic bags. Not cheap.

    Easy enough to start out here. Hopefully you have or can borrow a mandolin. You can pick on up here: http://amzn.to/2hDGt85 (affiliate link)  If not, cut the sweet potatoes into 1/4″ slices, as uniform as possible with a sharp knife.

    Sweet potato dog treats recipe

    BE VERY CAREFUL when using a mandolin. They can cut your fingers. Most have a vegetable holder-guard,  or you can get one of those chain-mail gloves. And put a towel under the mandolin when cutting the sweet potatoes.

    The secret I found in a another version of this recipe that uses a food dehydrator is this.

    Spray the sweet potato slices with a very light coating of vegetable oil.

    Sweet potato dog treats recipe

    This allow the dog treats to stay slightly pliable, and they wont crack when being stored.

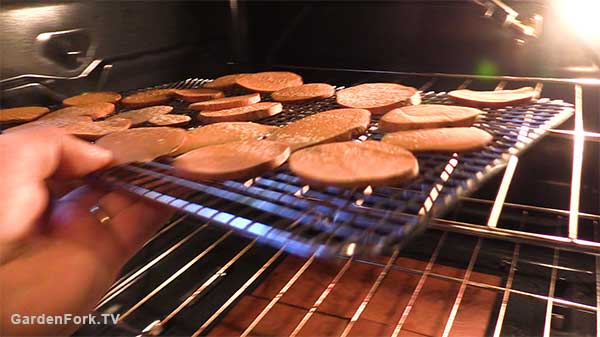
    In our previous sweet potato dog treat recipe video, we used an electric dehydrator to dry the snacks, but this time I wanted to see how the oven would work. The lowest oven temp on my oven is 170F, so I set it to that and turned it on. The dog treats dried in about 3  hours.

    Sweet potato dog treats recipe

    And how cool is that?

    Sweet potato dog treats recipe

    Sweet Potato Dog Treats Recipe : GF Video

  • Bean Hole Beans Recipe, Dig A Hole, Start A Fire, Cook – GF Video

    Bean Hole Beans Recipe, Dig A Hole, Start A Fire, Cook – GF Video

    A while back I read an article about an artisanal bean hole beans recipe, and then and there decided to make the GardenFork version. In other words, the done is better than perfect Bean Hole recipe. Watch the video:

    Any project that involves open fire and food is a good one. Growing up, we would camp in the backyard, and boil crayfish we caught in the quarry pond over our campfire. Fire, coffee can, crayfish = good. Same thing with beans, bacon, and a hole in the ground. Its wicked simple, and fun to do on the weekend, especially in the fall.

    What is a bean hole beans recipe?

    Cooking food in a hole in the ground, as a cooking method, has been around for a long time. Probably since humans learned how to use fire to cook food, or shortly thereafter. But the Bean Hole Beans we are talking about started with the Penobscot Tribe in Maine. They cooked their beans in a clay pot with bear grease and maple syrup.

    This bean hole baked beans recipe was adopted by the logging crews in Maine. One story I read told of how they used this method while transporting logs down the river to the harbor. The cook would ride down the river one day ahead of the logging crew. He would dig a hole and start a pot of beans, mark the spot, and then ride down the river another day, and do the same thing. The loggers would arrive at the camping spot, and dig up the beans for dinner.

    I’m not sure of the veracity of this story, but its certainly plausible to me. And what’s not to like about pulling into camp to find dinner ready?

    Bean hole cooking is the original Crock Pot cooking method of its day, the pre-electric version of the slow cooker. Plus its one of those low and slow methods, which we now know as a braise or BBQ.

    How To Make Bean Hole Beans

    This cooking method, is more than just cooking, its an experience. And it is great. It embraces the two mantras of GardenFork:

    Done is better than perfect.

    Use what you got.

    Here’s what you need:

    • Cast Iron Dutch Oven with a handle, and ideally a rimmed lid.
    • Wood to burn or chunk charcoal. Not large pieces of wood, btw.
    • Used clay bricks or rocks. Don’t use rocks that break when heated.
    • Sheet metal of some sort.
    • Chain, or heavy wire, or coat hangers.
    • Aluminum foil.

    You will need to dig a hole in your yard. I have found its easiest to do this in a raised vegetable garden bed. Its much easier, but dig where you are allowed. THINK about where you are digging, before you dig, OK?

    Bean Hole Beans Recipe

    Your hole is at least 6″ wider than the dutch oven and at least a 12″ deeper. Line the hole with used clay bricks. I don’t think one needs to use firebrick.

    Start a small fire in the hole with small pieces of wood. This will take longer if you use big pieces. Use small pieces. Add wood to this fire to build a larger fire.

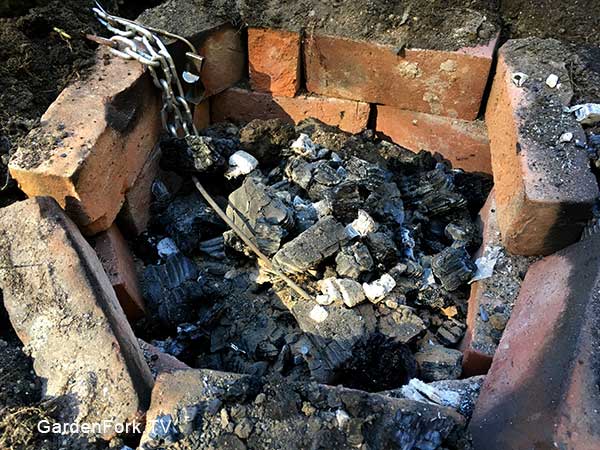
    Let the fire burn down so the wood is starting to turn to coals. This is subjective, but you want a good base of coals to surround your dutch oven. There can be some wood that has not become coals yet. If you wait for everything to be burned down to coals, you’ve probably waited too long.

    Clean the center of the fire pit

    There are many bean hole beans cooks that par boil their beans before putting them in the dutch oven – to me this a waste of time. The beans are going to be cooking a long time. It’s great to brine beans before cooking, i do it all the time, but for this recipe, you don’t need to. OK? Good.

    Bean Hole Beans, the GardenFork recipe

    One 1 lb bag of dried northern beans – not soaked (other white beans work fine too)

    2 TBSP Mustard

    One small can of tomato paste

    1/2 cup maple syrup

    One chopped sweet onion

    4 slices of bacon.

    1 tablespoon kosher salt

    6 cups of water

    – again, use what you got, you can add other stuff to this recipe

    Put all the ingredients in the dutch oven. If your dutch oven lid does not seal well, place one or two layers of aluminum foil between the dutch oven and the lid.

    Cover the outside of the lid with aluminum foil to keep any dirt from getting in to the beans.

    Remove half the coals and move the rest to the sides. Lower the dutch oven into the hole, add back in the hot coals. Cover with the tin and then dirt. Be sure to lay the chain so its outside the fire pit.

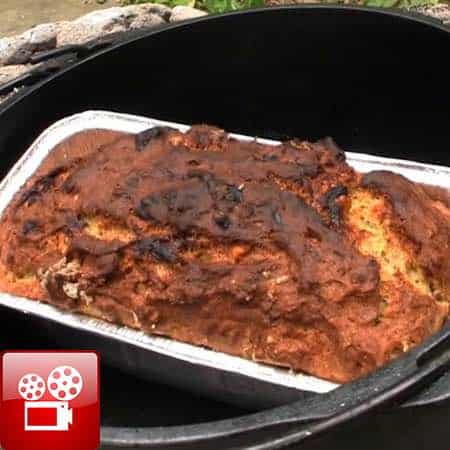
    dutch oven banana bread recipe
    Now watch this dutch oven banana bread video

    Eric Bakes Artisan Bread in Five Minutes a Day


  • Healthy One Pot Pasta Recipe – GF Video

    Healthy One Pot Pasta Recipe – GF Video

    A healthy one pot pasta recipe video inspired by Anna Cole. Take your typical one pot recipe, add kale, and turn it from a carb meal into a green meal, at least thats how I look at it. Check out my video, then read through the recipe.

    I read about this version of a healthy one pot pasta recipe in the the NY Times Food section, where they reviewed some cookbooks, one of which was Anna Cole’s A Modern Way To Cook.

    Cherry Tomatoes Are A Secret Ingredient

    Cherry tomatoes are key here, I think. They seem like these pedestrian items, but when you cook them down, they morph in to something more than a store bought tomato. Of course, garden fresh cherry tomatoes are even better, but use what you got.

    Healthy one pot pasta recipe
    Don’t forget to add the kale!

    The pasta and most of the ingredients go in the pot at once, consequently, its super easy to make this. Even I can do it. Of course, I forgot to add the kale, but it worked out OK. As the spaghetti cooks, it releases starch into the cooking water. This starch mixes with the tomato juices to make a nice sauce.

    Be sure to mix the pasta as soon as you add it in, and as it cooks. I didn’t stir it right away so the spaghetti stuck together a bit. Keep the lid off while it simmers, I forgot that one.

    Chop the kale into smaller pieces than I did in the video. The smaller pieces mix together better when the dish is finished.

    Easy to follow directions for you:

    [tasty-recipe id=”13308″]


  • How To Cut Up Chicken – GF Video

    How To Cut Up Chicken – GF Video

    Wondering how to cut up chicken? The chef term for this is to joint a chicken, but cutting up a chicken is a pretty good term for me.

    When you cut up a chicken instead of buying, lets say, chicken thighs, you save a ton of money. The cost of a whole chicken is not that much more than buying already cut up thighs, for example, and you get a whole chicken to use for other meals.

    How To Cut Up Chicken, Some Tips:

    • Buy poultry shears
    • Wash the cutting board really well
    • Pull out the neck before you start

    I like the poultry shears that come apart for easy cleaning. Super simple way to clean up your tools after breaking down a chicken, and makes it easier to sanitize everything. Mine have good handles so I don’t slip while working.

    Its important to clean your cutting board well after working with meat. I use comet cleanser, because is has some chlorine in it and is scrubs out stains as well. Its easy to cross contaminate, so pay attention to where you are putting your hands after handling chicken and tools.

    Cut Up Chicken

    Pull out the parts! Sometimes I forget to remove the neck and giblets, then I wonder what is going on with this chicken. Even me, the alleged expert has moments like this.

    Consider cooking more than just the breasts or thighs next time, could you use the wings for something? You can make a nice stock with the back of the chicken and some vegetables, for basicaly free.

    That being said, my favorite part of the chicken are the thighs, as they are the easiest to cook. You can overcook the dark meat and it will still taste good. Not true with breasts, you know.

    Do you have any tricks or tips for cutting up a chicken, how about the best way to freeze a chicken after you have cut it up? Please let us know below.

  • Cheater Apple Pie Recipe, aka The Apple Galette – GF Video

    Cheater Apple Pie Recipe, aka The Apple Galette – GF Video

    Simple apple pie recipe hack, this apple galette is much easier to make than a proper apple pie, and tastes and looks just as good. Call it Rustic Apple Pie. Watch the video and check out the recipe below.

    We’ve done a few galette recipes already, and we’ll be doing more, as the form is versatile. Its kinda like a pie tart shell, you can put all sorts of stuff in it, be it sweet or savory. Sign up for our email newsletter to be in the know when we post them.

    Cheater apple pie recipe, aka The Apple Galette

    I call this a cheater apple pie, because its similar to an apple pie recipe, but is less fussy. Roll out dough, drop in fruit, bake, done. Apple pie seems more involved, but we’ll make those too. Now I have ideas for pie in my head. Do you? Let me know below.

    Cheater apple pie recipeThis galette is a low sugar version, a sprinkle of sugar is all I added, and it was fine. I used dried cranberries and learned that its best to have the cranberries tucked under the apples on top of the galette, else they get too crunchy from the oven heat. You could use other dried fruits, but I think we need to eat more cranberries.

    Don’t sweat the pie crust! It’s not rocket science to make a decent crust. Be sure to put the pie dough in the fridge for a while to let it set up. A key ingredient in my pie crust is sugar. It adds a bit of sweetness and crunch to the crust, this same crust would make good rugelach, you know. Have to work on that one. My grandmother made those every Christmas.

    Cheater apple pie recipe

    The apples in this galette get soft, but don’t break down and go mushy, its baked apple slices and cranberries, and goes well with a bit of vanilla ice cream. Some liquid may leak out the side, but that’s ok. Best to bake this on a lined cookie sheet or a greased cast iron flat skillet just in case.

    I used Fuji apples for this, and use my fav apple corer, it makes the prep go fast, I think.

    Cheater Apple Pie Recipe, aka The Apple Galette
    Recipe Type: Dessert
    Cuisine: American
    Author: Eric Rochow
    Prep time:
    Cook time:
    Total time:
    Serves: 1 pie
    A simpler version of apple pie, the apple galette is a open faced rustic crust pastry that you can add all sorts of fruits to. Today we use apples and cranberries
    Ingredients
    • 3-5 apples cored and sliced – if the apples are small use more apples.
    • 1 cup of dried cranberries
    • 1-2 tablespoons sugar
    • 1 tablespoon lemon juice
    • lemon zest
    • 1 1/2 tablespoons cornstarch
    • 1 stick of unsalted butter – cold
    • 1 1/4 cups all purpose flour
    • 1 tablespoon sugar
    • 1/2 tsp salt
    • ice water
    Instructions
    1. If possible, make the pie crust a few hours beforehand, or the day before:
    2. Cut the stick of cold butter into 1/2″ cubes, and place in food processor.
    3. Add the flour and sugar and salt.
    4. Pulse the processor until the flour and butter have cut together. it looks kinda like lumpy cornmeal. if you’re not sure, make sure all the butter cubes have been mixed into the flour.
    5. Put this dough in to a bowl, and add ice cold water a few tablespoons at a time. mix the water into the dough until the dough can form a ball. Don’t add too much water and make the dough sticky. If you do, add some more flour to the dough.
    6. Place this dough onto some plastic wrap, shape it into a large hockey puck, and put in the freezer for 10 minutes, or the fridge for 30 minutes. The longer it is in the fridge , the better the dough gets, I think.
    7. Combine in a bowl the apple slices, lemon, sugar, zest, cornstarch, and cranberries. Mix together.
    8. Roll out the dough on a floured board, you want it about 14″ in diameter, about 1/4-1/8″ thick.
    9. Place the pie dough onto a greased cast iron pan or cookie sheet.
    10. Pour the apples into the center of the crust and pull up the sides onto the pile, pinching the dough together to hold it up. Slip any exposed cranberries underneath some apples.
    11. Bake at 400 for about 35-40 minutes. The apples will not break down, but will be soft.
    Cheater Apple Pie, aka Apple Galette Recipe
  • How To Cook Grilled Steak – GF Video

    How To Cook Grilled Steak – GF Video

    Simplest recipe I’ve found for how to cook grilled steak is to cook steak directly on charcoal. Watch our how to video and get the recipe below.


    How to cook grilled steak directly on charcoal

    Key here is the steak you choose. I like the strip steak. Here they call them NY strip steaks, and the work best with the bone-in. I happen to get these on sale, which was a bonus. You will probably have to ask the butcher to cut you thick steaks. I rarely see thick steaks pre-packaged. These are 1 1/2″ thick. I think thin steaks will not work well with this. You can cook thicker steaks too. The NY Times suggests charring on both sides and then cooking them on a grill if you prefer.

    How To Cook Grilled Steak

    Ideally, you will coat the steaks in the dry rub and leave it on overnight or as long as you can. I did these the same day and they were fine, but planning ahead helps. As you know, I am not great at planning…

    How To Cook Grilled Steak

    Chunk Charcoal, aka hardwood charcoal is the only way to cook grilled steak, you don’t want to use charcoal briquettes. Not sure what briquettes have in them, but chunk charcoal is just wood. You will want two chimneys of wood charcoal. Be careful with the chimneys, I almost melted one of them, the charcoal got so hot.

    How To Cook Grilled Steak

    I found a baking pan worked much better than putting the coals in the bottom of a grill. Made it much easier to work the rig and check the temperature of the steak. When laying the steaks on the coals, plan ahead so you can flip the steak over onto fresh coals. This isn’t a must do thing, but I found it helpful. I was able to cook two strip steaks at a time in a 9×13 pan.

    How do you cook grilled steak? Let me know in the comments below.

    Grilled Steak Dry Rub
    Author: Eric Rochow
    Prep time:
    Cook time:
    Total time:
    This dry rub recipe to cook grilled steak is based on an article from the NY Times by Matt and Ted Lee and Tim Byres of Smoke Restaurant in Dallas Texas.
    Ingredients
    • 2 TBSP of Pimenton Picante, a spanish smoked paprika
    • 2 TBSP Ground Cumin
    • 2 TBSP kosher salt
    • 1/4 cup brown sugar
    • 1/4 cup ground coffee – i used a medium roast set for drip coffee grind, use what you got
    Instructions
    1. Mix all the ingredients together in a bowl, break up the brown sugar with a fork or your hands.
    2. Put the steak on a flat dish and dust the both sides of the steak with the dry rub, patting it onto the steak with a spoon or flat metal spatula, use what you got.
    3. Turn the steak onto its sides and roll it to get the dry rub onto the edges of the steak.
    4. Cover with plastic wrap and put in the fridge overnight.
    5. Let the steak warm up before putting on grill.
    6. Its ok if you don’t do the overnight rub, you can put it on shortly before you grill the steaks also.
    7. This dry rub will coat about 3 steaks.


  • Easy Maple Baked Beans Recipe Video

    Easy Maple Baked Beans Recipe Video

    We just finished the maple syrup season, so its time for our easy maple baked beans recipe. You can use canned beans for this or cook some beans in your pressure cooker. There aren’t a ton of ingredients to this, but the few ingredients combine to make this perfect for a BBQ side dish.

    A viewer suggested the other day that our homemade maple syrup evaporator could be used as a DIY meat smoker, and that provided the easy connection to make baked beans with maple syrup.

    I’ve been to plenty of BBQ places across the U.S.A., and some of the baked beans I’ve been served are not great. I want them to be slightly sweet with some baked tomato flavor, and not too soupy. I’ve seen and eaten a wide range of them, and my easy maple baked beans recipe reflects what I like in a baked bean recipe.

    A good potluck dinner recipe, these beans should be served on a paper plate in your friend’s backyard on one of those red stained wood picnic tables. Or at least one made out of pallets… ( more DIY pallet videos coming )

    easy maple baked beans recipe

    I baked these beans in a seasoned cast iron dutch oven. Learn how to season cast iron here. I think its the perfect vessel for this dish. Its got a nice carrying handle, and the thick walls keep the heat even. And drop that puppy on a potluck table and it looks so much better than those plastic food storage containers, right?

    A lot of recipes call for molasses or brown sugar, or both. I am not big on super sweet beans, and the maple syrup works well, I think. 1/2 cup of syrup does well for me. I would not suggest adding any more, but again, its a personal thing. The canned beans are cannelini beans, but any white bean works here – you could even use lima beans – which has now got me thinking about a lima bean baked dish.

    The small can of tomato paste stands in for ketchup. I LOVE ketchup, especially on meatloaf, but these beans are better without it.
    Here are a variety of cast iron dutch ovens to check out:


    Easy Maple Baked Beans Recipe Video
    Author: Eric Rochow
    Prep time:
    Cook time:
    Total time:
    A perfect segue from the Maple Syrup season to the BBQ season, baked beans work in winter and summer, perfect potluck dinner recipe or just because you love baked beans like I do.
    Ingredients
    • 2 29 oz cans of white beans – northern, cannelini, small whites.
    • 1 6 oz can tomato paste
    • 1 medium onion chopped medium
    • 1 tablespoon Worcestershire Sauce
    • 2 tablespoons brown or good deli mustard
    • 1/2 cup real maple syrup
    • 5 strips of bacon, thick cut is preferred
    Instructions
    1. Drain the liquid from one of the cans of cooked beans.
    2. Roughly chop the onion.
    3. Cut or Slice 3 of the bacon strips into 1/2″ pieces. Cook in a fry pan while preparing the dutch oven.
    4. Put about 2 tablespoons of the bacon fat or vegetable oil in the dutch oven on the stovetop.
    5. Add in the onion and cook, you want the onion to start to brown and be kinda clear.
    6. Put in the two cans of beans, reserving the drained liquid from one of the cans.
    7. Add the tomato paste, Worchestershire, mustard, maple syrup.
    8. Add in the cooked bacon and mix together the ingredients.
    9. At this point, see how much liquid is in the pot, the liquid should not be above the beans. The top layer of beans should be just above the liquid.
    10. Add more bean liquid if the liquid level is too low.
    11. Lay the remaining uncooked bacon across the top of the bean mix.
    12. Set the oven to 350F and cook covered for 30-40 minutes. Check at 30 minutes, if its not bubbling, cook a bit longer.
    13. Take the lid off the beans, turn on the oven broiler, and put the beans about 6″ below the broiler for 10 minutes, when the top starts to brown, its done.
  • 5 No Knead Bread Recipe Tips – GF Cooks Video

    5 No Knead Bread Recipe Tips – GF Cooks Video

    Make better bread with these 5 no knead bread recipe tips I’ve learned from baking this great bread. The original recipe is great, but with a few baking tips, its even better. Below are links to our other no knead bread videos. Watch our tips video here and then tell us your bread baking tips in the comments below.


    The basic no knead bread recipe can be changed up several ways, we did a steel cut oatmeal no knead recipe video here, that adds a neat oat flavor to the bread.
    First a big thank you to Jim Lahey, and his book, My Bread, The No Knead Method. He also has a pizza book, My Pizza.

    Using parchment paper has been a lightbulb for me. I’m not sure where I learned it from, but I used to flop the dough in to the dutch oven with some unfortunate results. Now I simply lower the bread dough in to the hot dutch oven. Its OK that the parchment sticks out of the lid, not a problem.

    5 no knead bread recipe tips

    Using a digital scale to measure your ingredients makes a huge difference! Yes, I am a convert to this method, as you can tell. The drag and scoop method makes for inaccurate measuring. Why does the bakery bread taste better? They use a scale to measure their ingredients.

    We love our dutch oven, but you don’t absolutely need one to bake the no knead bread recipe. Any oven proof bowl that has a lid that wont melt will work. Corning Ware kind of stuff is what we are talking about here big casseroles, etc.

    You can make cool designs in your bread, we use scissors, but you can use some serrated knives, and this fancy bread baking tool called a Lame. Dust the top of the dough before you cut into it. What kind of flour do you dust your bread with? I’d like to read about what people are using.

    Yes, you can make a whole wheat no knead bread, but from what I’ve found, the 100% whole wheat breads don’t come out great. We usually add up to 30% whole wheat to bread flour. Works pretty good.

  • Pumpkin Cornbread Recipe – GF Video

    Pumpkin Cornbread Recipe – GF Video

    A cornbread recipe that adds in pumpkin to change it up. This will go great with chili, stews, or as a Thanksgiving side dish recipe. I love cornbread already, and when I saw pumpkin puree on sale at the store, I started to think of ways to use it, and there you go: add it to a cornbread recipe!


    A couple of key things here, I use a sectional cast iron pan for this, you can use a cast iron fry pan or an 8×8 or other square baking pan as well. A glass baking dish will make the best crust, I think. If you are using cast iron, put the fry pan in the oven and then preheat the oven and the cast iron. Do not oil the cast iron pan, just let it heat up. We will oil the pan just before we put in the batter, OK? You can buy the cast iron cornbread pan here. This post may contain affiliate links which won’t change your price but I earn a commission from. Thx!

    If you are using a baking pan, put 2 tablespoons of butter in the pan, and put it in the oven to melt just before you are ready to add in the batter. Take care not to burn the butter, this is a bad thing. If the butter burns, get a clean pan out and start over with that process.

    This is basically a quick bread recipe, so take care not to over mix the batter, the milk helps everything come together pretty well, but don’t beat it into a mess. If you want more pumpkin flavor, add in more puree, and dial back on the milk. It will be an experiment, but I think it will come out fine. Let me know how you use pumpkin in the comments below.

    pumpkin-cornbread-recipe-gf-cooks-video2

    Pumpkin Cornbread Recipe
    Recipe Type: Bread
    Cuisine: American
    Author: Eric Rochow
    Prep time:
    Cook time:
    Total time:
    Serves: 8[url:1][img:1]
    Cast Iron Corn Bread Recipe gets a flavor upgrade with Pumpkin for Thanksgiving or any time.
    Ingredients
    • 1 1/2 cups Cornmeal
    • 1/2 cup All Purpose Flour
    • 1 tablespoon Baking Powder
    • 1 teaspoon Salt
    • 1/4 cup Brown Sugar
    • 1/2 teaspoon Nutmeg
    • 2 Eggs
    • 1 cup Pumpkin Puree
    • 1/4 cup Vegetable Oil
    • 1/2 cup Milk
    Instructions
    1. Preheat the oven to 375F and preheat the cast iron pan if you are using one.
    2. Mix all the dry ingredients together in medium sized bowl
    3. Crack the two eggs into a small bowl and scramble them together, then add to the dry batter.
    4. Add in the puree, milk, veg oil.
    5. Mix the ingredients together, but don’t over mix, OK?
    6. If using a baking pan, put 2 tablespoons of butter in it, and place in the oven to melt.
    7. After butter has melted, swirl it around in pan and then add batter.
    8. If using cast iron, take pan out, swab vegetable oil all around and add batter.
    9. Bake for about 30 minutes and test for doneness. Its not the end of the world if cornbread overbakes a bit.
    10. Let cool for 1o minutes then pop out of the pan.
    11. This tastes great with maple syrup.

  • Cherry Tomato Recipe: Make Pesto! – GF Video

    Cherry Tomato Recipe: Make Pesto! – GF Video

    A cherry tomato recipe that is a new one to me: Cherry Tomato Pesto. I heard about this from Lidia Bastianich, who was interviewed on ATK Radio and mentioned it. I was surprised at how well it turned out, never had I thought of making pesto this way before. What fun to have a new and unique cherry tomato recipe just in time for the tomato overflow from the garden.

    Another interesting ingredient in this pesto recipe is the use of almonds, which i had not thought of before but now seems so obvious. One thing I did learn while working on this recipe was that the almonds need to be ground up in the food processor before adding in the rest of the ingredients. Just dumping them in with the tomatoes doesn’t work, as the almonds are still pretty chunky when the rest of the ingredients have been mixed together.

    Basil does play a role here, but you could also use parsley, both work well when paired with tomato. I imagine you have both growing in your garden somewhere near the cherry tomatoes, do a mix of the two if you like.

    And do not use cheap olive oil for a pesto recipe, use the best you can get, or almost the best. There are a lot of adulterated olive oils out there, you can check out Truth In Olive Oil for a list of good olive oils you can buy in your area.

    cherry-tomato-recipe-make-pesto-1

    Not your usual Cherry Tomato Recipe

    Cherry Tomato Pesto Recipe  based on Lidia Bastianich’s recipe

    • 1 pint cherry tomatoes, not the super sweet kind, a mix is good.
    • 3/4 cup grated Pecorino Romano cheese, buy a wedge and grate it yourself
    • Approx 1 cup Extra Virgin Olive Oil
    • 3/4 cup raw almonds, not salted or roasted, but you could use the salt-roast kind in a pinch
    • 1 medium clove of garlic, smashed or minced
    • 1 small handful of basil leaves and young stems
    1. Mince of smash the garlic and let it sit out while you prepare the rest of the ingredients.
    2. Put the almonds in a dry saute pan on the stove, and toast lightly. Be careful not to burn them. The almonds will click when its time to turn them.
    3. Grate the Pecorino Romano cheese with the large holes of a box grater.
    4. Pull the basil leaves and young stems from the woody older stems.
    5. Put the toasted almonds in the food process and break them down to small chunks and some powder
    6. Add the cherry tomatoes, cheese, garlic, basil.
    7. Turn on the food processor and mix this all together, be careful not to over process, you want this to have some texture.
    8. Slowly drizzle the olive oil into the food processor as it mixed the ingredients together. The pesto will thicken a bit.
    9. Test for salt, it may or may not need some.

    Do you have a favorite cherry tomato recipe? Let us know below!


  • Thaw Meat Quickly How To – GF Video

    Thaw Meat Quickly How To – GF Video

    Learn how to thaw meat quicky, defrost steaks, chicken breasts, fish and other smaller pieces of meat with this simple method. No longer does one have to defrost meat in the fridge overnight. No when you get home from work, you can thaw meat quickly and have it for dinner that night.

    The information presented here was first published in the NY Times in a article by our favorite food science writer, Harold McGee.

    The science behind how to thaw meat quickly

    Liquids transfer heat more efficiently than air, so if you want to change the temperature of an object, putting it in a liquid instead of the fridge will cause the objects temperature to change faster. Putting a frozen steak in the fridge overnight, the steak is surrounded by slightly warmer air, and over time, an equalization of temperature happens.

    Putting that same frozen meat in a warmer tray of water, the temperature equalization will happen much faster. The warmer water will cause the meat to warm up, and the water will lose of of its warmth, both the water and steak come to an equilibrium eventually.

    For a long time, we’ve been taught that you can run cold water over a piece of frozen meat to thaw it. But this still takes some time and lots of water, despite the water running at a trickle. Now we’ve learned that you can use warm water – I use about 100F water – to defrost meat quickly.

    A few rules here:

    • One must cook the meat right after defrosting it
    • This works only for small pieces of meat- steaks, fillets, breasts, etc.
    • The meat must be fully submerged in the water, weigh it down with something heavy.

    An alternative to the hot water running over the meat is to fill pot with 125F water, and put the meat in it. Stir the water occasionally, and the meat will defrost. Its important to stir the water. This method saves water too.

    thaw-meat-quickly-gf-video
    Chicken Breasts can be thawed quickly with this method

    What do you all think? Let us know below:

  • Quick Coleslaw Recipe -GF Video

    Quick Coleslaw Recipe -GF Video

    Here’s a quick coleslaw recipe that takes no time to put together. This is a perfect addition to one of our pulled pork recipes. The pairing of BBQ and coleslaw is a given in the GardenFork world, so here we go!

    We use the grater disc on our food processor for this quick coleslaw recipe, you can also use a box grater or a mandolin, but it will take longer, hence, less quick. OK? We used a larger size grater hole for the carrots. I think big chunks of cabbage are unappealing, but I also don’t want the cabbage to look like sawdust. Just my thoughts here.

    You can use red cabbage for part or all of the cabbage in this recipe, but I’d suggest adding some red cabbage but not 100%. Its just too much, and i think red cabbage is a tougher chew when it is raw. We do have some great red cabbage recipe videos here, so check them out after make this coleslaw.

    Quick Coleslaw Recipe

    1 medium head of green cabbage

    4 good sized carrots, washed well but not peeled.

    2 teaspoons of caraway

    1 tablespoon deli or brown mustard

    1/2 cup virgin olive oil

    4 tablespoons apple cider vinegar

    salt and pepper to taste

    Cut the cabbage into quarters and remove the core. Then cut into chunks that will fit into your food processor. Put on the grater blade and shred the cabbage.

    Change the blade to a coarser one and grate the carrots.

    In a large bowl add in the olive oil, vinegar, caraway, mustard, salt and pepper. Whisk this together. The mustard will bind it all together. Taste for salt, you may need to add more afterward.

    Add in the shredded cabbage and carrots, and toss well. This tastes best when put in the fridge overnight, I think, but you can serve it right away as well.


  • Dr Pepper Pulled Pork Slow Cooker Recipe – GF Video

    Dr Pepper Pulled Pork Slow Cooker Recipe – GF Video

    Pulled Pork is a GardenFork favorite, and I’ve heard of adding soda to the slow cooker, so here is our Dr Pepper Pulled Pork Slow Cooker Recipe. I like how the soda adds some sugar-caramel flavor, plus that raspberry taste that Dr Pepper has. Plus it was just fun to put this together to see what happened. What did happen was a great pulled pork. Add a side of our easy coleslaw recipe and you are good to go for a summer BBQ. Yet another great slow cooker recipe

    We used a smaller pork shoulder for this recipe, but you can use a large one if you have a large slow cooker. The cut of shoulder we use is also called a Pernil, you might see that on the label at the butcher. We like skin on and bone in, but you can use a boneless pork butt if that is what you have. Use what you got. The skin, aka fat cap, adds flavor, and you peel it off after the pork shoulder has spent its time in the crock pot.

    Dr Pepper may sound like an odd choice, but I like it. I do not drink a lot of soda, but Dr Pepper has that cola taste with a touch of raspberry that makes me want to try it with this. Colas in general have sugar and caramel, which work well for slow cooking meats, I think.


    A key tool to have here is a gravy separator, which I did not own until recently, but I’m glad I have it. After the pork is cooked, pour the cooking liquid into the gravy separator, and add some of this braise liquid back into the pork after it is pulled apart. I’ve seen a bunch of recipes that toss this cooking liquid, not sure why.

    Cole Slaw is a must for pulled pork, and we have a companion video with an easy Coleslaw recipe here. I like apple cider vinegar in my slaw, and sweet tomato BBQ sauce in BBQ pork.

    Dr. Pepper Pulled Pork Slow Cooker Recipe

    3-4 lb pork shoulder, bone-in, skin on

    1 bottle Dr. Pepper

    1 medium onion, chopped into rough chunks

    This is one of those throw it all in and turn it on pulled pork recipes. Some people brown the pork before braising it, and we have another pulled pork slow cooker recipe where you can do a dry rub overnight here. But this is super simple

    Take all three ingredients and put them in the slow cooker. You want the Dr. Pepper to cover about 2/3 of the pork shoulder.

    Put the cover on the slow cooker and turn it on Low and let it go for 5  hours, check it with a fork. If the pork is not falling apart tender, put the lid back on and let it go longer, check again in an hour. Repeat.

    Once cooked, remove the pork, and pour the braise liquid into a gravy separator. Remove the fat cap and shred the pork with two forks.

    Pour the braise liquid over the pork, using the separator to avoid adding the liquid fat back into the pork.

    This is best when put in the fridge overnight, but you can dress it right away with BBQ (sparingly) and have at it.

    The accompanying Coleslaw recipe is here.

    cole slaw vid


  • Grilled Pineapple – GF Video

    Grilled Pineapple – GF Video

    Are you grilling some food tonight? Then try this Grilled Pineapple Recipe while you’re at it. I like the idea of making dessert outdoors, one less thing to heat up the house with.

    We’ve touched a bit on grilled fruit before, with mixed results, but this one works well and is easy to do. Its a good way to get your kids acquainted with grilling and the payoff is a healthy dessert. Nice.

    Grilled Pineapple How To

    At its simplest, we take pineapple, slice it up, and place it on an oiled hot grill and keep our eyes on it. Half inch pieces work well for us, any thinner and they burn quickly and can be hard to lift up off the grill. Learn from my experience.

    This grilled pineapple can be cooked on a gas or charcoal grill, or you can use the broiler in your oven. In the summer I’m all about keeping heat out of the house, so if we are already grilling some meat or vegetables, I automatically think about grilled fruit. One could also make this in the fireplace with a grate like the one we use in our fireplace cooking videos here.

    Variations on grilled pineapple

    There are a lot of recipes that say to put the pineapple in a marinade or glaze it with oil or sugar. I don’t see the need for this, but go ahead and try it with honey or brown sugar. We drizzle some of our balsamic vinegar reduction on it (video here), and sprinkle on cinnamon or nutmeg. Chunky salt flakes are good too for that sweet – salt thing.

    A few thoughts on cutting up pineapple here. You can add the skin and top to the compost pile, but it will take a while for the top of the thing  to break down. Its kinda like a cactus or spiny aloe vera plant with thick leaves. One GF viewer suggested saving the skin and cuttings and put them in a juicer, had not hear of that one.

    Let me know your thoughts below on how to make grilled pineapple.


  • Garlic Scape Recipe, A Scape Frittata – GF Video

    Garlic Scape Recipe, A Scape Frittata – GF Video

    Here’s a garlic scape recipe that my friend Georgina sent to me, and I immediately wanted to make it. I had given Georgina a bunch of scapes we had harvested from our garlic plants, and she sent me a photo of the scape frittata she made. Hence this video.

    What I like about this garlic scape recipe is it moves scapes beyond the usual sauteed garlic scapes, which we have a video of here, into an area i had not thought of. But then it became obvious to me that garlic scapes can be substituted into many recipes that call for scallions or chives.

    Raw, garlic scapes have a bit of a bite, but when cooked, they mellow out. We use them in a pesto recipe raw, but I usually cook them down in a pan with some olive oil when used in other dishes.

    When harvesting garlic scapes, be sure to get them before it uncurls. That’s when the stem gets woody. You want the young immature flower and stem. If you grab them when it unfurls, you wont like the taste or the hard stem. If you don’t grow your own garlic, you can usually find garlic scapes in your Farmers Market in late spring and early summer. If you belong to a CSA, there’s a good chance you will find them in your allotment box at some point.

    To get the garlic smell off your hands after handling scapes, or garlic in general, grab a stainless steel spoon or similar tool, and rub your hands over the spoon under running water. Not sure how it does it, but the stainless steel removes the garlic smell from your hands. We’ll have to find out what that happens.

    Below is our Garlic Scape Recipe, let us know your thoughts and suggestions for more scape recipes!

    Egg Frittatta Garlic Scape Recipe

    5 or 6 eggs

    1 cup of chopped garlic scapes, 1/2″ long

    2 slices of bacon – optional

    Parmesan Cheese to taste

    2 tablespoons of milk

    If using, cook the bacon in an 9″ oven proof fry pan, set the bacon aside and drain off most of the bacon fat, leave about a tablespoon.

    With the pan still hot, toss in the garlic scapes and cook  them down to your liking. I like them brown

    Put the scapes in a bowl and crumble the bacon into the bowl.

    Add a few glugs of olive oil into the pan, and pour in the eggs. Add the scapes and bacon on top of the eggs. Don’t touch.

    Turn down the heat and let the eggs cook slowly. It should be 5-6 minutes, mbe more depending on how many eggs.

    Fire up the broiler and place the pan under the broiler to cook the top of the Frittata, I like to brown the top, but careful not to brown it.

    Slice the frittata into wedges, and sprinkle with some cheese or add dollops of goat cheese.

    Serve warm or cold.

  • 2 Ingredient Cake Recipe – GF Video

    2 Ingredient Cake Recipe – GF Video

    Bake a simple cake with our 2 ingredient cake recipe. Yes, it works. Super simple cake recipe, just watch our video and follow along.

    This cake recipe succeeds because ice cream has the same ingredient as most cakes:

    • Eggs
    • Dairy – in this case cream and milk
    • Vanilla or some sort of flavoring


    The addition of self rising flour makes for a true 2 ingredient cake. I have found if you want to get a high rise, use a narrow loaf pan. And in true “use what you got”™ GardenFork style, we had some dried cranberries on hand, so we tossed those in. You could add in walnuts or raisinss, dates, etc.

    The choice of what kind of ice cream opens up all sorts of possiblities. Want to make pistachio cake? Buy pistachio ice cream. I think a chocolate chip mint ice cream cake sounds great. That and   cup of coffee makes dessert easy. I also like this style of simple cake recipe because it gets kids interested in cooking. I’m thinking they will be curious about how ice cream can become cake.

    I like to have ice cream along with most quick cakes, and our 2 ingredient cake work well with additional ice cream in its original form alongside the cake. Now i’m wondering if someone makes banana ice cream, and whether it would work , and how it would taste. With the endless flavors of ice cream available, you will busy with the cake recipe.

    If you like easy cakes, consider trying out our 5 minute microwave cake, decadent and done in 5 min. nice.

    2-ingredient-cake-recipe-gf-video

    If you don’t have self rising flour, you can make some. For each cup of self rising flour needed, add 1 1/2 teaspoons of baking powder and a pinch of salt to one cup of all purpose flour

    2 Ingredient Cake Recipe
    Ingredients
    • 1 pint high quality ice cream, vanilla to start
    • 1 1/2 cups self rising flour
    • handful nuts, dried fruits, whatever you got
    Cooking Directions
    1. Preheat your oven to 350 F
    2. Oil and flour a 4 x 8 cake pan or similar loaf pan
    3. Put the ice cream on counter to melt.
    4. When its kinda thick but liquid-like, pour the ice cream into a bowl.
    5. Add the flour and mix, but don\’t over mix.
    6. Pour into cake pan
    7. Bake for 45 min, until knife comes out clean.

  • How to make homemade pasta GF TV Video

    How to make homemade pasta GF TV Video

    Home made pasta, aka fresh pasta, we show you how to make a home made pasta recipe in the GF cooking video. Pasta from scratch is not hard, there’s just a few steps to get it right. Homemade pasta tastes different from store bought pasta, and when you make it yourself, there are infinite variations possible. neat.

    There’s a good chance you have a pasta machine in the basement, an xmas gift from a while back that you never got to, so you’ve got the equipment. If you don’t have a pasta machine, check out these pasta machines
    or the links at the bottom of this article.

    My technique for making home made pasta is based on a method Jamie Oliver shows us in his book, Cook with Jamie: My Guide to Making You a Better Cook
    – a book I really like, BTW.

    Home Made Pasta Recipe  ©2012 Eric Rochow

    100 Grams all purpose or Italian “OO” flour

    1 egg

    For homemade pasta, you can use either all purpose flour or an italian flour labeled “OO”, i believe its a finer grind flour, but if you can’t find it, all purpose flour works fine.

    The ratio that I’ve found works best is 100 grams of flour to 1 egg. If you are making fresh pasta for 4 people, I’ve found 300 grams of flour and 3 eggs works well.

    Put the flour and eggs in a food processor, and pulse until the flour comes together and looks like small pebbles.

    Dump the pasta dough mixture onto a floured board, and collect the flour into a ball.

    Now knead the dough by stretching the dough out and folding it over on itself. Its best to watch our how to video to see this. Knead for 5-8 minutes

    The dough is kneaded when you press your finger lightly into the dough and the dough fills out the dimple you’ve made again, the dough bounces back.

    Shape the dough into a rectangle, wrap in plastic wrap, and put in the fridge for at least 30 minutes, longer is better.

    Take the dough out of the fridge and cut into square pieces about 3″ x 3″,  3/4″ thick. how many pieces you will have depends on how much flour and eggs you mixed together.

    Take one of the dough squares and run it through your pasta machine at its widest width. Fold the dough back over on itself in thirds, like folding a letter into an envelope.

    You will now run the dough through each width setting on the machine, holding the dough so the folds are on the sides. You may need to flour the dough when rolling it through the machine to keep it from sticking.

    After you have run the dough through the machine at its smallest width, take the dough and fold it back on itself until it is about 4″ wide or so, you want a width that is small enough so you can run the dough through the machine again.

    Run the dough the machine again, starting at the widest width and progressing through to the narrowest setting. Note: some machines  have a real narrow final width, you may not want to get the dough that thin, it depends on what kind of pasta you want to make, and how thick you want it to be.

    You can cut the dough in half if it gets too difficult to work with. And you can flour the dough as needed.


    You are now ready to run the pasta dough through the die cutters to make various kinds of pasta, or you can hand cut it on a board, or you can make ravioli with the dough. I’ve found it works best to let the pasta dough rest under a towel for 10 minutes or longer before running it through the pasta cutters, you may need to flour the dough again, you want it quite dry.

    The flour you use for dusting can be whole wheat or semolina or just regular flour. I’ve used whole wheat thinking it gives a bit of a nutty taste to the pasta, but maybe i’m just fooling myself.

    Once you cut your pasta, you can drop it into boiling water or let it dry on a dowel or broomstick set between two chairs. Fresh pasta can take 3 minutes to cook, or 8 minutes, it all depends, you’ll have to keep an eye on it.

  • How to Cook Steak Perfect : GF video

    How to Cook Steak Perfect : GF video

    Learn how to cook the perfect steak in this steak cooking video we made. Simple steak recipe that uses a frozen steak, so you don’t have to wait to defrost it. Neat. If you are looking for the answer to how to cook the perfect steak, watch this GardenFork video, you will be amazed at this easy steak recipe.

    This steak recipe video was inspired by Melissa Clark of the NY Times and Nathan Myhrvold, author of the 5 volume Modernist Cuisine: The Art and Science of Cooking. They made a video on the NY Times site showing this method, and I wanted to share it with you all and put the GardenFork spin on how to cook steak.
    For this steak cooking method, I suggest a propane torch from the hardware store, don’t buy one of those little butane torches at the cooking supply store, buy the real thing. Its also great for making Creme Brule, see our how to make Creme Brule video here.

    We have also made a video about cooking steak sous vide, which is also a great way to cook steak and is part of the modernist cuisine movement. Our version of sous vide cooking uses a beer cooler, low tech but it works, much like a propane tech is low tech but it works.
    I have a copy of the Modernist Cuisine At Home and really like it. If you want the full set, you can get that below as well.

    Tell us your steak recipes, hacks and hints below, love to hear from you all, eric.