Tag: full-image

  • Bottling HomeBrew Beer – Home Brewing 101 – GF Video

    Bottling HomeBrew Beer – Home Brewing 101 – GF Video

    Learn how to bottle homebrew beer and hard cider in our homebrewing 101 tutorial video. Eric show you that bottling homebrew beer is not hard, all you need are brown bottles and a few pieces of equipment. This same homebrew how to applies to bottling hard cider.

    Get your supplies from your local homebrew store, or consider Midwest Supplies, we like these guys:

    Make Your Homebrew Easier with this gear

    • Jet Bottle Washer: attaches to your faucet, rinses bottles quickly
    • Bottle Tree: great way to hold, dry, and move 2 cases of bottles
    • Bottle Filler: simple bottle filler makes it all easier
    • Siphon Starter: its a pain to get a siphon started without something like this

    The most important thing to remember is everything must be CLEAN that comes into contact with your beer or hard cider. You can use a diluted bleach solution, or better yet, a sanitizer. There are several types available from your homebrew supplier.

    bottling-homebrew-beer-home-brewing-101If you decide to use bleach, 1 tablespoon of laundry bleach per gallon of water works fine. Keep in mind if this gets on your clothes, it will leave white dots and patches. Not good. This is why I use sanitizer. I have ruined several pairs of pants with bleach.

    Move your fermenter bucket carefully. There is sediment at the bottom of the bucket, and you don’t want to stir it up. Its best to elevate the bucket above your work surface. Its a pain to bottle beer on the floor. Gently remove the airlock and fermenter lid.

    If you get lots of bubbles in your bottling tube, check that you have the right diameter tubing. It really helps to have 2 people doing the beer bottling, as something always spills. If you have to put down the bottle filler tube, place it in a clean bottle, so the tip does not get dirty. Remember, clean is everything with homebrewing.

    Have some suggestions? Questions? Let us know below:

  • Clear Cloudy Honey – Beekeeping 101 – GF Video

    Clear Cloudy Honey – Beekeeping 101 – GF Video

    Clear Cloudy Honey with our how to video. Crystallized Honey can be easily decrystallized, watch Eric show you how. Why causes cloudy honey? The most common reason is temperature. The honey has been stored somewhere and the honey temperature eventually lowers enough to crystalize. The moisture content of the honey also causes cloudy honey.

    How to Clear Cloudy Honey, some info:

    clear-cloudy-honey-200pxIs it safe to eat cloudy honey? Yes, honey keeps for years. You can stir crystallized honey into your tea and it will dissolve just fine. Its hard to measure cloudy honey for baking, so its best to warm it first.
    Can I use a slow cooker as a cloudy honey fix? Yes, its a great solution

    There is some foam that floated to the top of the warmed honey. That’s ok, just skim it off, its beeswax probably.

    The types of flowers that the honeybees collect from also can cause cloudy honey. If there are lot of rape seed flowers nearby, part of the mustard family, the honey produced gets cloudy quickly.

    In my experience, we have had honey get cloudy when we have harvested honey from dead hives, and the frames may have a mix of capped and uncapped honey in them. The uncapped honey has a higher water content, and I believe this contributes to the cloudy honey.

    If you have frames of capped and uncapped honey, I would leave them in the hive. If its a dead hive, I’d suggest cutting out the capped comb for comb honey. Or just extract the whole frame, keeping in mind this mixed capping honey should be consumed sooner than the capped frame honey.

    This beekeeping video is part of our beekeeping 101 video series, you can check out all of the how to keep bees videos here.

    Eric suggests 2 beekeeping for beginners books,


    Buy On IndieBound Here

    Click Here to buy on Amazon


    Click Here to Buy On Indiebound

    Click Here To Buy On Amazon

  • Sweet Potato Dog Treats Recipe : GF Video

    Sweet Potato Dog Treats Recipe : GF Video

    Homemade Sweet Potato Dog Treats Recipe in this how-to video. We’ve bought sweet potato dog chews from the store, and they are expensive. Prompted by a GF viewer who sent us some sweet potato dog biscuits, we decided to try and make these.

    The Labradors Love Sweet Potato Dog Treats

    Charlie Pup Loves These
    Charlie Pup Loves These

    As you can see in the video, our dogs love the chews, and they were easy to make. I’m thinking you can also use an oven to dry the potato chews, a convection oven would do very well.

    A couple of thoughts about making dog treats here. Be very careful with the knife, don’t use a dull knife. You can also use the side of a box grater, if it has a slicer on it. Or use a mandolin, but again be careful.

    We did not peel the potatoes, and did not use any sweet potatoes that had started to get mushy. Firm good looking potatoes only.

    There were several reasons for making the home made dog treats. First was just how expensive the sweet potato dog treats cost in the store. A bag of them goes quickly, and so does your money. Second was the concerns about food safety in general, and a few things we’ve read about dog treats from other countries being made with unsafe ingredients. I don’t understand people who do things like that, but it happens more often than it should. Homemade food, to me, is just plain safer.

    sweet-potato-dog-treats-recipe-1

    We liked the dog treats that we sprayed with vegetable oil, they were a bit more leather like, not as crisp and hard, but its a judgement call on your part.

    We have more dog treat recipe video here on the site, click here to watch them. This is our first potato based dog treat, but i’m sure we’ll do more of them as we go along. Let us know your dog treat ideas in the comment section.

    Sweet Potato Dog Treats Recipe
    Ingredients
    • 2 sweet potatoes
    • 1 can vegetable oil spray
    Cooking Directions
    1. Slice the raw sweet potatoes into dog treats. You can either do round discs by cutting from the end of the potato, or cut long slices. I slice them 1/4\” thick.
    2. Lightly spray both sides of sweet potato with vegetable oil.
    3. Put in dehydrator for 24 hours. Rotate the racks halfway through for even drying.
    4. Keep in zipper plastic bags.

  • Easy Cranberry Recipe, Cranberry Jam – GF Video

    Easy Cranberry Recipe, Cranberry Jam – GF Video

    Bought too many cranberries? Here’s an easy cranberry recipe to use up those extras you bought. This jam is a simple cranberry recipe to make and you can store the jam for up to a year in mason jars by canning them.

    Easy Cranberry Recipe The GardenFork Way

    These berries are one of those superfoods that I think we should be eating year round. And by making jam and canning it, you can make a big batch of this, and have it for the rest of the year. Watch our easy canning instructions video here. How cool is it to show up at a friends dinner party with a jar of homemade jam?

    We often run across cranberries on sale at the grocery store, so buy 4 bags or so, some oranges and ginger, and you are good to go.

    These berries have a long  history with the Americas, they grow in the U.S. and Canada. Wikipedia has a long entry on cranberries, and I liked this early dinner reference to turkey and cranberries:

    In the 1672 book “New England Rarities Discovered” author John Josselyn described cranberries, writing:

    “Sauce for the Pilgrims, cranberry or bearberry, is a small trayling plant that grows in salt marshes that are overgrown with moss. The berries are of a pale yellow color, afterwards red, as big as a cherry, some perfectly round, others oval, all of them hollow with sower (sic) astringent taste; they are ripe in August and September. They are excellent against the Scurvy. They are also good to allay the fervor of hoof diseases. The Indians and English use them mush, boyling (sic) them with sugar for sauce to eat with their meat; and it is a delicate sauce, especially with roasted mutton. Some make tarts with them as with gooseberries.”

    easy-cranberry-recipe-cranberry-jam-1

    I find many sauces made with cranberries to be too sweet, so for this jam, I use only 1/2 cup of sugar, but you might want to increase that a bit. Taste the jam and add sugar if you want. Be careful, as the jam is pretty hot in the pan, let it cool on a spoon. Our Easy Cranberry Recipe is below:

    Easy Cranberry Jam
    Ingredients
    •    1 lb Fresh Cranberries
    •    1/2 cup sugar
    •    1 cup water
    •    1 navel orange
    •    2 inch piece ginger
    Cooking Directions
    1. Wash the orange well and cut into quarters. Then slice slivers of the orange, including the rind. How thick to make the slivers is up to you.
    2. Peel the ginger and cut into rounds, sticks, or diced. This depends on how you like your ginger…
    3. Rinse the cranberries and put into a medium saucepan with a thick bottom, or use a heat diffuser under the pan
    4. Add to the pan the water, orange slices, ginger, sugar.
    5. Bring to a simmer, you will start to hear the cranberries pop, kinda like quiet popcorn.
    6. Cover the lid, turn down the heat to low, and cook for 10-20 minutes, stirring every few minutes.
    7. When most of the berries have burst and started to break down, turn off the heat and let cool.
    8. Taste for sweetness, and add sugar if you want.
    9. Keep in the fridge in a covered container or jars for about 2 weeks, or use hot water bath canning to preserve. I processed the jam for 10 minutes with 1/4\\\” headspace.

    Have an easy cranberry recipe? Let us know below, be great to hear from you:

  • DIY Greeting Cards – Paper Crafting – GF Video

    DIY Greeting Cards – Paper Crafting – GF Video

    DIY greeting cards are an easy paper crafting project using lino block printing. You can make homemade cards for Christmas, wedding announcements, birthday cards, you name it. The method we are using is called block printing, or linoleum block printing. Super easy to do, and a great kids art project.

    Our guest crafts expert is Jessica Kaufman, who is a crafts instructor in the NYC area. You can learn more about Jessica at her website: happygocrafty.com

    Paper Crafting GardenFork Style

    I have done some block printing and paper crafting in grade school. I made some DIY Christmas cards using the linoleum block printing method. Looking back, this was the start of my love of print media. I moved on to silkscreen and letterpress printing later in school, loving it all.

    block-printing-clip-9

    Now that we have everything digital, I thought we should go super analog and revisit some neat paper crafting projects that you can do. Projects such as these are great for kids. The ink we use is a non-toxic water based printing ink, just wear a homemade art smock and you are ready to go.

    We bought some blank cards and envelopes at the art supply store. You can also get these at retail stores such as Paper Source, or an at arts and crafts store.

    You will also need a tool to carve the block, we used a Speedball brand lino cutter tool. The actual printing block comes in several forms, we suggest using the more flexible carving blocks, the hard ones are harder to carve for kids and adults. A breyer is a roller that applies the ink to the lino, get a rubber one.

    block-printing-roller

    We built a simple carving board, this allows you to safely do lino block printing. Get a scrap piece of plywood, put a small piece of trim on each side, and you are done.

    simple carving holder thing
    simple carving holder thing

    What do you think? Have you done block printing or other paper crafting projects? Let us know in the comment section below:

    block-printing-copy-pin-600


  • How To Make Gravy – GF Video

    How To Make Gravy – GF Video

    Easy how to make gravy recipe for turkey or chicken, for Thanksgiving or Christmas, or just dinner. Really good gravy is not hard to make, watch our gravy video to learn the steps. Chef Erica Wides joins Eric and walks us through the steps, and we learn some cool stuff about deglazing the pan and all.

    How To Make Gravy – the basics

    Here are the key steps to making great tasting gravy:

    • Have some extra good chicken or turkey stock on hand. Store bought is ok, but buy the good stuff

    • A quality white wine, bourbon, whiskey or hard cider will release unique flavor compounds

    • When adding the alcohol to the pan, turn off the burner to prevent the alcohol from turning into flame.

    • After adding the flour, bring the gravy to a boil so the starch molecules do their thing and thicken the sauce.

    • The gravy will thicken more as it cools

    In this how to make gravy video, we talk about Thanksgiving and Christmas and Holiday Cooking, you can apply this gravy recipe to all sorts of foods. If you roast meat in the oven, you can use the pan drippings and this gravy recipe to make a super cool tasting gravy to go with your meat. In other words, this is not just for the holidays and turkey.

    And again, this proves to me that you do not have to have fancy equipment or foods to make a great tasting meal. I used  store bought chicken, added some celery, carrot, and onion to make what is called a mirepoix, but is, in my mind, a bunch of vegetables underneath a chicken. But these vegetables are key to how to make gravy that tastes wow. Celery is one of those low key vegetables that is a secret flavor source for so many stocks.

    We have a number of Thanksgiving recipe videos here for you, check them out and let us know your suggestions and comments below, always good to hear from you.

    how-to-make-gravy-gf-video

  • How To Build A DIY Pallet Compost Bin Video

    How To Build A DIY Pallet Compost Bin Video

    Build your own pallet compost bin! Its easy. I’ll show you how with these photos and video. You’ll be composting in a few hours. Recycled pallets are perfect to make this bin, they are strong, have built in vents, and are free. This bin is also dog proof, our Labradors can’t get in it and cause trouble. Learn how to compost with our composting basics video. Want more DIY pallet ideas? See this page for more of my pallet projects.

    How To Build A Compost Bin

    If you have several pallets to choose from, pick those that are made of hardwoods. I am still amazed to find pallets made from oak, but yeah, they are out there. Hardwood pallets will last longer.

    Basically, we are building a box, with an open top and bottom. Its best to not site your bin where the ground is wet or muddy. You want your compost to drain, not hold water.

    We used some shelf brackets we found in the trash to hold the the walls of the compost bin together. Or you can get some online. Wire, angle brackets, and wood all work. I have used recycled shelf brackets to build my raised vegetable garden beds, and they will hold up longer than the wood they are screwed into.

    bracket holding pallets together

    Once the sides and back of the pallet compost bin are screwed together, I drive old pieced of metal pipe down in between the slats of the two side walls. Wood stakes will work as well here, or even rebar (metal rods).

    close up of compost pallet wall

    The door of the compost bin is hinged, and again, use Use What You Got™, used door hinges work fine. I hung the door about 1.5″ higher than the bin walls, using small pieces of wood to hold it up. This is based on experience; if you don’t do this, the door can drag on the ground, I’ve found. To add strength to the bin, I hammered some metal pipes in the two side pallets. Metal fence stakes or other long strong things will work as well.

    The hinge side of the door needs the most stability here, as it holds the most weight. I used a piece of chain i had laying around to secure the door closed. The door will have to hold up quite a bit of weight when the bin is full, so think about that when crafting some sort of latch.

    The floor of the compost bin is dirt. I don’t put a base in the bin. I like the idea of worms moving from the soil up into the compost and the dirt provides some natural drainage. You could also put into the compost pile some red wiggler vermicompost worms to help break down the pile.

    compost bin

    more compost videos

    What to add to your compost bin?

    We have our Composting Basics video that explains a lot about how to compost in your yard, but a few key things are to not add meat or greasy stuff to the pile, and to make sure it is not packed down, air needs to circulate in the compost pile. You can also read more in Wikipedia. Let us know your questions, suggestions, and how you compost below:

    Save

  • DIY Pizza Oven Tips and Tricks – GF Video

    DIY Pizza Oven Tips and Tricks – GF Video

    Using our easy brick pizza oven plan, learn these tips for building your wood fired pizza oven and how to cook pizza in it. After using our DIY pizza oven several times, I wanted to share with you all some things I have learned about firing the brick oven and cooking pizza in it. If you haven’t watched our how to build a portable brick pizza oven, check it out here.

    Planning helps a lot to have a successful brick oven pizza night. I suggest you start assembling the oven 4 hours ahead of time, and starting the fire 3 hours ahead.

    Build the pizza oven on a strong base. Don’t use flimsy sawhorses, they will break! Again, learn from my mistakes here…

    Start your pizza dough at least 24 hours ahead of time, if possible. You can check out our pizza dough recipe videos here. If this is a spontaneous pizza night, go ahead and use the Artisan Bread in 5 Minutes a Day dough recipe. It all tastes good!

    diy-pizza-oven-tips-and-tricks

    Don’t burn green wood. Learn from my mistakes! I grabbed a bunch of kindling that I did not realize was green, and had to rebuild the fire after it didn’t start well. Oak works best, I think.

    Rake most of the coals to the back of the oven, and then throw another large log onto the coals, you need to keep the fire going for multiple pizzas.

    Our homemade pizza peel works great with the brick pizza oven, watch the pizza peel video here. Use cornmeal on the pizza peel, it helps the pizza slide off the peel onto the oven floor.

    Rotate the pizza halfway through the baking process, it helps to even out the cooking.

    Don’t pile on the ingredients, less is better in this case. Vegetables should be sliced thin. Vegetables such as broccoli are best blanched first, so they cook along with the pizza. You can also add things after the pizza comes out of the oven.

    Here is the how to build the brick pizza oven video:

    Click here to see some of the pizza ovens people have built after watching our how-to vids, have you built one? Please send us pictures:  [email protected]


  • Easy Hard Cider Recipe – GF Video

    Easy Hard Cider Recipe – GF Video

    Hard Cider made easy with this hard cider recipe in our DIY video. All you need are a few items from a homebrew supply store, we like to use Midwest Homebrew, click here to visit their site. Watch our how to make hard cider video and then let us know your questions and suggestions below.

    The key to making hard cider

    When making all fermented beverages everything must be clean and sanitized. You can use a mild bleach solution or one of the commercial sanitizer products. I prefer B-Brite, but you can use any of them. Bleach can cause problems with your clothes if you splash the sanitizing solution on them. Keep a quart of sanitizer solution nearby as you make hard cider. Rinse your bottle or carboy in the solution and rinse, along with anything else that will come into contact with the cider.

    easy-hard-cider-recipe-gf-video
    Hard Cider in 5 gallon and 1/2 gallon batches

    If you are going to use fresh cider from a mill or some that you made yourself – watch us make our own cider in this video here – you will need to kill off the wild  yeasts and organisms in the cider before adding your cultivated yeast you bought from the homebrew store. We use campden tablets. Crush one tablet per gallon, toss in, mix well and let sit for 24 hours before pitching the cider yeast.

    Read the instructions on the yeast package. Liquid yeasts with a burst pack need to be activated a few hours ahead of time. It can be tricky to burst the little pack that is inside the yeast package. The yeast package does not have to be bulging to pitch the yeast. Be sure to sanitize the scissors you open the pack with and the yeast package itself when pitching the yeast.

    When fermenting small quanities of hard cider, use a jug that is twice the volume of the cider you are brewing for the initial fermentation that lasts a few days. This keeps the large foaming of the yeast from clogging the airlock. After the first few days of activity, siphon or rack the cider into an container sized for the amount of cider you are brewing. So for a half gallon of cider, you would start it in a one gallon jug, and then transfer it to a 1/2 gallon jug. Do your best to keep the sediment from the initial fermentation from moving to the second jug. The sediment can impart off-flavors, and its easier to pour from bottle with less stuff in the bottom of the bottles.

    We will post a how to bottle cider and beer video soon. In the meantime, let us know your thoughts below:


  • Plywood Boat – Fail or Float? – GF Video

    Plywood Boat – Fail or Float? – GF Video

    The Improved One Sheet Plywood Boat with fiberglass seams. How to build a plywood boat despite just about everything going wrong… The perfect DIY project!

    What started out as our EPIC Plywood Boat video featuring the Ford F150 Limited that Ford loaned us for the weekend instead became a story of perseverance despite record low temperatures, huge thunderstorms, and really cheap duct tape.

    Plywood Boat with fiberglass: A Lesson

    The idea here was to improve upon our original plywood boat, which has been a very popular video on our site and YouTube. The original boat used strips of wood and caulk for the seams, which added weight and wasn’t always exactly waterproof. I also wanted to use a new thinner plywood I found at the store that is sustainably harvested. Thinner plywood and lighter seams would mean a lighter boat.

    I have a good friend who uses fiberglass a lot, and he gave me some fiberglass tape, which was perfect for the boat seams. I had read online about how to dryfit a plywood boat using duct tape to hold it all together while you added fiberglass to the seams.

    This all sounded great in theory, in practice is was another story. Things I’ve learned about working with fiberglass:

    • It smells real bad, use a high quality vapor mask, don’t cheap out on this.
    • It does not work well in cold temperatures
    • It sticks to itself and your gloves.
    • Its not easy to use from the get go.
    • You need someone to help when applying fiberglass
    • Don’t buy cheap duct tape.

    Despite applying the fiberglass in the garage with the doors open, the smell was quite strong, get a good mask. And if the temperature plunges, consider choosing another day to start this project. Also pick up some good quality nitrile gloves, you will use quite a few of them.

    plywood-boat-fail-or-float-gf-video

    We all make mistakes

    What this video is more about is to plan and persevere. What can go wrong will, and it was a weekend of everything going south quickly. In the end we triumphed. How do you push through to get stuff done? Let us know below.

    A big thank you to Mike Levine and Scotty Monty of Ford Motor for the truck!

    Original boat design based on Deek Diedricksen’s boat.


  • DIY Cider Press Video – GF Video

    DIY Cider Press Video – GF Video

    Homemade cider press built by my neighbors Gene and Priscilla. A hydraulic cider press that uses found materials from a log splitter and a tree chipper, Gene built this from parts he had. Use this video and the photos here as a basis for your own cider press plans. This is really cool to use, and it would be a blast to build as well.

    Build your own cider press

    You can do this! It will take some time, but its do-able. Its helpful to have some metal skills or ask a neighbor who does to help. You’ll want a bunch of people around anyway to help with the cider press, its a lot of work to process all the apples, apple mash, and bottle the cider.

    This cider press uses a chipper, much like those that are in electric wood chippers, to mash up the apples. I love the use of a traffic cone to direct the apple mash in the right place. The racks that hold the mash are custom built, be sure the racks have slots to allow the cider to drip out. The cloth is muslin.

    The apples are first washed in a mild bleach solution and then rinsed in two buckets of water. A 5 gallon bucket with holes drilled in it works well for this. Any bruises or blemishes are cut out of the apples.

    After the apples are pressed, the cider is filtered and pumped through a UV sterilizer. UV light kills bad bugs in the cider, its a simple way, i think to have good cider and not have to pasteurize it to sell. Your local rules might not allow this, so check first.

    You can freeze cider to be able to enjoy it all year. Leave enough space in the containers for some expansion as the cider freezes.

    We’ve made hard cider from Priscilla’s press, you can check out our how to make hard cider videos here

    diy-cider-press-video-gf-video

  • How To Harvest Garlic – Grow Garlic Video Series – GF Video

    How To Harvest Garlic – Grow Garlic Video Series – GF Video

    Learn you how to harvest garlic properly, and how to store your garlic. We showed you how to grow garlic in the first of our grow garlic videos – link below – and now its the middle of summer and time to harvest and store the garlic.

    The question I get most often is when to plant your garlic, the second is when to harvest it. Garlic is usually harvested in middle to late summer, when the plants start to turn brown, but not completely brown. If you let the plant go completely brown, the bulbs will be falling apart and starting to rot. Pay attention to the scapes to see if they are pointing straight up, and then the plant will start to go brown. Pull a bulb or two and check the condition of the bulb.
    Grow Garlic, Then Harvest It

    how-to-harvest-garlic-grow-garlic-v
    The bulb will still have a lot of moisture in it, and most people will air dry the bulbs before using them or selling them. I’ve even seen farmers who put the bulbs in large plastic trays, stack the trays, and then put a fan underneath the trays to push air through the stack and dry the garlic. Personally, I tie the garlic into bunches and hang it in the shed for a few weeks. Avoid putting the garlic in damp areas, which will invite mold to start, which is not a good thing.

    If some of your garlic has brown spots on it, it is still ok to eat, most people just cut around the spotty areas and you are good to go. If you want to save garlic seed, set aside the largest cloves for the fall planting. The idea here is that the largest cloves will yield large bulbs. Check out Filaree Farm to order garlic.

    How To Plant GarlicLet us know your thoughts on garlic growing.

  • Rainwater Collection With Recycled Materials – GF Video

    Rainwater Collection With Recycled Materials – GF Video

    Build a Rainwater Collection system using recycled materials from your yard and the town dump! This rainwater harvesting setup uses recycled rain gutters and recycled water tanks to collect rainwater for your garden. Super simple to put together, this rig is on our friend Priscilla’s small farm. To do this, they used some found materials, rain gutters, and they had some old water tanks nearby. So they put together this easy rainwater collection system to catch the rainwater off their barn roof.


    This rainwater collection system is powered by gravity. The barn and the tanks sit higher than most of the farm, and at the base of the tank is a regular garden hose valve where they connect a hose to water their garden. This is not a system for collecting potable drinking water, OK? This system works great for watering plants.

    Rainwater Collection: Use What You Got

    In the true spirit of Use What You Got™, Priscilla and her husband put this together by themselves. With a few ladders they attached the rain gutter to the edge of the barn roof, and then wired the second piece of recycled rain gutter to channel the rainwater to the water tank. Simple, and it works great, as you can see in the video.

    A few things to keep in mind when building a rain water collection system, don’t use any tanks that may have held hazardous materials. If you don’t know what was in a tank or barrel originally, don’t repurpose it for watering your garden. I have seen gravity fed soaker hose systems for sale on the web, stay tuned for more  videos on rainwater harvesting. In our garden we have a soaker hose drip irrigation system setup, and it is powered by a pump. Fedco Seeds Organic Growers Supply has drip irrigation parts for sale. Check out the links below for our soaker hose drip irrigation videos:

    rainwater-collection-with-recycled-materials

    Click Here To Watch GF Drip Irrigation Videos


  • Composting 101 – Backyard Composting Basics – GF Video

    Composting 101 – Backyard Composting Basics – GF Video

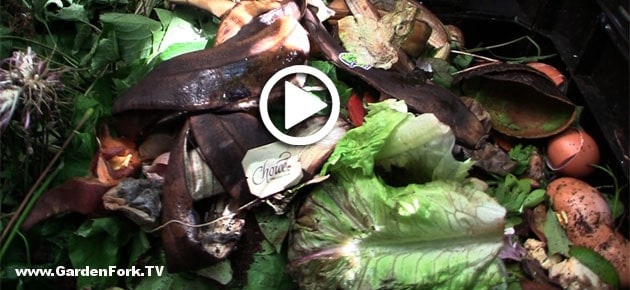
    Composting! Learn how to compost in this video. What food can you compost? What food should not go in the composter? What kind of bin should I buy or build? Watch the show and let us know your thoughts in the comments below.

    To compost in your backyard, you’ll need a bin of some sort. You can buy one – here are a few models – or you can build one – here are some GF videos with compost bin plans.

    Composting Ingredients

    Here is a brief list of things you can compost:

    • Eggshells
    • Coffee Grounds
    • Salad Greens
    • Corn Cobs
    • Vegetables
    • Newspaper, napkins, paper towels
    • Light cardboard

    Stuff  you should not compost:

    • Meat
    • Foods saturated with oil
    • Cat Litter and Dog Waste
    • Cheese & Dairy Products

    more compost videosMost backyard composting takes months to break down, because of the lack of a large biomass, the pile cannot achieve the ideal temps for hot cooking of the material. But  this isn’t a reason not to do it. Taking food scraps in to the backyard instead of the trash can is a super eco green way to live, and its real easy. There’s really no wrong way to do it.

    composting-101-backyard-composting-basics-2

    Backyard Composting can be as simple as a pile of leaves and yard waste in the back of the yard, or in a more structured bin, its up to you. Whatever type you go with, be sure to aerate the pile, turning it over on itself, or lifting it up and poking holes in it. The pile needs air to work.

    I’ve found that most of the compost accelerators don’t do much more than a good shovel full of manure will. What do you think? Let us know below:

  • How to Can – Canning Tomatoes, Fruit, Vegetables : GF Video

    How to Can – Canning Tomatoes, Fruit, Vegetables : GF Video

    How to can video! Learn how to can food: apples, peaches, can tomatoes, vegetables. Canning food is easy using the waterbath method. Use a big pot you already have as a canning pot and buy a funnel and a  grabber tool and you are good to go.

    Home Canning How To

    This waterbath method is for high-acid food like fruits, tomatoes, pickles. You should use pressure cooker canning for low acid foods like meat and fish. You can buy a canning pot to boil the jars, but we use a big metal stockpot, the same one we use for brewing beer and cooking pasta. When using a stockpot for canning, place a towel in the bottom of the stockpot to keep the jars from touching the metal bottom of the pot. A GF viewer suggested tying together some jar bands with twist ties to form a base for the jars to rest on in the pot.

    Some things to keep in mind when canning food:

    • Be sure to wash the jars, lids, and bands with hot soapy water
    • Do not allow any food to get on the rim of the jar or on the rubber area of the sealing ring. Wipe off any mistakes
    • Allow the jars to cool for 12 hours and test the lids for seal. Some jars lids may still make the pop sound when they are taken out of the waterbath.
    • Buy a canning funnel and tongs, they are worth it. Less spilled food and no burned hands!
    how-to-can-canning-tomatoes-fruit-vegetables-4
    Canning Funnel keeps the rim of the jar clean and sits nicely on top of the jar. Canning Tongs save your hands!

    We based our information on one of the experts at Ball Jar Company, they have a great PDF on canning.

    pickle-rhubarb-play

    Watch our other canning videos here!

    What are your canning tips? Let us know below:

  • Tell Us Your Show Ideas!  GF Video

    Tell Us Your Show Ideas! GF Video

    What do you want to see on GardenFork.TV? Let us know in the comments below!

  • Squash Vine Borer Treatment #3 : GF Video

    Squash Vine Borer Treatment #3 : GF Video

    A new Squash Vine Borer treatment to control Squash Vine Borers and keep them from eating your squash plants. Squash Borers live inside your squash plant and eat the plant from the inside out until  you have a dead squash plant. Are your Zucchini plants dying? Summer Squash too? The culprit is likely the borer. Here’s a video how to on a new squash vine borer treatment that uses Bt.

    Many times I hear of people who walk into their vegetable garden and find all their squash plants wilting and yellowing. Check the base of the stem, where it enters the soil. If you see this orange frass that looks like wet sawdust like in the photo below, you have squash vine borers in your plants. If left untreated, there’s a good chance you will lose the squash.

    squash-vine-borer-treament
    Orange frass at base of stem, a sure sign of squash vine borer infestation

    How this squash vine borer treatment works

    In this video we are using Bt, Bacillus thuringiensis var kurstaki . This is a naturally occurring organism that, once it enters the gut of the borer, causes it to stop eating. Bt is considered an organic treatment, allowed by the OMRI ( Organic Materials Review Institute )

    The adult moth of the borer lays its eggs in the soil at the base of the squash plant, then the eggs hatch and the borer chews a hole in your squash plant, enters the stem and starts eating. The Bt is injected into the stem of the squash plant at several intervals. The goal here is to get the borer to ingest some of the Bt, so you want to inject the Bt in front of where the borer is currently chewing. Watch the video for how to do this.

    This Bt is not to be confused with GMO BT, which has been genetically spliced into plants. This is a naturally occurring organism that we are harnessing to kill caterpillars. Below are our other videos on how to prevent squash vine borers, let us know any suggestions or comments below:

    squash-vine-borer-treatment-3

    Squash Vine Borer Treatment method #2

    squash-vine-borer-play

    Squash Vine Borer Prevention and Treatment method #1

    squash


    Check out our Squash Recipes Here


  • Cut Down A Tree With A Chain Saw : GF Video

    Cut Down A Tree With A Chain Saw : GF Video

    How do you cut down a tree with a chain saw? Watch this GardenFork video. Watch us cut down a tree with a chainsaw safely. Be very careful when using a chainsaw or tree felling, if you don’t know what you are doing, hire a professional.

    Tree felling like this is pretty straightforward, there were no houses nearby, and the tree was already leaning the way we wanted it to drop. The wedge cut was fairly shallow, and the back cut was a bit off, it should have been a more straight cut just above the wedge cut.

    Going forward, we will be using more plastic wedges, which are driven into the back cut as the cut goes deeper into the tree. The wedges keep the tree from binding the saw, and help to push it in the direction you want it to drop. Do not use metal wedges. The metal wedges can damage the chain of  your chain saw if they come into contact with each other.

    cut-down-a-tree-with-a-chain-saw-gf-video-3

    And again, safety is paramount here, watch all our how to chainsaw safely videos here. Chain saw chaps are a must, I recently saved my leg from a nasty cut from the chainsaw because I had chainsaw chaps on. The chaps have a material in them that will bind the saw if the saw tears open the chaps, which are protecting your legs.

    cut-down-a-tree-with-a-chain-saw-gf-video-2

    I use an all in one helmet that has a face shield and ear protection, plus i wear steel toed boots, long sleeves, and gloves. Be Careful OK?

    Click here to watch all our chainsaw vids and related posts here

    Let me know any questions or comments below: